Question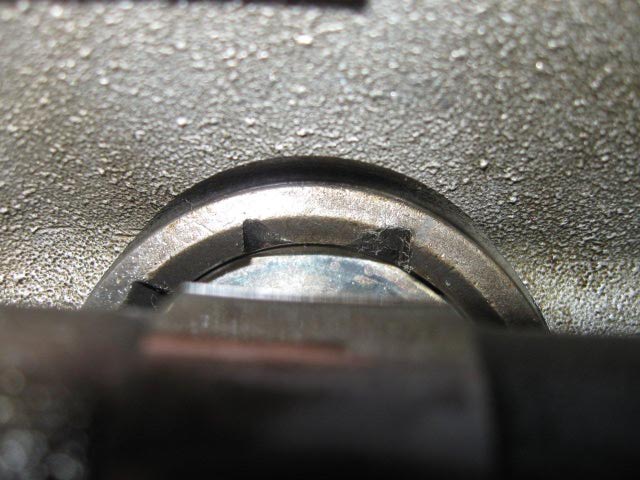 Damaged guide
 Stakedown plate
QUESTION: Howard,
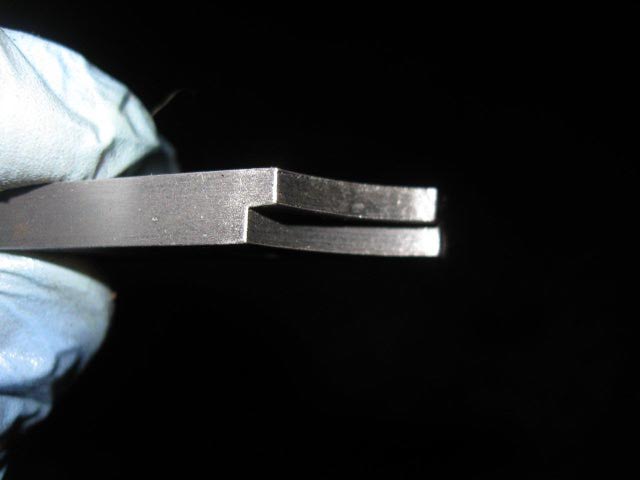
I'm putting in a stakedown kit for my 84 Vanden plas, good thing, I can see the 3rd cam from the front has been chipping away at the valve guide. The stakedown plates have a step on each end, about .122 inch in height, I guess that's how high each valve guide is supposed to sit above the head. All my valve guides are a bit higher than that, so the plates won't lay flat on the head when overlapping the guide. How best to tap them down ? Use a drift or mild steel rod ? Just keep tapping them down until the plate will easily slide over them while in contact with the head ?
Thanks again,
Steve.
ANSWER: Hi Steve,
The hold down plates will not go all the way down and contact the head. If you notice the cut away in the hold down plates do not equal the thickness of the top flange of the lifter sleeves so even when the lifter sleeves are fully seated there is a space between the hold down plates and the head. This is normal on each of the several brands of hold down plates.
What ever you do, DO NOT! try to drive the lifter sleeve down by using a punch or drift. You must remove the cam and find or make a flat plate or thick wall tube to fit the top of the lifter flange. Then you can drive that down so an even pressure is applied to the full circle of the lifter flange. These lifter sleeves are not steel and are very soft and if you hammer on the edge with a punch or drift, you will destroy it. Then it will require that the head be removed and a machine shop will need to machine the destroyed one out and a new one installed.
If you have not removed a cam in a Jag before, let me know and I will walk you through the process as there are several pit falls that trap even a good mechanic.
Your lifter sleeve has only minor damage and can be used. I have used many that were worse than that. But you do need to check that the lifter rotates freely and the nicks have not put a bind on the lifter.
All of your lifter sleeves need to be seated because if one was loosened then several more may have also moved slightly even though they have not come out far enough to get clipped by the cam lobes. This makes it very important that the cam be removed to do it correctly. It is not difficult except there are a few dangerous pit falls that can cause a lot of damage. No special tools are needed.
let me know and I will give you the procedure.
Howard
---------- FOLLOW-UP ----------
QUESTION: Howard,
Sure, please give me the instructions for removing the camshaft. I have a Haynes manual but I'm sure your instructions are better !!!
Thanks,
Steve.
ANSWER: Here is my procedure and it has worked well for me for many years in Jag dealerships.
Before you start, it would be wise to check the valve clearance of each exhaust valve to see if you need to adjust the clearance while you have the cam out.
First note the notch in the cam flange at the front cam bearing. Then rotate the engine until that notch is pointed toward the head and about 90 degrees from the gasket surface of the cam cover. (the cam is then about 180 degrees out of timing that the cam is normally set to)
Now stuff a shop rag down into the cam chain area so as to catch anything that might drop into the timing cover area. Now unlock the lock tabs on the bolts that hold the cam sprocket to the cam flange. The shop rag is there to catch the bolts if you drop one. Some times the lock tabs plate can be across the two bolts that are accessible so if they are that way you will be able to retrieve that too. (older Jags had the bolts safety wired)
After you have removed the bolts that are accessible, remove the shop rag and rotate the engine so that the notch in the cam flange is 90 degrees out away from the cam cover gasket surface.
Now, you can reinstall the shop rag and remove the other bolts and lock plates. (the shop rag is there to prevent any accidental dropping of a bolt or lock plate down into the cam chain cover area which would require the complete removal of the cam chain cover and oil pan.
Now you have the cam about in time and all bolts removed. DO NOT REMOVE THE LARGE WIRE CLIP INSIDE THE EDGE OF THE CAM SPROCKET!!! This must stay in place!!!
It is a good practice to remove the ignition key so there is no accidental spin of the engine with the cam chain sprocket loose.
Now, you can bump the sprocket off of the cam flange and note the small pin in the center is sticking through the guide. That pin has a notch in it and is used to insert a spacer and a clip but I never met a Jag mechanic who had the spacer nor the clip so we always just used safety wire in the groove to tie it out and away from the cam flange. (if you choose to put a spacer on the pin first be sure to use the shop rag in place so it will be impossible to drop it down into the chain cover.) The older Jags had a threaded stud that a nut and washer would hold the sprocket away and against the guide.
Now, go down the cam bearing caps loosening them evenly a little at a time. So that you do not put undue strain on any one bearing cap due to the valve springs. While loosening the bearing caps you will arrive at a point when the cam will pop over but that is normal. If a bearing shell falls out of a cap be sure to keep it with the correct cap.
Note that each bearing cap is numbered and a corresponding number is stamped into the head next to each number and note that each bolt hole has a alignment sleeve. These are sometimes loose so be careful to catch each one and keep the caps and their sleeves together. These sleeve guides are needed as the bolt hole and studs are not sufficient to align the bearing caps.
Some mechanics like to warm the engine up just before this job so that the head is still warm when they are ready to drive the lifter sleeves in. This helps when driving the sleeves down tight. It is sometimes difficult to drive the lifter sleeves in when the head is cold. Confirm that all lifters rotate freely when finished.
When you are ready to put the cam back in, try to hold the cam in time (notch at 90 degrees from the cover gasket surface) I use a pair of vice grips on the cam shaft to hold it in time as I evenly snug each nut down a little at a time down the length of the cam so it goes down evenly. Be sure to lube each bearing with the engine oil that is used in the engine.
YOU MUST NOT JUST BOLT THE CAM IN PLACE AND THINK THAT YOU CAN ROTATE THE CAM INTO TIME AFTER IT IS INSTALLED. Be sure to use the serrated washers that are under each nut and look up the torque specs for the nuts in your Haynes manual.
Some times it is necessary to put a small block of wood on the front of the cam chain cover and use a pry bar to put the sprocket back on to the cam flange. If the sprocket slips up on the cam flange by hand easily you may need to adjust the upper cam chain tension when finished. This is not an easy job without the tools. If when finished you note the upper chain is loose let me know and I will cover it in another writing.
Another dangerous note! If you use Castrol Syntec oil, DO NOT USE A CAM LUBE OR AN STP/OIL MIX TO LUBE THE CAM!!! There is a dangerous chemical reaction if you use either one and Castrol refuses to discuss it!! So there is something they are hiding.
let me know if you need to adjust the upper chain tension.
Howard
---------- FOLLOW-UP ----------
QUESTION: Howard,
Thanks for all the info, how will I know when I've driven the valve guides in enough ? Is there any spec to how high they sit above the head ?
Or will I know from the sound when I whack them ? Also I will check the valve clearances beforehand, I guess that's done when cold - and my Haynes manual says they should be 12 - 14 thou...
Thanks again Howard,
Steve
AnswerYes, sometimes there is a different sound when they are seated but not always. On the one that you know is out you can gauge the sound of that one and usually the sound is a higher pitch like a higher ring when it hits home. Some are very tight and they make the head ring anyway.
You can measure the front one and the rear one as they usually are not the ones that come up. Then use that as a rough guide as to when one is seated. The head it not machined out far enough usually to have a point to measure to so it is a rough science to measure.
Howard