QuestionQUESTION: The petcock on my nighthawk isn't letting any fuel through. The vacuum
is good but still no flow. Can you tell me which part I need to rebuild it
so it will work. I've inspected and cleaned the strainer in the bottom cup
and the diaphram on the side that the vacuum line hooks to with no luck.
Is it the filter tube inside the tank that is most likely the culprit?
A new petcock is like $188 and the body alone is $93. Would it be
possible to switch to a manual type vs. the vacuum or would that not
be advised? I know it would mean remembering to turn it off and on
but other than that would it be ok in your opinion or just fix or replace
the original? Thanks in advance for the help!
Steve
 In-Line Fuel Filter Ni
ANSWER: Hi Steve,
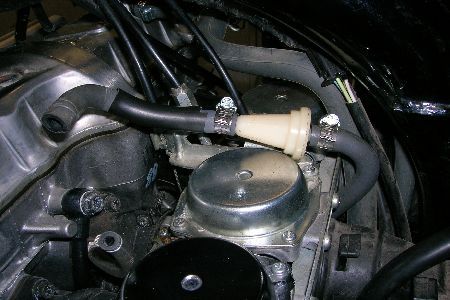
The filter tube could be the culprit. I would remove it (they are a bugger to get out) and see if it is clogged. On a side note, I discarded my filter tube and I am now using an in-line filter, as I didn't like how the filter tube was seating against the petcock. I have attached a pic of what I am using. I do clean that strainer more often now though (twice a year).
You can purchase petcock rebuilt kits off of ebay. It comes with all new internal parts, including the diaphragm and seals.
However you can turn your vacuum in to a manual by removing the diaphragm or by puncturing a hole in it. This voids the vacuum pressure from needing to open it. I would then remove the vacuum line and the brass fitting it goes into on the intake boot. Plug the hole on the intake boot with a screw that is exactly like the other screws for the other intake holes (these holes are used for carb sycning, btw).
One of the petcocks on one of my Nighthawks was operating like a manual petcock, even though the vacuum line was hooked up. I took the petcock apart and cleaned it up with WD40 and compressed air. Now it is working properly now with the vacuum line.
---------- FOLLOW-UP ----------
 85 Nighthawk S
QUESTION: Hi Jeff,
I tried to go the manual route by removing the diaphragm which definitely got fuel running but it leaked badly at the cover plate. I cleaned it like you said and put it back together to stop the leaking and the bike started in 1/2 second crank! (BTW this bike hasn't run in 1 1/2 years so that really sounded fantastic!!!)
But it ran for about 10 minutes "very well" and then died and now I'm not getting fuel again.I guess it was just the bowls being filled up.
So how do I remove the diaphragm yet keep it from leaking as that seems to be the seal also for the cover plate?
For the vacuum and drain tube I just made a U shaped connection with the vacuum hose to plug them so they wouldn't leak there.
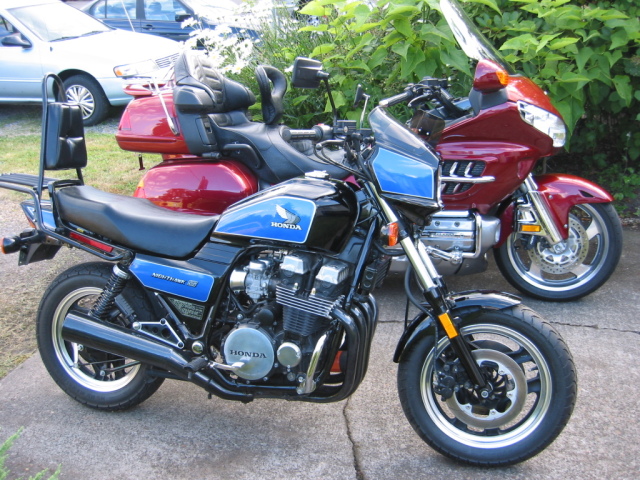
Again Thanks in advance!!! Here is a pic of my bike
AnswerYou should be able to just puncture the diaphragm and leave it intact in the petcock. This will stop the leaking and disable the job that it preforms. You will have to block the little tube on the petcock that the vacuum line connects to, or it will leak out of it.
BTW, have you cleaned the carbs?
This is a must for any bike that is sat more then a year.
How I clean carbs...
A couple of things first..you don't need to completely disassemble the carbs to clean them and you don't need to purchase a carb rebuild kit, unless you have a bad seal or bad rubber on the carb. In most cases, the rubber is fine.
- Remove the carbs from the bike (following instructions in your manual). You do not need to separate each carb from each other; leave them joined to each other.
- Remove the float bowl. Then remove the floats and the float valve.
- Remove the main jet and the Needle Jet holder (what the main jet screws into).
- Remove the slow speed jet and the pilot jet/air mixture screw (be careful with this one, as there is a small spring and washer and rubber seal on each screw).
- Now on top of the carb remove the top cover off each carb (four screws). Be careful removing the final screw as there is a spring underneath the cover and it could shoot out when you take the cover off. Remove the spring.
- Peal back the rubber on the slide slowly and be careful not to rip it. Pull the slide out.
- Now soak the carbs, jets, floats, slides, gas lines and whatever else that was on the carb, in some carb cleaner. I know Gunk makes a carb cleaner sold in a big jug at WalMart. There are many kinds though...some are environmentally friendly and smell like citrus. Its up to you. I've even used Diesel fuel, but that can be really bad for you. Let it soak overnight. Turning the parts over every once in a while helps too.
- After soaking, arm yourself with some rubber gloves, a toothbrush, compressed air, needle nose pliers and lay out some clean rags.
- Pull each piece out one at a time with the pliers. Give it a scrub with the toothbrush, rinse it and blast it with compressed air. If it is a jet, be sure to blast all of the holes in it. Then wipe it off with a rag and place it on top of another clean rag.
- I would do the carbs last. Be sure to scrub all the dirt off on the outside of them. Then blast any and every hole on or in them. Be careful that your face isn't on the receiving end of one of the holes, or you will get a blast of air/carb cleaner on you.
-Once everything is clean and dry you can reassemble everything and put the carbs back on the bike.
Some tips:
- Don't go nuts removing or tightening the jets. They are made of brass which is soft, and can strip or get damaged very easily.
- If you turn your pilot jets/air mixture screws in first and seat them lightly, make a mental note of how many turns for each one. That way when you put them back you can set them at the same spot. Otherwise you will have to refer to your manual for the setting for them.
- The rubber boots on the back of the carbs come off pretty easily. But getting the carbs out of the rubber boots on the engine side can be a challenge. I've used a hockey stick to pry against the engine and the carbs to pop them out (and to pop them back in). This can save you allot of struggling. If you are worried about scratches you can wrap the stick with a rag.
- The hair dryer is your friend. I use a hair dryer to heat up the rubber on the slides just before putting the caps back on. The rubber generally shrinks a tad and it doesn't always seal perfectly. Heating it with a hair dryer expands it enough to make it seal again.
I also use the hair dryer for heating the rubber boots on the back side of the carb (air box side) for when the carbs are being installed again. I get the carbs popped back into the rubber intakes on the engine first, then I work the boots at the back on to the carbs. Heat them with a hair dryer and make sure they are pushed on all the way. You don't want any air leaks.