RV skylights are a great option in any RV, providing natural light to areas that can sometimes be dark and uninviting, but proper care and maintenance of RV skylights is extremely important.
One of the main areas you will see a skylight, in an RV, is in the shower area. Even though most RV showers are equipped with traditional lights, an RV shower skylight gives you a more natural light. And we all know that conserving water in your RV is more pleasant in natural light!
www.EZTopsWorldwide.com
Like every other part of your RV, the RV skylight will require some maintenance to keep it in proper working order. A frequent visual inspection, along with an annual resealing, will go a long way toward helping you maximize the life of your RV skylight.
An RV skylight effectively consists of two pieces. On the inside of your RV there is an inner liner. The inner liner consists of a clear cover, allowing that great natural light into your shower. It also includes a plastic frame that is screwed into the ceiling . On the outside of the RV, screwed into and sealed to the roof, is the RV skylight dome.
Because the RV skylight consists of two separate pieces, different care and maintenance should be observed.
The interior liner of your RV skylight should be checked often for normal wear and tear. Because the RV shower skylight is in an area that can be damp and humid, keep the interior liner clean so that mildew doesn’t form.
Additionally, be sure the edges of the frame of the liner are in good repair. It isn’t uncommon for the frame of the liner to crack around the screw holes, and if this happens, you’ll want to replace the liner and frame.
The RV skylight cover is on the roof, and like other parts of your RV roof, it needs to be checked one or two times per year. Check the RV skylight dome itself for: cracks from age, flexing or the occasional tree branch in a campground. Also look for bubbles that may have formed in extreme conditions, which can also lead to cracks or leaks.
Additionally, it’s important to check the sealant around your skylight dome. Again, like other parts on the roof of your RV that get sealed, you’ll want to reseal the edges of your skylight dome. One or two times per year should be sufficient, depending on use and the conditions in which you use your RV.
Extreme temperatures, either hot or cold, can lead to the sealant wearing out more quickly. If the sealant begins to crack or tear, it can lead to leaks in a very short amount of time.
If your RV is older or you’ve spent a lot of time driving in areas with low hanging trees, it might be time for an RV skylight replacement. This is an easy do-it-yourself project that even a novice can undertake. But it’s important to pay attention to details while you’re doing it.
After all, you’re dealing with the roof, and the last thing any RV owner wants to worry about is roof leaks that lead to damage, before you know it. Those leaks are particularly painful if the damage was caused by your own error, and not paying attention to detail.
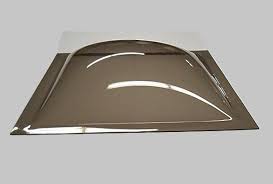
Once you’ve determined that you need an RV skylight replacement dome, the first thing you’ll want to do is to measure the existing skylight dome. Pay particular attention to the size of the dome itself, and the width of the flange where the screws fasten the dome to the roof.
Next you’ll need to find a replacement. Your local RV parts and service center should carry replacement domes, or you may find more variety by checking online.
If your RV is older, you may have trouble finding a replacement that is the same size as your current RV skylight cover. Don’t be alarmed by this! It’s okay to choose an RV skylight dome that is a different size than your original, but as you can imagine, it has to be larger.
There are two very important things to consider when choosing a replacement. First, make sure that the dome covers the entire skylight opening. Second, make sure the flange of the new dome is as wide, or wider, than the original. It is important that the flange at least covers the original screw holes.
Now, let’s get that RV skylight dome replaced!
11 Steps to RV Skylight Replacement

D&H RV and Trailer Repair – www.dnhrv.com
Make sure you have the right sealant. Once you have acquired a replacement dome, read the instructions to find out what type of sealant the manufacturer suggests.

D&H RV and Trailer Repair – www.dnhrv.com
The last step is continuing good maintenance habits. Be sure to check your RV skylight, along with all areas of your RV roof, a few times each year. Wear and tear, or trouble spots where sealant may have become worn, cracked or brittle, will become problem areas in a hurry.
With proper maintenance, your RV skylight will provide you with years of enjoyment!