Good brakes are essential for car safety. Disc brakes are shown to give more consistent stopping power than drum brakes, primarily because they cool faster. Heat is the enemy when it comes to braking systems because if the brake pads become too hot, the driver will experience brake fade, or loss of braking power. Aftermarket parts manufacturers offer conversion kits for Chevrolet vehicles so that owners can install disc brakes in place of their rear drum brakes. The 1957 Chevy is used here as an example with a Wilwood conversion kit.
Jack up the rear of the car and place it on jack stands. Remove the wheel assembly on both sides of the car.
Remove the brake drums. Disconnect and remove the emergency brake cables. Remove the brake line from the wheel cylinder assembly. Be sure to plug the brake line so it doesn't leak brake fluid everywhere. A spare screw is handy for this job.
Using the correct size socket and wrench, remove the four bolts that hold the backing plate to the axle.
Remove the axles. If they are resistant to being removed, use the slide hammer to get them moving.
Remove the square-shaped axle bolts, along with the nuts and washers. These pieces will be reused, so clean them before re-installation. Clean the axle flange with the wire brush and thinner or acetone.
Insert the spacer ring, pushing it back into the axle bearing cup until it is firmly seated.
Use the clean square head bolts to attach the parking brake assembly from the kit to the axle plate. Slide the axle back into place, lining up the axle splines. Once the splines are aligned, push the bearing into the bearing cup. Line up the bolts in the axle flange with the holes in the parking brake assembly. Tap the end of the axle to seat the bearing. Install the nuts on the bolts and tighten down as much as possible.
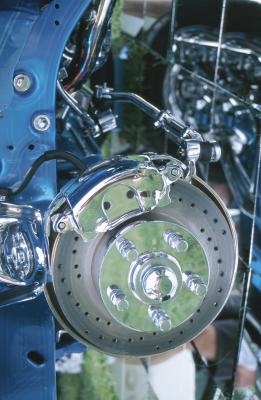
Place the spacer from the kit over the centering ring on the axle flange. Place the new rotor on the axle flange and hold it in place with three lug nuts. Mount the caliper onto the caliper bracket assembly, with the caliper being placed so it is on both sides of the rotor. Secure the caliper with the included bolts, making sure it stays centered over the rotor. Torque the mounting bolts to 35 foot-pounds.
Install the brake pads from the top of the caliper assembly. Lock them in place with the quick clip retainer.
Re-attach the brake line and bleed the brake system. Replace the wheel assemblies, remove the jack stands and lower the car.