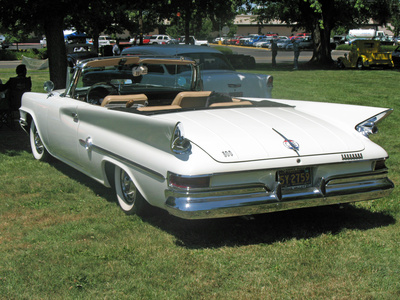
The brake system on a 1955 Ford was a single circuit hydraulic brake system. In a single line system, if a leak occurred the brakes on all four wheels would fail. Stopping ability in such a case depended on how bad the leak was and how much brake fluid remained. Once the fluid is gone so are the brakes. The dual master cylinder arrived in the late sixties and divided the brake system into two separate hydraulic circuits, the front and rear. If a leak occurs in one circuit the other circuit stops the car.
Remove the old single master cylinder from the cowl of the '55 Ford. By loosening and removing the single brake line into the master cylinder and loosen and remove the two bolts that secure the master cylinder to the cowl.
Inspect the cowl area of the 1955 Ford. Be sure the cowl is solid, with no fatigue cracks or rust damage.
Determine that the brake pedal linkage rod is of sufficient length to work with the new masters cylinder. Hold the linkage rod at the cowl while a helper in the car holds the brake pedal even with the clutch pedal or around five inches from the floor. Measure the length of linkage rod that protrudes through the cowl. Be sure the linkage is long enough to push the master cylinder plunger and stop the car.
Bench bleed the dual master cylinder. This is done by clamping the master cylinder into a vice. Fill the reservoir with brake fluid. Thread the two small lines included with the new master cylinder, one line in each reservoir. The short lines route the brake fluid back into the reservoir, the ends of the those lines must remain under the fluid level.
Bolt the dual master cylinder to the cowl. Be sure there is a dust boot installed on the master cylinder to keep the linkage rod, dirt and moisture free.
Trace the brake lines from the rear axle to the junction block or T-block where the front and rear brake lines joined into a single line that ran to the old master cylinder. Remove the rear brake line from the junction block and thread a double flare union on to this rear line.
Measure the distance from the rear master cylinder reservoir to the newly installed union. Select a new brake line the length of the measurement. Join one end of the new line to the union on the rear brake line. Do not tighten this end of the line. Thread the other end of the new line to the rear reservoir of the new master cylinder and tighten this line tight.
Trace the brake lines from the front wheel to the junction block or T-block where the front and rear brake lines joined into a single line that ran to the old master cylinder. Remove the front brake line from the junction block and thread a double flare union on to this front line.
Measure the distance from the front master cylinder reservoir to the newly installed union on the front line. Select a new brake line the length of the measurement. Join one end of the new line to the union on the front brake line. Do not tighten this end of the line. Thread the other end of the new line to the front reservoir of the new master cylinder and tighten this line tight.
Push the brake pedal to the floor and hold it there. Now tighten both the front and rear brake lines. Then release the pedal. This will release some air that was in the new line. With the pedal released loosen both of the new lines at the double flare unions. Again push the pedal to the floor and hold it there until both lines are re-tightened then release the pedal.
Check and add brake fluid to the dual master cylinder as needed. Bleed the front and rear brakes separately. Once the air is bled from the brakes inspect all the lines to be sure they are tight. Visually look under the dash, pull the brake pedal all the way up to be sure the linkage rod can not come out of the master cylinder. The brakes should now be suitable for highway use.