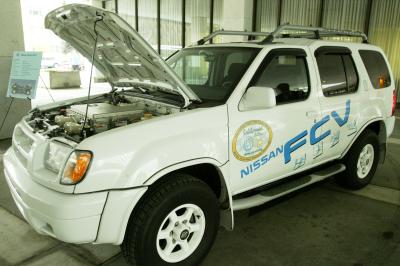
The 2002 Nissan Xterra main models were the SE and the XE. Both models were available in two-wheel drive or four-wheel drive types. The 2002 Xterra SE and XE were equipped with a 243 horsepower in-line 2.4-liter four-cylinder engine. A 3.3-liter 170 horsepower V-6, and a 3.3-liter supercharged 210 horsepower V-6 were both available options on the 2002 Xterra. The fog lamps on the 2002 Xterra can be accessed from beneath the vehicle, on the inboard side of the bumper cover. The lamps should be replaced when they are bad, to increase visibility on the road.
Raise the front of the Xterra with a jack. Place jack stands beneath the front lower sub-frame rails, just inward from the lower control arms. Do not place the stands beneath the lower control arms. Lower the Xterra onto the jack stands. Lie beneath the front bumper of the Xterra and slide yourself in position to access one of the fog lamp assemblies.
Disconnect the fog lamp harness connector by hand. Remove the fog lamp mounting bolt with a ratchet and socket. Remove the lens and bulb housing from the front bumper cover by pulling it horizontally from the inboard side of the bumper cover.
Install the new fog lamp assembly into the front bumper cover, making sure the top of the bulb lens is facing upward. Install the mounting bolt, and tighten the bolt between 44 and 53 inch-pounds with a torque wrench. Connect the harness connector to the fog lamp assembly by hand.
Repeat steps 2 and 3 to complete the fog lamp replacement on the other side of the Xterra. Raise the Xterra off of the jack stands, and remove the stands from beneath the vehicle. Lower the Xterra to the ground.
Raise the front of the Xterra with a jack. Place jack stands beneath the front lower sub-frame rails, just inward from the lower control arms. Do not place the stands beneath the lower control arms. Lower the Xterra onto the jack stands. Lie beneath the front bumper of the Xterra and slide yourself in position to access one of the fog lamps.
Disconnect the wiring harness from the back of the lamp housing. Remove the light bulb cover by hand. Remove the bulb spring fastener by hand to release the light bulb. Pull the old bulb from the Xterra by hand.
Insert the new fog lamp bulb into the fog lamp housing. Do not touch the bulb lens with your bare fingers. Handle the fog lamp bulb by the socket end. Install the spring retainer onto the new bulb. Insert the bulb cover onto the rear of the bulb housing. Install the wiring harness by hand.
Repeat steps 2 and 3 to complete the fog lamp bulb replacement on the second side of the Xterra. Raise the truck off of the jack stands, and remove the stands from beneath the truck. Lower the Xterra to the ground.