Welding cast iron can be challenging if you do not know the correct process and the properties of the metal. Cast iron contracts and expands with temperature all the time. Cast iron has brittle properties that allow it to crack easily, and it rusts easily. Several kinds and grades of cast iron exist, making it difficult to know its carbon content. However, cast iron can be successfully welded with a gas welder, called an oxyacetylene system, along with some special welding rods and proven welding techniques.
Place the cast iron piece on a firm bench, in a vise or on the floor. Make certain that no combustible materials are within range of any sparks produced from grinding. Place a conical, pointed grinding bit in a drill motor. Don gloves and safety goggles. For a crack or break in the stock iron piece, turn the drill on and grind out a V-groove channel inside the crack until you have removed all rust and reached bare, shiny metal.
Grind the outside edges of the crack area for at least two inches on all sides. There should be nothing but bare, shiny metal showing. Inspect the ground-down area for pits or holes in the iron. You might see small pressure cracks. For iron in this condition, move the piece to a well ventilated area outside. Don a respirator and pour a few ounces of hydrochloric acid on the crack and move away from it. Let it air dry.
Place the cast iron piece over a metal plate that rests over a solid surface made of cement or bare earth. Or use a vise to secure it, if the area contains no combustible materials. If the stock piece can fit inside an old barbecue, place it there on top of the grille.
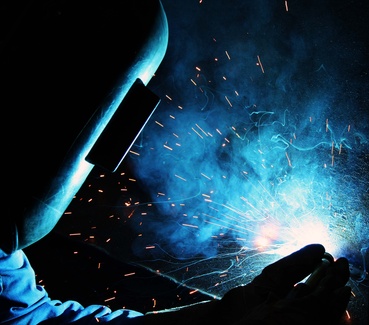
Don a welding helmet. Turn your oxyacetylene welding set valves on and ignite your welding torch. Adjust the flame for a neutral dispersion. Preheat the iron piece with the torch, bringing the surface to a dull red color. Move the flame away and wire brush the crack area.
Heat the iron piece up with the torch again until dull red. Use a flux brush to paste flux over the crack area, inside and out. Adjust the oxygen setting on your welder to produce slightly more oxygen flow to the tip flame. Place a braze welding rod into the crack area at one end, while holding the torch on the tip of the rod.
Let the rod melt and flow into the crack area. Push the bead of melted rod along the crack. Stop after a few inches. Pull the torch tip away and gently tap the bead with a slag hammer. Let the piece cool completely.
Heat the iron piece again until it glows dull red. Paste more flux on the crack. Insert your welding rod over the crack where you left off. Run another two-inch bead of weld over the crack. Tap with the slag hammer. Let it cool. Continue to weld two-inch sections in this manner until you have reached the end of the crack. Tap the bead weld with the slag hammer and use the wire brush to burnish away any ash. Let the piece cool and inspect the weld.