The timing belt of your 1993 Honda Civic is integral to the proper operation of the engine. The belt is connected to the crankshaft and camshaft by pulleys on the exterior of the engine block. The toothed timing belt spins the pulleys to synchronize the operation of the valves and pistons. If the timing belt breaks on a 1993 Honda Civic, it can cause severe internal engine damage. Honda recommends that the timing belt be replaced every 90,000 miles on the 1993 Civic.
Park the Honda Civic on a level area. Open the hood of the vehicle and disconnect the negative battery terminal using an open-faced wrench. Jack up the front end of the vehicle with a jack and place jack stands under the frame on each side to secure the vehicle.
Remove the lug nuts on the front driver's side wheel with a tire iron. Lift the wheel so it clears the dowel pins and remove it.
Crawl underneath the exposed front wheel well on the driver's side. Use a socket wrench to remove the mounting bolts on the plastic wheel well splash guard. Remove the splash guard.
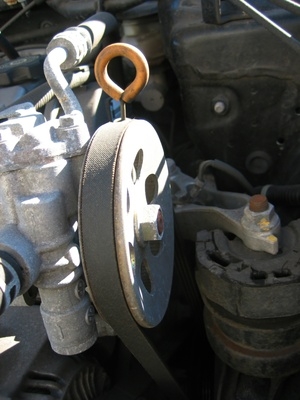
Remove all accessory drive belts including the alternator, air conditioner and power steering. Loosen the adjuster bolt on each accessory and then swing the accessory toward the engine block to release the tension on the belt. Work each belt off its pulley.
Use a socket wrench to remove the upper and lower timing belt covers. The covers are held in place by two mounting bolts on each cover facing the front of the vehicle.
Remove the crankshaft pulley using a socket wrench to release the bolt in the middle of the pulley. Use the same socket to loosen the timing-belt tensioner bolt. Slide the tensioner away from the timing belt and finger-tighten the bolts to keep the tensioner out of your work area. Note the route of the timing belt by drawing a simple diagram on a piece of paper. Work the timing belt free from all pulleys.
Align the markings on the crankshaft and camshaft pulleys. The crankshaft pulley will have a singular score that corresponds to a score on the engine block at approximately 12 o'clock on the pulley face. Align the scores. The camshaft pulley will have the word "Up" written on the pulley face. Adjust the word until it sits at 12 o'clock on the pulley face. Locate the two additional leveling scores on the camshaft pulley at approximately 3 and 9 o'clock. These scores should line up with the top of the engine block.
Install the new timing belt onto the pulleys, starting with the crankshaft pulley. Loosen the tensioner bolt until the tensioner comes down onto the belt and reduces the slack on the belt. Use a socket wrench to turn the crankshaft pulley one-quarter turn counterclockwise, which will allow three teeth of the timing belt to turn on the crankshaft pulley. Tighten the tensioner bolt to 33-foot pounds using a torque wrench.
Reinstall all accessory drive belts, the wheel well splash guard and the front driver's side wheel by performing the disassembly steps in reverse. Remove the jack stands, lower the vehicle and reconnect the negative battery terminal. Close the hood.