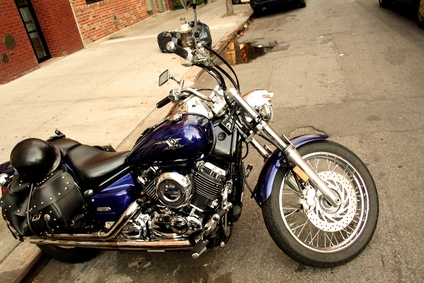
If there's a ring of oily dirt building up on your motorcycle's fork tube, chances are that you need to replace the fork seal -- and fast. Fork seals should be replaced at the first sign of oil at the top of the fork leg. Left untreated, a faulty fork seal will leak oil until it runs out, seizing the sliding mechanisms and locking the front end of your bike. That means that if you've noticed oil on the fork and the problem seems to have stopped, chances are that you're running out of oil and potentially putting yourself in a very dangerous situation next time you hop on your bike.
Loosen the two bolts on the upper triple-tree that clamp onto the fork legs by turning each a half rotation. If your bike has air-pressurized forks, you'll need to bleed the pressure. Loosen the fork caps, brake caliper bolts and front axle.
Prop the front end of the bike securely off the ground.
Remove the brake calipers, speedometer, front fender and front wheel. Depending on the make of your bike, you may also need to remove brake hose clamps and air clamps.
Loosen the triple clamp bolt securing the fork leg and pull the fork leg out by twisting while applying pressure.
Place the upper segment of the fork vertically into a soft-jawed vise, leaving at least six inches of the upper fork above the vise grip. Use caution not to damage the chrome plating.
Remove the fork cap slowly and carefully using the box-end wrench. There is a spring inside the fork leg that will push the cap off forcefully and send it flying across the garage if you are not careful. Remove the spring and drain oil from the fork into a container.
Separate the two halves of the fork by removing the bolt at the bottom of the outer tube that connects the damper rod holding the two fork halves together. Manufacturers sell special tools specifically for this process.
Remove the dust seal and bushing from the outer fork tube and pry out the metal spring beneath it using a flat head screwdriver.
Clamp the outer fork tube in the vise at the brake mounting tabs, firmly grasp the inner tube and pull. With effort, the fork tubes should separate.
Remove and discard the two bushings from the the inner fork tube and note any pitting on the chrome surface of the inner fork tube. Pitting will have to be removed (by using an oiled honing stone) in order for any new seal to function properly.
Clean all non-rubber parts by placing them in a solvent solution to remove contaminated oil.
Reassemble the fork by installing each item in the reverse order of disassembly. An expanded view of the fork should be available in your factory service manual. Use the seal driver to install the new outer bushing and greased dust seal.
Check your service manual for the recommended oil weight and oil level. With the fork fully compressed, fill with oil, ensuring that no air pockets remain in the fork.
Reassemble the front end and take the bike for a test ride.