The fuel pump on your 1998 Chevrolet Blazer, located inside the tank, uses high pressure to deliver fuel to the fuel injection system. You can easily replace this particular fuel pump because the pump, sending unit and strainer are all contained within one system. The first sign that your fuel pump may need replacing occurs when your Blazer begins to slow down and sputter significantly with a full tank. If the condition does not improve after you first change your fuel filter, you must replace your fuel pump.
Open the hood, open the fuse panel located under the hood and remove the fuse for the fuel pump using your hands. (See your owner's manual for the exact location of this particular fuse.)
Depressurize the fuel system by starting the truck and letting it run until it dies, then reinsert the fuse.
Disconnect the battery using a ratchet and socket.
Siphon the gas from the tank using a siphoning kit.
Raise the truck with a jack, place jack stands under the frame rails at the rear of the truck and lower the jack until the truck rests on the jack stands.
Remove the nut from the spare tire rack beneath the truck using a ratchet and socket, and remove the spare tire.
Place a jack beneath the fuel tank, and raise the jack until it sits flush with the bottom of the tank.
Unbolt the holding straps from the tank using a ratchet and socket. Check to ensure the jack is holding the tank securely.
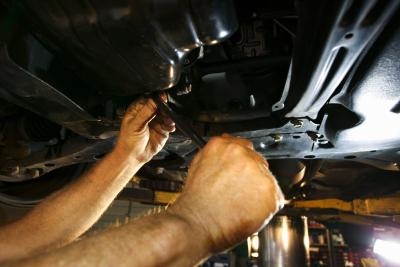
Remove the wiring connections on the upper side of the tank by lifting each wire tab with your hands and pulling it away from its connector. Remove the fuel lines by following the same procedure.
Unscrew the hose clamp from the fill hose at the back of the tank with a screwdriver, and pull it off with your hands.
Lower the tank with the jack, and gently slide the tank from under the truck.
Loosen the retainer ring from the top of the tank by gently tapping it with a hammer and punch in a counterclockwise fashion.
Reach in and remove the fuel pump assembly from the tank with your hands.
Remove the O-ring in the retaining ring. Replace it with a new O-ring, which should have come with your new fuel pump assembly kit.
Insert the new fuel pump assembly into the tank.
Secure the fuel pump assembly by tapping the the retaining ring with a hammer and punch in a clockwise fashion until tight.
Put the tank back on the jack, slide the jack under the truck and lift the tank with the jack to just a few inches from the top.
Reconnect the wires and fuel lines by pushing their individual connectors together with your hands.
Reconnect the fill hose to the back of the tank, and tighten the hose clamp with a screwdriver.
Raise the tank to the top with the jack, and reinsert and screw in the holding straps with a screwdriver.
Raise the rear of the truck with the jack, remove the jack stands and lower the truck with the jack.
Refill the gas tank.
Reconnect the battery.
Reconnect the spare tire into the spare tire harness beneath the truck.