The wheel wobbled around and the stud is ruined. Or it was cross threaded, and you can't get the nut to rethread. You may need to replace a pressed-in trailer wheel stud for a number of reasons, but following a few simple steps makes the job run smoothly. Never attempt to reuse damaged studs because a malfunctioning wheel could lead to serious injury or death.
Remove the lug nuts and tire and set them aside. Remove the grease cap in the center of the hub. A nut secured by a cotter pin is underneath. Remove the cotter pin and discard it because you will need to replace it.
Remove the nut that holds the hub to the axle using a large socket or a large wrench if a socket is not available. If using a large wrench do not round off the corners of the axle nut. Remove the washer behind the axle nut, and slide the hub off the axle. As you do so, the outer bearing will become loose in the outer part of the hub. Remove it and set aside, being careful not to drop it.
Set up two of the wooden blocks with a space between, and rest the hub on them. Locate the wheel stud you wish to remove over this space. Place the third and smallest block of wood on top of the stud, and strike a rapid solid blow with the hammer. It may take several blows to move the stud. Once the stud is moving, continue striking until it falls out of the hole. If the stud is broken, and there is not enough sticking out of the hole to strike with a hammer, place a punch or drift in the center of the stud, and use the same striking technique to remove it.
Turn the hub over and remove the wheel seal and inner bearing. Thoroughly clean the inner bearing races and the hub. Set aside the inner bearing, and discard the seal. Place the new wheel stud in the hole, ensuring that it is straight. Tap it gently to "seat" it in the hole. Strike it once or twice to seat it more firmly in place, but do not drive it all the way in.
Turn the hub over, and thread the new wheel nut on till it bottoms out on the hub. Using the lug wrench, slowly tighten it, pulling the stud into the hub. Ensure that it remains straight, and tighten until the head of the stud is flush against the inside of the wheel. Remove the lug nut.
Pack the inner wheel bearings with grease, and replace the wheel seal. Slide the hub onto the axle, and repack the outer bearings, sliding them into place. Using the bearing washer to hold the outer bearing in place, slide the hub all the way onto the axle. Replace the axle nut, and tighten it to the trailer manufacturers torque specifications using a torque wrench. Replace the cotter pin to hold the nut in place.
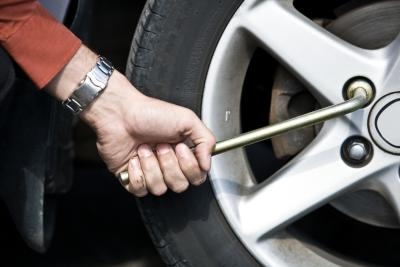
Replace the wheel, and torque the lug nuts to the manufacturers specifications. Check the tire and hub to ensure they are tight. After driving for approximately 100 miles, retorque lug nuts using the torque wrench.