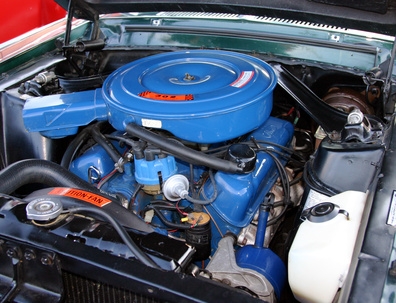
The intake manifold functions as a routing chamber for atomized (mist) fuel which has to enter the combustion chamber for ignition. Intake manifolds can be made of aluminum, magnesium or cast iron, but they all perform the same function. In addition to sending fuel into the cylinders for ignition, they often times have ports that have vacuum sensors attached to them. The sensors send signals to the engine's computer. Some intake manifolds have two-piece construction and contain other devices like the central sequential multi-port fuel injection, exhaust gas recirculation -- or EGR -- and the pressure regulator. Replacing the intake manifold gasket can be complex, but with some knowledge and basic tools, the industrious repair person can complete the task.
Place the vehicle in park or neutral with the emergency brake engaged. Raise the hood and place a bright shop light over the engine compartment. Disconnect the negative battery cable from its post.
Refer to your owner's manual for the specific components attached to your intake manifold. Disconnect the air box hose that runs to the throttle bottle; pull the air cleaner housing off and disconnect the PCV valve hose, if vehicle has the carburetor design.
Remove any sensor wire or vacuum line for any component directly attached to the intake manifold. In the case of a carburetor vehicle, this would included any throttle cable or linkage arm that must be disconnected before the manifold comes off the engine. Construct a small diagram on a piece of paper, showing the proper placement of lines and wires to the sensors or vacuum valves. Remove any metal lines with a proper six-sided line wrench.
Remove the fuel rail with the proper line wrench (if the car has one). Remove the EGR heat shield, if so equipped. Remove any throttle cable bracket that will impede the manifold removal. Spray the intake manifold bolts with penetrating oil and let soak for 10 minutes. Spray again for complete saturation.
Use the correct socket and extension to remove the intake manifold mounting bolts. Arrange them in a configuration on the ground in the profile in which they came off; the bolt lengths may vary. Use a slot screwdriver to gently pry the intake manifold away from the engine block surface. Lift the manifold out.
Use a gasket scraper and carburetor cleaner to remove all old gasket material from the intake manifold. Wipe the outside and inside surface of the intake manifold ports, keeping all debris out of the ports. Plug all the intake ports on the engine block with rags. Use the gasket scraper and carburetor cleaner to remove all old gasket material from the block mating surface. When finished, remove the rags.
Apply a thin coat of gasket adhesive on the clean intake manifold surface. Press the new gasket onto the manifold. If equipped with individual gaskets for each intake port, press them on individually. Align the intake manifold with the block and start mounting the bolts in by hand. Use an assistant to help support the manifold for a steady alignment. Turn the bolts in by hand until snug.
Refer to your owner's manual for the correct foot-pound torque pressure and tightening sequence, then set the torque wrench measurement. Tighten each bolt to the correct foot pounds, starting in the middle of the intake manifold and fanning outward toward the ends.
Reassemble each component, bracket, shield, wire or cable in the manner that you removed it. Check any vacuum lines or wires for tight fits and clean connections. Take your time, making sure the components fit exactly back into their seats or mounts. The air box intake hose (or air cleaner housing) will be the last component to reconnect. Reconnect the negative battery cable. Start the engine and check for leaks.
Connect a vacuum gauge up to a vacuum line and note the reading, comparing it to the manufacturer's specifications. The vacuum reading should fall within tolerance.