Over time, the rubber seal around the windshield of older cars become severely cracked and oxidized. It would be preferable to purchase a new seal and have a windshield replacement professional install it for you...that is if you have the bucks. If you don't have the bucks, here is a simple and inexpensive repair method. It isn't concours, but it will improve the looks of your car show cruiser.
First wipe down the entire rubber seal with mineral spirits to remove any dirt and oxidize. You will a see a great deal of black oxidize come off at first. Keep wiping with spirits until very little black shows up on the rag.

Next, wipe down the seal with a household degreaser like Grease Lightning. Over time, the seals have probably been sprayed with preservatives, this will remove as much as possible.

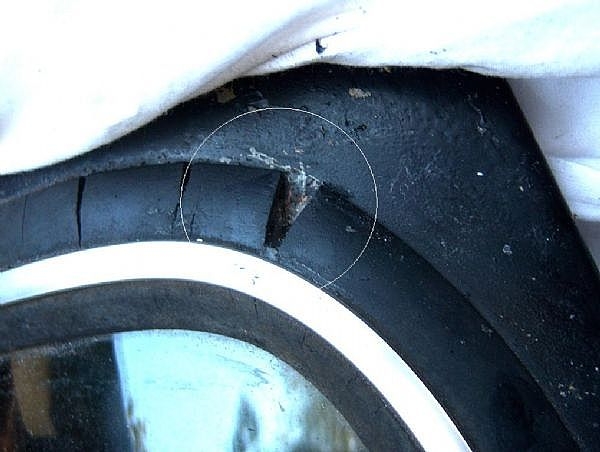
Mask off the areas to be repaired to keep the filler from sticking to other surfaces. Using a razor blade or x-acto knife, carefully trim the masking tape where the seal meets the windshield frame and the chrome center strip to give a sharp separation.

Fill the gap with bondo or other catalysed body filler. When the filler hardens, carefully sand and shape the filler with the 220 grit sandpaper until the filler is flush with the edges of the seal. Then move on to the next crack to be filled.
Remove the old masking tape. It is best to coat the entire seal all at once. Coating by sections will leave raised end marks that will show where the coating ends. Again mask off the entire seal with fresh masking tape and again trim to fit with the razor. Spray the entire seal with a coat of the Plasti-dip coating following the manufactures instructions on the can. Wait until dry and then coat again. Three coats should be sufficient. In between each coat, trim along the edge of the masked off area to keep the coating from peeling back when removing the masking tape.

When the coating has dried for a couple of hours, trim again with the razor and slowly remove the tape.

Let the coat cure for a couple of days. Any areas where the coating has not been satisfactory, can be touched up with a small artist's brush and a little of the Plasti-dip sprayed into a small container.
