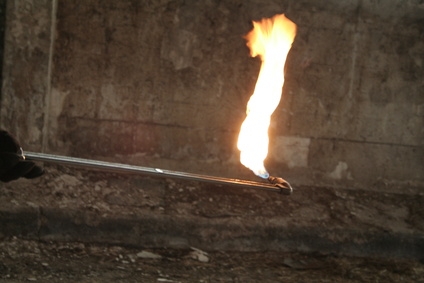
Oxy acetylene welding, sometimes referred to as "gas" welding, uses acetylene gas as the fuel for the welding torch. The flame produced by an oxy acetylene welding torch heats the metals you're welding and causes them to melt together, bonding the pieces with the resulting weld seam. Though oxy acetylene welds aren't as aesthetically pleasing as those created by other methods, they are fast and easy to produce while being strong enough for most welding needs.
Clean the torch nozzle and the metal you plan to weld. Use a metal cleaner on the metal, then brush it with a steel-bristled brush designed for use on metal to remove any small particles that might remain. Dirt or impurities left on the metal can cause problems or weaknesses within the weld.
Clamp the metal pieces to your work table, or otherwise secure them in place. The pieces should have a slight gap between them, which will be filled with the weld. Make sure that they can't move easily to prevent movement that could ruin your weld.
Assemble the welding torch by hand, attaching the nozzle you cleaned. Check the gas pressure on the oxygen and acetylene tanks to make sure that each has at least 50 pounds per square inch (psi) of pressure, then connect the gas lines to your torch.
Turn the main valve of the acetylene tank half a turn, and open the acetylene pin valve on the torch. Adjust the regulator valve on the acetylene tank until you have 5 psi of pressure, then close the pin valve. Turn the main valve of the oxygen tank half a turn, and open the oxygen pin valve on the torch. Adjust the oxygen regulator valve until you have 10 psi of pressure on the oxygen tank, and then close that pin valve as well.
Put on a welding mask and gloves. Open the acetylene pin valve slightly so that you can hear gas escaping, then light the gas with a gas striker. Adjust the acetylene flow until the flame is barely touching the nozzle, then open the oxygen pin valve slowly until the flame turns blue.
Move the tip of the flame over the edges of the metal pieces until the metal begins to glow red. Continue moving the flame, allowing more of it to touch the pieces of metal until small pools of molten metal begin to appear.
Move the flame in a circular motion to swirl the molten metal together, moving slowly down the seam you are welding. Make sure that you don't move along the weld seam too quickly, or you will run out of molten metal and will have to form more. Continue welding the pieces until the pools from each piece have been mixed along the entire seam.
Close the oxygen pin valve once you have finished your weld and want to shut down the torch. After you turn off the oxygen, close the acetylene pin valve. Shut off the main valve on the oxygen tank and fully open the regulator valve to clear the gas line. Repeat this with the acetylene tank, then disconnect the gas lines from the welding torch. Close the regulator valves and disassemble the torch for cleaning and storage.