The transmission fluid in a Chevy Cobalt should be changed every 50,000 to 60,000 miles, depending on the driving conditions to which your car has been subjected. When a transmission has shifted gears through dirt roads and highly polluted areas, the fluid that runs through the system tends to thicken, change color and create corrosion and other troubles. Changing the transmission fluid may take an hour or so to complete, but is well worth avoiding the fees incurred by hiring a professional mechanic for transmission repair or fluid changes.
Raise your transmission fluid's temperature by driving your Cobalt for approximately 10 to 20 minutes before beginning the fluid replacement.
Turn your car off but leave the keys in place, since you will need to start it again when you put the new fluid into the transmission.
Jack your car up using a car jack, supported by two stands on the left and two stands on the right sides of the car near the inner side of each tire.
Stand back from your car and evaluate whether or not the car is perfectly level. If your vehicle appears level, you can proceed to the next step. If not, keep adjusting the car jack and stands until the car is evenly horizontal with the ground beneath it. A tilted car could mean hot transmission fluid hazards.
Go under your car and locate the square, metal transmission pan. This is identifiable not only by shape but by the numerous bolts that secure it to the transmission area, near the driver's side of your car.
Place your drip pan under the transmission pan, as a catch for the fluid that will begin pouring out in the next step.
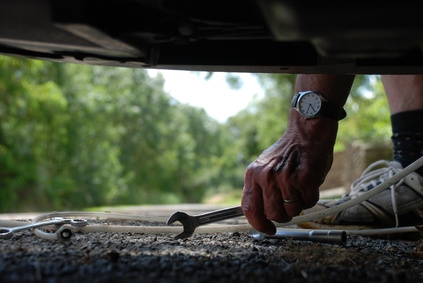
Unscrew the transmission pan's side cap, known as a drain plug. You may need to use your socket wrench in order to loosen the cap if it is particularly tight. The fluid will begin draining into the drip pan and could take as long as 10 minutes to empty completely.
Use your socket wrench to loosen the other bolts that keep the transmission pan mounted under your car.
Clean the entire transmission pan using a small amount of degreaser on your wet rag. This is important because residue from the old fluid could contaminate the new fluid, creating problems earlier than necessary after the fluid change.
Tighten the bolts back onto the transmission pan, making sure that there are no cracks or crevices where transmission fluid could leak out once it is full again.
Remove all four jack stands from under each side of your car and lower the jack stand slowly and cautiously.
Raise the hood of your car and identify the fill port on top of your transmission unit.
Open the fill port using your fingers just like a bottle cap. If the cap is difficult to turn, use a pair of pliers for an extra-firm grip.
Position the funnel downward so that the fluid will enter directly into the fill port.
Engage your emergency brake to prevent accidental rolling of your vehicle.
Start your ignition so that the car is warming and the new fluid will flow freely through the transmission as you pour it in.
Pour the first quart of Dexron transmission fluid into your transmission's fill port.
Put your foot on the brake pedal and shift the gears of your car slowly from park to neutral, reverse and drive, in no particular order. This will push the new fluid around the transmission's various parts, so that each component is adequately lubricated.
Pour the other quart of transmission fluid into the funnel with the car in "park."
Shift the transmission's gears with your foot on the brake once more, and the fluid should be completely lubricating the entire transmission system at this point.
Replace the transmission's fill port cap and close the hood to finalize the successful transmission fluid change.