A bad battery can cause a wealth of problems in your vehicle including starting failure, flickering lights, and poor performance. The average car battery should last approximately four years, but factors such as excessive short-distance driving and extreme temperatures can wear it down faster. Changing a battery is something that any vehicle owner can do by himself or herself. The following is a guide to changing your car battery.
Tools for Changing Your Car Battery
To change your car battery, you will need to have several items. Your new battery is the most important item on the list. You can find a reliable car battery from a number of places. Some of the longest lasting batteries to buy for your car are Diehard, Optima and NAPA batteries. These are designed to handle some of the harshest temperatures.
You will need something to clean the battery terminals before you install your new battery. Corrosion usually collects around the terminals, and it can cause battery failure in your new battery if you do not clean it. You will need to have with you a baking soda and water solution along with a wire brush to get the terminals clean. Auto parts stores also sell battery-cleaning solutions that you can use as an alternative option.
The third item that you will need to remove your old battery is an adjustable battery wrench or a set of adjustable pliers. The adjustable wrench or pliers can help you to loosen all battery connections so that you can easily pull the old battery out of its position.
The last items you will need are a ratchet and socket. You will use these tools to disconnect the bolt that holds down the battery hold-down clamp.
Step 1: Disconnect the Battery
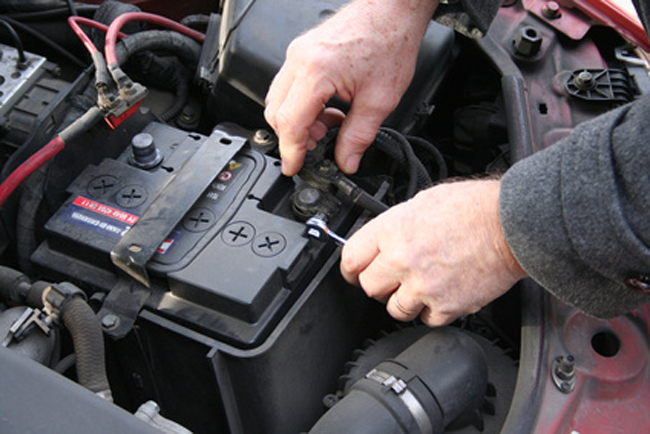
Turning your vehicle off is the most important step in the process. With your vehicle off, you will need to open the hood and locate your battery. Your battery could be on the left or right side of your vehicle depending on its make and model. Once you find your battery, you will need to disconnect the negative cable from the battery. The negative cable is the one that is either colored black or coded with a negative sign.
Turn the nut with your pliers or wrench until you loosen it enough to where you can remove the cable. Once the nut is loose enough for you to remove the cable, then you can pull up on the cable until it completely disconnects from the battery.
Next, you will want to disconnect the positive cable from the battery. The positive cable is the one that has the red coloring and the plus sign. You can use the same method to disconnect the positive cable that you used with the negative cable.
Step 2: Disconnect the Battery Clamp
Next, you will disconnect the battery hold-down clamp. Use your ratchet for this final step before you remove the battery.
Step 3: Remove the Old Battery
Once your battery is free from all connections and clamps, you can pull it out and dispose of it. Most batteries have handles on them. You will want to grab the handle with both hands since batteries are on the heavy side. Pull upward until you have the battery in your hands, and then place the battery out of view while you are installing the new one. If your battery does not have handles, then you can use both hands to grab at it from the bottom.
Step 4: Clean the Battery Terminals
Next, you will want to clean all battery connections and holding devices. You can do this by dipping your wired brush into the water and baking soda solution that you have. Use your wired brush to scrape corrosion from the battery tray and the hold-down clamp. Next, carefully scrape corrosion from the battery connectors. If you have purchased a battery cleaning solution, then you can use the solution for the battery connectors. The solution may work well for heavy corrosion and grime. You will want to get all connections as clean as possible so that everything touches the new battery and nothing causes a short or malfunction.
Step 5: Install the New Battery
You can install your new battery in a backward fashion once you have cleaned all the necessary connections. First, slowly drop the battery into place on the hold-down tray and tighten the hold-down clamp. Next, you can use an anti-corrosion solution if you want to give the terminals extra protection. After you spray your terminals, you will reconnect the positive (red) cable to the battery. Finally, you will reconnect the negative cable. Check the stability of the battery by tugging on it after you have tightened every part of it. A properly placed battery will have little to no movement when you tug on it.