 Verne Simons
Senior Editor, Jp
Photographers:
Trenton McGee
Verne Simons
Senior Editor, Jp
Photographers:
Trenton McGee
After Cheap Truck Challenge 2015 (CHEAP TRUCK CHALLENGE 2015 KIA SPORTAGE) I had a good idea what I wanted to do with my little green Kia, Kimchi. Kimchi did well and showed why small, lightweight 4x4s like Suzuki Samuris, Geo Trackers, and early Jeeps have always been fun and work well in the dirt. I also realized that we off-roaders missed the boat recognizing Kia Sportages of the 1990s and early 2000s for what they were. They are well built and durable and make good platforms for 4-wheeling modifications. Their only fault might have been that they were sold by what was, at the time, an obscure manufacturer (at least in the U.S.).
I wanted to keep the Kia small and light while improving performance and its already high fun-per-dollar factor. My plan was to strip down the extra weight, add a bunch of tubing, and build myself a side-by-side fighter with the flavor of a miniature Trophy Truck. Part toy, part race car, all for fun in the dirt.
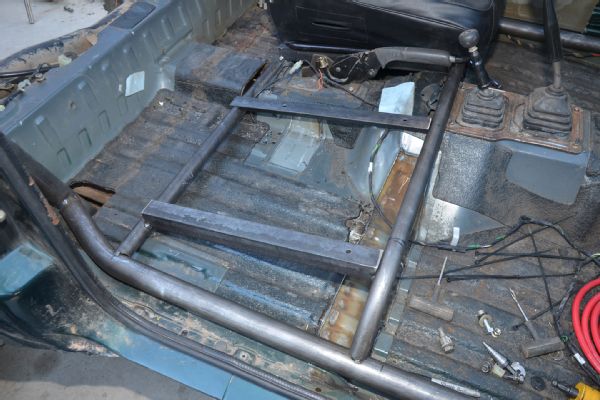
I started by pulling the interior and trimming extra sheetmetal. I also pulled the heater, dash, and other HVAC components and removed the glass from the doors, along with window regulators, switches, wiring, and so on. I even went so far as to remove the rear floor of the small SUV, cutting off the rockers that were damaged in CTC 2015 and removing front and rear crossmembers with a little bit of framerail. I gutted the roof, rear quarter-panels, and front fenderwells, leaving Kimchi a stripped-down floppy shell of itself.
Once that was done I rebuilt the structure of the Kia using a combination of 1.75x0.120-wall, 1.5x0.120-wall, and 1.5x0.095-wall DOM steel tubing. I built a stout six-point rollcage and front and rear bumpers and tied all of the remaining body to a trimmed-down frame. With the rollcage in place I then added a pair of economical and comfy MasterCraft Nomad seats from Rusty’s Off-Road, added in harnesses, moved the battery to the back of the rig, and fabricated mounts for some old remote reservoir shocks I found hiding in the garage.
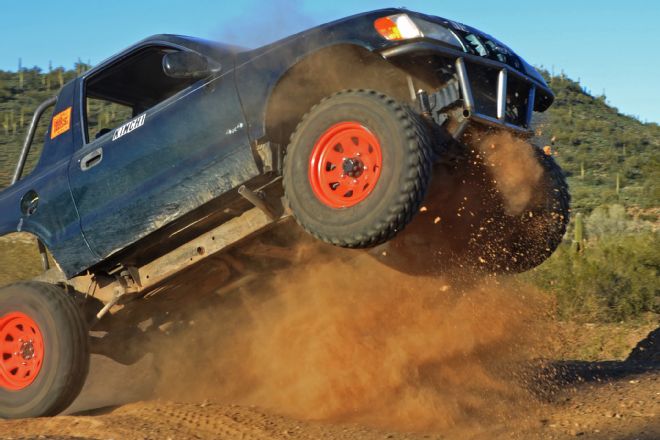
The result is a quick and fun mini 4x4 that, dimes to dollars, will give any $40,000 side-by-side a run for its money (even if it is slower and heavier). Like any good project it was fun to build and occasionally frustrating. All in all, it is a pretty inexpensive investment in fun (that still isn’t worth much money compared to a built Jeep, Toyota, or fancy side-by-side). But hey, it’s mine. I built it. It takes abuse well and it is one heck of a good time out in the dirt.
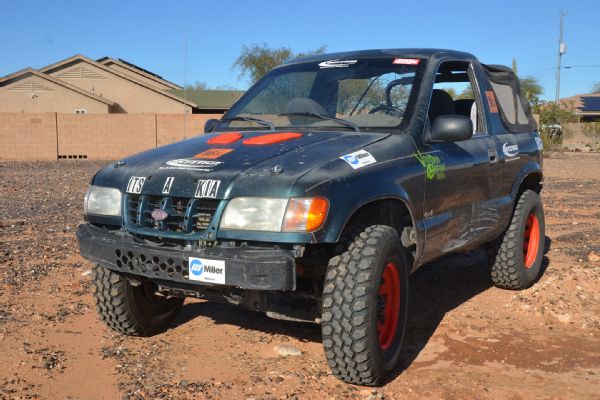
Here is Kimchi much as it was after the end of Cheap Truck Challenge 2015. The Kia did well in the event and hardly needed any maintenance (and has gotten no maintenance since the event, unless you count jumpstarting the battery once or adding fuel). One of the front CV-boots tore and still needs to be replaced.

We did take Kimchi wheeling once between CTC 2015 and this rehash of the project. Part of the wheeling trip devolved into a little foolish target practice. Thin sheetmetal versus .223 ammo makes for real vehicular character. Leave your bullet-hole stickers at home. Don’t do this kids—it’s dumb. Always remove all your target trash too.
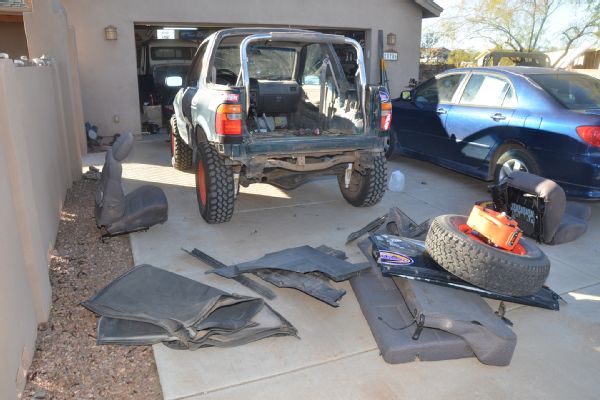
Our first task was to tear out the 17-year-old carpet and interior —it was gross and needed to come out. The Kia soft top was brittle and wouldn’t come off without breaking. We don’t need it. Our driveway started looking like a chop shop. The pile of trimmings had begun to grow.
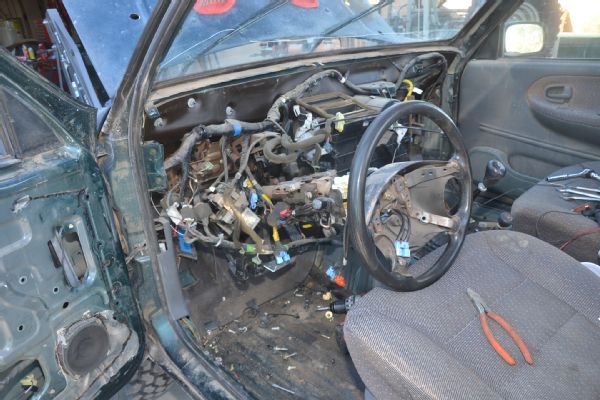
Next to go was the dash. The A/C hadn’t worked since we bought the $1,500 Kia, and who cares? The heater and other amenities are not necessary and add weight. We want a fake toy race car.
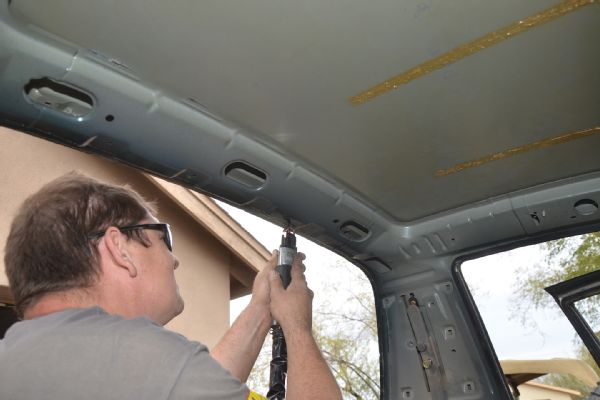
A Neanderthal with an air saw? Part of the plan was to remove all the structural bits of steel from the Kia. This would help shed pounds and allow for clearance of tube work that would make the Kia strong and safe while retaining those sexy Korean looks. Tools of choice for chopping up the SUV were our favorite air saw, a Sawzall, a plasma cutter, and maybe even a pair of tin snips. All these cut edges are razor-sharp, so be careful!
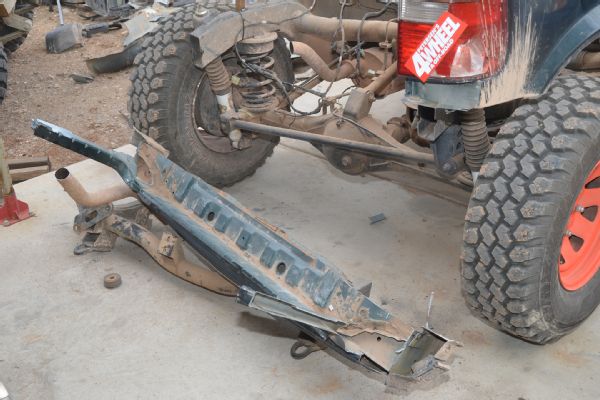
This rear crossmember and part of the rear frame were heavy and useless once we committed to dropping the tailgate/tire carrier. We will rebuild with steel tube for a stronger Kimchi.
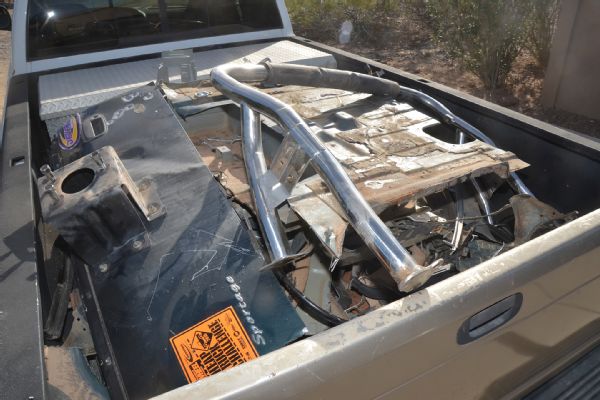
We cut out the rear portion of the floor (behind the front seats), the rear wheelwells, the celling gussets and hood structure, the front inner wheelwells, and the inner door panels and gutted the doors of their glass regulators and wiring. At the steel recycling place we offloaded 250-300 pounds of 1999 Kia Sportage, not including all the plastic interior components, glass, fabric, and so on.
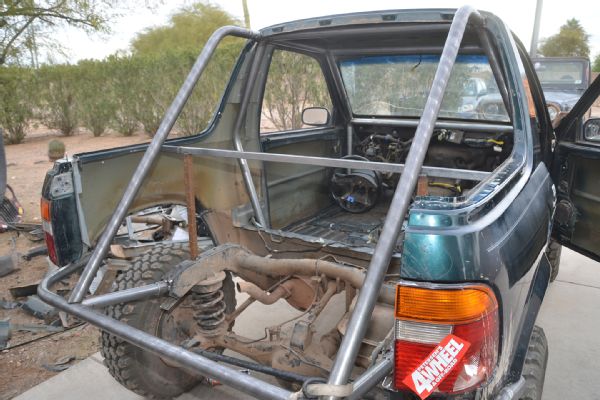
A few bits of scrap steel were used to hold wobbly Kia skins in place until we could get the cage started. The rear quarters and taillights were very floppy once everything was gutted. Our main cage is constructed of 1.75x0.120-wall DOM. Fellow CTC competitor Rob Bonney from Rob Bonney Fabrication kept an eye on the project to make sure we didn’t screw up the tube work. Years of fabrication experience are a nice asset to add when doing something silly like building a side-by-side sort of toy Trophy Truck thing.
We wanted to tune the suspension of the Kia with some small coilovers or air shocks but ran out of time. Our one big splurge besides steel for the cage was a pair of MasterCraft Nomad seats from Rusty’s Off-Road Products. These seats are on special at Rusty’s for $350 a pair! To mount the inexpensive and very comfy seats, we built a substructure out of 1.25x0.120-wall DOM and some 3/16x1 1/2 angle-iron. This allowed us to fine-tune the seat placement.

The MasterCraft Nomads are inexpensive, high quality, comfortable, and a lot lighter than the factory Kia seats. We added in race harnesses we had on the shelf, but Rusty’s Off-Road Products has great deals on MasterCraft race harnesses as well.
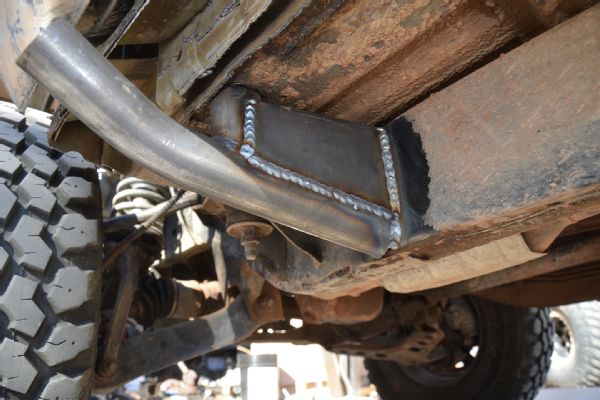
To tie the A-pillar of our rollcage to the frame, we used cut pieces of 2x4-inch 0.120-wall rectangular tubing and some lengths of 1.75x0.120-wall DOM. The DOM will eventually tie into body-protecting rocker guards. Our Millermatic 190 MIG welder made easy work of welding everything together.
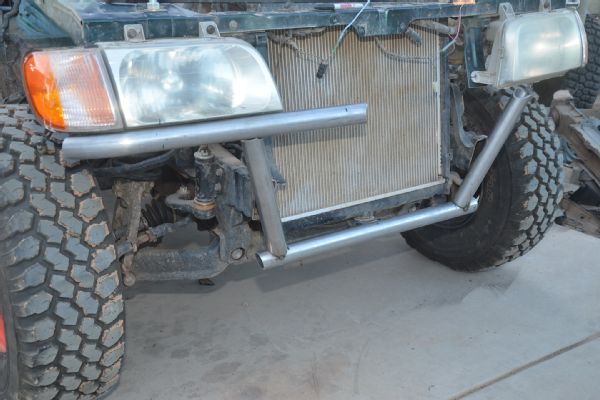
Up front we trimmed a bit more framerail and hacked out some useless front body mounts. Our future plans involve dimple-died aluminum fill plates to protect the radiator, and we’d like to run more tube from the A-pillar of the cage out the front of the hood for extra bumper strength.

The Kia’s new rear shock setup interfered with part of the factory exhaust. The huge factory muffler was also falling apart at the seams after many miles and the abuse of Cheap Truck Challenge 2015. I initially thought I’d run the Kia without a muffler, but it was way too loud and annoying. A quick run to the parts store yielded this small Thrush muffler, which keeps the Kia’s 2.0L four-cylinder nice and quiet. I also repurposed the exhaust hangers and made a turndown tip out of part of the old exhaust system.
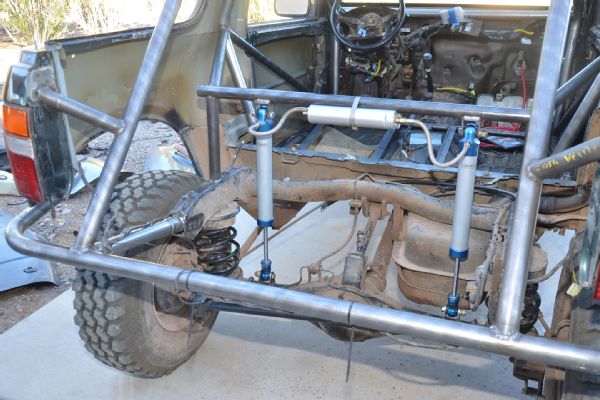
Speaking of the rear shocks, we’ve had these old Pro Comp rebuildable remote-reservoir shocks on a shelf in the garage for years, intending to use them for a TJ. To mount them, we removed the rear coil springs, set the suspension at full compression, and figured out where the tops of the shocks needed to be held. A little bit more 1.5x0.120-wall and 1.5x0.095-wall DOM and a few shock tabs from Rusty’s Off-Road Products make the mounts.