
 Christian Hazel
Brand Manager, Four Wheeler
Christian Hazel
Brand Manager, Four Wheeler
There's nothing wrong with having points in your distributor. There's also nothing wrong with walking across country. There's just more efficient ways to get both jobs done. We had a 1959 Willys CJ-6 we recently purchased sight-unseen on Craigslist. The previous owner had converted the vehicle from 6 V to 12 V, and part of that conversion involved loading the stock Prestolite IAY-4401 distributor with all new points, condenser, cap, rotor, and even a coil and plug wires. The trouble was it still didn't run quite right, no matter how much we mussed and fussed with the point gap, dwell, timing, and fuel system.
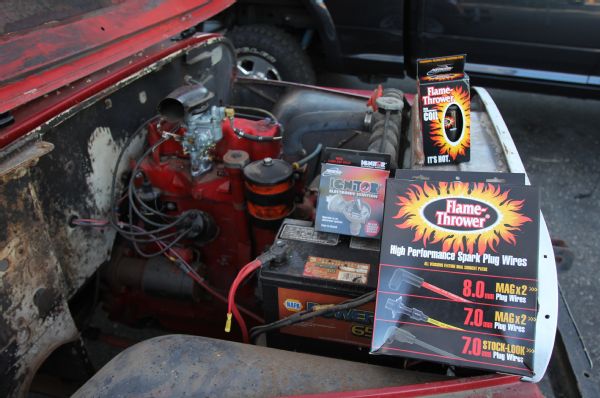
Something was amiss (pun intended) so rather than mess any more with antiquated technology we decided to upgrade the entire ignition system with some modern parts from Pertronix.
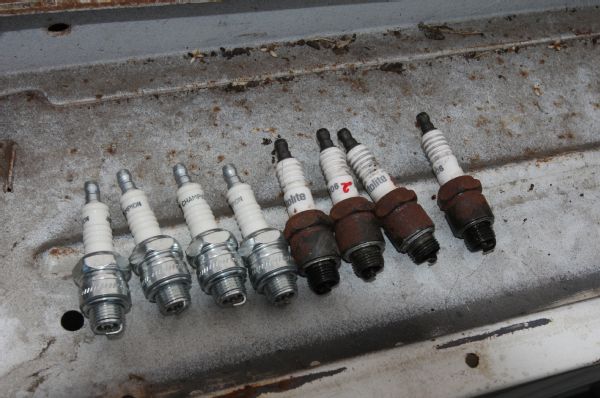
For our F-head 134ci four-cylinder, we ordered a Pertronix Ignitor electronic ignition conversion kit (PN 1548), a Fire Power 3.0-ohm coil (PN 40611), and a set of universal 7mm Fire Power plug wires (PN 704180). Rather than mess with trying to clean the old spark plugs, we also grabbed a set of Champion J8C spark plugs. The parts dropped right in, and with the first turn of a key, we were immediately rewarded with the engine coming right to life and settling into a nice, steady idle. We advanced the timing from 5 degrees BTDC to 12 degrees BTDC, and the engine now snaps right to life when we blip the throttle. Follow the photos for the full step-by-step installation.
01 Our F-134 engine ran, but it felt like it was only firing on two cylinders. Something was definitely wrong in the ignition system. The key was probably left in the "ON" position for some time, which can fry ignition components depending on how things are wired. The dead battery when we got the vehicle was a tip-off to that possibility, but dead battery or not, the first step in the conversion is to disconnect the battery.
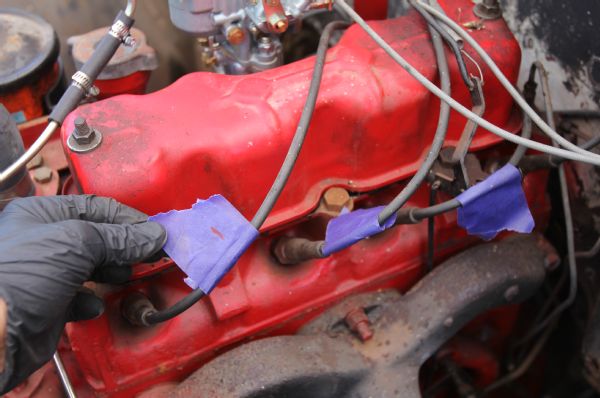
02 It's not high-tech, but we use low-adhesive painter's tape and a marker to label the plug wires before pulling anything apart. It just makes things easier when it's time for the new wires to go on. The painter's tape comes off easily when the job is finished.
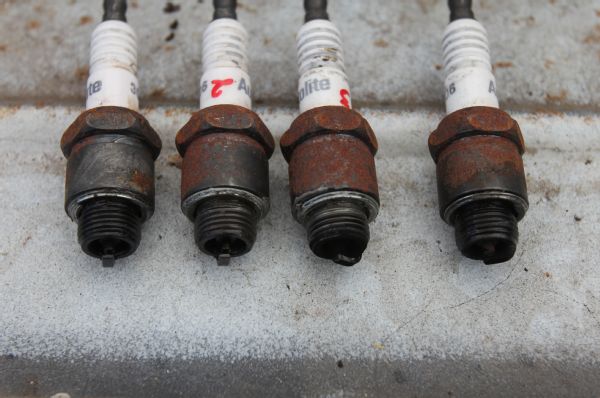
03 It's an old habit, but we also label the spark plugs and keep them in the same cylinders. But in this case we'll be installing these plugs into the trash can. The fuel in the tank was pretty varnished, but even still, these plugs weren't firing correctly as indicated by the black, sooty coating on the porcelain and electrodes.

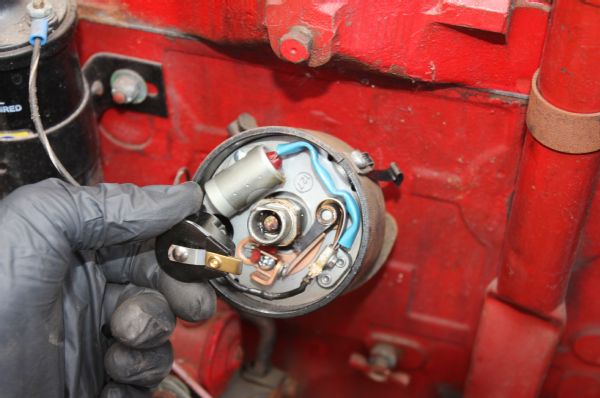
04 The Pertronix Ignitor electronic conversion works with the factory cap and rotor, so we removed our cap and set it aside. Note the nice, new points components. The gap was set correctly, and the timing was at the factory spec of 5 BTDC. We could've used a multimeter or even a test light to track down the culprit causing the misfiring, but we wanted the long-life, stronger spark, and simplicity for this vehicle's ignition system that the Pertronix Ignitor delivers.
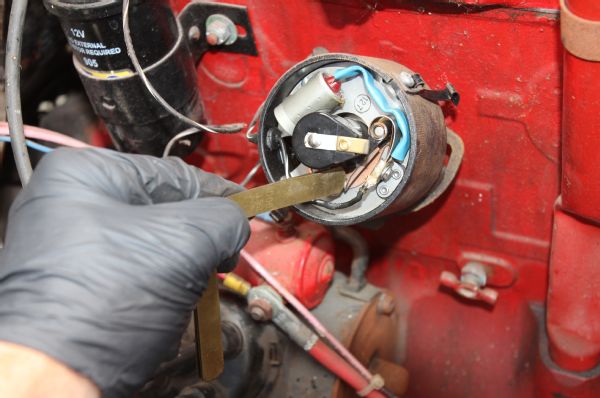
05 Not to completely pooh-pooh points, they're pretty simple to diagnose and maintain. If you don't have a dwell meter, you can use a set of feeler gauges. If you don't have feeler gauges, then even the cover of a match book or a credit card will get you close. Just measure the gap between the points when they're open at their max. Ours were bang-on the factory 0.020 inch.
06 With the cap removed, the first step in the Pertronix Ignitor conversion is to remove the rotor and set it aside. You'll reuse this, along with your distributor cap.
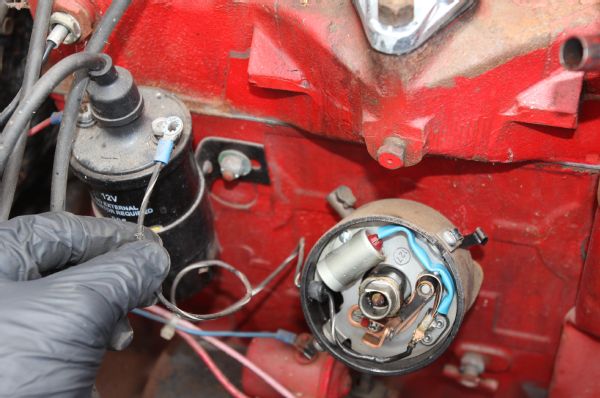
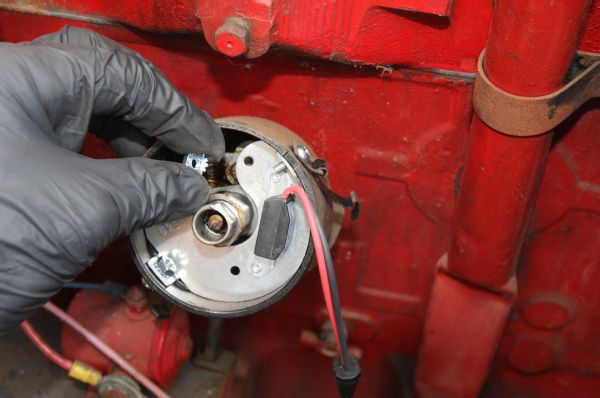
07 Disconnect the wire from the points that connects to the Negative post on the coil.

08 Pull the grommet plug and then fish the wire completely through the hole in the distributor body and pull it up and out of the way so you can remove the points plate.
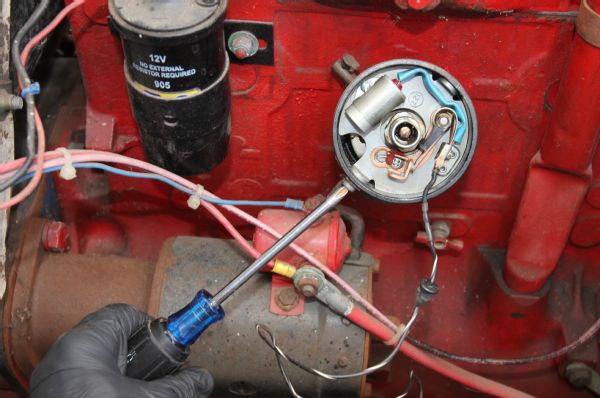
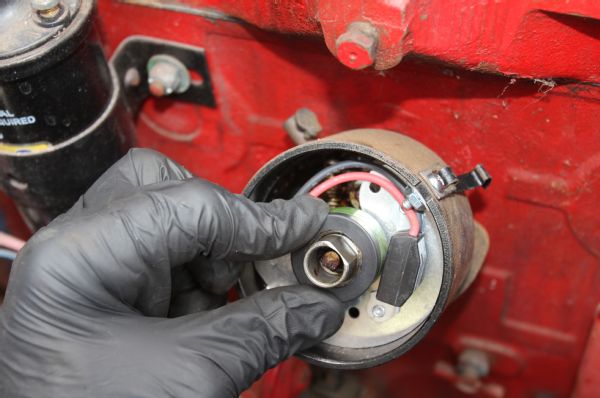
09 On the Prestolite IAY-4401, the points plate is held on by two screws in the sides of the distributor body. Remove the screws and carefully set them aside. Make sure nothing drops down inside the distributor.
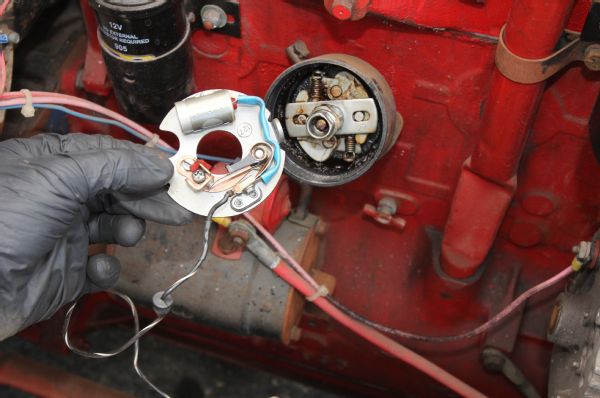
10 With both screws removed, simply pull the points plate up and out of the distributor. If your points were in good working order, you can insert the two retainer screws into the plate body and toss the points in your glove box as a spare in case of an EMP attack. Google it.
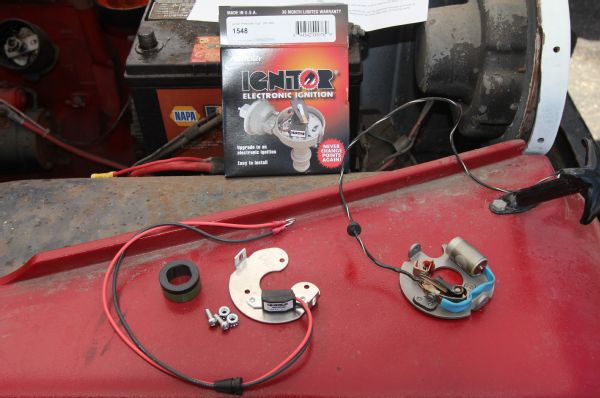
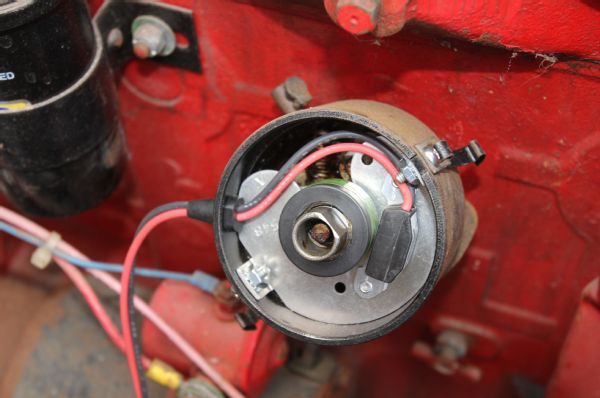
11 The Ignitor electronic module (left) employs a hall-effect pickup that reads magnetic pulses as the distributor spins, rather than the old-school mechanical cam opening arrangement of the points (right). It's a much more precise method of spark delivery.
12 Drop the Pertronix Ignitor plate into the distributor and use the supplied machine screws and locking nuts to secure it in the distributor. Again, make sure you don't drop any small parts down into the distributor body while you're working.
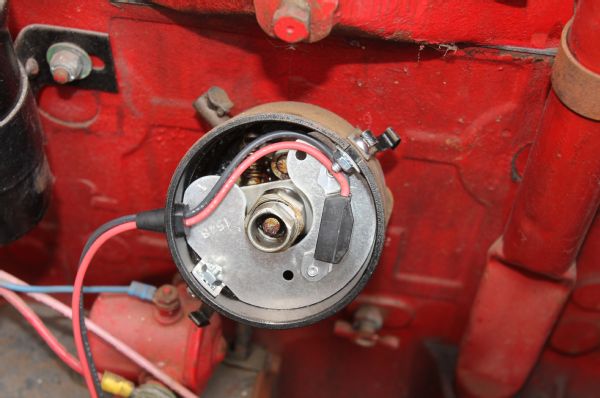
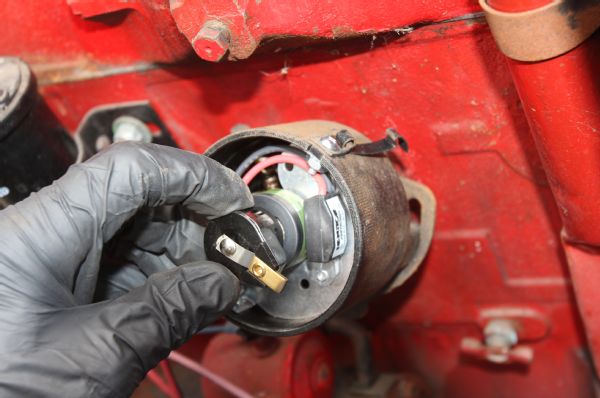
13 With the Ignitor plate cinched down, route the Ignitor wiring around any obstacles inside the distributor and out to the coil. You can adjust the slack of the wires by sliding them through the grommet. When you get the wires oriented correctly, secure the grommet into the distributor wire hole.
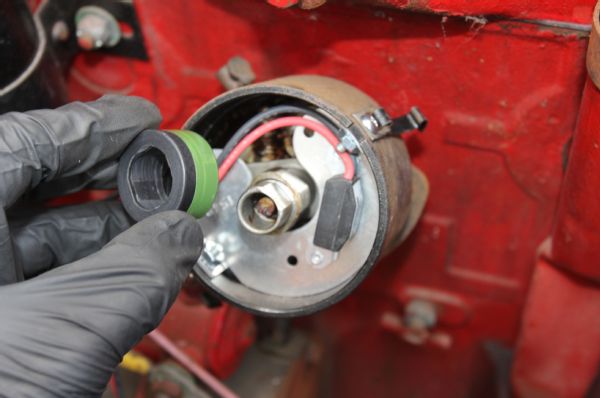
14 The magnetic sleeve slides over the distributor shaft. Orient the corresponding notches in the sleeve with the distributor shaft and slide it on.
15 Push the magnetic sleeve firmly onto the distributor shaft. You'll feel a slight click as it goes home.
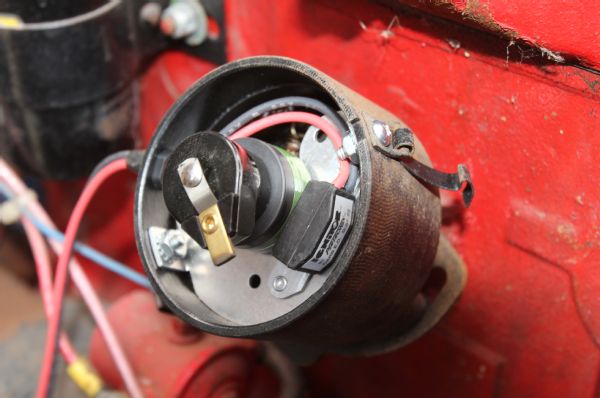
16 Here's the finished Pertronix Ignitor electronic conversion under the distributor cap. In all, it only takes about five minutes to do the job.
17 Don't forget to reinstall the rotor before you put the distributor cap back on.
18 Our cap and rotor were relatively new, but if you're working with old and worn parts, remember your spark will only be as good as your cap, rotor, and wires can deliver.
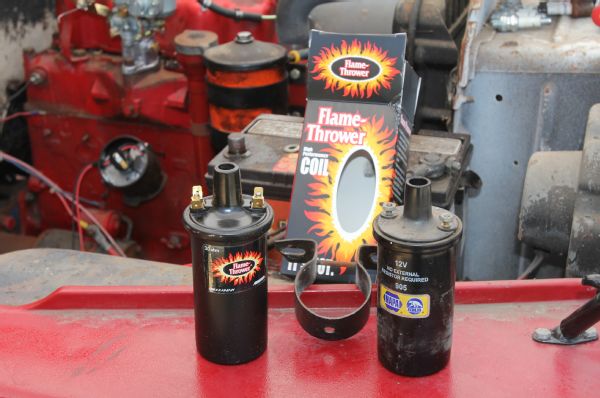
19 The Flame Thrower coil puts out a monster 40,000 V to help ensure every smidgeon of our air-fuel mixture is burned. We used PN 40611 for our application, which was a 3.0-ohm unit. Most four and six-cylinder applications, such as ours, will use the 3.0-ohm (PN 40611) distributor. Most V-8 applications can use the 1.5-ohm coil, but you should retain the factory resistor if you're using a 1.5-ohm coil in a four or six-cylinder application.
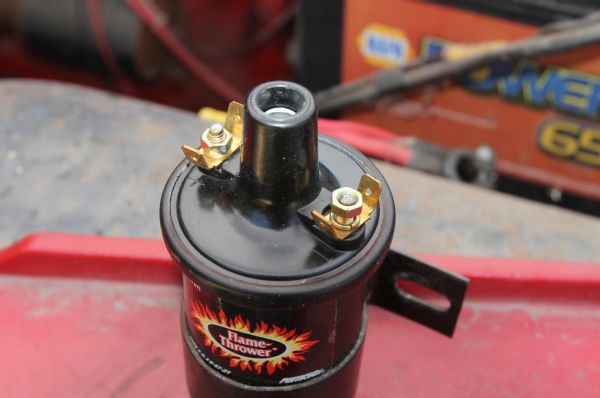
20 The Flame Thrower comes with nice brass terminals and lock washers under the nuts. Since our ignition used ring, and not blade, terminals we removed the male blade adapters and saved them for another time.
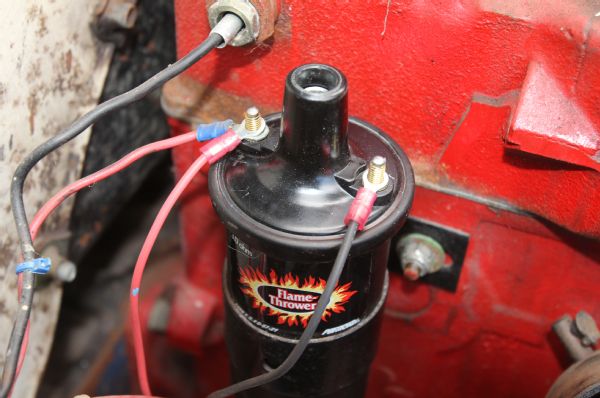
21 Wiring the Pertronix Flame Thrower coil with the Ignitor electronic ignition conversion is dirt-simple. Just place the red wire from the Ignitor to the coil Positive terminal and the black to Negative. The other wire in the photo is the key-on 12V wire that went to the Positive terminal of our old coil.
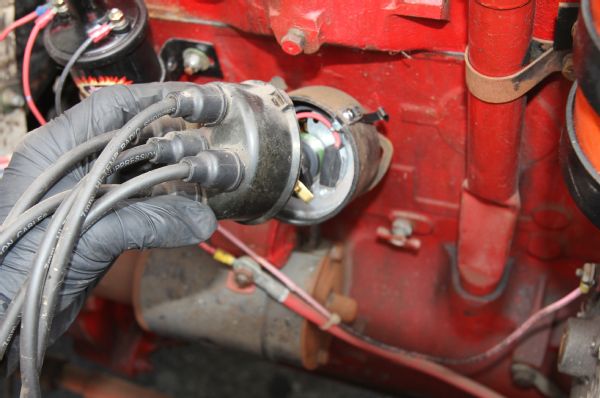
22 With the coil wiring all buttoned up, reinstall the distributor cap. At this point you could be done if you're not changing out the plug wires. A word of caution here is the Ignitor hall-effect sensor doesn't like solid core wires. Click the next photo to see why.
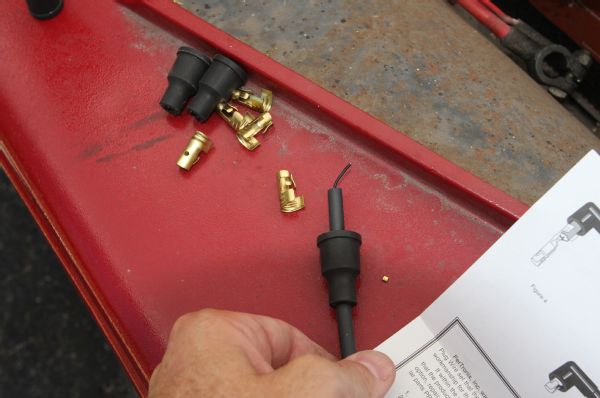
23 The Ignitor's sensor is susceptible to voltage spikes that can bleed back to the unit when used with solid-core wires. These voltage spikes can actually blow out the sensor, so it's important to use resistor-type wires. Our old wires were resistor-type, but we took this as an opportunity to step up to the Pertronix Flame Thrower stock-look 7mm wires.
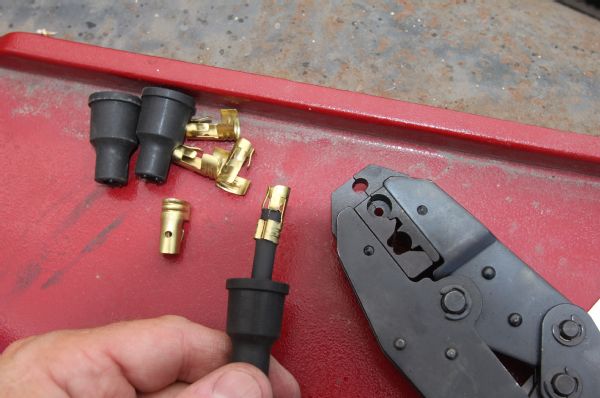
24 The cut-to-fit Flame Thrower wires come with high-quality brass terminals. After cutting the wires to length, we used a crimping tool to securely install the terminals. Don't forget to put the boot on the wire before crimping.
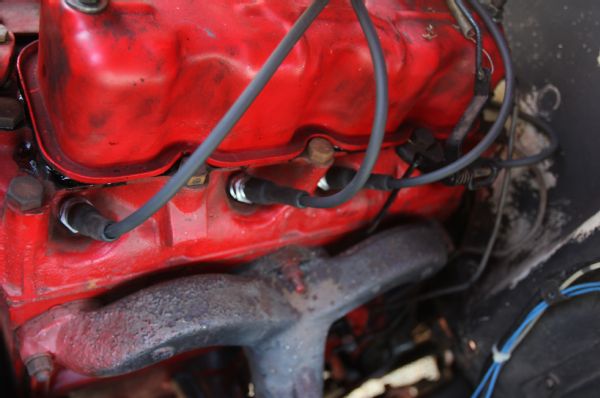
25 We used a little dielectric grease inside the boot terminals and replaced our old wires with the Flame Thrower 7mm wires one at a time to prevent messing up the firing order, although that would be pretty hard with only four little cylinders to keep track of.
26 Finally, a set of new Champion J8C spark plugs went into the holes and we fired up the engine. It lit to life instantly and settled into a nice, smooth idle. We upped the timing to 12 degrees BTDC up from the factory 5 degrees BTDC and now the little F-head snaps to life when you blip the throttle.