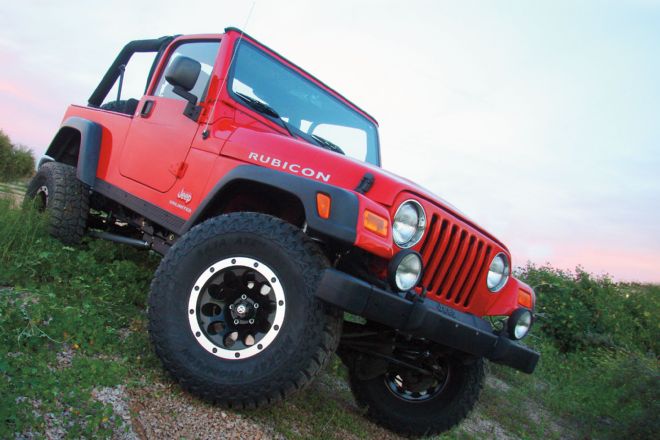
We acquired a 2006 Jeep Wrangler Rubicon Unlimited, known as an LJ. It was bone stock and in need of suspension upgrades. We considered a variety of lift kits on the market in the 3- to 4-inch range and ultimately chose to go with an offering from Rubicon Express.
We opted for the company’s Extreme-Duty Long Arm System. Rubicon Express offers the comprehensive kit for the LJ and TJ models in lift heights from 3 1⁄2 to 5 1⁄2 inches. Since we were targeting to run 33-inch tires on our Jeep, we went with the shortest of the kits. However, an advantage to this system is that it can be upgraded in the future to a taller lift easily should tire and wheeling desires grow.
What’s the advantage of a long arm kit? Well, quite simply, suspension geometry, handling, and articulation are improved. The short factory suspension arms work well on a Wrangler at stock heights or for very short lifts. But as lift height increases, so do the resting angles of the links, and this starts to diminish the handling stability and traction capabilities of the suspension.
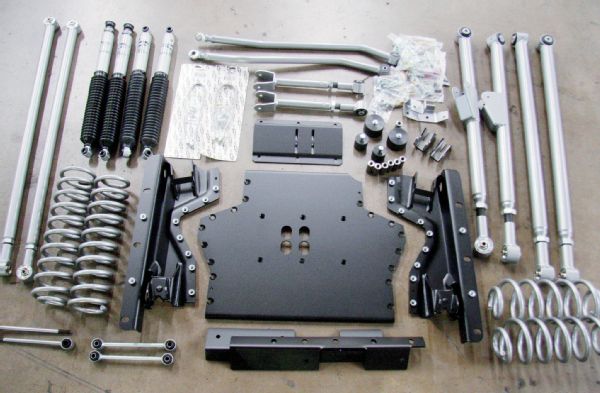 Here’s the overall parts pile used to complete the Rubicon Express Long Arm System. You can see the large metal plate structures that form the transfer case skidplate and link mounts. It’s a complete suspension replacement that includes all new links and track bars.
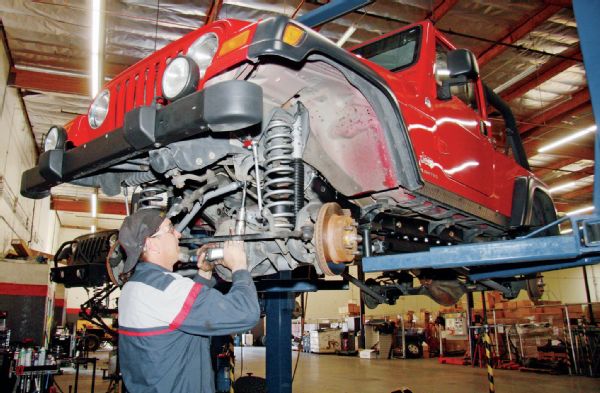
While this lift can be installed by most competent home mechanics, it does require some skills in cutting to remove factory frame brackets and welding to secure some of the new hardware. In our case, we let the technicians at our local 4Wheel Parts store in Phoenix, Arizona, tackle the job and we documented the process to show you what’s involved.
While we were there we also had the crew mount us a set of 33x12.50R15LT Mickey Thompson Baja ATZ-P3 tires onto ATX Wheels SLOT rims in an 8-inch width. These tires offer what might be termed an aggressive all-terrain tread, along with sidewall side-biters for additional traction. 4Wheel Parts mounted the spun-balanced tires on the Jeep and then put it on the alignment rack for final tuning of all the suspension links and steering. In two days we were ready to hit the highway and head for the dirt.
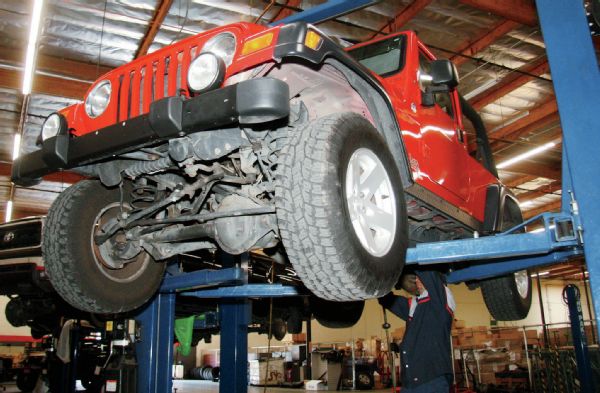
With the stock Wrangler on the lift, 4Wheel Parts service manager Brett Corder got started with the teardown. The kit can be installed as a driveway project, but working on a hydraulic lift with a variety of tall screw jacks that can be used under the axles is immensely faster.
The factory Jeep skidplates and crossmembers were removed and the drivetrain supported with a jack. These components are replaced with the new Rubicon Express assembly.
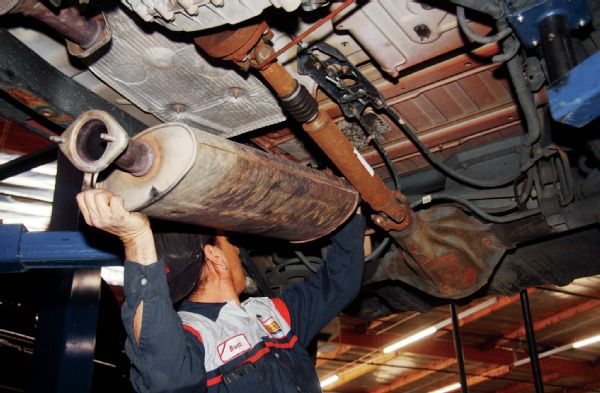
The stock monster muffler won’t clear the rear links, so it was removed and a new cat-back exhaust will be fabricated after the lift install.
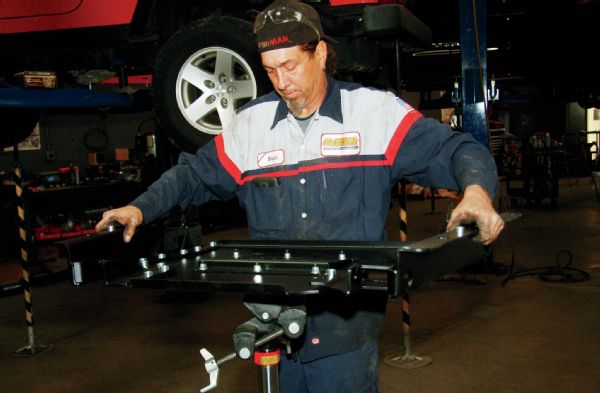
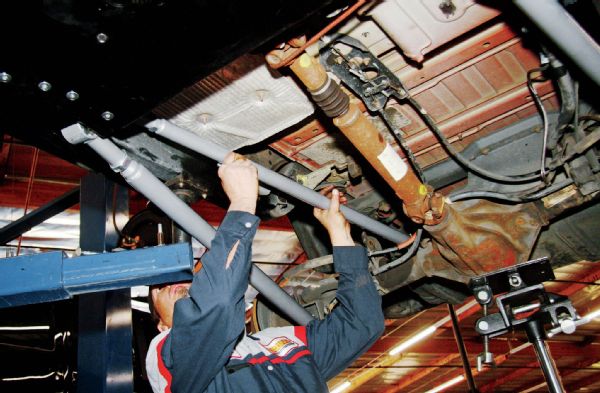
Here you can see that Corder has temporarily assembled the 1⁄4-inch-thick steel three-piece crossmember. This is the main structure of the new lift kit and includes link mounts for all the new links.
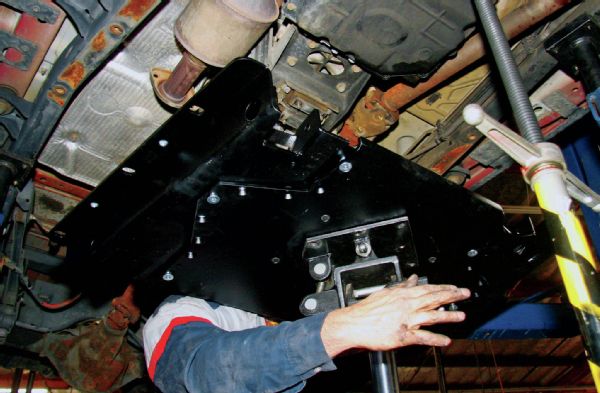
The new crossmember not only serves as a skidplate and link mount point but also supports the transfer case and structurally ties both framerails solidly together. Several fitting iterations are needed to mark and drill new mounting holes as well as to get the crossmember lined up for final assembly.
The crossmember bolts to the frame using the six factory threaded holes on the bottom of the frame. Then it’s also secured with a pair of frame side plates and additional bolts that run through sleeves installed in the framerails.
One-inch holes are drilled to insert the frame sleeves for the crossmember. While it’s not required to weld the sleeves to the outside edge of the frame, Rubicon Express does recommend it. Corder burned ours into the frame for solid mount points.
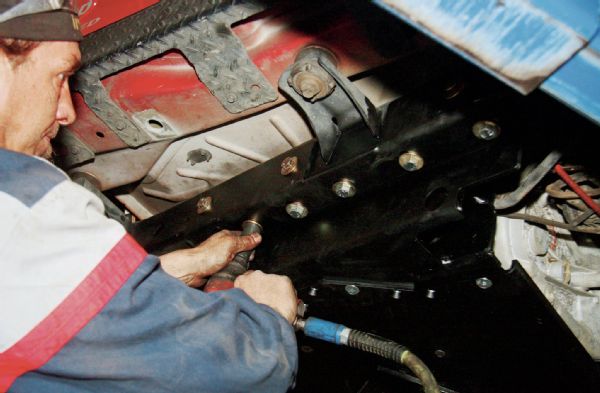
Here is the final assembly of the new crossmember. With all the 1⁄4-inch steel wrapping around the frame, it makes a sturdy structure. Once installed, the flat center piece can be removed independently for drivetrain access and maintenance.
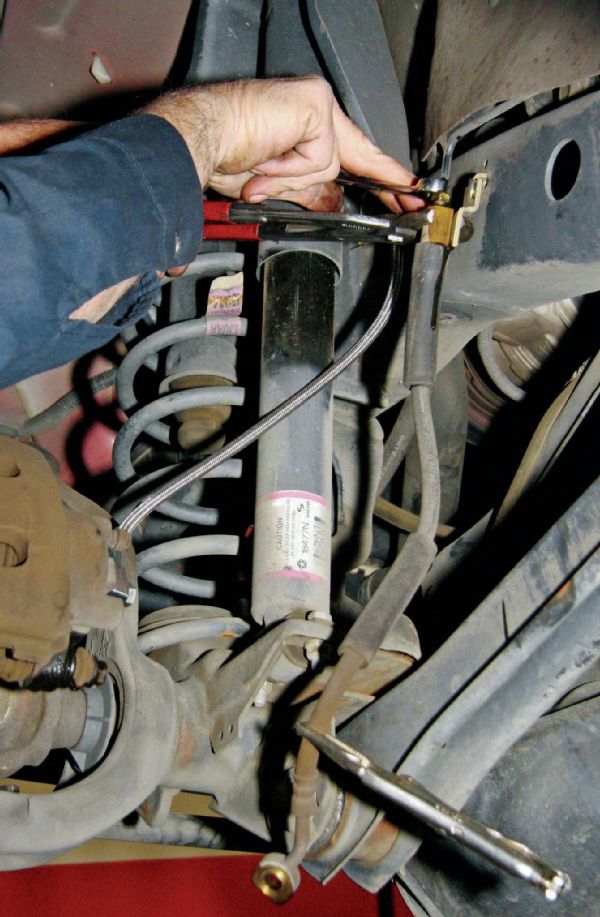
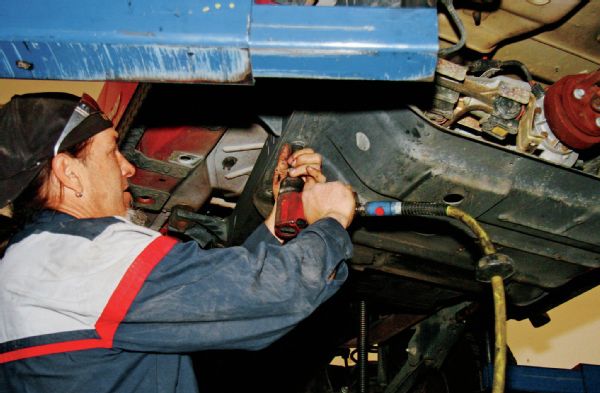
The kit provides stainless steel braided brake lines to accommodate the lift. Corder prefers to replace the lines at this point in the install. If brake fluid drips on painted parts it can remove the paint. Care is taken not to let any drip, but Corder would rather have it eat paint on the old parts than the new parts.
Coils, shocks, and lower links were then removed from the axles, leaving the upper links intact to hold the axles in place. Corder suggested, in general, leaving as many parts in place as long as you can to keep the axle positions more stable and make the overall install easier.
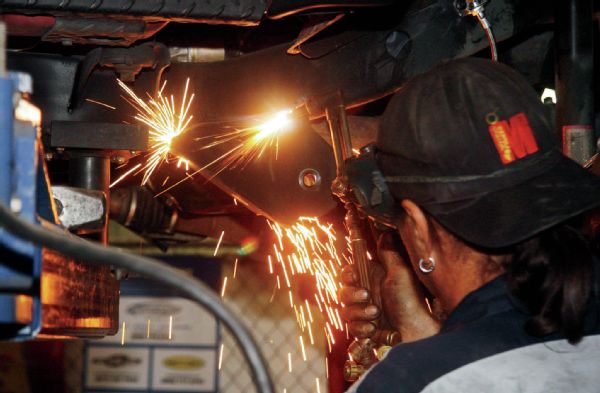
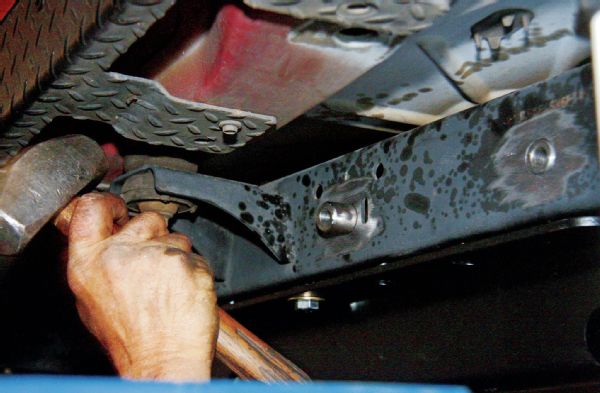
With the belly pan fully installed, it was time to pull out the heat wrench and torch the factory lower link mounts off the frame. Once Corder did the torch work, he stripped the leftover slag line off with an air chisel and then smoothed the framerails with a grinder. A coat of paint hid the evidence that the brackets were ever there. No turning back.
The new links went on next, but not before setting their length based on the instructions and lift height chosen. All the joints got new zerk fittings and a few shots of grease. It’s a good idea to index the fittings at this time so they can be accessed with a gun later after mounting. The lower control arms are beefy 2x0.25-wall chromoly tubing. Nice.
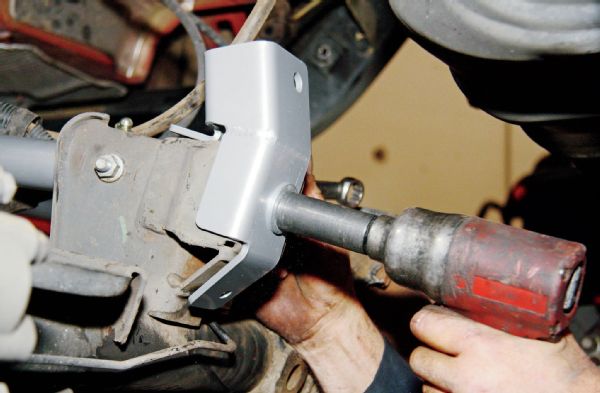
The kit includes a bracket to raise the track bar mounting at the rear axle. It’s secured at three different points with bolts.
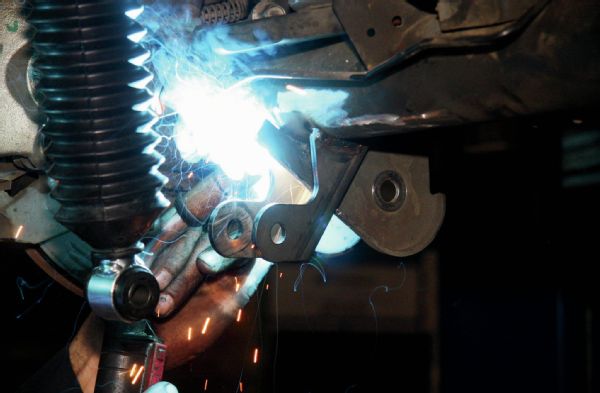
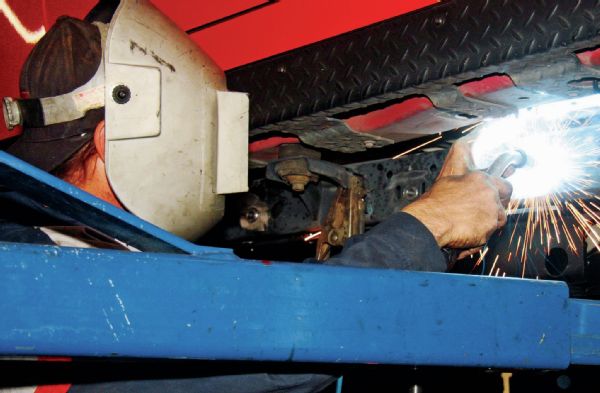
The factory rear shock mounts needed to be cut off and Rubicon Express provided new mounts that were welded to the axletubes.
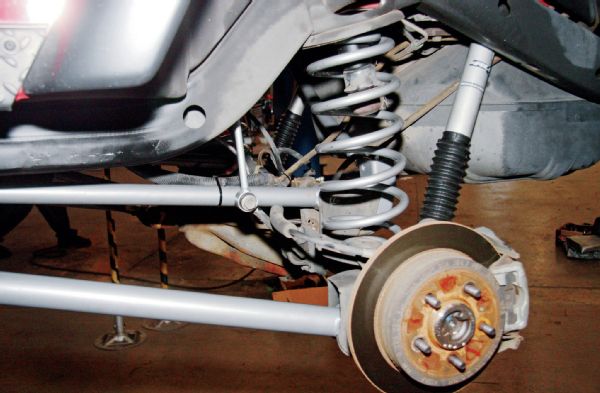
Here’s the completed rear suspension with the new upper and lower links. The new coil springs and shocks were installed, as were extended sway bar links for the factory sway bar. Our Rubicon model came from the factory with a standard flange output at the transfer case and a CV-joint driveshaft. Otherwise, conversion to a rear slip-yoke eliminator and new driveshaft would have been needed.
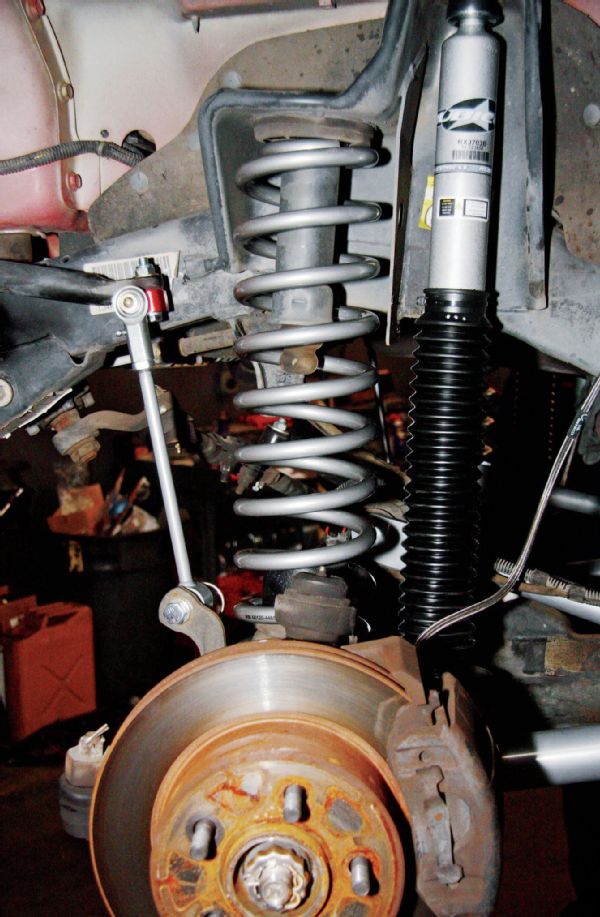
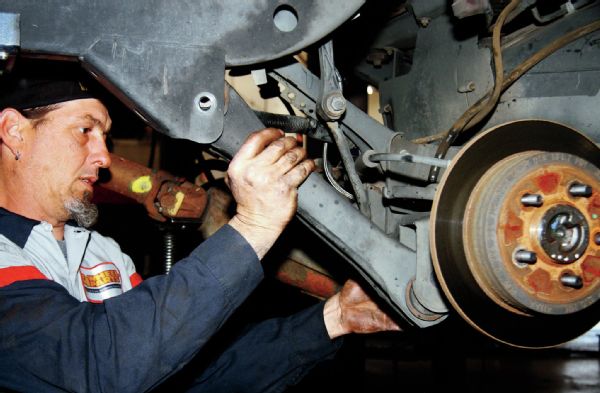
The front end was completed with the new radius-arm lower links, coils, and shocks. The kit comes with extended links for the factory sway bar with quick-disconnect pins to disable the sway bar action on the trail.
The frame hole for the front track bar had to be enlarged for the new heavy-duty bar with rod end. Both front and rear track bars were adjusted and fully connected once the Jeep was back on the ground sitting at ride height.
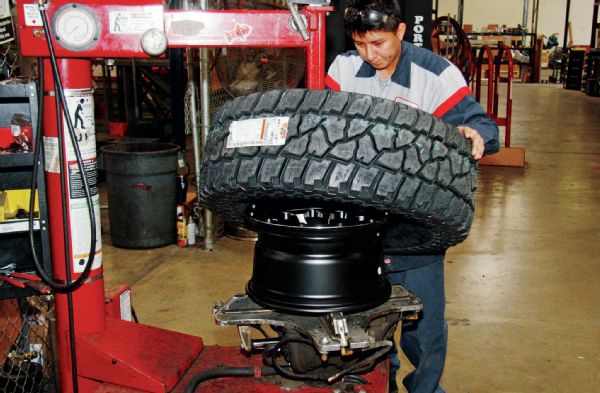
With the lift on, it was time to swap to larger treads. We opted for a set of 33x12.50R15LT Mickey Thompson Baja ATZ-P3 tires. These are described as a hybrid design between an all-terrain and a mud-terrain. Sure, the latest rage is taller and taller wheels but we prefer the philosophy of running a rim no taller than half the height of the tires. We could have run a 16-inch wheel, but 15s fit over our calipers and allow us a little more sidewall and the choice of using Load Range C tires.
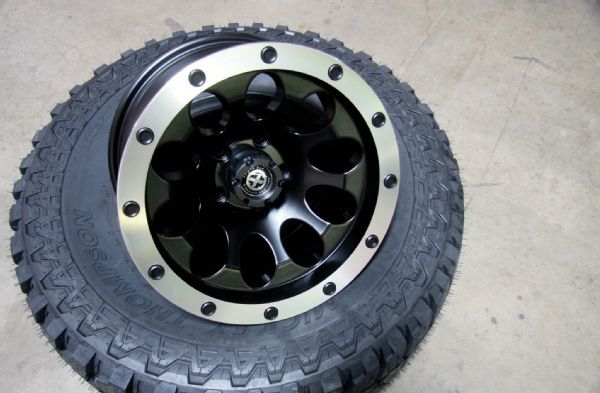
For wheels, we chose the ATX Wheels SLOT in an 8-inch width. The wheels are finished in a satin black with a machined edge. Backspacing is 33⁄4 inches. You can see the aggressive sidewall on the Mickey Thompsons here. The crew at 4Wheel Parts mounted and spun balanced our new tires, and finished the lift with a full alignment procedure.