 Ali Mansour
Brand Manager, 4WD & Sport Utility
Ali Mansour
Brand Manager, 4WD & Sport Utility
Suspension progression is part of the off-road hobby. For those looking to go fast off-road, a well-tuned suspension is a necessity. For those simply searching for a better ride quality on- and off-road, it’s an investment in comfort. One of the most common and sought-after suspension upgrades is moving to coilover shocks. The reason is simple.
Unlike a leaf-spring or standard coil and spring configuration, a coilover can be easily tailored to fit your rig and driving needs. By swapping coils, valve packs, and adjusting the position of the shock itself, you can create a suspension that can handle virtually all of your off- and on-road needs. While coilovers have been a staple in the competition side of the off-road industry for years, the recreational side of the hobby has only more recently adapted the coilover as a suitable suspension member for a daily driven vehicle.
Bolt-on coilover kits and complete coilover conversion systems have changed the way we view the coilover and ushered in a new benchmark for what it possible with a daily driven 4x4. The biggest draw to the coilover for us is the fact that we can tune it with relative ease. Take for example our heavily modified ’97 Jeep Wrangler.
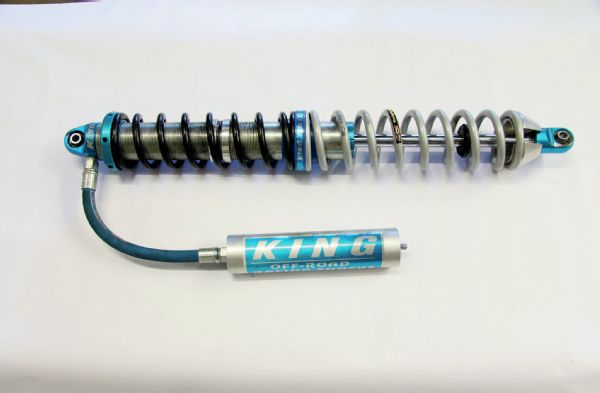
For nearly a year, the V-8–powered TJ has used King 2.5 coilover shocks up front. While King was able to get our shocks in the ballpark when we ordered them originally, we knew we’d likely need to fine tune the shocks later down the line. With a few thousand miles under our belt, we were able to establish that we needed a bit more compression valving for our more spirited off-road driving.
So, we ordered a new set of valves from King and decided to tear into the coilover. While we could have sent our shocks out to King to have this done, we knew that this can be easily accomplished from the comfort of our home garage. In fact, breaking down the King shock didn’t require any specialty tools, just a little knowledge, a bench vise, and a couple hours of time.
Since we’ve been working on our Jeep Cherokee XJ project (Disposable Hero) at Low Range 4x4 in Wilmington, North Carolina, we decided to stay late one afternoon and pull our TJ in to knock out the shock rebuild. The following procedure can be used for most 2.0 and 2.5 King shocks. This includes bypass shocks, as well as standard, smooth-body, non-coilover shocks.
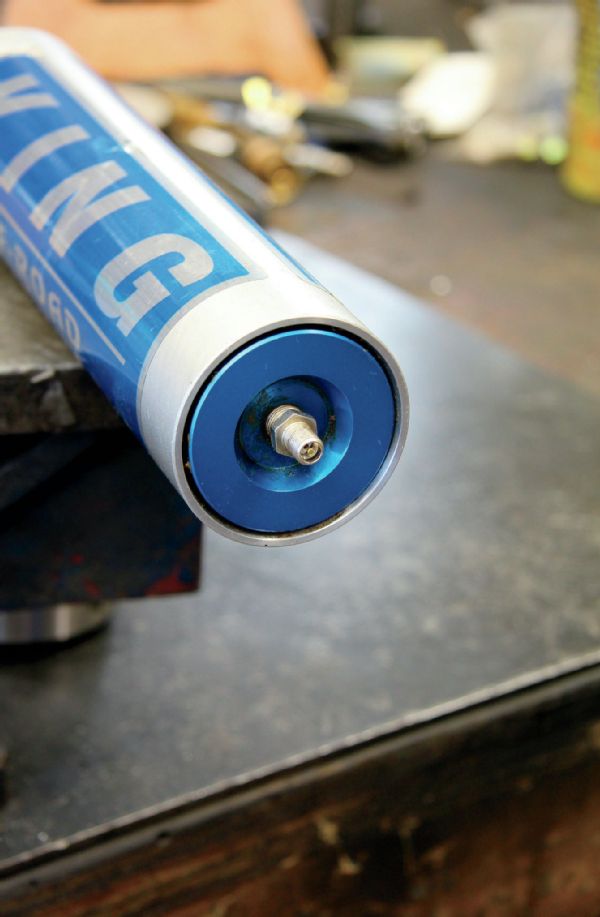 Once you have the coilover removed from the rig, secure it in your bench vise and mount it vertically with the body side down. After you lock the shock in place, purge the nitrogen from the shock by pressing down on the Schrader valve on the end of reservoir.
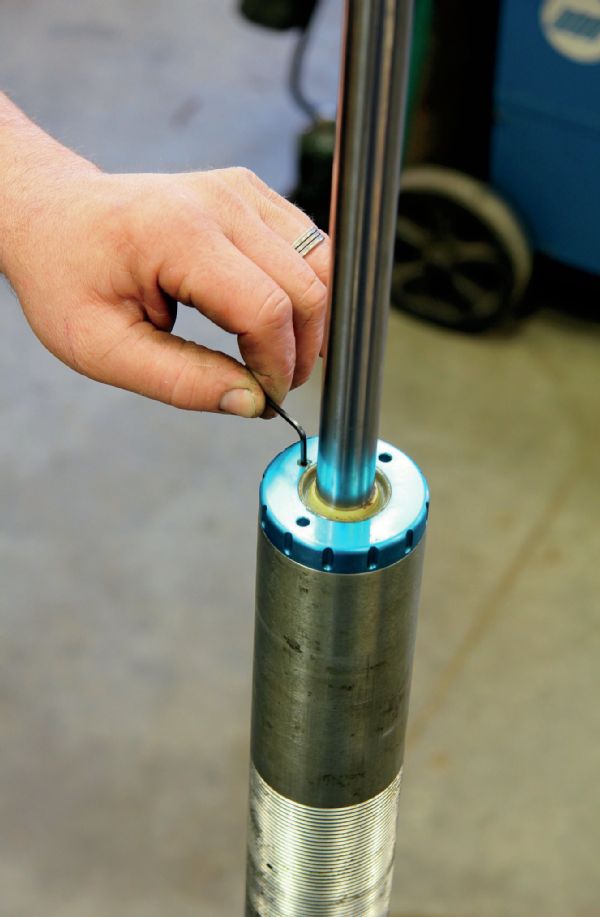 Your next step will be to remove the Allen head set screw from the dust cap. After you get it out, spin the cap counterclockwise to remove it.
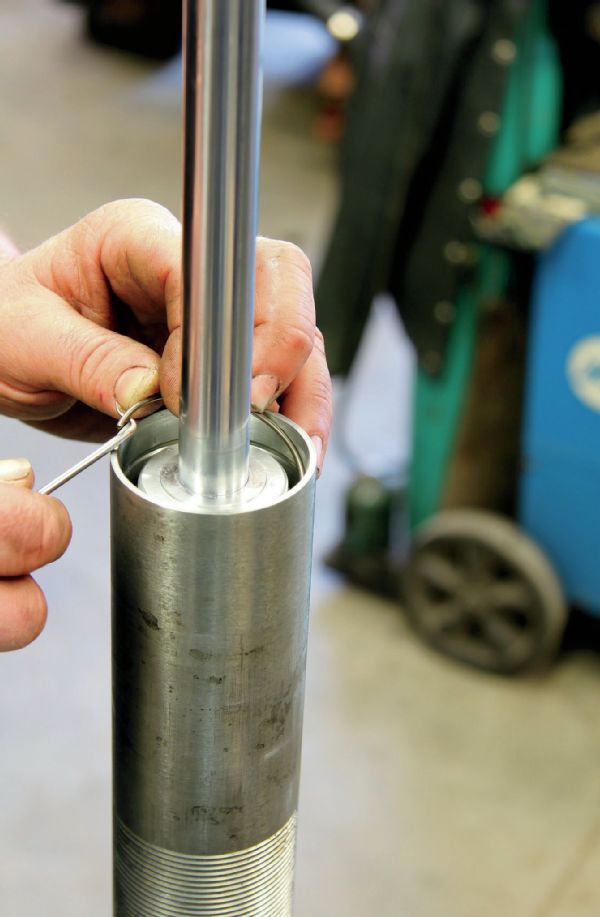 With the cap slid up the shock shaft, you’ll need to press down firmly to unseat the shaft guide from the snap ring. The guide doesn’t need to move much; just enough to allow you to get the snap ring out of the groove.
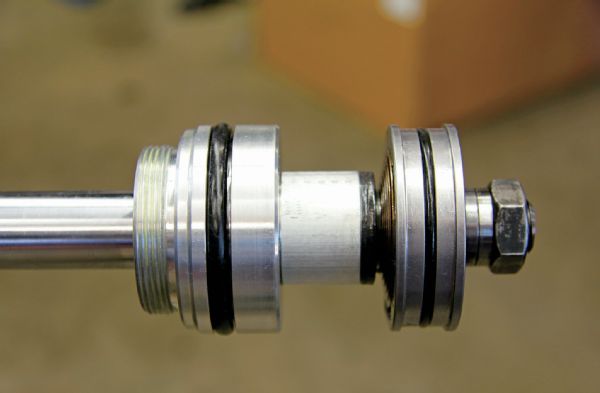
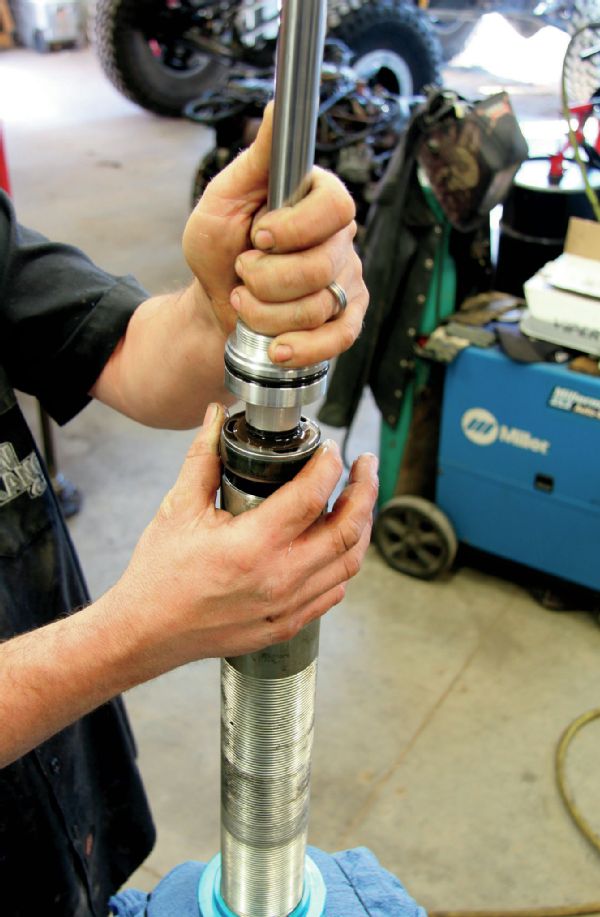 To remove the shaft, pull up firmly but slowly. You will lose a little fluid during this process, but it won’t be enough to matter if you don’t plan on breaking the shock down any further. Be careful not to lose or damage the piston wear band as it will dislodge itself.
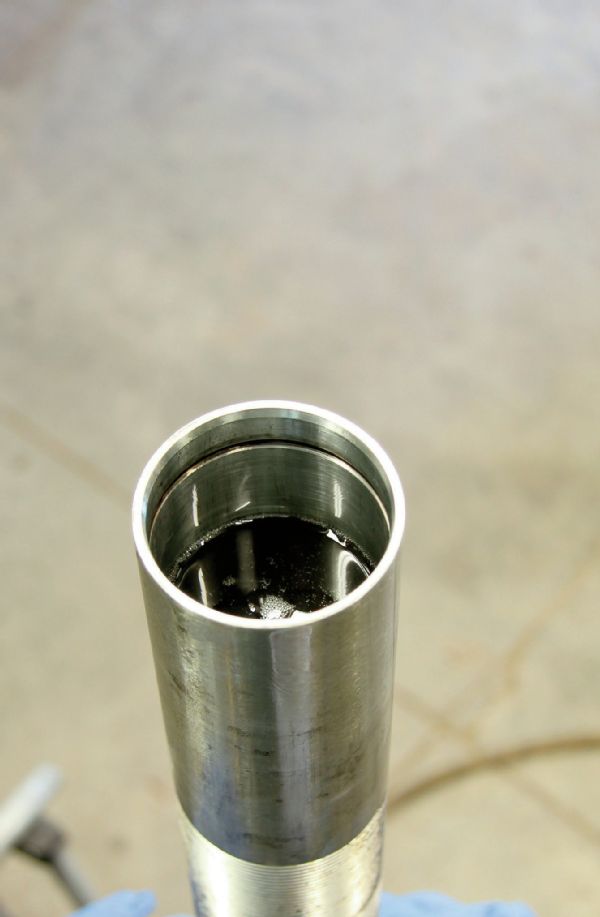
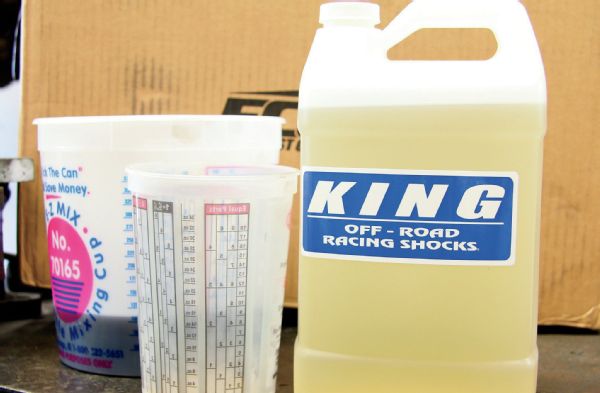 Since we were removing the tender coil setup that we were originally running, we had to remove the remote reservoir and shock top. This meant we needed to drain the fluid from the shock completely. We used a ratio-rite cup we picked up from our local parts house to make sure we put back the exact fluid amount that we pulled out. As a general rule, you always want to start with fresh fluid, which is typically manufacturer-specific.
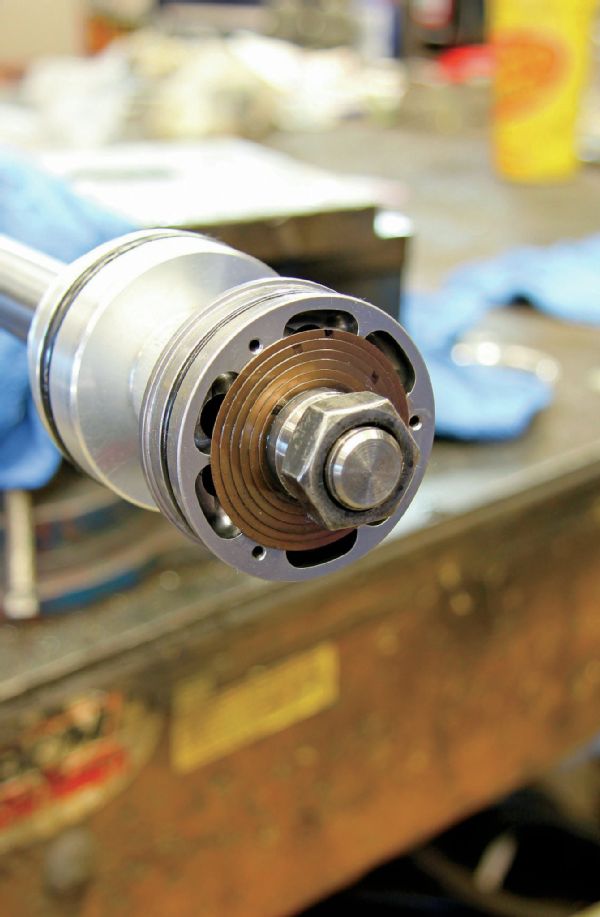 With the coilover body set aside, we placed the end of the shock shaft in the vise. This allowed us easy access to remove the nut that locks the valve piston in place.
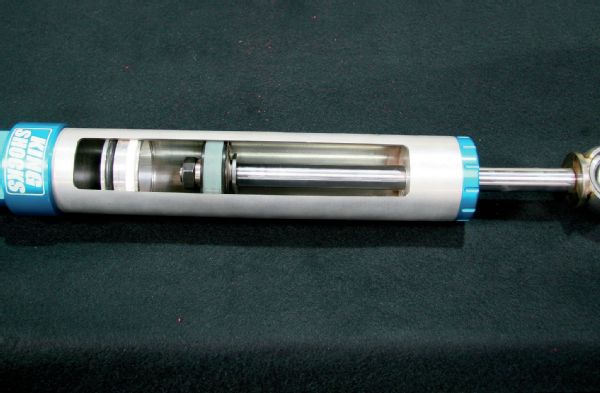
 The 2.5 King coilover shock houses the valve piston you see here and a floating piston that resides in the fluid reservoir. To keep debris from entering the shock, King equips the shock with a dust cap, wiper seal, and Teflon-coated brass wear band, which extends the life of the shock, as well as deters leaks.
 With the valve piston removed, we separated the upper and lower valve shim stacks. The shim packs are what control the shock’s upward (compression) and downward (rebound) motion. As pressure forces the rod into the cylinder, the shims bend to let fluid pass at a certain rate. As the rod drops out, the opposing valves kick into action. The shims are velocity sensitive, so they can control both high and low-speed shock movements. We added a slightly more aggressive compression valve pack to help the shock moderate the shocks dampening to handle the harder hits and faster driving off-road.
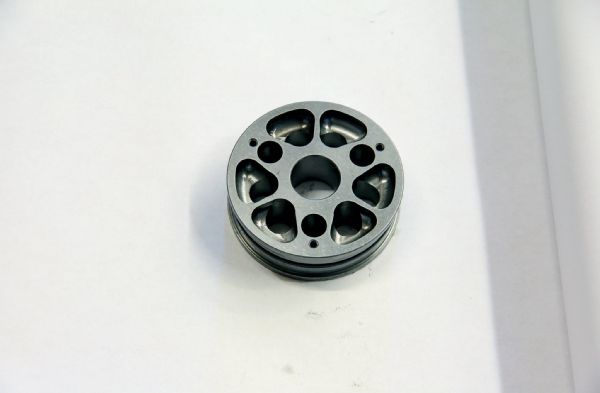 Pistons are another area where you can easily fine-tune the shock. Our King shock is equipped with a linear piston, which is what you would typically find in a coilover or bypass shock. The linear piston is a high-flow-rate piston that offers little resistance. This is perfect for high-speed applications where the shock is constantly cycling. For low-speed wheeling, a digressive-style piston is often preferred. The digressive piston has a lower fluid rate, which tends to provide the shock with a slower and more controlled cycle.
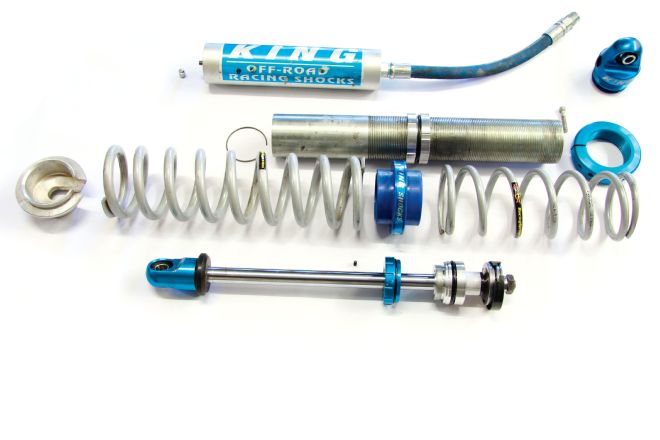
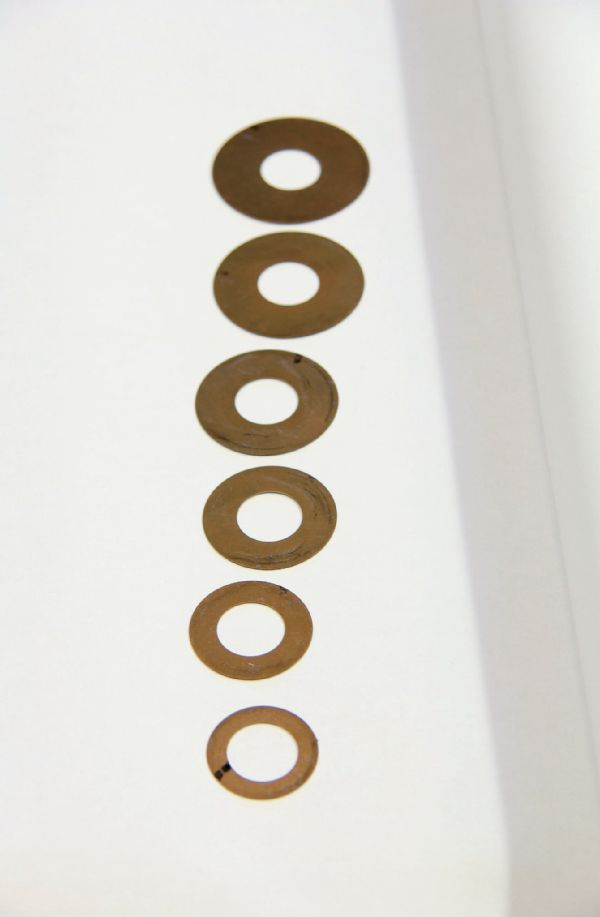
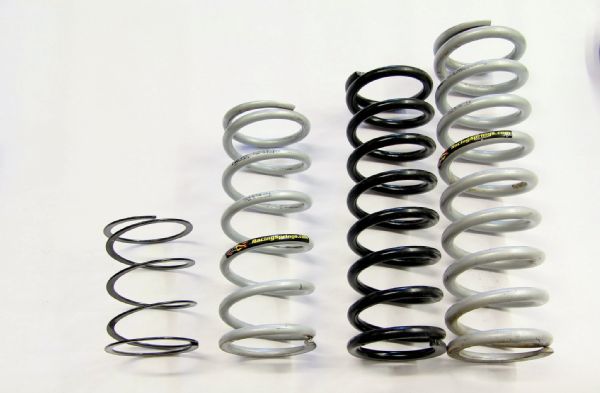 Another way to dial in your coilover is through spring rates. Getting the best spring rates for your rig is a combination of black magic, geometry, testing, and a little luck. Starting from left to right, we have a tender coil, 10-inch primary, 12-inch primary, and 14-inch secondary spring. For a 12-inch-travel coilover such as ours, we suggest going with a 14-inch secondary coil spring. For the primary, it will largely dependent on spring rate and the desired ride height of the Jeep. We’ve decided to remove our tender coil and 10-inch upper in favor of a 12-inch length coil. The 12-inch-lengh coil still has the same 150-pound spring rate as the 10-inch coil we were using, but the 12-inch allows us to get rid of the tender coil. The tender coil is used to keep pressure on the primary and secondary coils so they don’t become unseated at full droop. The tender requires an additional coil isolator, whereas with a longer coil, one was not needed in our case. The goal here is to get usable up travel, with a ride h
 In our configuration (above) of a 150 over 300 spring rate, the Jeep sits with around 5 inches of usable up travel. We have the secondary set to come in around 11⁄2 inches into the compression cycle so we can take advantage of the light rate when ’crawling. We might play with the spring rates more down the line, which, thankfully, is an easy process.
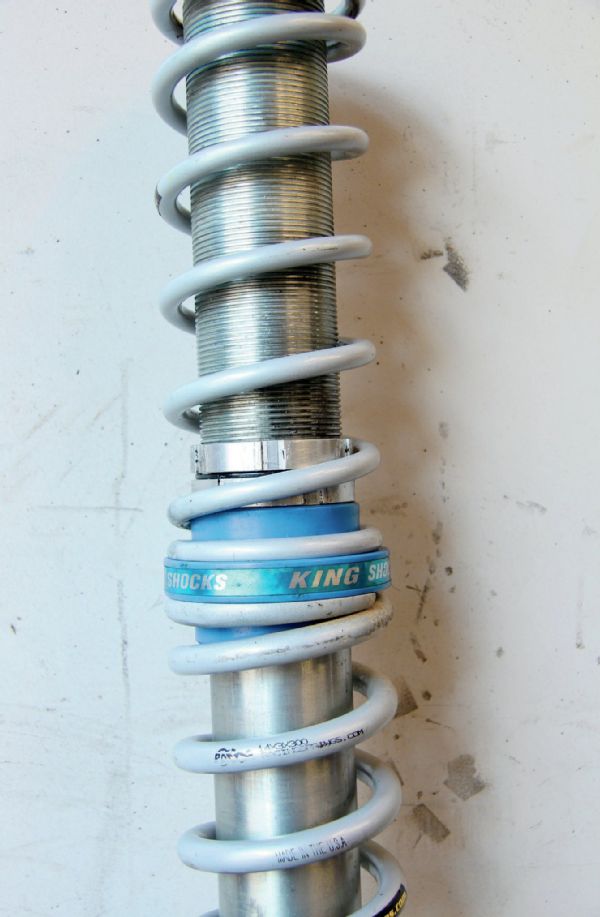 Most coilovers (right) are designed to be a dual-rate shock. This means your rig uses a softer primary spring (upper) and stiffer secondary spring (lower). As soon as you kick up speed or hit a large bump, the secondary (lower spring) moves up and contacts the secondary adjusters/stops. With a secondary coil rate of 300 pounds and primary rate of 150 pounds, we can get a smooth low-speed ride but still have enough rate in the secondary to go fast and take harder hits. Since the secondary adjusters can be easily moved up or down the body of the shock, you can fine tune when the secondary comes in.
 With the body re-assembled, place it back in the vise to refill it with fluid. We touched on the fluid amount earlier, but a general rule is to have the fluid line approximately one inch below the snap ring groove.
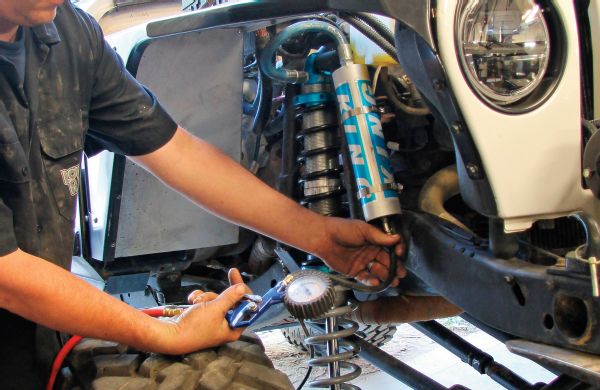 After you rebuild the shock, charge it with nitrogen on the bench to make sure there are no leaks or problems. Typically, your nitrogen minimums are around between 130 to 150 psi, but common pressure settings in our 2.5 are around 180-200. Running the shock pressure below the recommended minimums risks cavitation, which can ultimately damage the shock. We’re running 180 psi up front and found that to be adequate for our needs.
Reservoir Rules
There is often a bit of misconception about the importance of a fluid reservoir. In a non-reservoir nitrogen-charged shock, the valve piston and floating piston are housed in the same cylinder. This more condensed setup leaves less room for fluid, along with a smaller nitrogen pocket. This setup can impede the travel of the shock as everything has to occupy the single cylinder.
With a reservoir shock, the shock internals are more spread out. The two major advantages of this are, one, that the shock shaft can be longer without requiring a longer body on the shock. This means you can fit a longer travel shock in a smaller space. The second major advantage is fluid distribution. As your shock cycles, it creates heat. As the temperature of the fluid increases, the effectiveness decreases. So, by adding a fluid reservoir you can prolong the negative effects of heat.