 Agustin Jimenez
Staff Editor
Agustin Jimenez
Staff Editor
The ‘80-96 Ford Bronco is arguably one of the greatest platforms ever built for all types of wheeling. They’re not too big and cumbersome, yet have enough room to store all your gear with plenty of room for passengers even during long road trips through the middle of nowhere. The short wheelbase makes them highly maneuverable in the dirt in almost any situation. Much of the Bronco’s off-road prowess can be attributed to the versatility of the Twin Traction Beam front suspension. While some will tell you TTB is absolute garbage and is the greatest shortcoming of Ford 4x4s of the ’80s and ’90s, we’re hoping to set the record straight and show you just how awesome a TTB suspension can be in the dirt.
We will concede that you really can’t expect TTB to withstand hard-core off-road abuse with massive 40-inch tires at wide open throttle. That will usually end with broken U-joints or, worse yet, broken axleshafts. While massive rubber and big horsepower might be out the window, a long travel TTB suspension can turn an otherwise unassuming 4x4 into a go-fast, whoop-eating monster that is still able to crawl and flex its way through a trail like a champ.
So now you’re probably wondering how a suspension that seemingly can’t survive the abuse of 40-inch tires could possibly survive life in a hostile desert environment at blazing speeds. Follow along as we show you how we reworked our Bronco’s old suspension to soak up some serious terrain while still delivering decent road manners.
Our Bronco has seen its share of suspension kits (it even had Project Juice’s old Skyjacker kit at one point) but once we decided we wanted to leave all our friends in the dust when bombing around the desert, we realized that a Cut and Turned TTB setup was the only way to go. What is a cut and turned beam? There’s more than a few ways to skin this cat but the gist of it is that the beams are modified and plated to the point where if you ran a 4-inch lift coil, you would not have to use a drop bracket to correct the camber. This results in more ground clearance as well as a bit more wheel travel when done right. Notice how the tie-rod ends are kept pretty close in alignment to the axleshafts. This is dictated by the pitman arm that you choose to run on your truck.
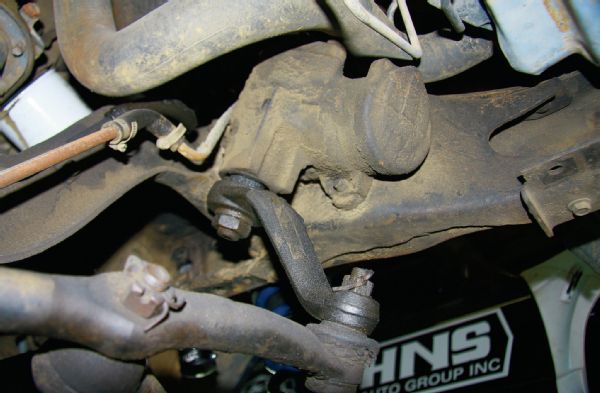
While a Cut and Turned Twin Traction Beam suspension can work with a stock pitman arm, Solo Motorsports recommends the use of a 4-inch drop-pitman arm (most aftermarket lift kit companies sell it as PN FD400) to correct the angle on the steering links. The drop-pitman arm will align the steering links with the axleshafts while the suspension cycles, which helps keep bumpsteer to a minimum.

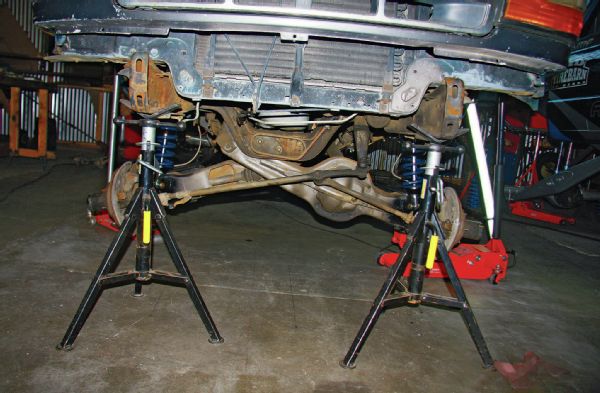
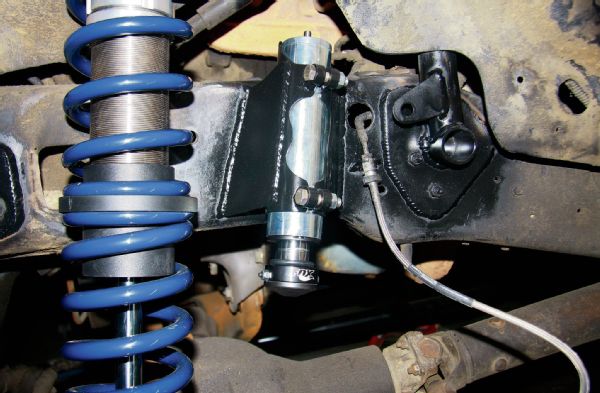
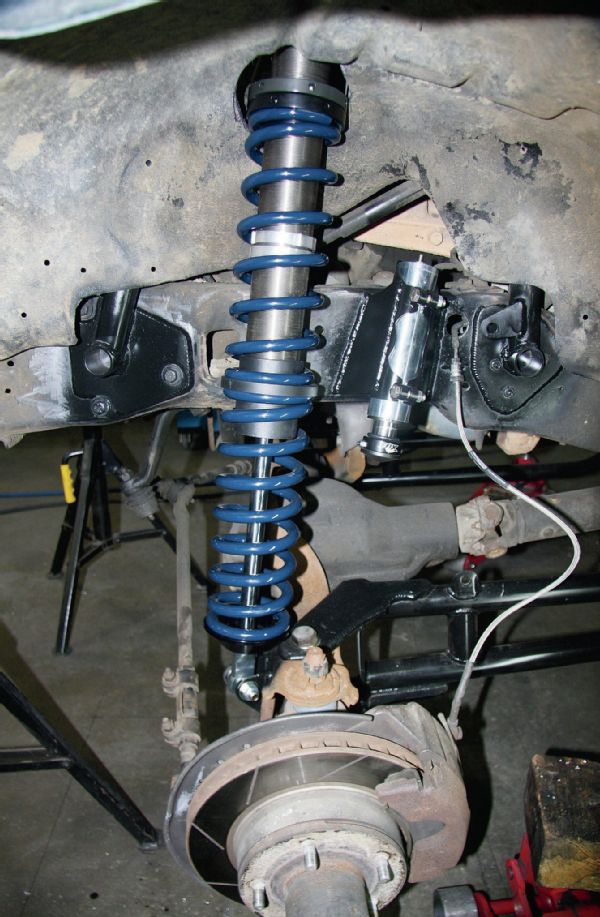
No long travel truck is complete without a set of custom coilover mounts. While you can run a cut and turned beam setup with the factory coil buckets, you’ll be missing out on much more wheel travel and better shock choices without going to a fabricated mount. Solo Motorsports designed their coilover mounts to work on both Bronco and F Series trucks that were equipped with TTB. They’ve really done their homework to get the shock angle just right not interfering with anything in the engine bay. While our Bronco is setup with single coilovers right over the beams, the Solo Motorsports coilover mounts also feature integrated bypass shock mounting tabs in case we decide to run a set of bypass shocks to chase down race trucks in the future.
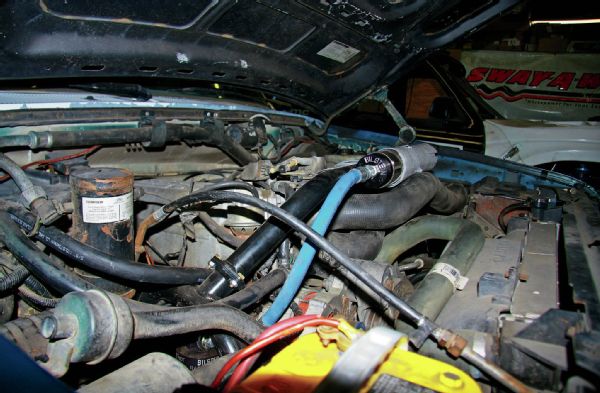
Solo Motorsports ties in their coilover mounts with a crossbar that stiffens up the front end and keeps the frame rails from moving around while hitting major whoops at high speeds. We ordered our Bilstein 9100 coilovers with 90-degree fittings and remote reservoir hoses in 14 inches to get them to tuck up over the crossbar without interfering with under-hood components.
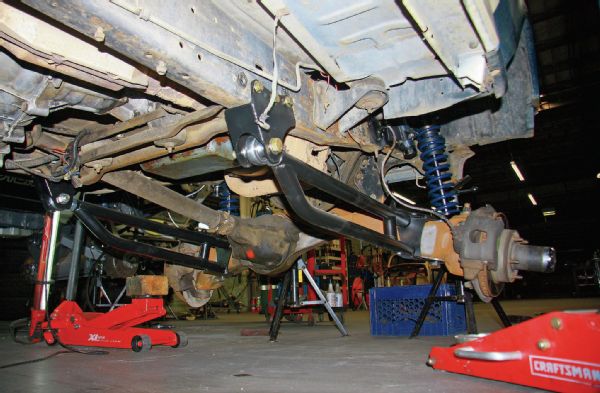
One of the key ingredients to getting some serious wheel travel numbers out of a TTB suspension involves the radius arms. While they seem simple in design, Solo Motorsports has done lots of research and development to get the caster angle right throughout the range of suspension arc. Too much or too little could have adverse effects especially at high speeds.
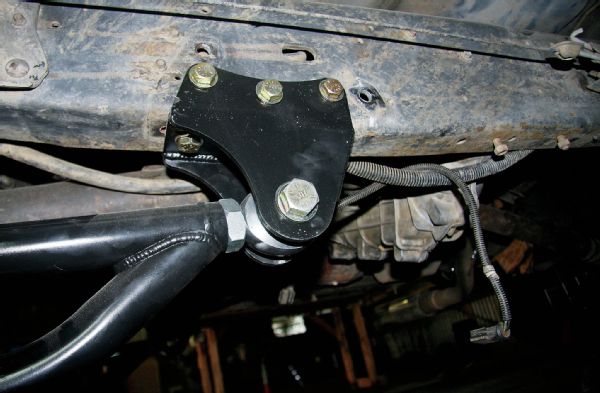
Strong pivot brackets can make the difference when going fast in the dirt especially when you consider the fact that Heim joints allow the suspension to cycle to full droop without much resistance when bombing around rougher sections of desert. Solo Motorsports uses ¼-inch steel for their radius arm pivot brackets and a big beefy 1¼-inch Aurora Heim joint to withstand the abuse that comes with the go-fast territory.
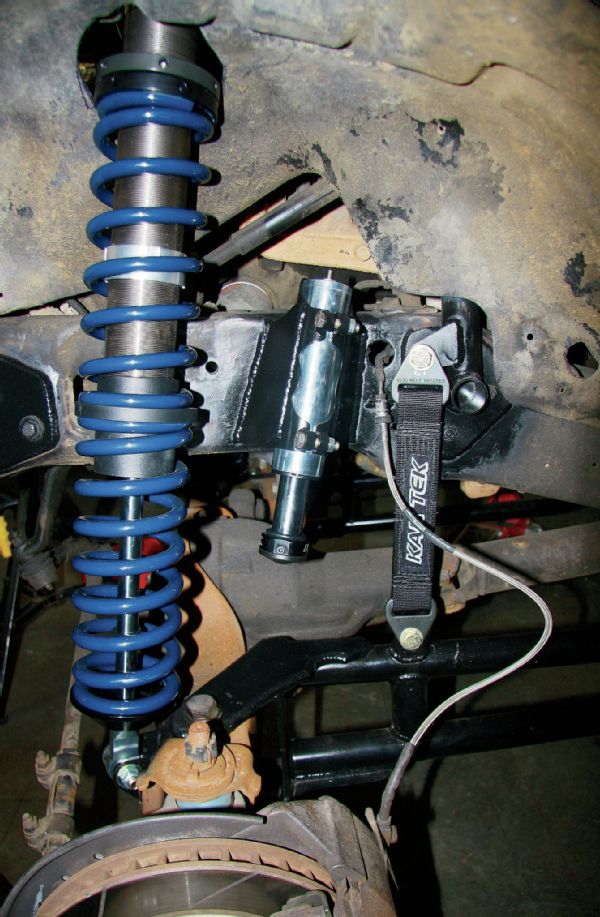
While the factory rubber snubber/bumpstop is fine for a stock suspension, they simply don’t hold a candle to what hydraulic bumpstops can do when hitting deep G-outs at speed. We ordered a set of 3-inch stroke FOX 2.0 hydraulic bumpstops to help soak up deep holes, and we can honestly tell you they’ve kept the ride quality smoother than butter.
To keep the shocks from pulling themselves apart when airing out the suspension, Solo Motorsports added a set of 12-inch Kartek limit straps. Keep in mind that a limit strap will stretch 1 inch for every foot of limit strap so make sure to factor that into your limit strap placement. We didn’t need to modify our brake lines since our Bronco was already equipped with a set of longer Pro Comp braided steel brake lines but Solo Motorsports did have to build a mount for the line since the stock coil buckets are used to retain them.
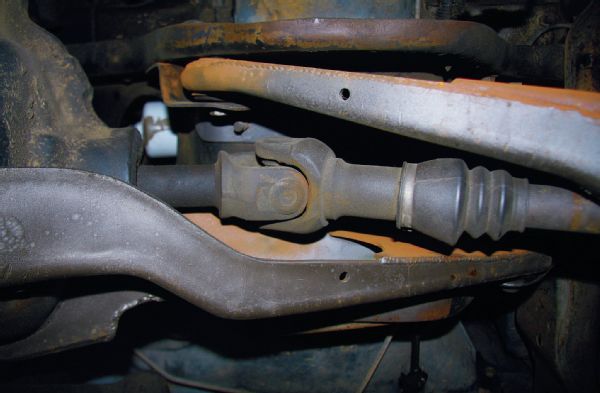
One area that needs to be addressed when going for bigger wheel travel numbers on a TTB suspension is the center U-joint on the passenger-side axleshaft. Most people shave down the center U-joint until it can safely rotate at full droop. Keep in mind that limit straps will stretch about an inch for every foot of limit strap so be sure to take this into account when shaving down your center U-joint.
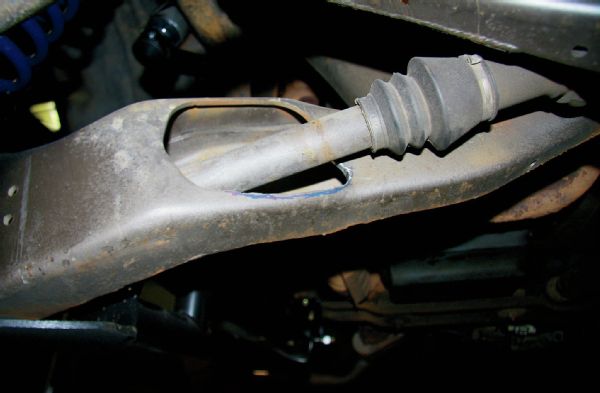
The passenger side beam needs to be clearance a bit so that the axleshaft can spin freely without binding when the beam cycles through its travel. It’s nothing a grinder can’t take care of.
Without question, one of the most important aspects of any serious long travel suspension is shocks. They can make or break the way a truck soaks up the whoops at high speeds, and it’s not really an area you want to pinch pennies on. We’ve had great success running Bilstein 9100 coilovers on The Juice project Bronco so we decided to go with a set of 12-inch stroke Bilstein 9100 remote reservoir coilovers for our go fast build. We called up Mirage Racing Products in Santee, California, and ordered a set of dual 12-inch Hypercoil springs to hold up the frontend of our Bronco. We chose to go with a spring rate of 350 pounds over 450 pounds per Solo Motorsports’ recommendation and now that we’ve had the opportunity to raise some hell in the dirt with all our newfound wheel-travel, we’re glad we listened to their advice. On-road driving manners are great but the best part is we can scoot through sections of whoops at much higher speeds than we ever could before in the kind of terrain that would force other off-road vehicles to slow down.