Let's face the facts: When it comes to suspension components, some are easier to understand than others. Springs control height and load. You can see all of the parts, and they are fairly easy to figure out. But shocks-that's a totally different story. All of their work takes place inside a tube. You can't see the hardest-working parts of the shock, and how they work is a mystery to most people.
To shed some light on what magic goes on inside the tubes under your 4x4, why some shocks cost $20 and others cost $200 and, most importantly, what you need to know to figure out what's right for you, we talked to Bill Johnson at Rancho and Shane Casad at Bilstein. These companies are two of the original manufacturers in the shock industry. The innovations from these companies span more than 150 years combined, and their involvement in four-wheeling gives them considerable knowledge and insight into the technology of shock absorbers.
What Shocks Do
Simply stated, shock absorbers control the up-and-down motion in a suspension system. Technically speaking, shocks convert kinetic energy into thermal energy. Shock absorber are also referred to as "dampers" because they dampen the energy of the spring. By creating resistance to up and down motion, the dampers turn motion energy into heat, and then dissipate the heat to the atmosphere.
 A shock is a shock is a shock, right? The shock absorber is the controller in your suspension system, therefore playing a key role. There are several different designs used for 4x4s, and an unlimited number of tuning possibilities within each design. Choosing high-quality aftermarket shocks can be one of the best improvements you make in the ride quality, performance off-road, and handling on-road of your vehicle.
Without shocks as part of your suspension system, two things would happen. First, when a tire strikes an obstacle, the springs alone would react to the impact, sending the vehicle's suspension into an undesirable undulation. The result would be a loss of control as the body and axles moved out of synch with each other. The second result would be that the suspension would move up and down until friction returns the vehicle to static ride height.
That's the Shock 101 lesson. To understand more, let's talk about the components inside a damper.
How They Work
The parts of a shock that you can see are the body and the rod. Inside the shock body is a piston assembly that includes a valve system. This piston and valve assembly is most often attached to the rod, but can also be mounted to the shock body. This valving is one of the things that shock companies use to tune a damper for a specific application. The valve stack creates resistance to the rod moving up and down, controlling the motion of the suspension. This resistance is how the damper converts energy into heat. So, a secondary function of a shock is to dissipate that heat. The heat is transferred from the fluid in the shock to the shock body, and then to the air.
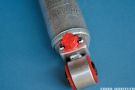
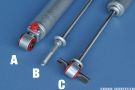
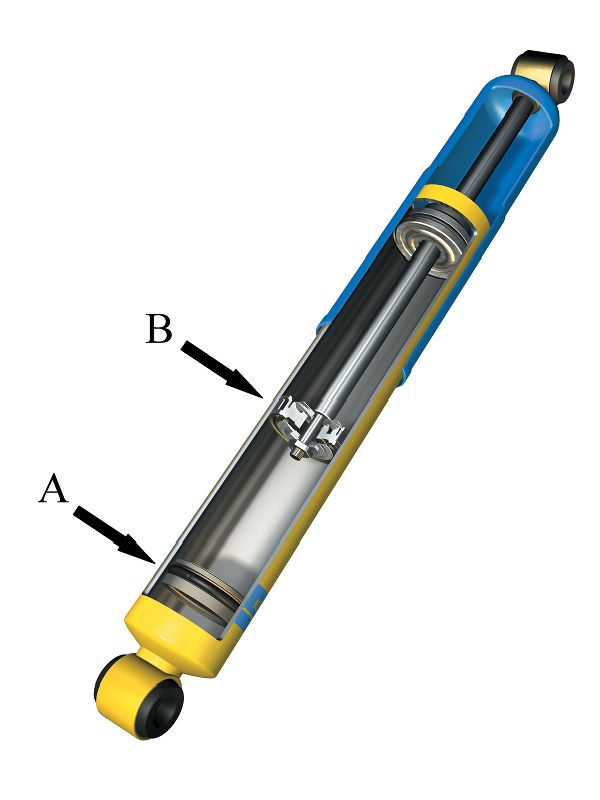
The most affordable shocks are a standard hydraulic design. These work okay in mild applications, but are susceptible to cavitation, or the mixing of oil and air. This occurs in hydraulic fluid when the shock is worked hard, and over time the shock loses its ability to perform. A monotube shock (such as the Bilstein shown) uses pressurized gas, usually nitrogen, under a floating dividing piston (A). Because of the pressurization, the oil in the shock cannot foam. The other mechanical parts inside a monotube shock are the piston and valve assembly (B) mounted on the end of the rod inside the shock body. The valves in this assembly control the resistance to up-and-down movement. Changing the valving in this assembly is the primary way a shock is tuned for a specific application.
There are variations to this, but for now, we want to keep things simple, and this understanding applies to just about every type of shock in the 4x4 market.
The Right Shocks for Wheeling
Off-road driving creates a unique set of requirements for a shock absorber. Generally, we want the on-road driving characteristics of a passenger-car damper: Control for good cornering and a comfortable ride. But we want longer travel for good suspension flex. Lifted 4x4s, with much heavier tires, build more heat. And if you drive at high speeds, such as those of desert racers, then you really work a shock, generating a lot more heat.
This has led to a couple of changes in shocks for lifted 4x4s. Both are related to adding more oil in the shock. If the oil overheats, it can foam and otherwise break down. And at that point, the shock loses its ability to do its job.
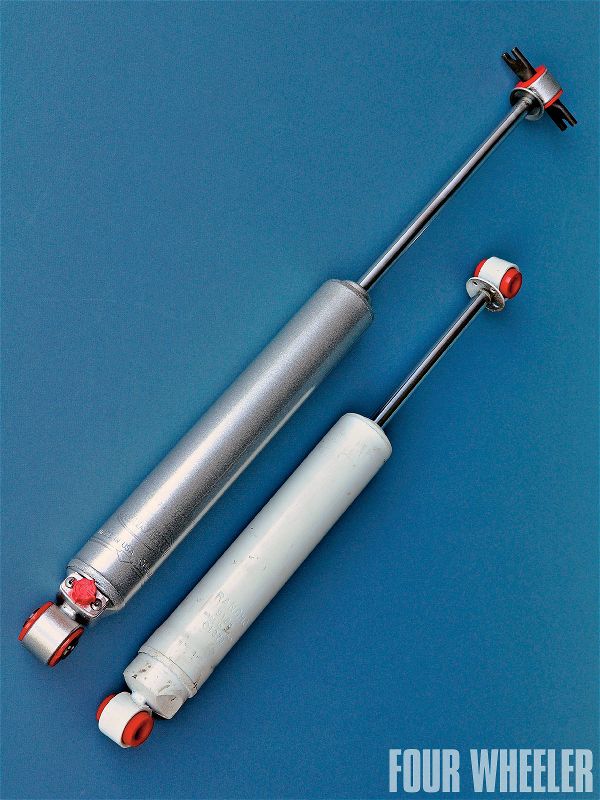
PhotosView SlideshowThe first change to shock design for 4x4s has been larger shock bodies. This is a relatively inexpensive way to increase oil volume. Shock lengths for lifted vehicles are generally longer, but the diameter of the shock body may also be increased in some applications, depending on the space available under the rig. The second way to increase oil volume is by employing a remote reservoir. This solution was developed for off-road racing, and has become popular for all types of 4x4s. A remote resevoir allows you to use a smaller shock-body diameter, while increasing oil volume by putting it in a separate reservoir connected by a hose or tube. There is also some additional heat dissipation realized through a greater combined surface area of the shock and remote reservoir.
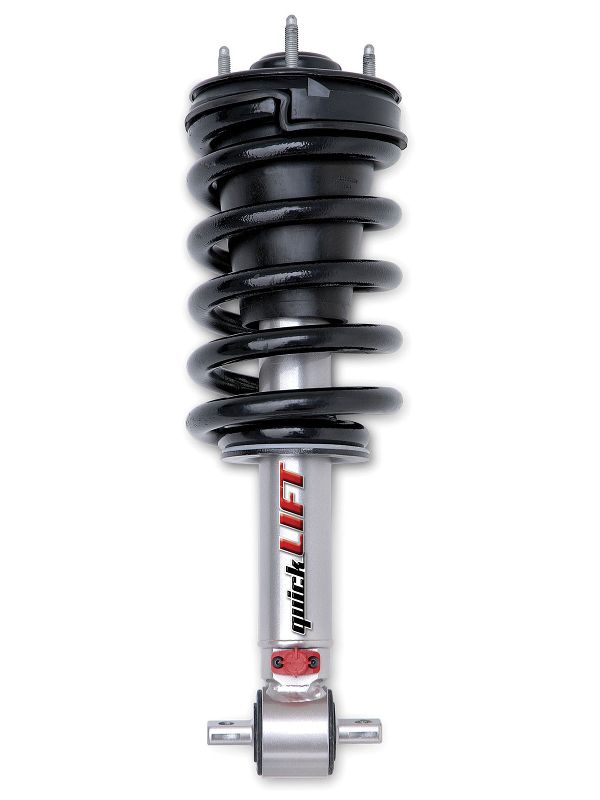 Some new vehicles come with coilover suspension, which allows companies like Bilstein and Rancho to provide better shocks and a lift, all in one package. The Rancho QuickLift shown for the 2006-and-later GM 1500 reuses the factory coil spring, but others are available with new springs. Both Bilstein and Rancho make systems for these vehicles that lift the vehicle as much as 2 3/4 inches. In some applications, this makes room for 35-inch tall tires.
Another type of shock that you'll see on modified 4x4s is a coilover shock. This combines the shock and spring of a suspension system into one assembly. These are popular in a custom setup because you can combine components within the same space. Coilover assemblies also allow taller springs than a traditional coil-spring suspension because the springs are completely captured. You can change springs easily to alter the spring rate, or "frequency", as suspension engineers prefer to talk about. You can also create a dual, or triple-rate springs by putting two or more springs with different frequencies on one coilover assembly. This can give you a soft ride for the first few inches of compression, and a more aggressive spring frequency for situations when suspension travel moves beyond the normal range.
Almost all current light-duty pickup trucks come with coilover shocks from the factory, including the new Dodge 1500, GM 1500s, Ford F-150, as well as all Nissan and Toyota vehicles. This has created an opportunity for traditional shock companies to offer a combination of a improved dampers and a lift in one component.
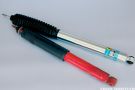
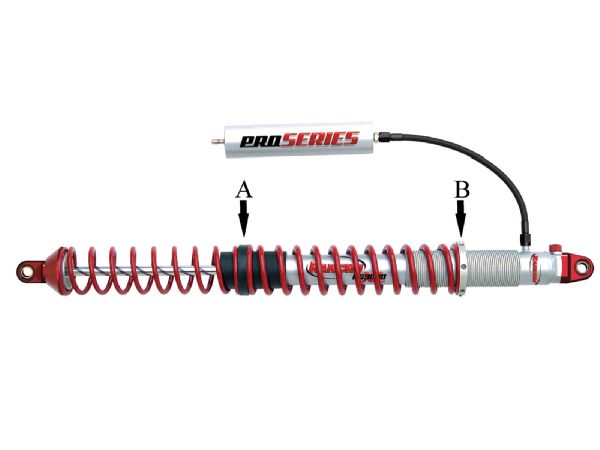 A coilover shock combines the spring and shock in one unit for excellent packaging. They generally deliver very long travel because the coil springs are captured. The Rancho Pro Series RS9000LX (shown) incorporates two springs divided by a mid-mount (A). Each coil spring has a different frequency for a dual-rate performance. Most coilovers also feature variable ride height that is easy to adjust with a threaded lower spring mount (B). This Rancho coilover also includes the company's nine-position adjustability feature and a remote reservoir.
Shock valving is typically engineered specifically for each application. For example, a high-quality shock absorber to fit a GM truck that's lifted six inches has been valved to accommodate the larger tires and handling characteristics of that lifted vehicle. Additionally, some shocks have user-adjustable valving, allowing you to soften the shocks when desired, such as during rockcrawling, and tighten them for towing or generally highway driving.
It's not too surprising, but you generally get what you pay for. If you simply drive back and forth to work, a low-dollar shock will suffice, though additional performance gains can be attained from a higher-quality shock-a must for serious trail work.
Shock Swap: One of the Easiest Mods to Do Yourself
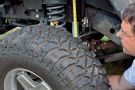
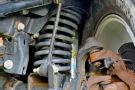
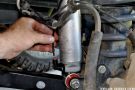
Unlike changing gears in your axles or installing a complete IFS lift kit, changing shocks is an easy job to do yourself. And the improvement in ride and performance can be very gratifying. To show you just how easy it is, we installed a set of Rancho RS9000XL shocks on a 2008 Wrangler. This installation is typical of most non-coilover applications.
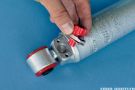
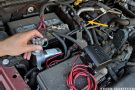
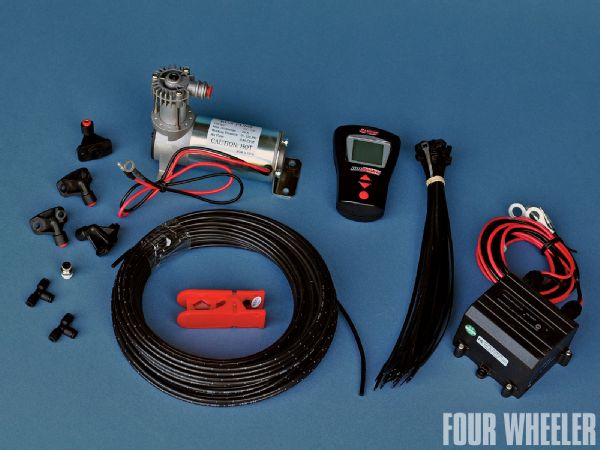 The Rancho MyRide wireless remote control system uses air pressure to adjust the RS9000XL shocks. This saves you from having to reach under your rig and adjust the shocks individually, and you can program your settings in the memory of the unit. The small air compressor provides pressure to the receiver, which gets signals from the remote and sends air pressure as needed to the shocks. The kit comes with everything you'll need for installation.
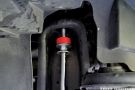
The RS9000XL shocks feature nine valving levels that you can set and adjust whenever you want. Adjustments are made by turning a knob at the base of each shock. You can also tune the shocks differently front-to-rear. We like a moderate setting for highway and a super-soft setting for rockcrawling. We took our install one step further by adding the Rancho MyRide system. This is a wireless remote control system for the adjustable RS9000XL shocks. With the system, we can program our specific front and rear settings for highway, rockcrawling and other driving conditions, and then choose each singular setting with the push of a button. Then we can put the controller in the console or glovebox when we're done. No need for permanently mounted switches or gauges.
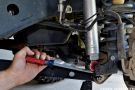
Generally, installing shocks takes less than one hour per shock. Our installation took most of a day because we added the MyRide system.
PhotosView Slideshow