 Verne Simons
Senior Editor, Jp
Verne Simons
Senior Editor, Jp
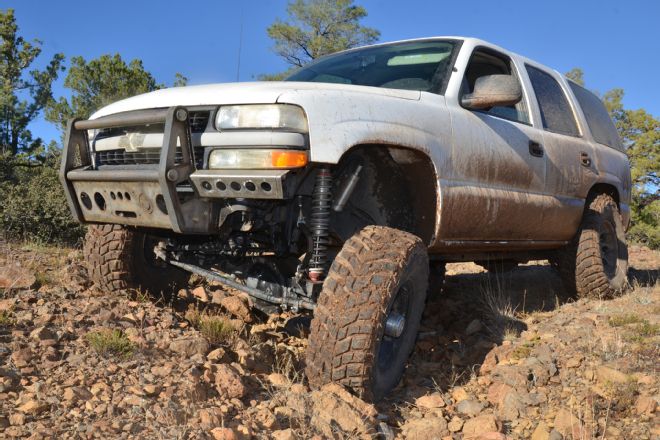
As far as projects go, building Rosco P. Drivetrain from a mundane retired 2WD police car into a capable, comfortable, and reliable 4x4 has been a great experience. Sure, there was plenty of downtime when we were working on the axle swap and it seemed like the truck would never drive again. And we’ve bumped our heads into more than one (or two) problems that we didn’t expect. But in the end we have an eye-catching 4x4 that can run down the highway at speed and tackle some difficult off-road obstacles without flinching. Yeah, we could push it more off-road, and we probably will at some point, but for now we are happy with what we’ve taken from idea to reality.
To that end, in this installment we tackle some much-needed body armor in the form of a font winch bumper and rock sliders. Like most of the truck these items are custom and require some fabrication and trial and error. For that we again lean on Rob Bonney of Rob Bonney Fabrication. In the end we should have much more of the sheetmetal protected from the trail (and our occasional drive-by-braille style). Also, we will have a place to mount a few off-road accessories like Lifetime LED lights for clarity in the dark and a Smittybilt 12,000-pound winch for those times when driver skill (or lack thereof) leaves us stuck despite our 37-inch tires from National Tire & Wheel, 2 1/2-inch remote reservoir shocks from Sway-a-Way, 1-ton axles, and front and rear lockers from AAM and Yukon Gear & Axle.
Next time we will wrap this project up (for the time being) and enjoy the fruits of our labors, but be sure to keep your eyes peeled for Part 8 because we still have a few tricks you won’t want to miss.
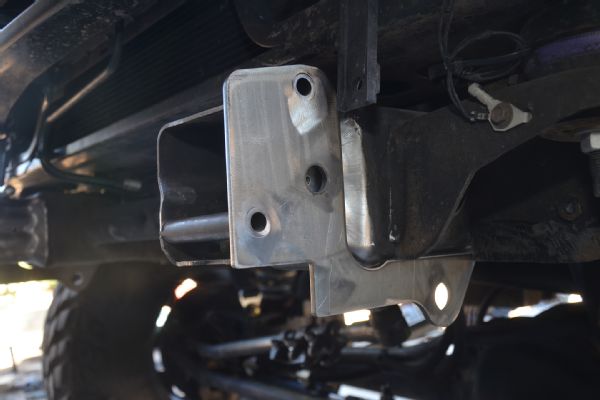
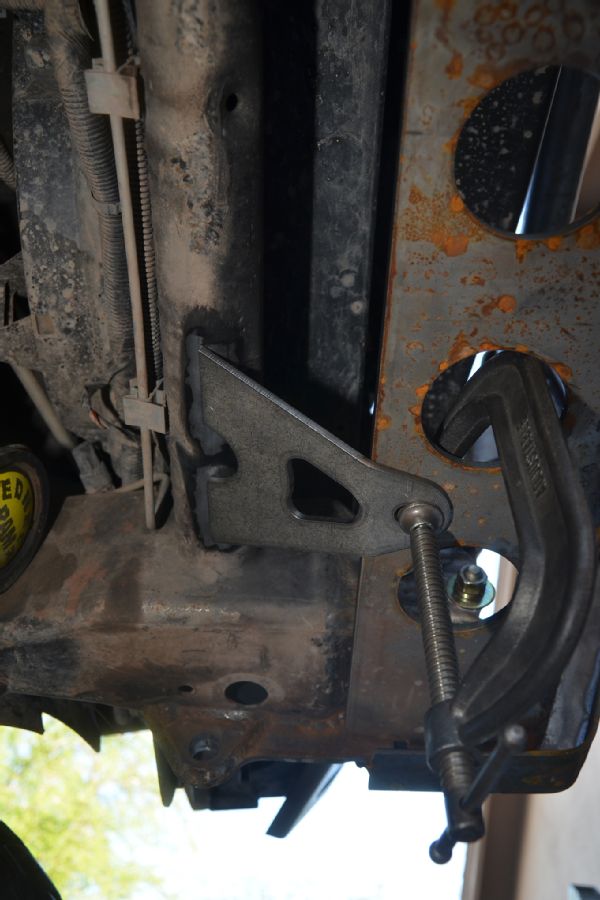
The factory front bumper mounts on a 2005 Chevy Tahoe leave something to be desired when it comes to mounting a winch and custom bumper. We started our bumper build by cutting the factory mounts off the front of the framerails. Then with a little bit of advice from Rob Bonney we came up with this mounting plate design. The plate is located off of the holes where the factory GM towhook mounted. We drilled out these holes with a Uni-bit and cut sleeves to fit out of 3/4x0.120-wall DOM to length. We then used the bracket to locate two more sleeves. One is welded to the top of the frame, while the third sleeve runs through holes located by the plate. The plate and the sleeves are welded to the frame. The bumper, via uprights, will mount to this plate and the sleeves using 1/2-inch Grade 8 hardware. Lots of factory framerail would have to get torn out of the way before this setup fails—and we’ll add a few more gussets and mounts for good measure.
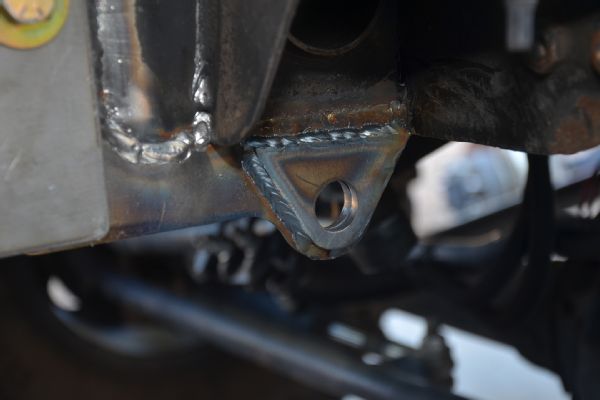
This bumper mount plate also has a tab that runs under the framerail to serve as a tow point for the front of the Tahoe. Once the plate is welded in place the tow point is plated on both sides with smaller 1/4-inch plates to add the width necessary for a 3/4-inch D-ring shackle.
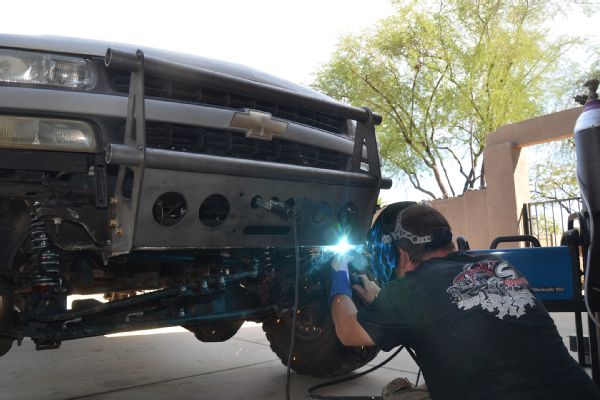
With good mounting points for a bumper we began mocking up different ideas in cardboard until we decided that Rosco needed a lightweight winch bumper that in the end should look like a police pushbar. Bonney taught us how to draw up all of the plates necessary for the bumper using his CAD program. Knowledge of a CAD program and a plasma table make creating clean parts easy. The winch will mount foot-forward and is tucked up high and as far back as possible. Our Miller Electric 190 with Auto Set makes welding the bumper together simple.
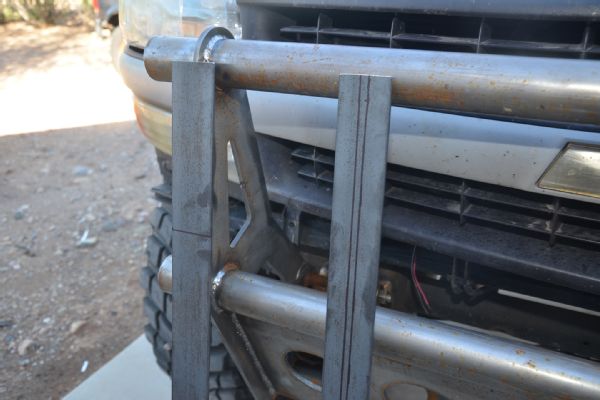
To add strength and give our bumper that pushbar look, we also got some 2-inch, 3/16 bar to wrap around the uprights of the bumper. The lines on the 2-inch bar help ensure that these pieces will be centered on the uprights. We also had to use our metal brake from Swagg Off Road to make the first bend for the back of the uprights.
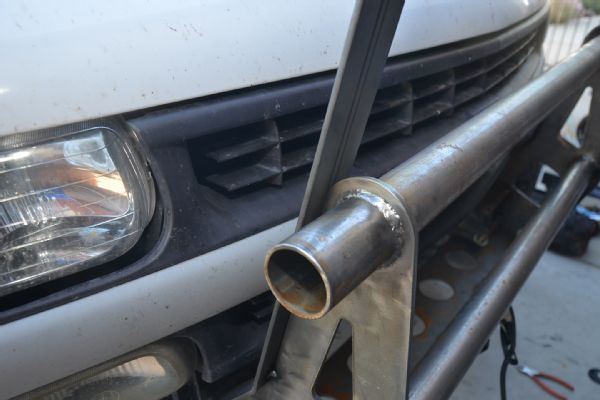
We started wrapping the 2-inch bar by tacking it in place using the Miller 190. For the top of the upright we used our body weight and a hammer to form the 2-inch bar around the top radius.
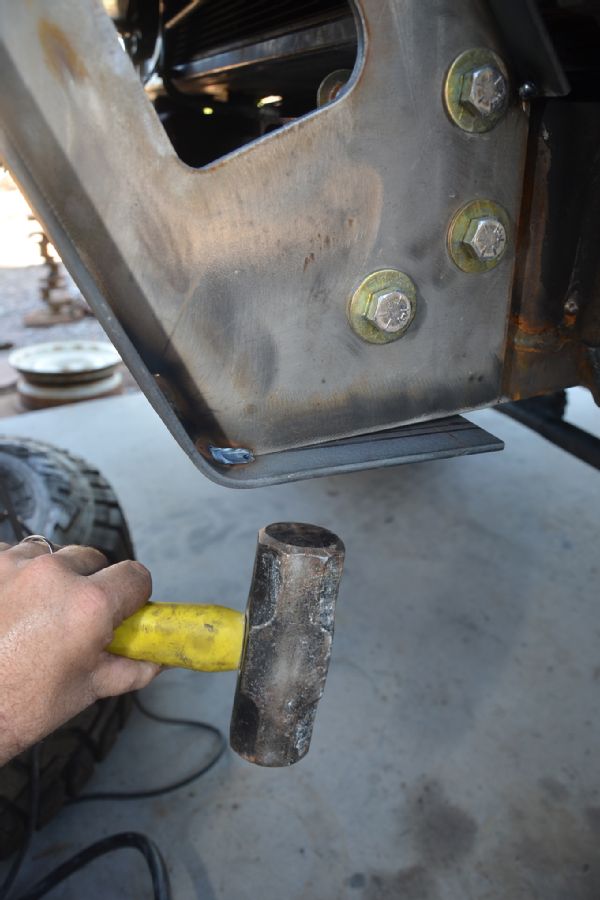
By tacking and welding the bar wrap came out pretty clean. We also used this large hammer for the tight bends and to keep the bar on center. Hammer, tack, hammer some more, tack again.
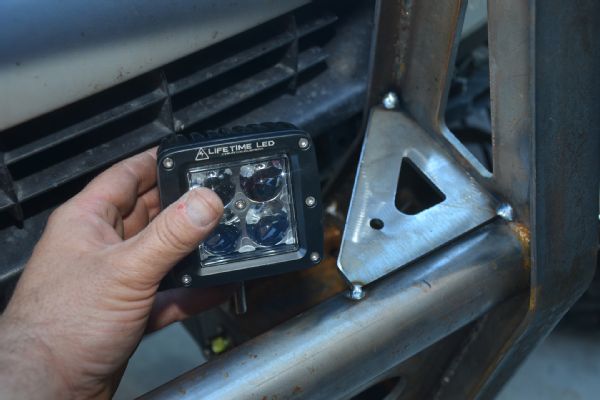
These corner gussets add lateral strength to the pushbar. They also serve as a mount for a couple of Lifetime LED Phantom Sun 3-inch Cube lights (available as a pair with wiring as a kit, PN LLLPS-23). The lights have a 40-degree flood pattern for close vision at night on the trail or at camp and should look policelike when mounted on the pushbar of the Tahoe.
Adding more mounting points to our bumper and winch mount will help distribute any loads to the framerails more evenly. Two of these brackets add rigidity to the base of the winch mount tying the center of the bumper/mount to a factory crossmember. The winch that will live there is a Smittybilt X20 Comp 12,000-pound winch. We’ll talk more about this winch when we get a chance to play with it after the bumper is done.
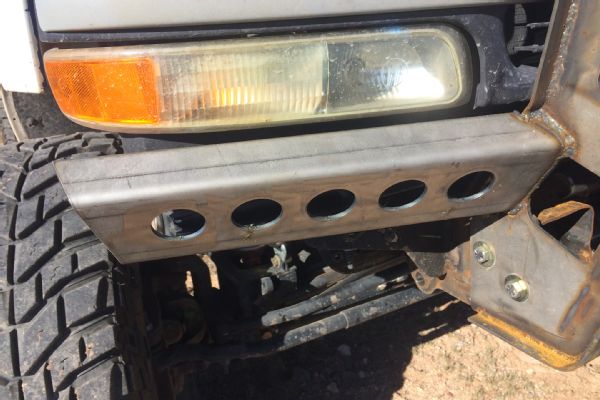
Coming together well, our pushbar-style bumper and winch mount had one flaw. Not only were the corners of the truck unprotected, but the radiator and grille support mounting structure was hanging out in the breeze. After playing with a few ideas we decided to add these wings to protect the plastic headlights and turn signal lenses.
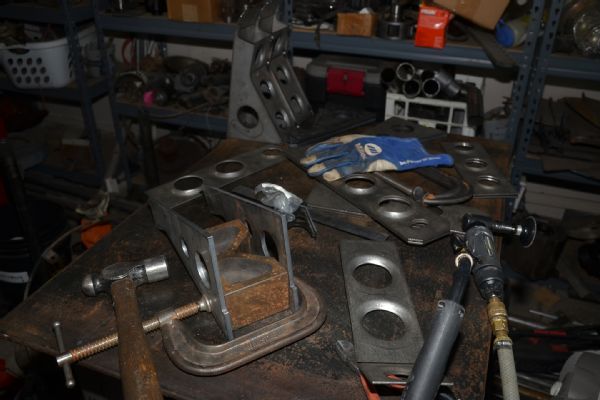
After getting to see the cool and sturdy parts built at Rob Bonney Fabrication we somehow talked Bonney into letting us modify some of his existing rocker guard designs for a 3/4-ton Chevy pickup to fit our Tahoe. The design uses boxed steel runners to hold square tubing under the rocker guards. The sides of the runners are made from 1/4-inch plate to resist bending up and down, while the tops and bottoms are made from dimple-died 1/8-inch plate to resist fore and aft stresses. If you have a 1999-2006 Tahoe these parts should work for you, and Bonney has the CAD files to cut the pieces. Some assembly required! He also has the aforementioned brackets for 3/4-ton Chevys. Our parts may also work on a 1500 truck with some modification.
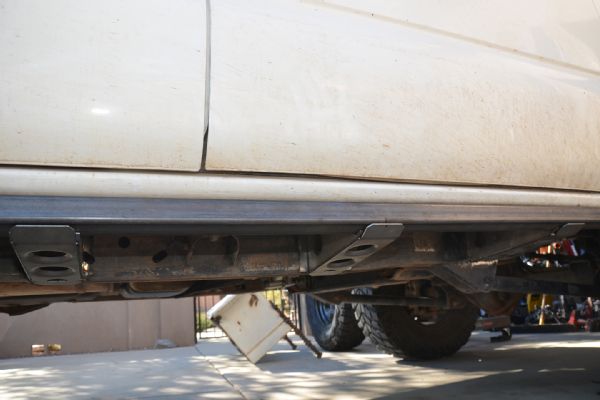
Three of these box runners per side hold the tubing in place, while short lengths of round tubing will tie the ends of the square tubing to the frame.