Chevy Steering Woes
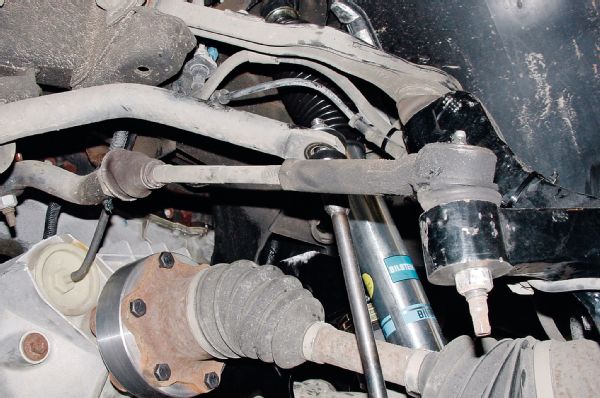
Q: I have an 2006 Chevy Silverado 1500 with a name-brand 6-inch lift that has been on it since the truck was basically new. I really like the truck, but at almost 100,000 miles I’m about to replace all of the steering parts for the third time. The lift kit utilizes all of the factory steering components, which was initially a selling point to me because I wanted replacement parts to be as close as any parts store. Now I’m not so sure. I’ve compared the various steering angles on my truck with a stock truck that’s the same year, and nothing appears to be operating at an excessive angle compared to stock. What gives?
Rick M.
Via nuts@4wheeloffroad.com
A: It would seem that about the time Chevrolet switched to independent front suspension on trucks in 1988, Chevrolet also forgot how to design durable steering parts. While the 1988-1998 trucks were not without their steering woes, when Chevy redesigned the suspension and steering in 1999, it made the steering components even more marginal. One only has to look at the wimpy tie rods on these trucks to realize that Chevy didn’t put a whole lot of thought into strength or longevity for anything other than a stock application that would see only occasional off-road use. When you throw a lift kit and heavier tires into the mix, you have a perfect recipe for rapid wear. Add in some off-roading, and you can cut the life of the steering parts by up to two thirds.
As you’ve probably guessed, the extra stress and leverage of moving the larger tires and wheels back and forth on your truck is the culprit of your steering woes. Since there doesn’t seem to have been much of a strength margin built into the stock components, this extra stress wears out the stock stuff much more quickly than a stock wheel and tire package does. You didn’t mention what size tires you are running, but we’re guessing 35s on 17-inch wheels. These are close to double the weight of the stock package with a much greater contact patch to boot, hence the extra stress.
The first level of defense is to be sure you are using quality replacement parts. Moog (moogproblemsolver.com) has an entire Problem Solver line of heavy-duty replacement steering parts that have been designed to exceed the strength of the factory components. This isn’t just marketing hype; you can compare a Problem Solver part to a stock replacement and usually see the difference in strength. They aren’t cheap, but considering that they can outlast two or three of the bargain brand versions, they are a wise investment.
If you want to take it to the next level, Cognito Motorsports (cognitomotorsports.com) has developed a complete line of extreme-duty steering components for both six- and eight-lug Chevy applications. The Cognito kits replace the stock stuff entirely with Heims and other heavy-duty components that are way stronger than the factory-designed stuff could ever hope to be. Developed specifically for lifted applications, the Cognito kits are the ultimate solution for anyone with a lifted late-model Chevy who is tired of replacing all of the steering every 30,000 miles.
Worn-Out Shocks?
Q: I recently purchased a new set of shocks to replace the ones that came with the Fabtech 6-inch long arm on my 2005 Jeep Wrangler Rubicon. I had them on my Jeep for maybe 5,000 miles. The ride began to get really rough, so I pulled the front shocks off and pushed the rod in to see if it would bounce back, and it did nothing. The shaft stayed compressed. I called Fabtech to see if they could be replaced under warranty. They told me their shocks are made differently and that they should not bounce back, so there was nothing wrong with the shocks. Is this correct? Because every shock I’ve replaced has always had some type of return pressure.
SSG Jeremy Agner
Via nuts@4wheeloffroad.com
A: You didn’t specify which Fabtech shocks you purchased (the company has three shock lines), but we’re going to assume you have the standard white-bodied twin-tube hydraulic shocks. With these shocks, as with the twin-tubes offered by the majority of the other aftermarket suspension manufacturers, there isn’t a gas-pressurized charge in the cylinder. This means that if you compress the shock, the shaft is going to stay right where you put it and not push back out or “bounce back.” We spoke with a Fabtech representative, and he confirmed that Fabtech twin-tubes do not have any internal gas pressure. Gas-charged shocks are the ones that push the shock shaft back out when it is compressed.
It seems odd that the shocks started out riding just fine but then the ride degraded in just 5,000 miles. The first thing you might want to do is verify that the replacement shocks you ordered are the right length for the application. If the shocks are too short or too long, that could be causing your ride issue. You might also inspect the shocks for trail damage. Twin-tube hydraulic shocks have an outside cylinder that stores oil and an inside cylinder where the shock piston actually rides. As such, any small dents in the outer shock body shouldn’t have an impact on shock operation, but large dents could. If there’s some exterior damage that looks suspect, then the best thing to do is remove the shock and compress and extend it manually throughout its stroke. If there are any dead spots or stiff spots when compressing or extending the shock, then it could be damaged or there could be something wrong with the shock internally. You should feel steady but firm resistance as you cycle the shock; if the shaft goes in and out of the body easily, then it’s not doing its job. Is there any evidence of them leaking around the seal? Is the shock shaft bent? Lastly, double-check the shock hardware to make sure it’s not too tight. The shock bushings should be swelled slightly but not pinched or tightened to the point that the bushings are deformed.
If you perform these tests and suspect there is something wrong with the shocks, then contact the place where you purchased the shocks and inquire about getting them swapped out. Fabtech confirmed that leaking or internal problems are covered under warranty, while exterior damage or any user-induced problems, such as incorrect installation, are not.
Leveled Out
Q: I have an 2004 Silverado 1500 extended cab Z-71 4x4 and recently purchased a leveling kit that includes new torsion keys, rear blocks, U-bolts, and shocks. When I inspect the front torsion bar adjusters on the truck, the right side adjuster is nearly all the way to the end of the threads. The leveling kit instructions say to measure the distance and to reset to the same after new keys are installed. I also plan to install a brushguard, and with the extra weight I do not feel I will be able to get the proper height with the current torsion bars. I am wondering if I can install a pair of torsion bars from a 2500 Series truck to maintain the desired height. Will they bolt right in, or will I need to also upgrade the crossmember? I live 6 miles off the pavement on a gravel road, and I would like the extra clearance for mud and snow. I do some light off-roading, but when the weather is bad I need what I can get. Thanks for any advice.
Myron G.
Via nuts@4wheeloffroad.com
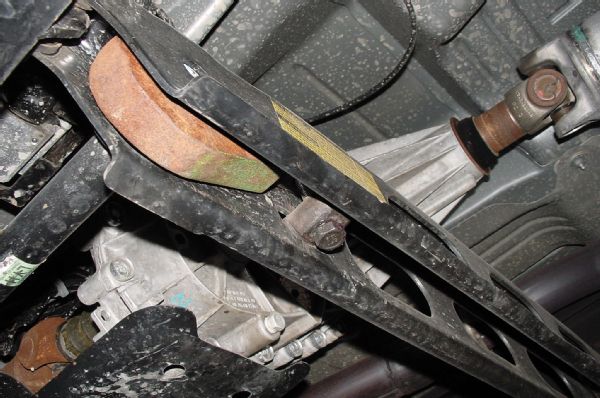
A: Keep in mind that a leveling kit is designed to increase ride height and is not necessarily a substitute for extra load-carrying capacity. While a set of torsion bars from a 2500 Silverado from a similar year truck will physically fit, that might not be the best option because you could actually end up with less ride height. Why? The torsion bar keys are indexed differently between a 1⁄2-ton truck and most 3⁄4- and 1-ton trucks, meaning that the position of the hex is different in relation to the arm where the adjuster bolt makes contact with the keys. If you mix and match 1⁄2-ton keys with 3⁄4-ton torsion bars, it’s possible that you will have less adjustment range than you did before, and therefore less preload.
Believe it or not, GM uses a wide range of torsion bars in its 1⁄2-ton trucks, with some sources reporting eight or more different torsion bar rates depending on the vehicle configuration (standard cab, extended cab, Tahoe, Suburban, and so on). Since you have an extended cab truck, you might consider getting a set of torsion bars from a crew cab or possibly a Suburban 1⁄2-ton truck. Chevy torsion bars usually have a color-coded tag on them, but time and the elements often make them disappear. A good Chevy dealership can determine which bars came factory on your truck with a VIN number and a little research, and a really good one can even tell you the spring rates of the different torsion bars available for ’99-’06 trucks. If you go the junkyard route, it will be largely a guessing game and there’s no guarantee that the junkyard torsion bars won’t be fatigued to the point of sagging anyway.
If you decide to go the route of 3⁄4-ton torsion bars, you’ll need a matching set of torsion bar keys either from the dealer or the donor truck, though there is a possibility that the leveling kit manufacturer will swap out the torsion keys you purchased as long as they have not been installed. Also, don’t be surprised if ride quality suffers. As for the mismatched adjustment of your factory torsion bar bolts between the driver and passenger side, that’s not at all uncommon. Curb weights can vary side to side, and some torsion bars fatigue more quickly than others. Above all else, be realistic about your final ride height. It’s easy to “overcrank” the torsion bar preload, which can cause all sorts of front suspension problems.
Possible Pinging Culprit
Q: In reference to the “JK Pinging” question in Nuts & Bolts, June 2014, in our experience of about a dozen or so 2007 Jeep JK Wranglers, we have found the heat shields on the exhaust manifold crossover (Y-pipe) to be the issue. It seems that one of these tack welds that holds the metal heat shield in place breaks and hides itself very well by appearing to be intact. Once the motor heats up, stresses and heat are placed on the crossover pipe, and this causes the broken weld on the heat shield to vibrate against the crossover pipe. You can test these tack welds by placing the flat-blade screw driver between the pipe and the shield. By pushing against the shield you will usually find the one that is the cause of the pinging.
We enjoy your magazine and thought this might help other readers. Cheers!
Staff of Off the Road
offtheroad.ca
A: Thanks for the tip! Pinging sounds can be hard to track down and are sometimes caused by unlikely sources, including exhaust heat shields. Thanks for sharing your insight.
E-Locker Woes
Q: Back in November 2012 I had 4.56 gears and an Eaton E-Locker installed in the rear of my 2007 Silverado 1500. When I engage the locker I sometimes hear a loud clicking noise and only one tire spins. I have brought my truck back four times to the shop that did the install, and of course each time everything works perfectly. I’m not sure what it is, but it sucks to put that much money into the rear and I’m afraid to use it because I don’t want to blow it up. The problem only happens occasionally. Thanks in advance. Any help would be appreciated.
Andy
Via nuts@4wheeloffroad.com
A: The E-Locker is a pretty cool driver-selectable locking differential that uses an electromagnet to lock and unlock the differential with the push of a button on the dash. It’s a great choice for any dual-purpose rig that is used for everyday commuting and weekend 4-wheeling. Since the problem is intermittent, I would first take a very close look at the wiring for the locker. In order to actuate, the electromagnet in the differential needs a steady 12-volt supply when it’s engaged, so any loose or weak connection could cause it not to engage. Also check and make sure that the circuit that powers the locker has a full 12 volts. It is a long way from the engine compartment to the dash to the rear differential, so there’s plenty of potential for a poor connection or damaged wiring.
If the wiring checks out, you might want to review the instruction manual and be sure you’re doing everything by the book. The manual states that the locker should only been engaged with the vehicle stopped or traveling less than 3 mph. In addition to these instructions I’d suggest engaging the locker before you get in a situation where one tire could slip while the other one is stationary. In other words, hit the button before your charge the mud hole rather than attempt it with the locker disengaged, get stuck, and then try and engage it. It has been my experience that selectable lockers need a few tire rotations to fully engage. I suspect that the loud clicking noise you hear is the internal pins failing to engage the side gear.
One test we would try is parking the truck in a flat, open field. Engage the locker, then do a few slow figure-8s. Do this several times with the locker engaged and disengaged (stopping each time before you hit the button) to see if you can get it to replicate the problem. If you can and everything else checks out, then there’s most likely something internally wrong with the locker. If that’s the case, the installing dealer will need to send it to Eaton for a checkup.
Binder in a Bind
Q: In a moment of weakness I purchased a 1975 International pickup truck that obviously has not run in years. The water pump on the 304 V-8 is frozen solid, the belts have been cut, and the distributor that appears to be original to the engine is lying in the bed while a points distributor with missing parts is currently stabbed in the engine. There was no air cleaner on it, and the carburetor’s throttle plate is frozen. The crank turns, and there appears to be something approaching compression in the cylinders, but the distributor does not turn with the crank. The truck itself isn’t in the greatest shape. Let’s just say it has plenty of character and may or may not have been the home of several small critters at some point. I bought it for essentially scrap pricing, and I like a challenge. I’d really like to get the thing running because I have a deeply seated sense of self-loathing and this is one of the ways I can punish myself. What’s the best way to go about getting an engine running that has been sitting for years? Also, do you happen to know what cylinder an IH 304 uses for top dead center?
V. Simons
Via nuts@4wheeloffroad.com
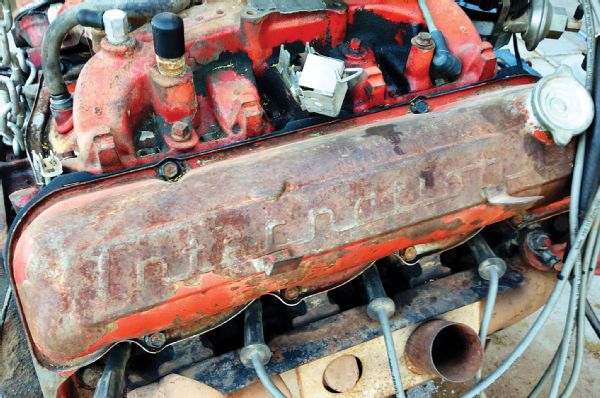
A: So it doesn’t run, is in really rough shape, and is a vehicle that is getting harder and harder to find parts for. That sounds like quite the project! It’s hard to resist the urge to make cracks about Internationals and the rarity of finding one capable of moving under its own power these days, but in all seriousness, IH products are extremely tough, even overbuilt, and they generally have very good drivetrain parts, not to mention being cool in general. If yours is complete and not a rust bucket, it’s worth saving, but to be honest it sounds a bit dubious.
The absence of an air cleaner is always a big red flag to me, so the first thing you want to do is verify that the crankshaft will move through its entire 360-degree rotation. If the truck was stored with the hood shut, there’s a reasonably good chance that water hasn’t gotten into the engine. Remember that trucks are usually parked for a reason, and this helps verify that the reason was not a thrown rod or a crankshaft that’s snapped in two. Once you’ve verified that the engine spins freely, the next step is figuring out why the distributor won’t rotate with the engine. There could be several reasons, including a broken timing chain, a broken camshaft, a seized distributor, or simply the wrong distributor in the engine. For your sake, let’s hope it’s one of the last two.
While you have the distributor out, change the oil and filter and then try priming the engine. Finding a priming tool for an IH might be difficult, but since it sounds like you have an extra distributor lying around, you might be able to make a tool using the shaft out of an old distributor. Chuck the shaft in a drill and use the drill to prime the engine. It might be a good idea to install a mechanical oil pressure gauge to make sure the thing actually builds pressure. If it doesn’t, that indicates internal engine problems. Alternatively, with the spark plugs removed from the engine you can use the starter to prime the oil system. This will help avoid a dry startup that could damage the bearings. If you have a compression tester, now would be an excellent time to use it. A dead hole may be the result of a stuck valve, which you can check by removing the valve covers and watching the valvetrain as the engine cranks. If one is stuck, you might be able to free it with some penetrating oil and a few taps with a hammer. There should also be at least some oil getting to the valvetrain by the time you finish your compression tests. If not, that’s a bad sign. If you can’t free a stuck valve, the only option is to pull the head.
As for the carburetor, you can see if it’s possible to free up the two-barrel Holley carburetor that’s likely on the engine, but keep in mind it will need a rebuild. Or, a Motorcraft 2100 should bolt right onto the intake, and these are readily available in junkyards, not to mention being great off-road carburetors. You might want to feed the carburetor from a gas can temporarily in order to bypass the fuel system and also install a clear fuel filter to see if the fuel pump is working. If you’d rather not mess with all of that you can run it on starting fluid at first, but be careful, as ether is highly flammable. It’s really easy to catch stuff on fire, including yourself, if the engine backfires. Have a fire extinguisher nearby regardless.
An IH 304 is timed with the No. 8 cylinder at TDC, which is the back cylinder on the passenger side. Rotate the engine so that the No. 8 is at the top of its compression stroke (no valves moving), stab the distributor, and start hooking up plug wires. The firing order is likely cast into the intake manifold.
As for the distributor and the rest of the ignition, there’s not really any definitive way that I’m aware of to test the electronic ignition box and distributor that belong to the engine other than hooking everything up and seeing if it has spark. If not, then you’ll need to figure out why. Check the wiring for damage and make sure the coil has voltage with the ignition key on. This is also a time when it would be handy to have another running IH around so that you can try swapping known good parts without having to buy new ones. Throw a new set of plugs in the engine and inspect the plug wires, cap, and rotor. If it looks like they’re serviceable you might try using the old ones until you know for sure that the engine is OK.
Once you do all of this, try firing the sucker up and see what happens. If there are lots of knocks and bad noises, then it’s time for a rebuild or searching around for a good used engine. Keep in mind that rebuilding that IH engine is going to be expensive, and while IH engines are good, it’s going to be hard to justify spending all that money when small-block Chevy, Ford, and Dodge V-8s are so plentiful and cheap in junkyards, and most of them actually make more power.
Nuts, I’m Confused
High- vs. Low-Pinion Measurements
Q: I currently have a low-pinion Dana 44 (rear) and Dana 27 (front) under my 1961 CJ-5. I need to replace both axles with stronger ones and am considering a high-pinion Ford 9-inch for the rear to reduce the driveline angle. I’d like to go with a high-pinion axle of some kind in the front, but I have potential clearance issues with the driveshaft. I know I have seen diagrams for the 9-inch and the Dana 60 for how high or low the pinion shaft centerline is in relation to the axle centerline, but I can’t find them now. Can you tell me what the offsets are for the low-pinion Dana axles (27, 44, and 60)? I’m assuming a high-pinion version of either the 44 or the 60 would be the same absolute value as the low-pinion one. Is that correct?
Dave P.
Via nuts@4wheeloffroad.com
A: Though we weren’t able to dig up the numbers on a Dana 27, we were able to locate the information through a combination of sources from Currie Enterprises (currieenterprises.com) and True Hi9 (truehi9.com). Interestingly, the measurements you seek vary a little depending on whether you are using a factory axlehousing or an aftermarket one like Currie or True Hi9. For example, a standard low-pinion 9-inch has the pinion 21⁄4 inches below axle centerline, while a Currie high-pinion 9-inch is 11⁄2 above and the True Hi9 housing is 21⁄4 above. A standard rotation Dana 44 is 11⁄2 inches below; a high-pinion Dana 44 housing is 11⁄4-11⁄2 above, and a Currie RockJock is 11⁄4 above. A standard rotation Dana 60 is 11⁄8 inches below, a high-pinion Dana housing is 11⁄8 above, while a RockJock 60 housing is 11⁄4 above.
We did find some minor discrepancies in the measurements of Dana housings among different sources, so treat these measurements as pretty close but not necessarily spot-on. Hopefully this will help you and others who are contemplating the low- versus high-pinion axle conundrum.