Cheap Jeep Cherokee XJ Tire Clearance - Jp Magazine

Cheap Jeep Cherokee XJ Tire Clearance - TJ Flares on an XJ Pete Trasborg Brand Manager, Jp 1998 Jeep Cherokee Goodyear Mtr Tires front Taped Flare Photo 14742713

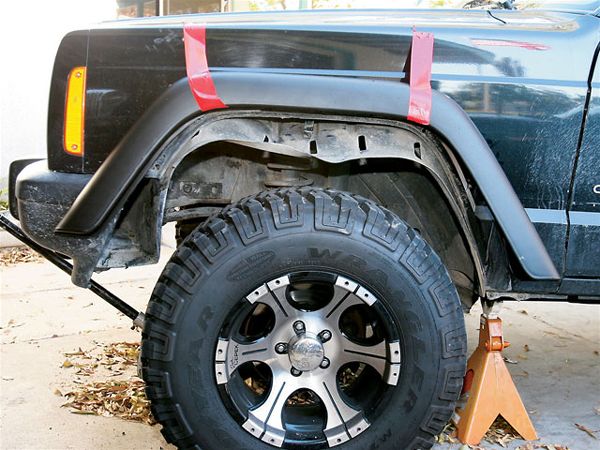
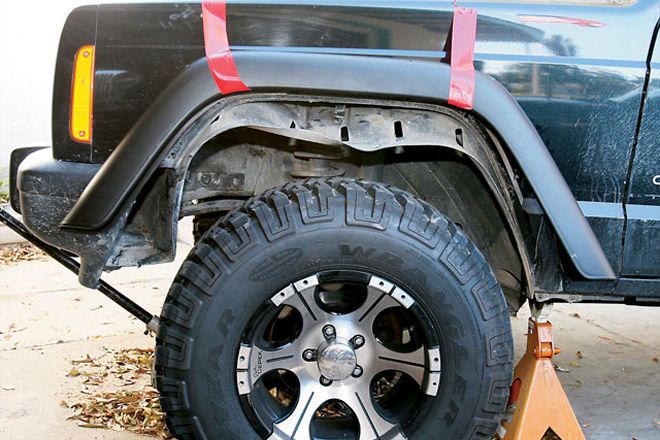
Our first trip wheeling after putting a set of 30x9.50R15 GoodyearMT/Rs on our '98 Cherokee sure taught us a lesson. After completely losing two rear flares and having one front flare knocked half off from the tires hitting them, we were kind of peeved. While the Cherokee isn't known for generous wheelwell openings, the '97-and-up flares really got to us. They are basically clamped on and one good hit from below can knock them completely off the Jeep.

1998 Jeep Cherokee Goodyear Mtr Tires rear Taped Flare Photo 14742752

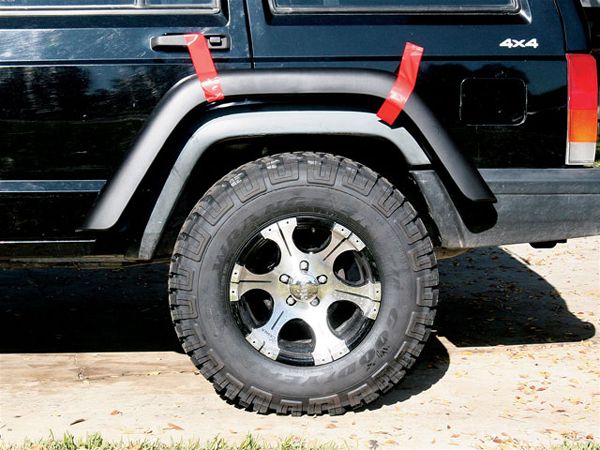
Sure, we could have just lifted the Jeep, but with all that plastic and sheetmetal above the tire that just doesn't need to be there, why not take out the angle grinder and make some noise? We wanted to stay low-budget, so we went to Quadratec and got four rear TJ flares (two driver-side [PN 52449.0160], and two passenger-side [PN 52449.0159]) for our project. For $120 plus shipping, we got an additional 21/4 inches of clearance over the front tires and 3 inches of clearance over the rear tires, without having to mess with shocks, brake lines, or driveline vibrations.

PhotosView Slideshow The rear flares hang down past the lip of the wheelwell a little less than an inch. With the flares removed, we cleared the tires even with a full load of camping gear, but we ended up with mud all over the side of the Jeep and there was more metal that could be relocated easily. Next, pie-cut the pinch seam. You don't want to just hack this section off because it is what holds the inner fender to the body shell. If you've got a welder and some time, you can cut it and weld in a new section of inner fender. But if you want your XJ to stay together without welding, just pie-cut it and bend it up into the wheelwell. Remove the plastic rear bumper cover and trim off the stepped portion of the lip like we've done here. If you don't trim this off, later on, after bending the fender up, it can trap debris and possibly lead to rust. We used an assortment of 1/4-inch bolts and fender washers through the stock TJ mounting holes and the corresponding holes we drilled in the body. After cutting off the locating tabs and the wheelwell lip so that the back of the flare was flat, we had to do some additional trimming so it fit the XJ body. This is looking out from the passenger rear door. We sealed the bent-up pie-cut pieces with some silicone and painted the whole thing with Rust-Oleum paint. Once the flare is on, you don't really see any of it anyway until the door is open. The bumper cover can now go back on, get marked so it flows with the new larger wheelwell, and then be cut to match. Remove the stock flare and the retaining hardware. We had to jack the Jeep up to get enough clearance for cutting. On the '97-and-up XJs, be careful not to cut the windshield washer bottle that is mounted right inside the fender. We cut the front bumper plastic on the vehicle since there is nothing behind it but more plastic. Again, we marked the holes that needed to be drilled through the stock holes in the TJ flares with a Sharpie marker, then removed the flare and drilled with a cordless drill. We used a scrap piece of steel to keep from drilling the plastic washer fluid tank, rather than removing it. Up front we had to decide if we wanted the TJ flare to run parallel to the body line of the fender or at an angle like it is stock. Due to the top of the TJ flare being straighter, we thought it looked better to run it parallel. We are planning on high-clearance bumpers and cutting out the rocker panels in the future, so the ends of the flares that don't quite line up now will eventually line up just fine. Normally we just throw out the plastic wheelwell liners on our Jeeps, but on the XJ the front liner helps to keep mud out from under the hood, and even the front edge of the front door. After we bent them up, these tabs allowed us to keep the plastic liner off the tire. We used zip ties where needed for additional support. The bottom edge of the flare needs to be cut to clear the bumper end caps or the beltline of the XJ. Using a cardboard template, we were able to come up with the needed curve. We then retained the lower corners of the flares with a piece of angle iron and some carriage bolts, which we later painted black to match.