
After decades of being parked in the dark recesses of our shop, we finally decided to drag our 1963 Corvette into the light of day. At one time the plan was a total restoration of the numbers-matching coupe, but after a series of spirited debates in our own mind, the decision was made to make the split-window into a driver and make some practical improvements. To that end we’ve added Borgeson power steering, there’s a new Vintage Air A/C system waiting to be installed and there will be a few more updates as well.
As we plan on pounding the pavement with our Vette, reliability will be crucial and something that is critical in that regard is keeping the engine’s operating temperature under control. To make sure our coupe always keeps its cool, we turned to Jim Walker at AutoRad for a new aluminum radiator. After years of working for one of the major players in the cooling industry, Jim concluded that there was a need for high-quality, high-performance radiators and AutoRad was born.
While our Corvette was originally equipped with an aluminum radiator that was arguably state of the art in 1963, much has changed since then. One of the most noticeable differences is the increased efficiency due to the much larger size of the tubes in the core. AutoRad’s hand-made coolers use two rows of 1-inch tubes (larger tubes are available for extreme applications) and all cores are vacuum brazed with no epoxy. [Jim points out that some companies use the very dated oven process of securing the tubes and therefore need an epoxy to stem any leaks.]
Cooling Considerations
The merits of aluminum versus copper/brass radiators are often discussed. Jim sums it up like this, “Although copper is a better material for heat transfer, the problem with a copper/brass radiator is the solder. Solder is what bonds the copper to the brass and really becomes an insulator between the two. If you could bond copper to brass without solder you might have a very good radiator. Aluminum cores are furnace brazed with an aluminum flux and basically the entire core becomes aluminum, so there is no action between dissimilar materials.” Jim continued by saying “All crossflow-type radiators need a coolant recovery tank to get rid of air in the cooling system. The quickest way to kill a radiator is to leave air in the cooling system. If the radiator tubes are not immersed in coolant they will fail.”
Electric Fans
On the subject of fans Jim prefers electric, as he says, “They work best when you need them the most—at idle and slow speeds. You really don’t need much of a fan when you are going down the road at a decent speed. Mechanical fans move less air at slow speed and more air at highway speed. Pretty much backwards of what you need.”
Our radiator came equipped with dual Maradyne electric fans, one 14-inch and one 12-inch, both feature S-style blades, which are generally quieter than the straight blades. To increase the fan’s effectiveness they are mounted in a removable shroud on the backside of the core (electric fans work better pulling air through the core rather than pushing it).
Fan Control
To control our dual fans we chose the Dakota Digital PAC-2750. Fully programmable, the controller will work with an existing electric water temp gauge, operating from the temperature sending unit already in place (a dedicated sending unit can be installed for applications without a water temp gauge). The controller has adjustable “fan on” and “fan off” temperatures to suit any application or personal preference. The PAC-2750 has the capability to leave the electric fan operating after the engine has been shut down for a user-adjustable time. The PAC-2750 offers a full digital LED readout for displaying temperature readings and maintaining simple installation. It is capable of running two fans (together or separately) or a single, two-speed fan.
Thermostats
Simply put, always use a thermostat. A relatively constant operating temperature is absolutely essential for proper emissions control, good fuel economy and performance. A thermostat will ensure the engine reaches operating temperature quickly (unlike restrictor washers alone) and provides the restriction necessary to build water pressure in the block (which eliminates steam pockets). Unless they malfunction, tossing them in the trash will not cure an overheating problem.
Two types of thermostats will be found: the poppet valve style and the sleeve style. The poppet style is either open or closed while the sleeve style is a non-linear design that opens gradually and they are designed to resist large variations in coolant pressures that can occur at high rpm. Under these conditions, coolant temperature and pressure fight for control of the thermostat, keeping it from opening at its designed temperature. Sleeve style thermostats often eliminate the cycling seen on the temperature gauge as a poppet thermostat opens and repeatedly closes.
Radiator Caps
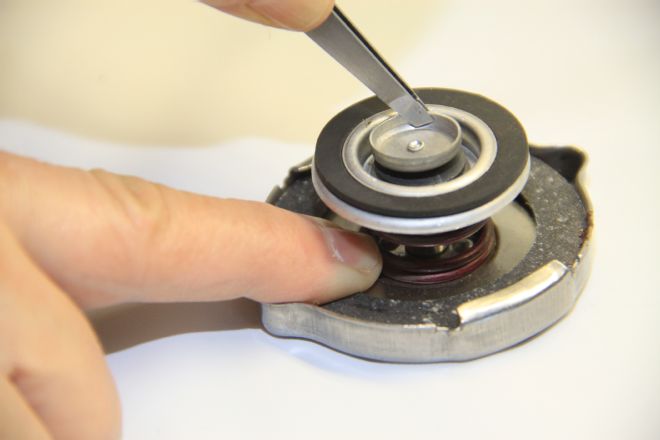
The radiator cap keeps the cooling system under pressure, generally somewhere between 5 and 15 psi. Pressure in the cooling system elevates the boiling point of the coolant approximately 3 degress for every pound of pressure. Another benefit of a pressurized cooling system is the elimination of steam pockets in the water jackets.
Like many things that seem simple, there’s more to a modern radiator cap than meets the eye. Along with a spring that keeps a preset amount of pressure in the cooling system, radiator caps also have a vacuum valve. When an engine is shut off the coolant stops flowing through the radiator, however the coolant continues to absorb heat from the heads and block. As a result, the temperature in the system increases. As the coolant expands, the pressure often increases to the point where the radiator cap’s rating is exceeded and liquid is released through the radiator’s overflow. When the system cools and the coolant contracts, air (or liquid) is drawn back into the radiator through the vacuum valve.
Coolant
Tap water is notoriously bad for cooling systems due to the high mineral content that is so common. We used AMSOIL pre-mix for a variety of reasons, not the least of which is convenience as adding coolant maintains the 50/50 antifreeze to water ratio. In addition, AMSOIL coolant has been shown to exceed standards for preventing corrosion and erosion. It also does not contain inorganic salts found in antifreeze/coolants that are responsible for scaling issues in cooling systems.
Electrolysis
Out of all the evils that can attack a cooling system, particularly an aluminum radiator, electrolysis is at the top of the list. Bruce Balfour of VE-Labs, a company that specializes in products to protect cooling systems, identifies the three reasons for electrolysis to occur in a cooling system:
Chemical Electrolysis: This is caused by dissimilar metals in the cooling system such as cast iron, aluminum, steel, copper, brass and others that can actually create electrical current. As a preventative measure, use a 50/50 mix of quality antifreeze and distilled water (pre-mixed is actually best).
Stray Voltage: Since the coolant will conduct electricity, stray voltage will travel through it to find a ground. And because aluminum is the softest metal in the system it is the most vulnerable to damage. To prevent this from happening, make sure the engine and frame are properly grounded (that’s why we used a chassis ground kit from Zip). Make sure all accessories are properly grounded, and remember painted and powercoated surfaces do not make a good ground—metal surfaces must be bare.
To determine if stray voltage is an issue, Bruce recommends the use of a digital volt/ohm meter. With the engine off, connect the meter’s negative lead to the negative battery post. Dangle the positive lead into the coolant with the engine off. [This is easier with a copper tube on the end of an alligator clip and will give you the most accurate reading.] A reading of 3/10ths (0.300v) of a volt with the engine off is considered acceptable. Anything over that can cause damage, and indicates the antifreeze is holding a charge, which should be thoroughly flushed from the system and replaced with fresh coolant.
Next, start the engine with all electrical accessories off and note the voltage. Bring the engine rpm up to approximately 1,500 to 2,000 rpm and note the voltage again. Now, with the engine at the same rpm, turn each electrical component in the car on and off. If there is a voltage spike with any component it is most likely improperly grounded.
Corrosion Erosion: When the antifreeze turns bad or electrolysis occurs, it leeches off very small particles of metals, rust and aluminum oxide into the coolant. Tests show these particles are like having liquid sandpaper flowing through your cooling system, which in turn erodes the aluminum components even more. To solve this problem the cooling system should be treated with a non-acidic flush like VE-Labs Inter-Ject and then thoroughly “reverse flushed.”
Getting Close
With the new AutoRad radiator and the rest of the major cooling system components in place, all that’s left is the installation of the heat and A/C unit and the necessary hoses. We’re confident that when all is said and done, our Corvette will be ready to rack up the miles and keep its cool in any situation.
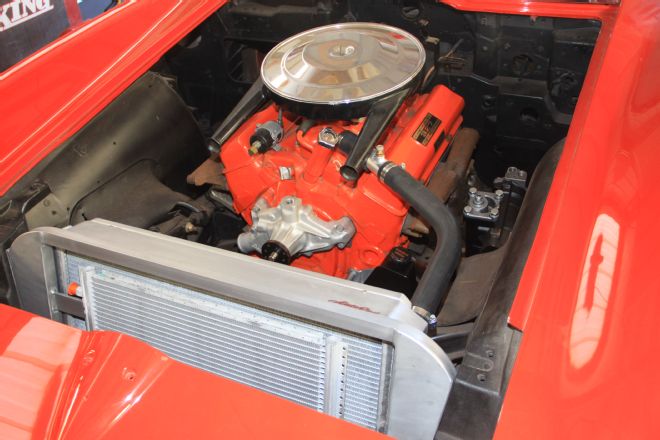
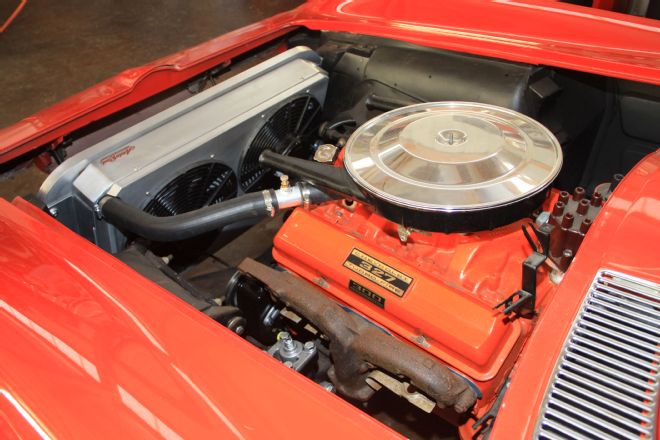
01. To keep our Corvette cool we installed a new aluminum radiator from AutoRad. We opted to include one of their new aluminum core supports.
02. AutoRad offers a variety of finishes on their radiators: powdercoated, polished and brushed—we chose the latter.
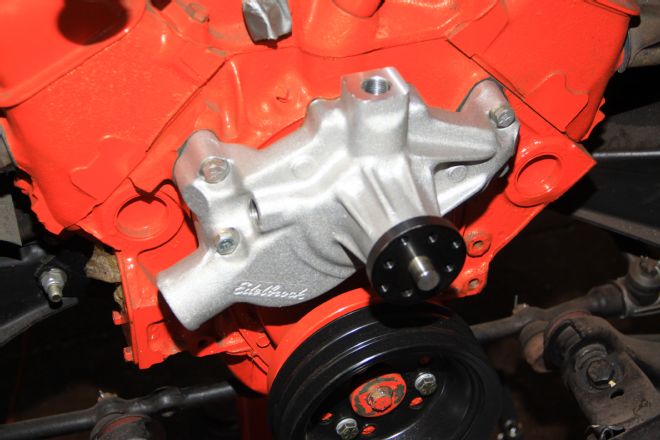
03. For maximum coolant flow, increased system pressure and equalized distribution side to side, we installed an Edelbrock Victor Series water pump.
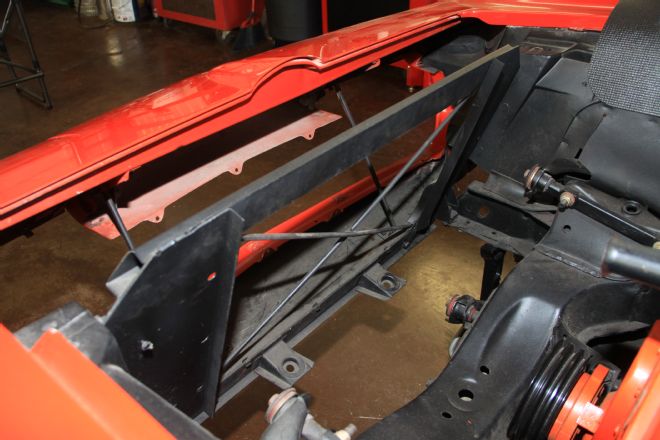
04. The entire stock core support was removed. Note the two brackets on the bottom; they are the mounts for the original radiator.
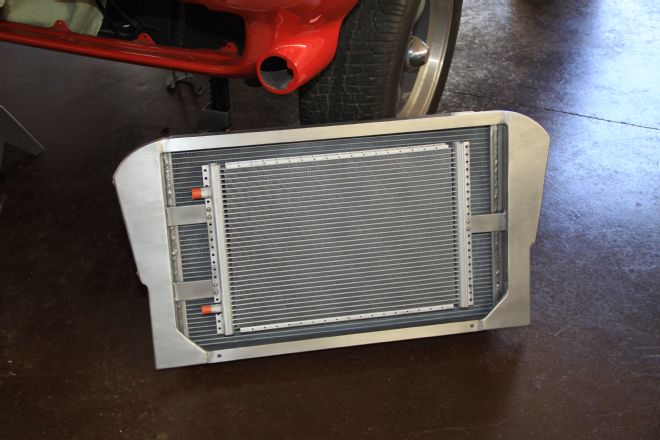
05. AutoRads’ replacement core support is not only beautifully built, the design allows for a larger radiator. We chose to include an optional air-conditioning condenser.
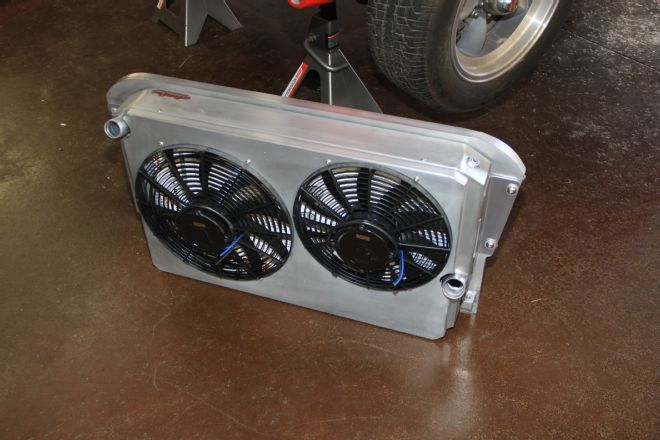
06. On the backside of the radiator is a custom radiator shroud that mounts twin Maradyne fans. The shroud/fan assembly is easily removable if maintenance is required.
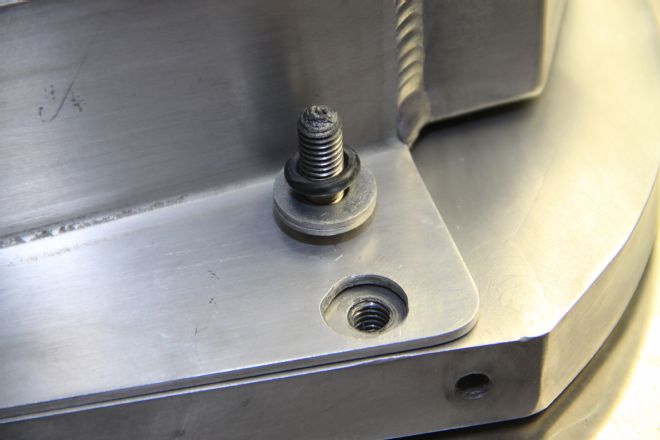
07. To allow for expansion and contraction, the mounting holes in the radiator’s flanges are oversized—rubber O-rings provide the needed flexibility.
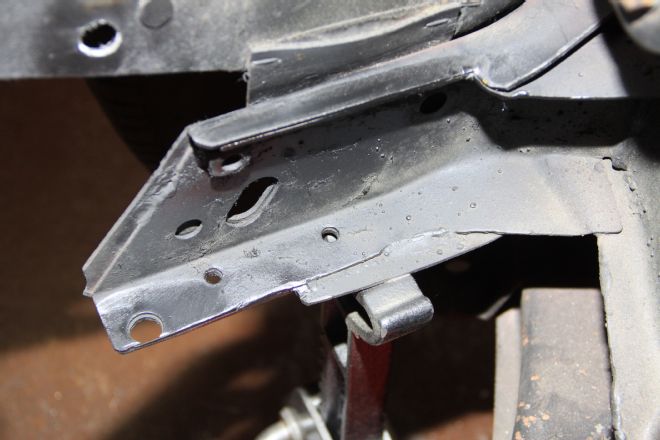
08. The AutoRad radiator is bigger than the original, and as a result the framehorns required some trimming. We figured it was a small price to pay for more cooling capacity.
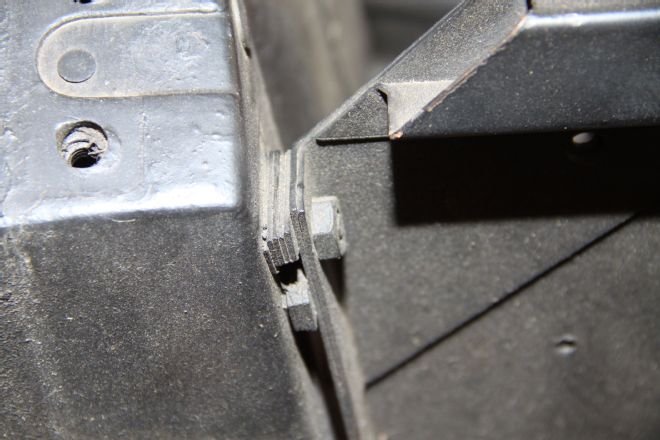
09. From the factory there was a stack of shims between the right-side inner fender panel and the core support. There were none on the left.
10. A test-fit indicated that the AutoRad core support fit just like the original and shims were necessary. Rather than use individual shims we fabricated aluminum versions that picked up both mounting holes.

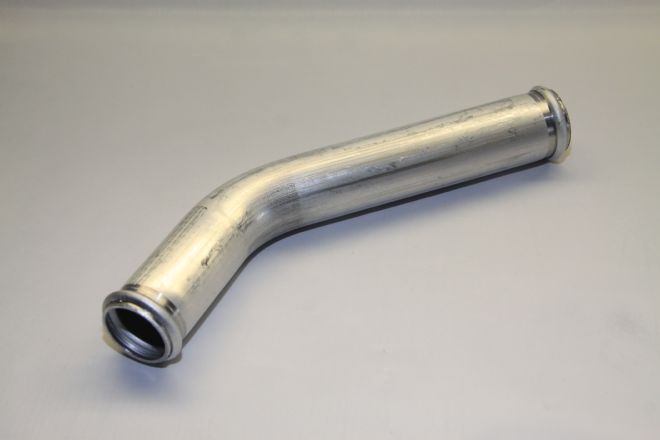
11-12. With the new radiator in place we elected to make modifications to the hoses with these aluminum tubes from Speedway Motors. The straight tube has a provision for a petcock.
13. As the radiator inlet was slightly lower than the thermostat housing, we installed a bleeder in the stock replacement upper hose to vent any air that may be trapped in the system.
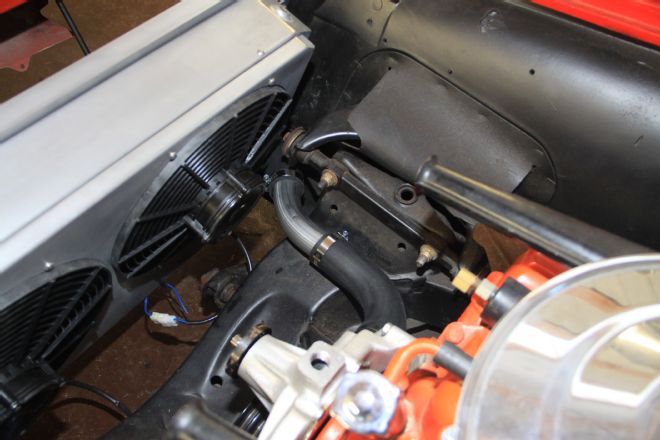
14. While we could have used a stock lower hose, it was closer to the crossmember than we liked. To solve that problem we reconfigured the hose with the Speedway 45-degree aluminum tube.
15. To operate the dual electric cooling fans we used a Dakota Digital controller. It can operate a variety of fan configurations and has adjustable on and off set points.
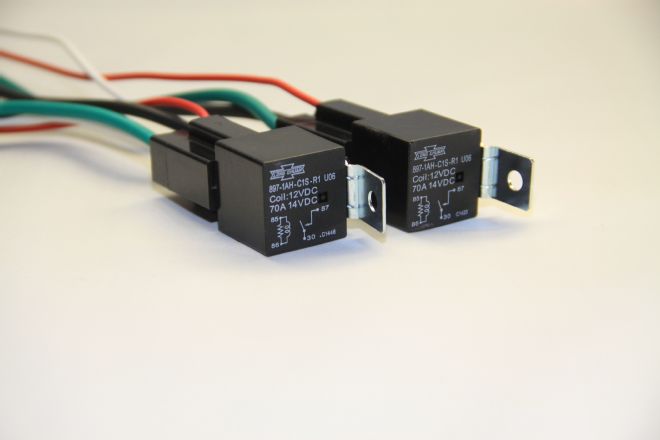
16. Dakota Digital also provided the individual 70-amp relays to power the fans.
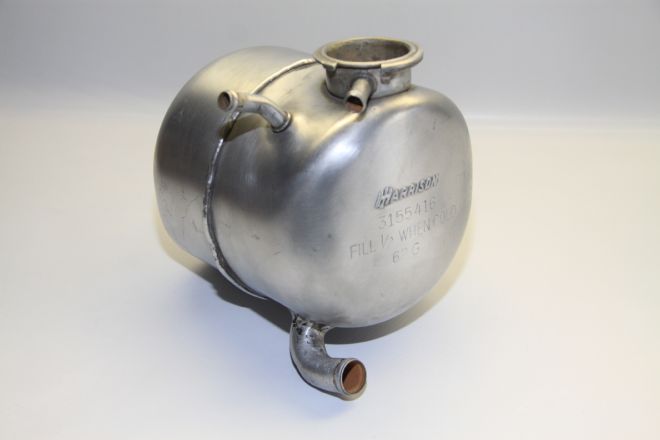
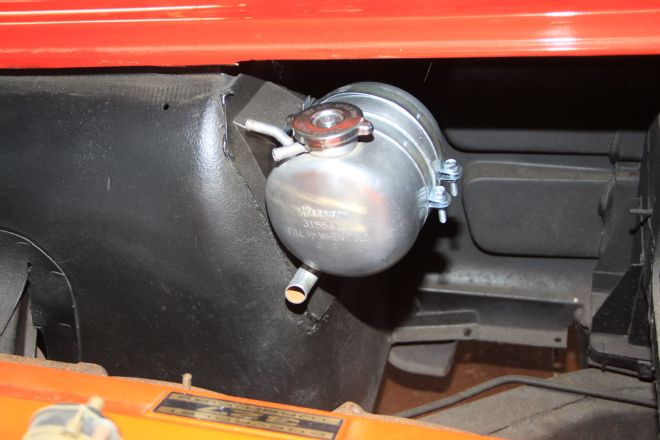
17. Our new radiator could have been equipped with a radiator cap, but we opted to retain the original expansion tank. The date code on ours was 62G, which translated to July of 1962.
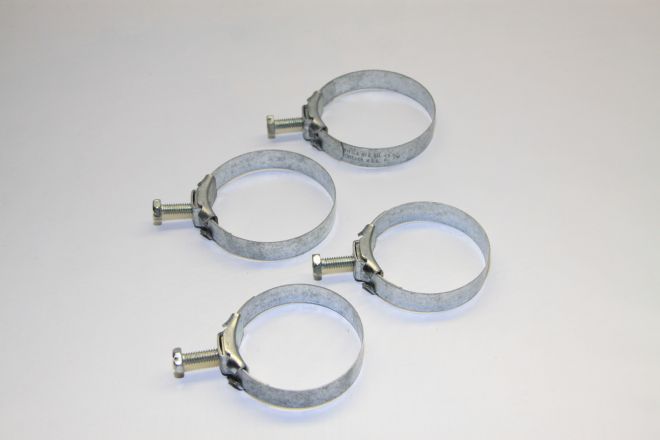
18. If authenticity is the goal, Zip Corvette offers the original tower-style hose clamps.
19. Also from Zip Corvette is this expansion tank mounting kit.
20. For those needing a replacement expansion tank, Zip offers reproductions; they can be stamped with an appropriate production date if necessary.
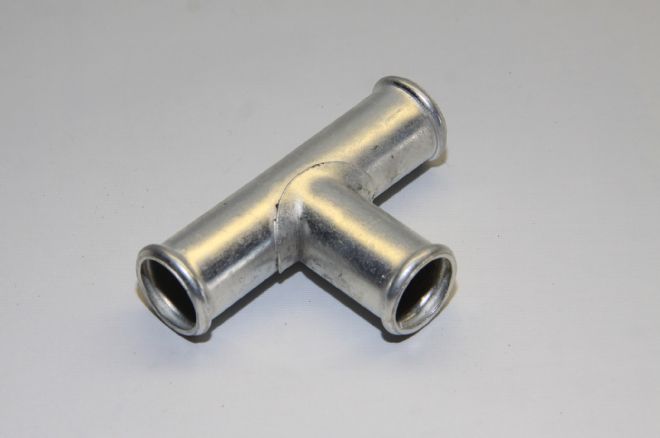
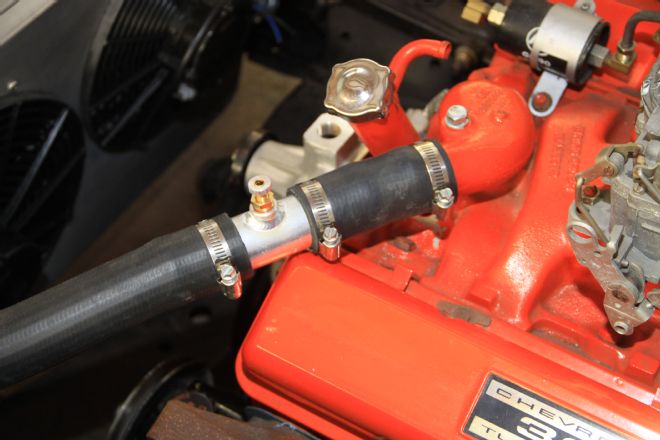
21. This T-connector is used to plumb the expansion tank into the heater hose coming from the water pump.
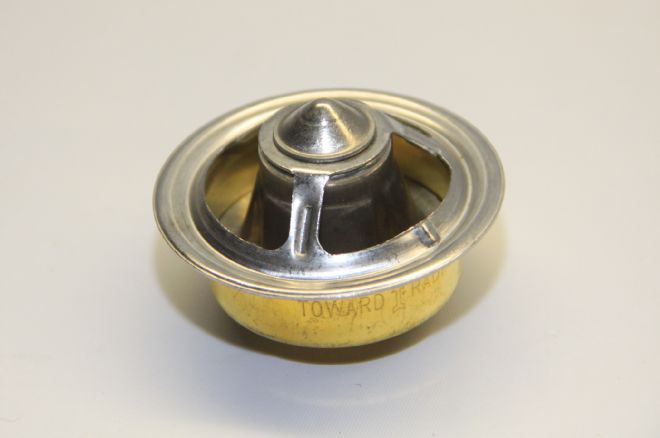
22. Never resort to removing the thermostat to cure heating problems. To ensure consistent temperature control we installed 180-degree sleeve-style thermostat.
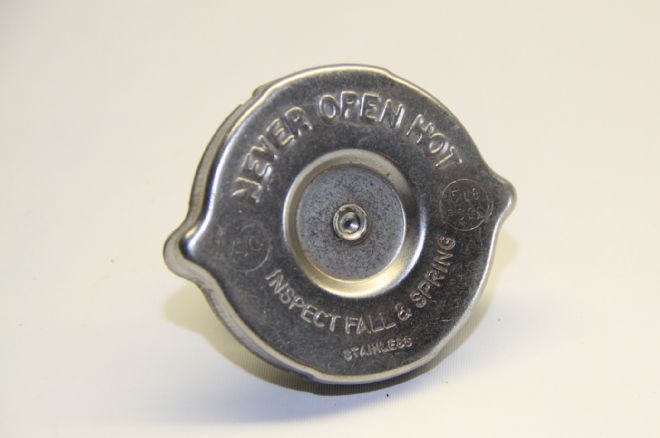
23. Pressurizing the cooling system not only raises the boiling point of the coolant, it also makes the cooling system operate more efficiently. We used a 15-pound cap from Zip.
24. Along with keeping the system under pressure, radiator caps have a vacuum valve to take in air or coolant to replace any liquid that may be lost.
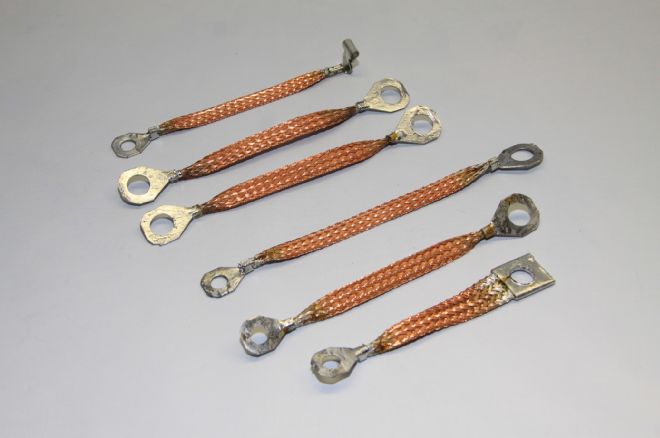
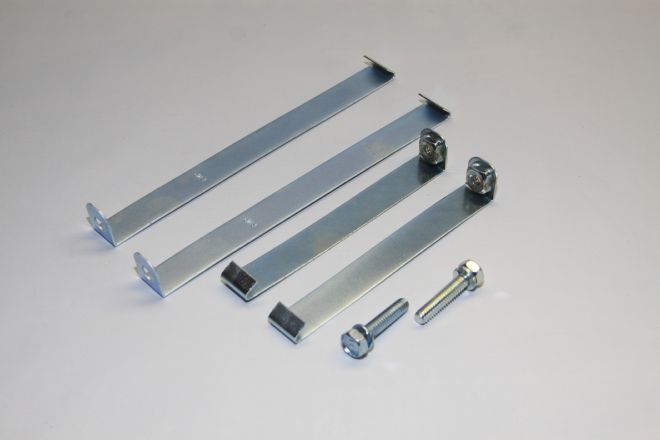
25. So what do ground straps have to do with cooling? A bunch when it comes to eliminating electrolysis. This chassis grounding kit is from Zip Corvette (only a partial kit is shown).
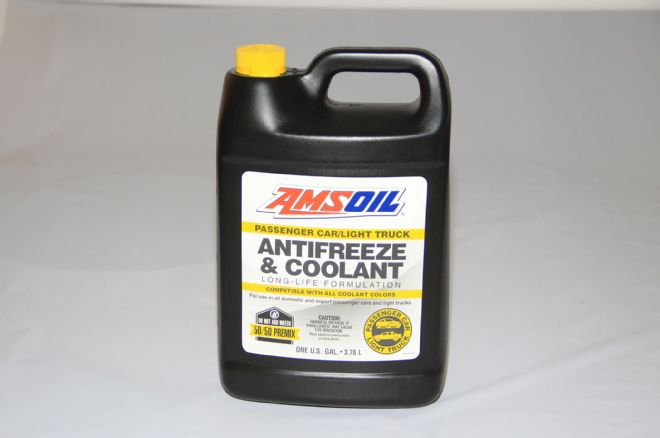
26. Using the proper coolant is critical. AMSOIL offers ethylene glycol antifreeze in a 50/50 Pre-Mix Formulation. It is said to offer superior protection for aluminum, steel, cast iron, copper, brass and solder alloys, thanks in part to the quality of the water it contains.
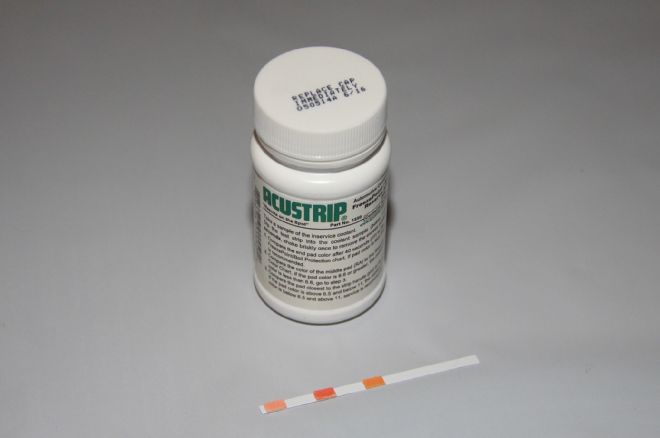
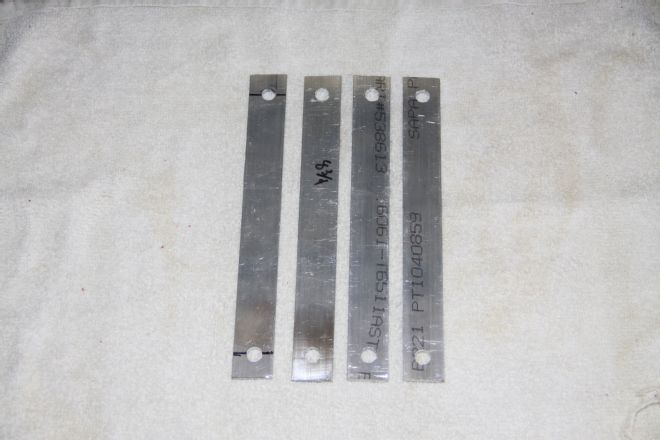
27. The best way to keep tabs on the condition of engine coolant is the use of test strips that indicate pH, reserve alkalinity as well as freezing and boiling points. The pH level should be slightly above 7.0, anything below that is considered acidic.