Our November issue featured a story on building a NASCAR side-exit style exhaust using components from Dr. Gas. We brought our Laguna down to LP Racing in Rancho Cucamonga, CA, the brainchild of builder/fabricator, Lang Paciulli. Lang is an expert TIG welder, and that's the technique he used to assemble our one-of-a-kind exhaust on our Laguna. We learned a lot about TIG welding from Lang, too much in fact to squeeze into our print story. We decided to compile all our extra knowledge into a web-exclusive story, which we promised in the November issue. Here's the text from our interview with Lang, along with some helpful tips for the beginning TIG welder!
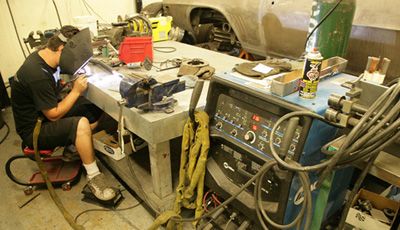
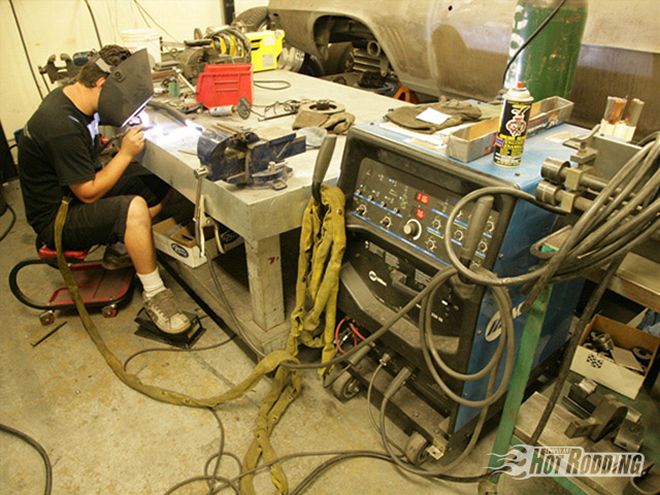
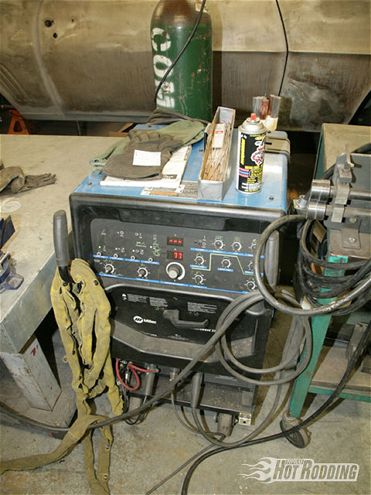 Lang prefers the Miller Syncrowave 250 DX because it's watercooled. This allows prolonged welding without frequent duty-cycle breaks.
Q: Which TIG machine do you like the best?
A: "The Miller Syncrowave 250 DX is the most well-rounded, economical machine out there, and I like the Miller brand. It's a water-cooled unit, so it actually runs water through the torch to cool it down. You can weld a lot longer, and heavier with it. It's more continuous. With your average non-watercooled TIG welder, like a Miller 180, you have to stop a lot to let the machine cool down."
Q: Why do you choose to TIG weld instead of MIG weld most of you jobs?
A: "I like TIG welding because of the precision. It takes more skill, but in reality, it's just a real precise gas torch. If you can gas weld, you should be able to TIG weld. You can buy a $500 or $600 MIG welder and do anything you want, but nobody's going to pay you to MIG weld. TIG makes your work a lot more professional looking, whereas a muffler shop will MIG weld it."
Q: Compare the quality of TIG welds to MIG welds for us.
A: "A TIG welder is always going to be a superior weld, especially on thin welds. It penetrates better and you can control it more. In a TIG, you actually can see the bead before you put any filler rod in, where a MIG filler is used as the actual electrical contact. A TIG weld is more 'in' the weld, where a MIG sits on top. Don't get me wrong, a MIG welder can get the job done if done right in the hands of the right user, but the TIG welder is going to be far superior for fabrication purposes."
 On the inside of a pipe weld, Lang uses a mild steel ER70S2 filler rod, which essentially turns two pieces of metal into one, fusing them together. Once the inside welds are completed, Lang likes to treat the outside to a silicon bronze filler for strength, and a nice appearance.
Q: Tell us about your choice of filler rod. What did you use for our Laguna?
A: "We were using 16 gauge steel, and the flanges are at least 1/4 inch thick. I like to use anywhere from a 40 thousandths to 16 thousandths Tungsten electrode in the torch. The smaller and sharper it is, the better you can control the weld, and make a finer weld. For filler rod, I like to use 45 thousandths mild steel rod-it's called ER70S2-and that's for pretty much any weld except the flanges. The '70' stands for 70,000 pounds of tensile strength. On the outside of the flanges, I like to use silicon bronze, which is like a brass filler brazing rod. This acts as a gusset on the tube because silicon bronze doesn't really penetrate the steel. It's more like a brace. I still use regular mild-steel filler rod for the inside."
Q: How do you select the amperage setting on a TIG welder?
A: "For amperage, you can run around 50 to 60 amps for the 16-gauge pipe. The flanges take more amperage for the thickness-about 90 to 100 amps. I like to set the amperage as low as possible to get the bead to start-to get it to puddle. Then I go 10 amps up from there. You don't need any more than that. This gives you more range on your pedal. By shortening up your total amperage, you're getting a wider range of control on the pedal. If you put the amperage at 200 amps, then you'd barely be touching the pedal and blowing holes. You want the amperage set at the upper range of the job you've got to do."
Q: What would you say to the guy just starting to TIG weld?
A: "When you first get a TIG welder, you're going to go through Tungsten electrodes. The hardest part is to learn not to touch the Tungsten to either the filler rod or your work. When you touch the Tungsten, then you've got to sharpen the Tungsten again, and that adds contaminants to the weld. TIG welding is the pickiest of all welding when it comes to being contaminant free. Cleanliness is the key.
"When you get a TIG welder, first, find someone else who knows how to use one to get advice, or even go to school for it. I learned from someone, and just went for it. I had three lessons with somebody I knew, and went from there.
"To start with, get a piece of metal and just get used to it. The hardest part is to get used to where the Tungsten electrode is. Just practice running a bead on the metal without any filler rod or anything. Next, practice by dropping actual filler rod in. Then I'd get some two-inch tube scraps, and start welding them butt to butt. The easiest joint to learn is a 90-degree intersection point with two tubes. The filler rod has a crevice to fall into, so there's a guide to follow.
Q: How hard is it for the beginner to do an exhaust system like ours?
A: "You should be able to do a system like this after playing around with a TIG welder for a month. For this kind of job, as long as you had someone to guide you to help set up the welder and your work, you should be able to do this."
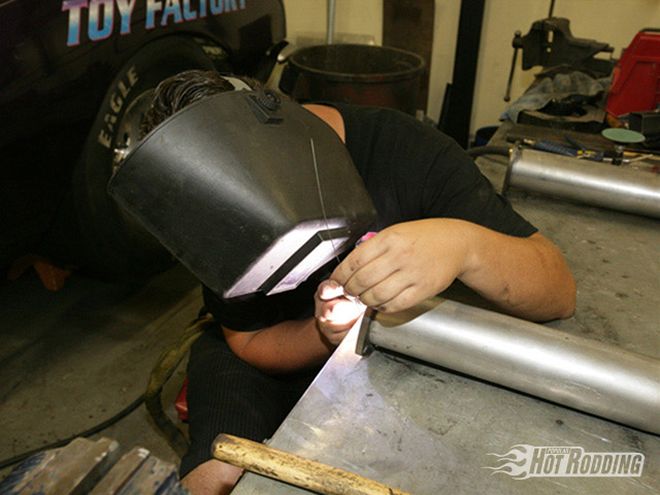
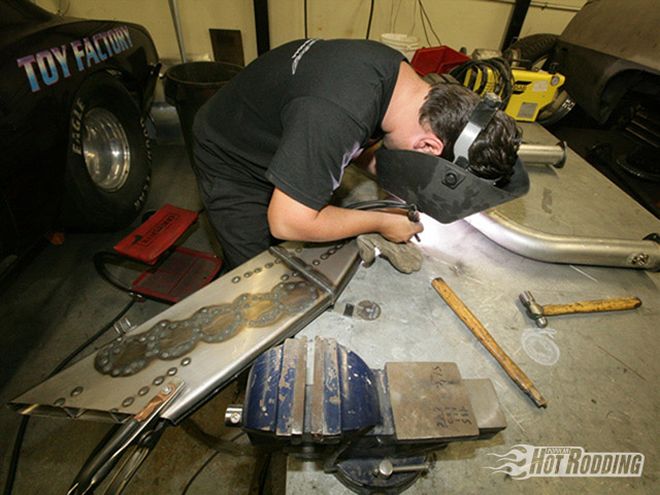 Lang puts the finishing touches on our "iron butterfly" side exit exhaust. It looked so nice when he was done, we didn't want to put it on the Laguna!
Lang's TIG Tips For Beginners
* "The gas actually starts flowing before the spark, and keeps flowing four seconds after the welding stops. Keep the torch over the weld when you're finished to keep the shielding gas flowing over the work while it cools."
* "Get your torch situated with your angle on the work. The torch should be angled toward the filler rod and in the direction of your work. The torch should be at 90 degrees to the filler rod."
* "Start pushing down on the pedal. Tip into it until it turns molten. You fluctuate the pedal to make your bead. You're making a sequence of puddles with the pedal and the filler rod. It's like a series of real close tack welds laid on top of each other."
* "Use a red two-percent thoriated tip-it's the most universal; you can weld aluminum and steel with it. You'll also need 100-percent Argon shielding gas, fed to your work at 10 psi."
* "Use Acetone to clean your parts before welding them. This is the best solvent to minimize contamination."