Depending on who you ask, discussion of the GM 10-bolt can be a polarizing conversation—people either hate it or love it. There are millions of vehicles on the road today with this axle and differential design, including Car Craft's ZedSled 1978 Z28 Camaro. Though the 12-bolt is still king, the 10-bolt has stood the test of time, even in a culture where bigger is supposedly better.
Our stock 10-bolt was plenty stout to withstand the torture of 165 hp from the ZedSled's stock 350 (yes, that was sarcasm), but we're looking down the barrel at 500 hp from our cammed-up 6.0 swap, so we thought we'd give the stock rear axle an upgrade and a facelift courtesy of Eastwood, Summit Racing, and Classic Performance Products. What we had at the end of a couple days' work is a rear axle that will stand up to our new power levels and handle the road better than the General ever imagined these cars could. The absolute bonus is that we spent about $1,200 for everything. ZedSled is an "affordable Pro Touring" experiment, with the car in freshened sheetmetal, new suspension, and a total expenditure of about $8,000 so far, including the $1,300 purchase price. We're not done spending and we're not done building, but at the end of this journey, we'll have a great car that will turn heads without having to dip into the 401k to finish.
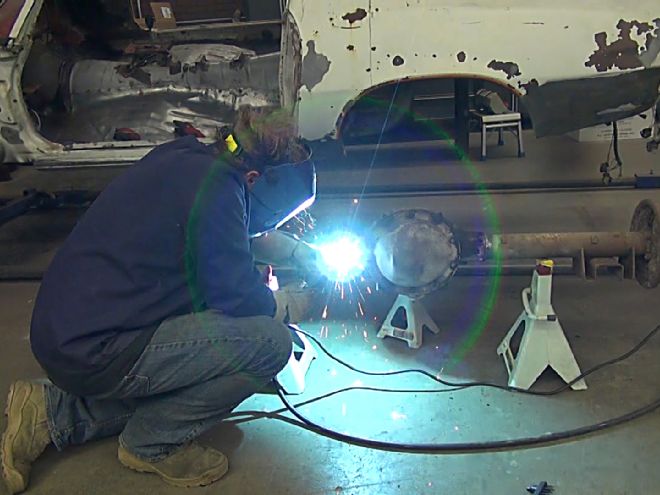
01 Welding axletubes to the differential centersection is an old trick—one with a lot of urban myths attached. You can safely use your MIG welder to do this, as long as you're armed with some good info. Most centersections are cast steel, not cast iron, and tolerate MIG welding. You test by grinding the housing. If you get orange sparks, you have a steel center. Whitish sparks indicate that it's iron and needs to be dealt with differently, generally by pre-heating the center to cherry red and using specialized MIG wire or filler rods. Orange sparks say our housing is steel, so no worries.
02 With our Eastwood MIG 175, welding the tubes is not difficult. The machine was cranked to 11, but it handled the duties easily.
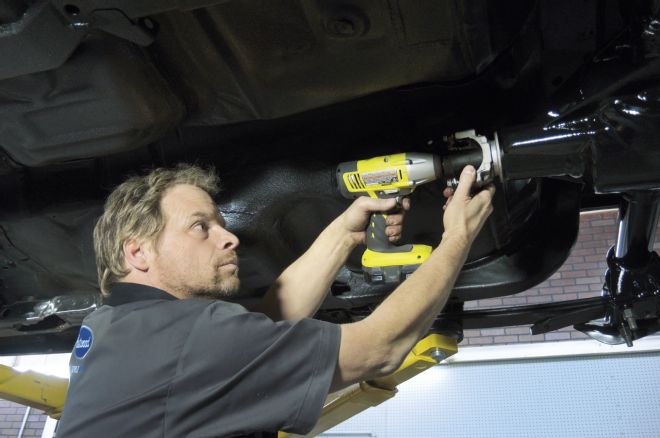
03 Our axle is mounted on CPP's dropped leaf springs. It has been media blasted, and coated with Eastwood epoxy. The stock bearings need to be removed, starting with the outer seals.

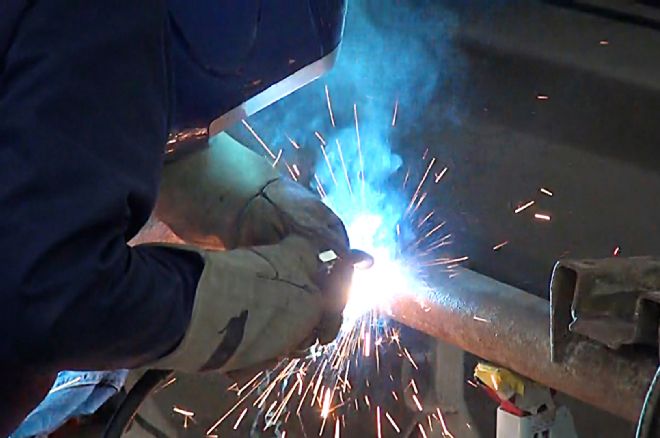
04 Just in case you think we may have warped the housing, check this photo—it's straight as a telescope! We pulled the weld pool off the cast-steel housing and dragged it onto the tubes. That was the key to prevent warping the thinner axletubes; that, and spacing the welds apart, which is a good practice in general.
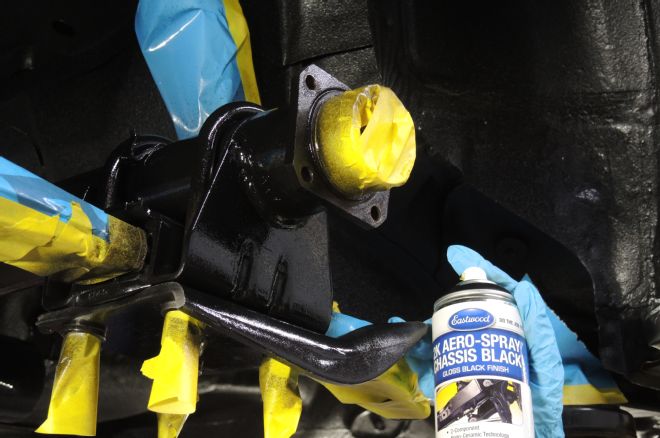
05 Eastwood's 2K Aero-Spray is professional paint in a rattle can, with a catalyst that's released into the paint. This will be durable and great-looking for a long time.
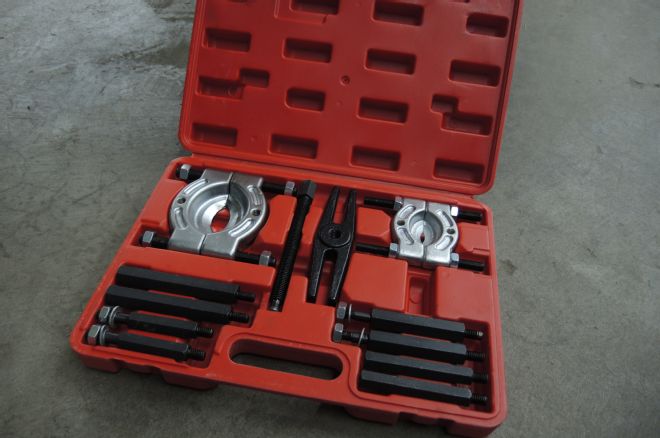
06 One of the specialty tools you'll need is a bearing cage separator. You can "borrow" this tool from most parts stores, but ours only cost about $60.
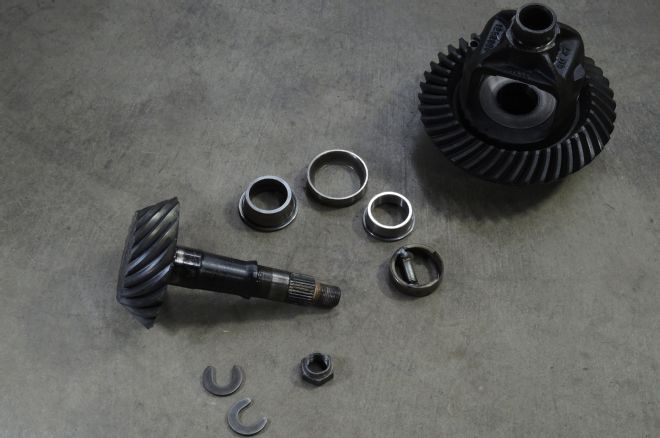
07 Save your old stuff. Our original pinion set was a 2.73:1 ratio, so it's useless to us, but the races from the bearings will become tools for pressing the new bearings on.
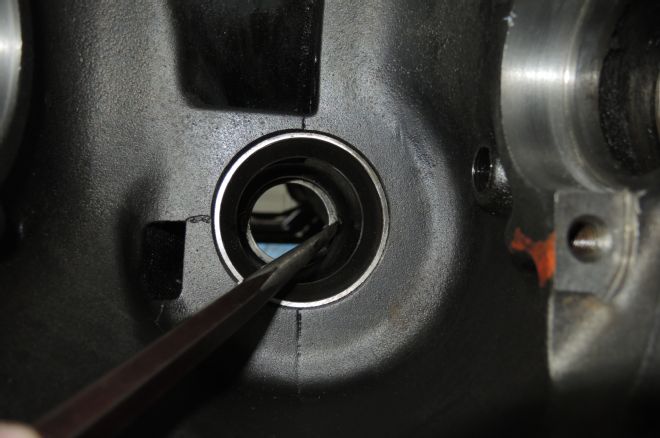
08 Don't take the shortcut of leaving the races in the diff housing. The bearings need a new mating surface and can wear out prematurely if you try to seat them against the old ones.
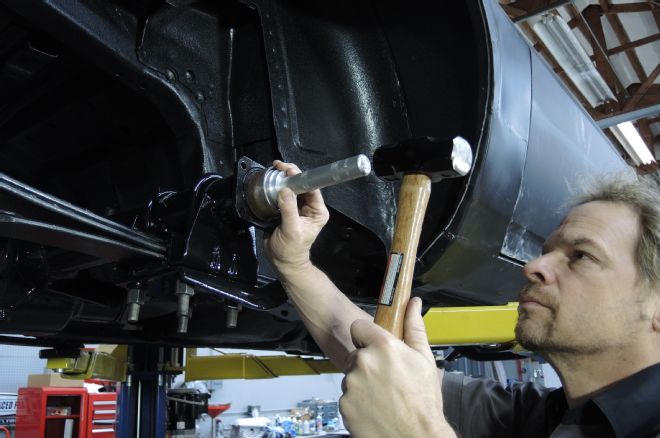
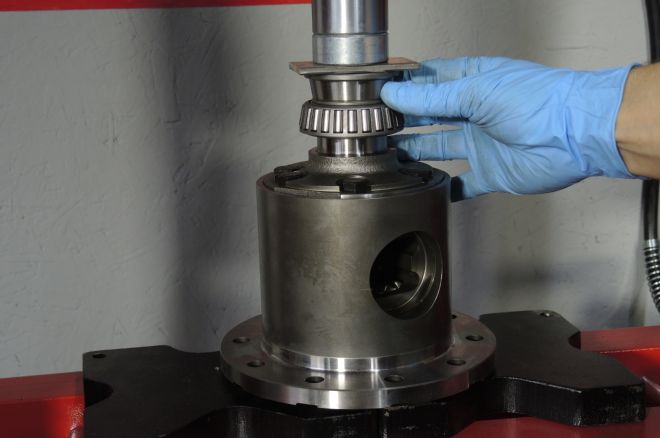
09 New axle bearings get pressed in first with our Eastwood seal-driver kit. A giant impact socket works for this, too—just match the size carefully.
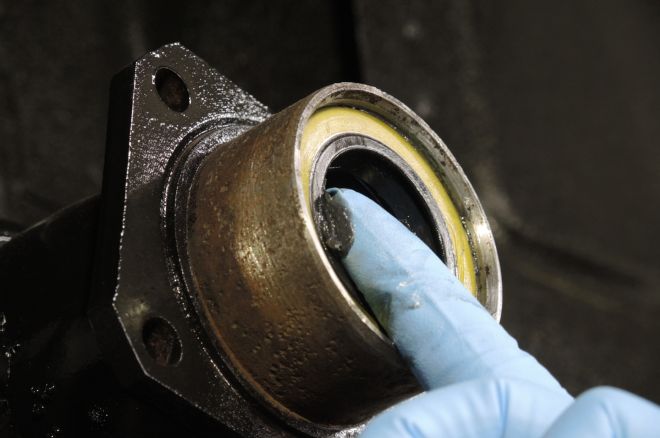
10 Lubing the outer seals before axle installation is a must—don't go dry-on-dry. Otherwise, you can tear the seal.
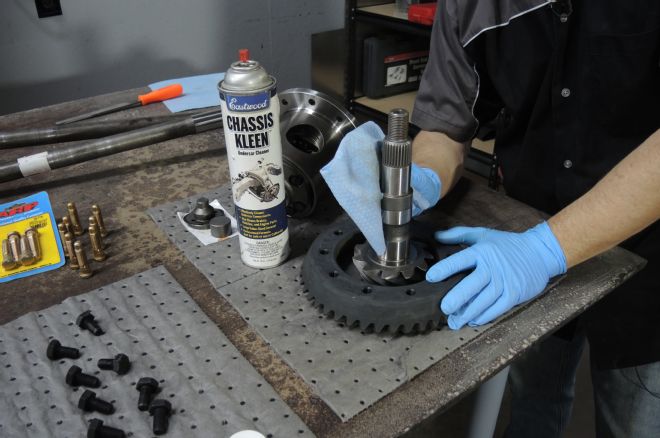
11 Our new 3.73:1 ring-and-pinion set came from Summit Racing and is a 3:73 ratio. They're shipped with a cosmoline coating and need to be cleaned off. Brake Clean or Chassis Clean is great for removing the protective coating.
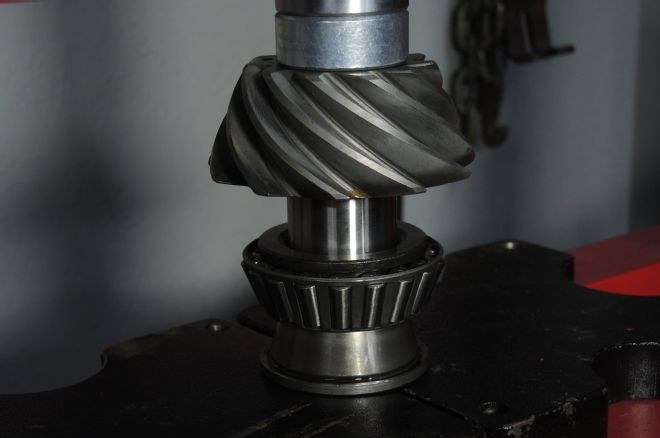
12 Here's where the old pinion bearings come into play. You'll have to split the cage and remove the bearings to use the old race, but once it's removed, you can use it as an installation tool when pressing the new pinion bearing on.
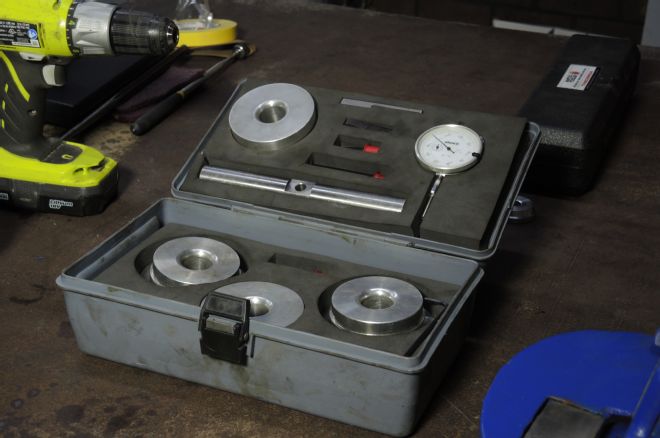
13 This is a pinion-depth gauge set. Obviously, it's a specialized tool, which we ended up borrowing from a buddy. We also borrowed the buddy, who showed us how to use the tool to install the pinion properly (thanks, Ian).This tool saves you multiple "in and outs" with your new pinion while setting the correct depth.
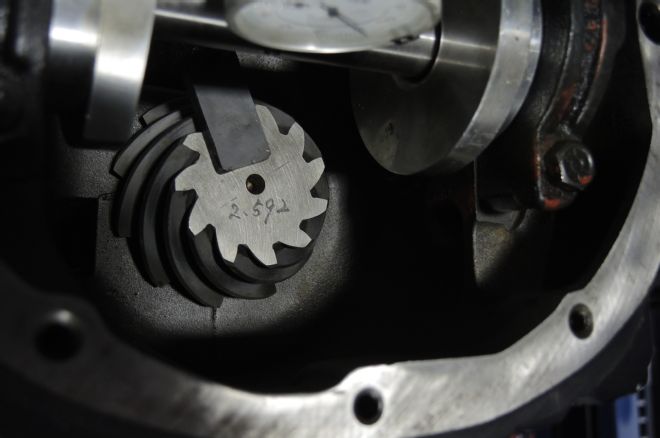
14 The tool gives a reading, which, when subtracted from the number scribed into the top of the pinion, gives you a depth calibration.
15 The calculation told us which shims to install under the pinion bearing. We had to remove the pinion bearing to install the required shim(s), then press it back on for final assembly into the axlehousing.
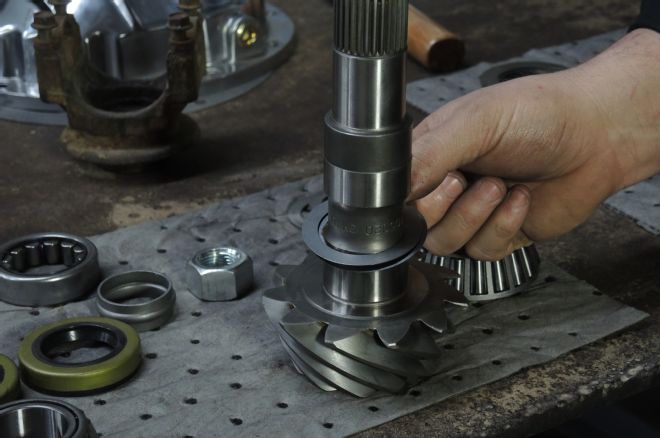
16 Using all-new bearings and races from Summit Racing ensures the new parts will break in properly.
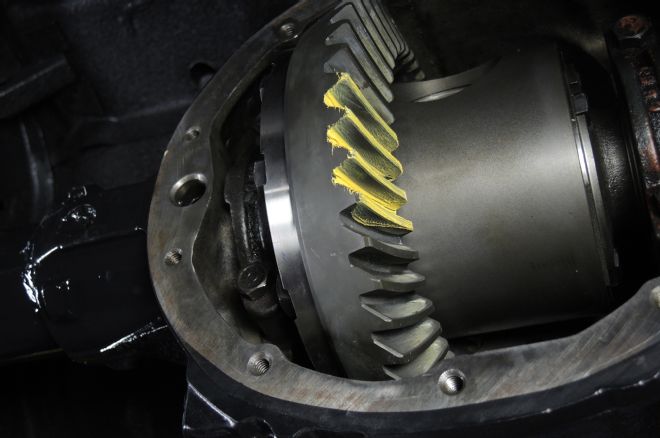
17 We used an impact wrench to tighten the pinion nut, but we used a torque wrench to set proper pinion-bearing preload: 14 to 19 in-lb for new bearings.
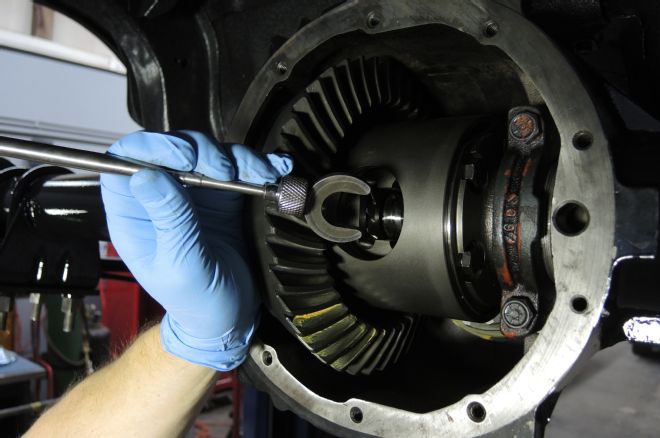
18 The Eaton Detroit Truetrac differential is what the cool kids reach for. It's a gear-type differential with no clutches to wear out and requires no friction modifiers in the gear lube. Plus, it has a higher torque rating then Eaton Detroit's clutch-type diff, making it the natural choice for our intended purpose on ZedSled. (We plan on beating the tar out of it.)

19 We dressed the back of the ring gear with a fine file to make sure the mating surfaces were free of burrs and sharp edges. .
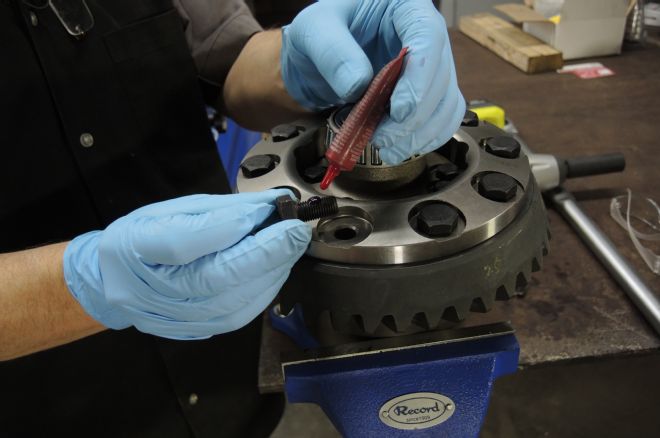
20 We used Loctite thread-locking compound and new ring-gear bolts, which we torqued to 65 ft-lb.
21 We installed the diff with the stock shim sets and crossed our fingers. Usually, you can get away with reusing the stock shims on either side of the differential carrier. Be sure to reinstall them in the same position (left or right) that they originally came from.
22 The gods smiled down at us and our pattern was acceptable—just slightly off center, toward the outside of the gear teeth.
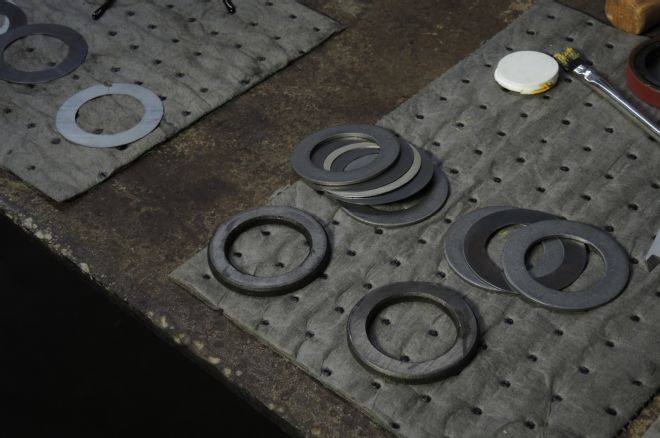
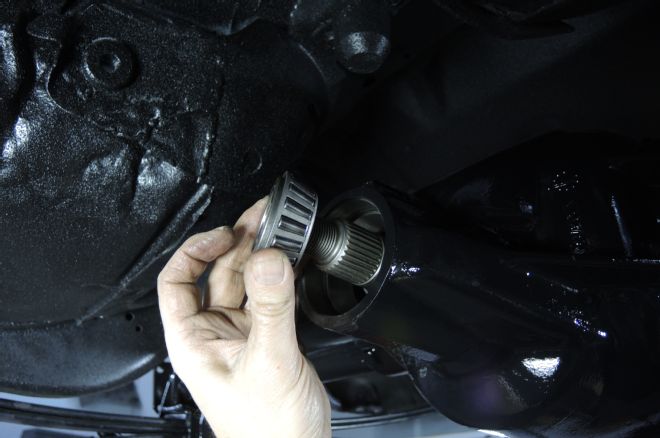
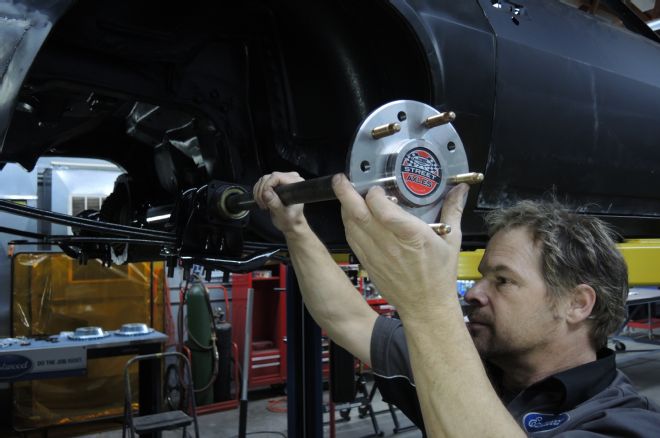
23 Summit Racing's installation kit was inexpensive and gave us all the shims and spacers we needed to properly set this diff up. Thanks to the pinion-depth tool, there wasn't a lot of guessing.
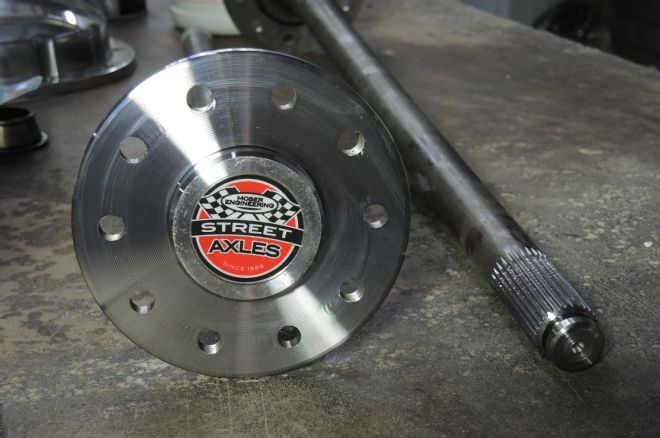
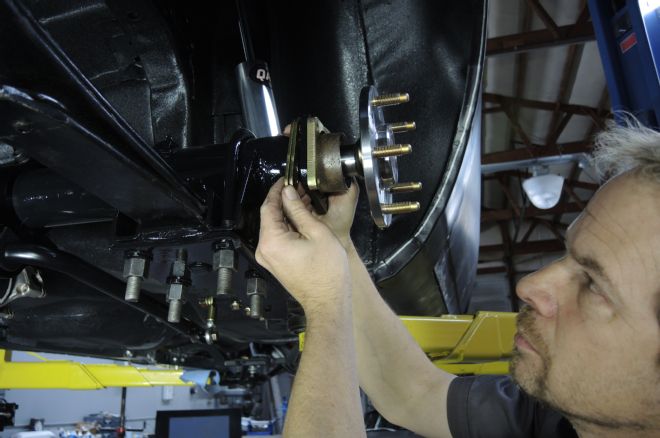
24 Next up was the axle upgrade, We tossed the 28-spline stockers in favor of Moser's 30-spline Street Axle replacements. A greater spline count and better materials equals more strength without going to a more expensive 12-bolt axle.
25 We took the opportunity to change to M12 axle studs to match CPP's C5 Corvette front setup. Our ARP replacement studs came from Summit Racing and fit a wide variety of late-model vehicles.
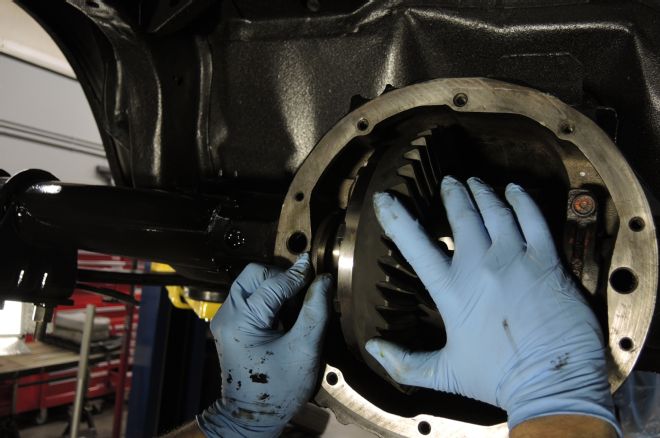
26 A magnet is the easiest way to install the C-clips without dropping them. These are the originals from the stock axle.
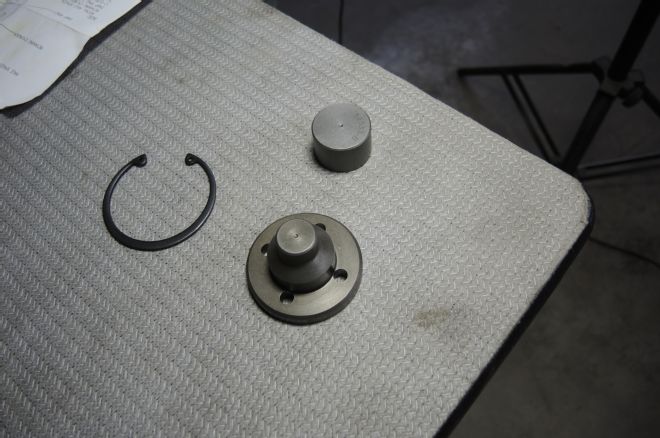
27 Here are the parts needed to complete the assembly of the True Trac diff. Yup, that's all. The button holds the axles apart, the retainer holds the button in place, and the spring clip holds the retainer in the carrier. No more fumbling attempts at walking the spider gears in. The Truetrac is very simple, very strong, and about the same price as a clutch-type, limited-slip-style carrier.
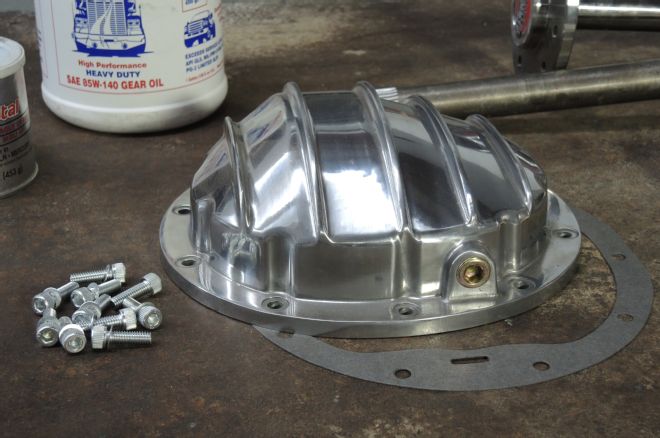
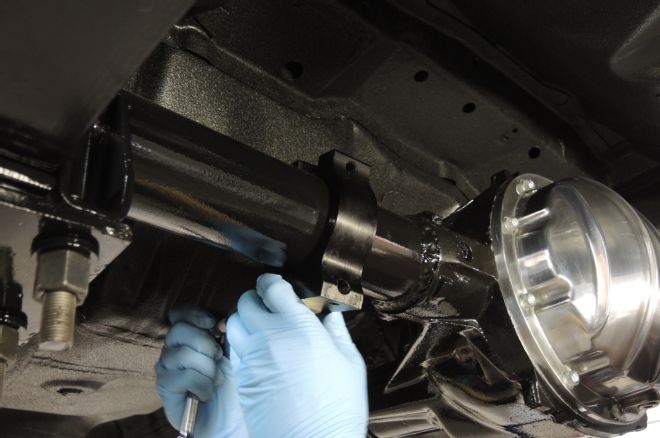
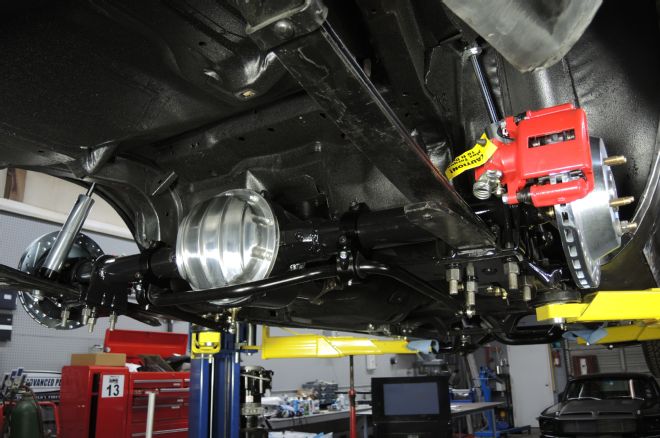
28 We indulged in a little bling for our housing by adding this polished aluminum cover. The stock one would work, but this was inexpensive and really looks great.
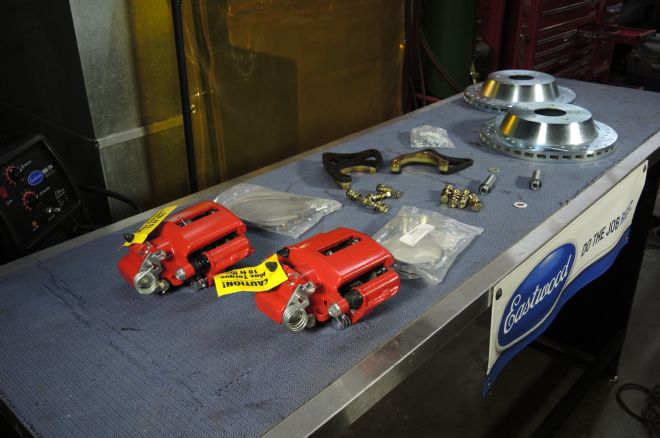
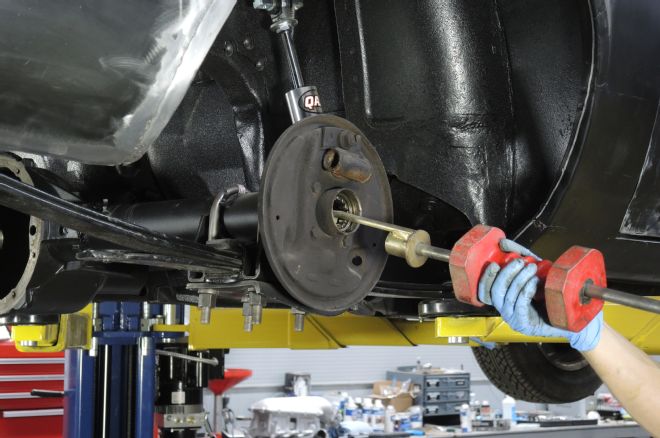
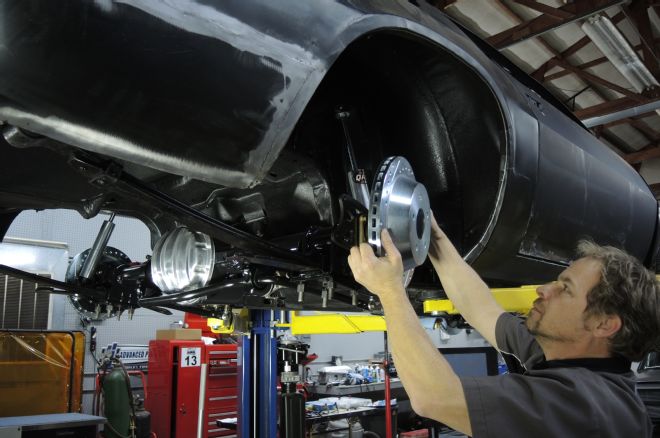
29 With the axle beefed up, CPP's 12-inch brake system goes on next. This is all part of CPP's Pro Touring Stage III system that we're using on ZedSled.
30 The drum-brake backing plates are long gone. CPP supplies clear instructions for installing the disc-brake adapter brackets.
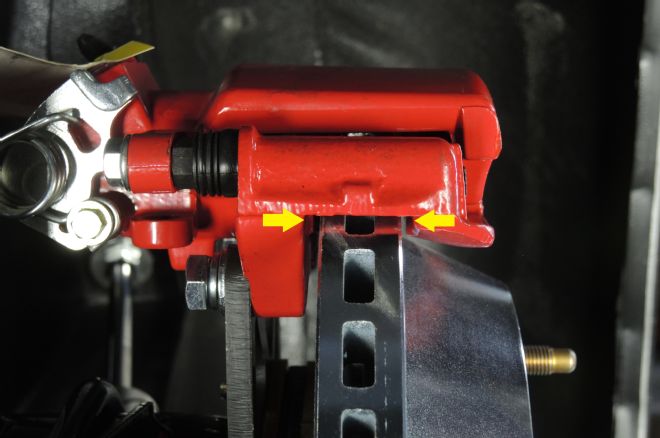
31 The rotors are vented, slotted, cross-drilled, and zinc-coated. You can see QA1's single-adjustable shocks in the background, which are also part of CPP's Pro Touring kit.
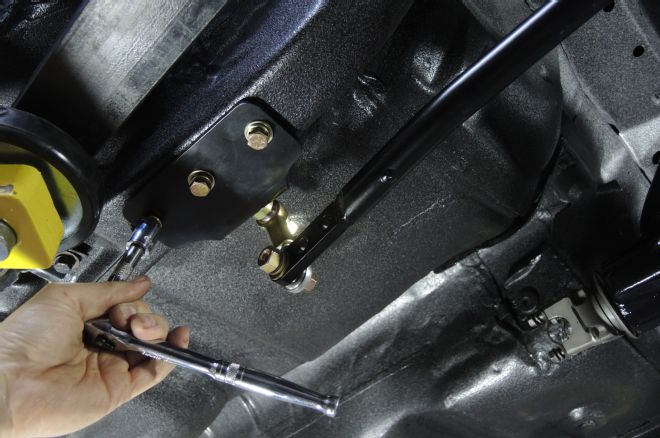
32 Aligning calipers is easy with the supplied shims; just space them so the distance on either side of the rotor is the same.
33 CPP's new, adjustable sway bar is a great design, which mounts to the axletubes with anodized billet compression clamps.
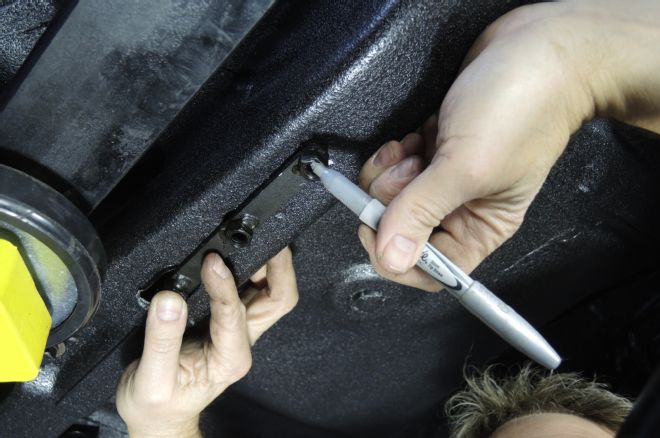
34 After drilling mounting holes in the lower framerails, a captured nut-retainer bar is inserted into the framerail.
35 The adjustable links allow you to dial in the amount of preload, or tension, you want for your setup. This design is far superior to the OE sway bar and gives you options to dial in the chassis.
36 The new setup looks fantastic. More importantly, it will hold up to the power levels we'll throw at it. A crate axle would have cost us about $3,500, and although that's a really good value, it was just more than we could afford. The total cost of these upgrades, including paint, was just under $1,200, and we're confident that we won't ever have to think about the rear axle again, regardless of the power levels we throw at it.