As far as the CUSTOM CLASSIC TRUCKS crew is concerned there are two great truths: there is no such thing as making just one modification and if a little of anything is good then more is better. These principles seem to be particularly applicable to our 1964 Chevy pickup project.
It all started with the installation of a Scott's Hot Rods and Customs bolt-in independent front suspension. Not only was the new IFS a major improvement over the original, but the swap was quick and easy and the lowered ride height up front looked cool. Of course that's when the issue of not being able to make just one modification cropped up. Obviously we would now have to drop the tail to match. On that end we installed a Scott's four-bar system and Panhard bar and planned to C-notch the frame to provide the necessary suspension travel.
Before tackling that project we stood back to look at the truck and admire our handiwork. That's when the "if a little is good, a whole bunch is better" school of thought came into play. The decision was made to lower the front an additional 2 inches with a pair of drop spindles from Scott's. It should go without saying that the changes to the front of the truck meant changing our plan for the back.
To get the rear of the chassis where we wanted it a C-notch was not going to provide for adequate suspension travel which meant the 'rails would have to be notched and stepped, so we made another call to Scott's. As we expected Justin Padfield, owner of Scott's, had the solution in the form of a frame stepping kit that includes a pair of inverted U-shaped frame sections that mimic the shape of the original 'rails. The replacement sections are high enough to allow enough axle travel for those who want their truck to "lay frame" or they can be trimmed for less extreme applications.
As with any frame modification, keeping the 'rails square and maintaining all the pertinent dimensions are major concerns. For those reasons the notches were welded in place before the original 'rails were cut away below them. In addition, angle iron braces were tack welded to the 'rails to hold them in position when the stock crossmembers were removed.
In our case the desired ride height put the rearend housing up against the bottom of the factory framerails, so we trimmed the notches to fit slightly above the top flanges. Stepping the frame would not only get the truck low, it was a way to provide more room for suspension travel—everything we were after. It all goes to prove more really is better.
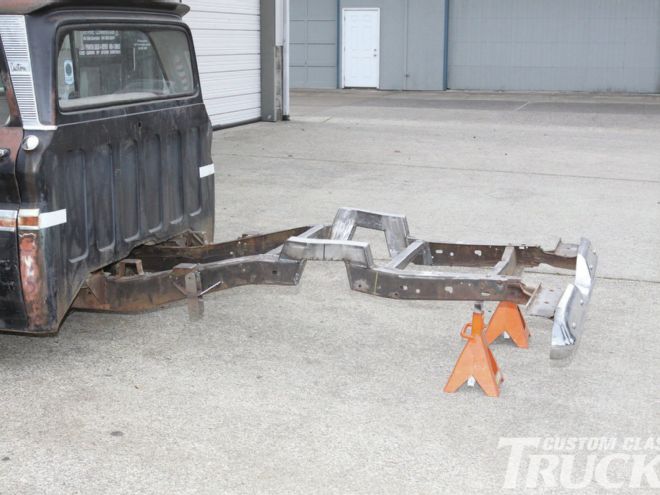
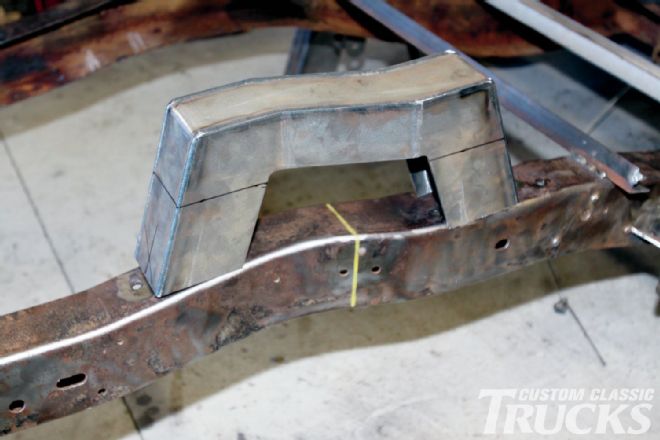
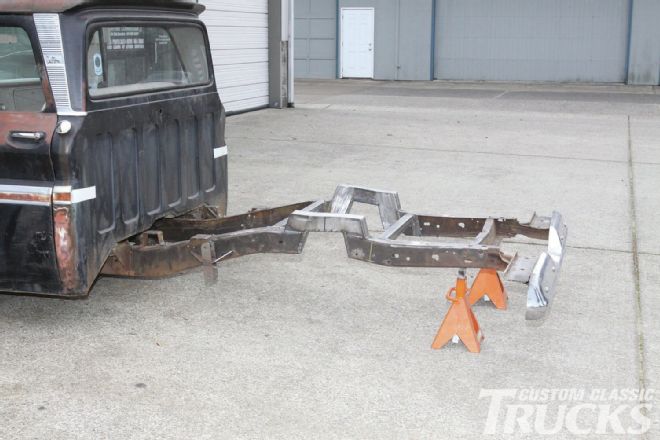 1. Scott’s Hot Rods and Customs supplied the step notch kit that made it possible to lower our Chevy and still have enough suspension travel for a smooth ride. The next chore is to pull the cab, then clean up the frame and shoot some paint.
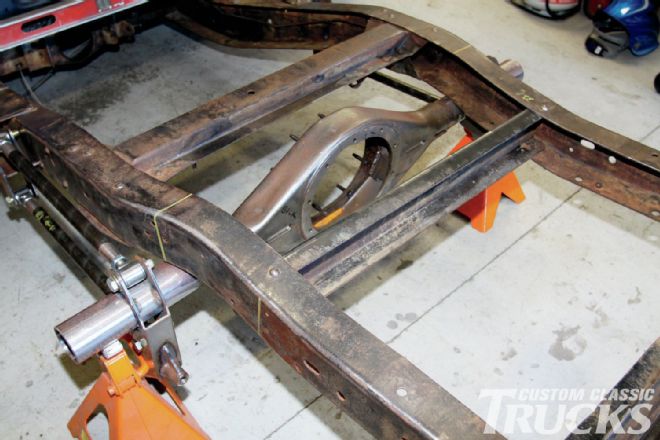
 2. This is the dilemma we were faced with—at the ride height we wanted the rear axle was against the bottom of the frame. Note how the frame narrows just behind the axle centerline.
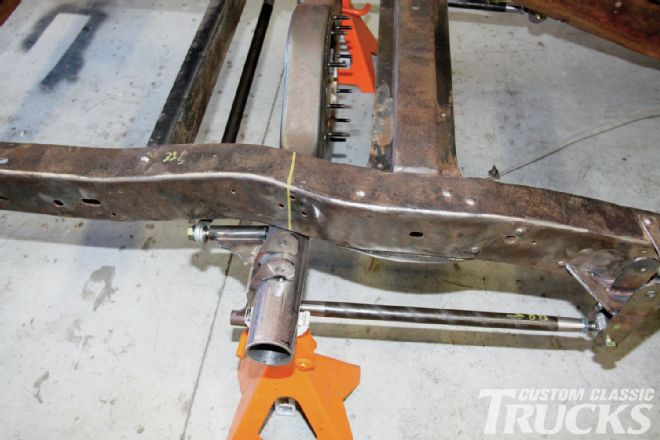
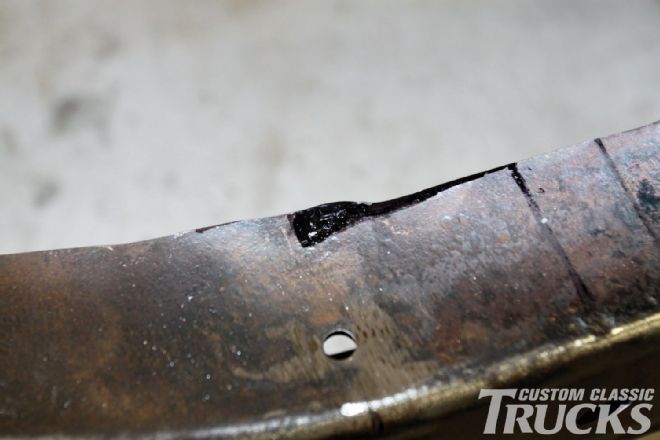
 3. There are crossmembers in front and behind the axle housing, both would have to be removed. Interestingly Chevrolet installed the crossmember behind the axle at an angle; it mounted the factory Panhard bar.
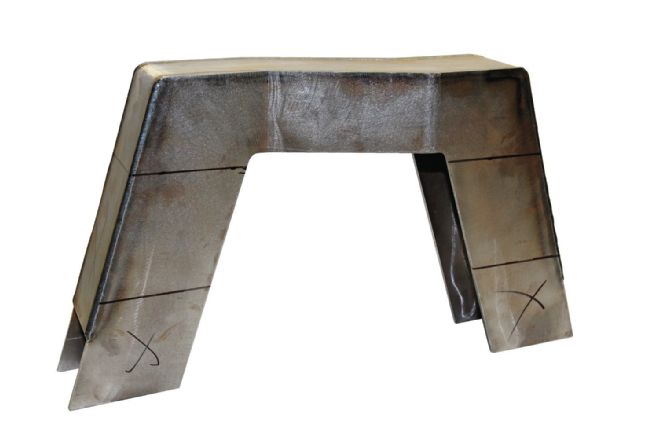
 4. Scott’s step notch kits are made from cold-rolled steel and formed to match the contour of the ’60 to ’72 frames. The steps are specific to each side of the frame—there is a left and a right.
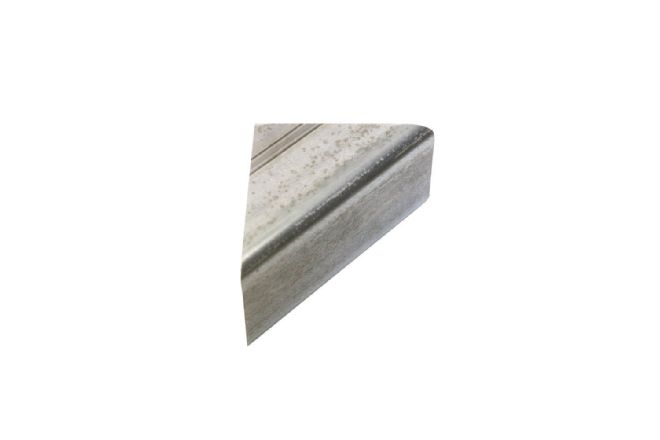
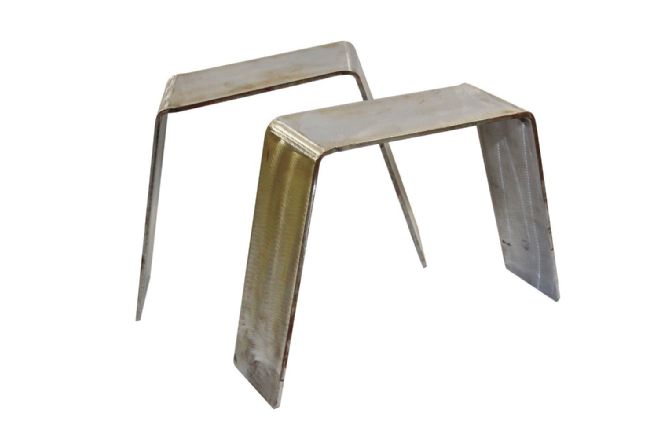 5. Included in the kit are pre-formed boxing plates to enclose the bottom of the steps.
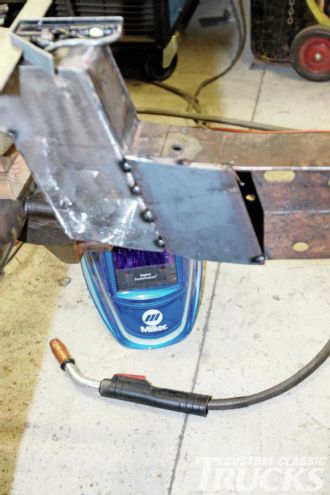
 6. With the frame leveled on jackstands, braces were welded to the ’rails with our trusty Miller weler before the crossmembers were removed.
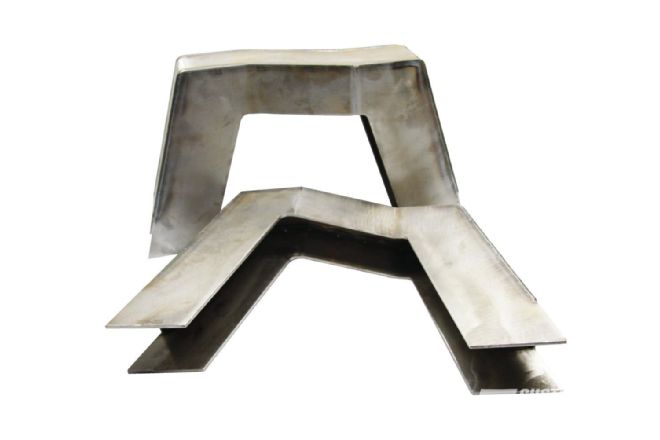
 7. The steps may be used as is or trimmed to fit the application. For our purpose the outside, front and rear of the steps were trimmed away at the marks.
 8. On the inside of the steps only the areas marked with an X would be cut off.
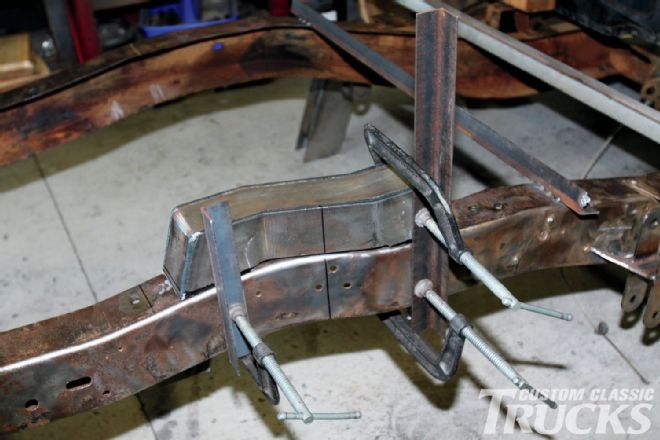 9. With the steps trimmed they were set on top of the ’rails—their centers were aligned with the marks indicating the middle of the axle housing. The outside surfaces of the ’rails and the steps were held flush with angle iron and C-clamps.
 10. To allow the steps to align with the outside surfaces of the framerails a small clearance notch in the top flange was necessary.
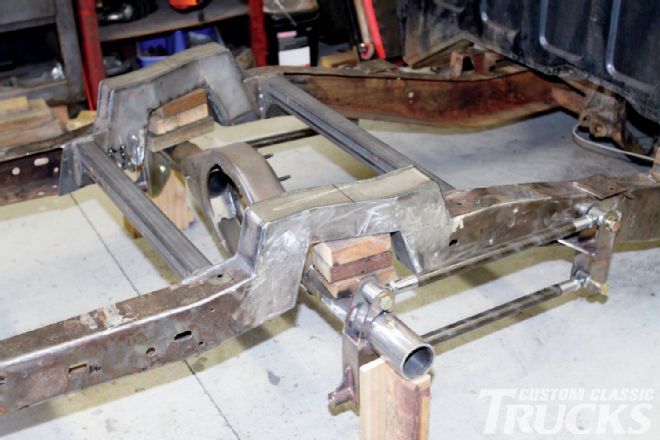
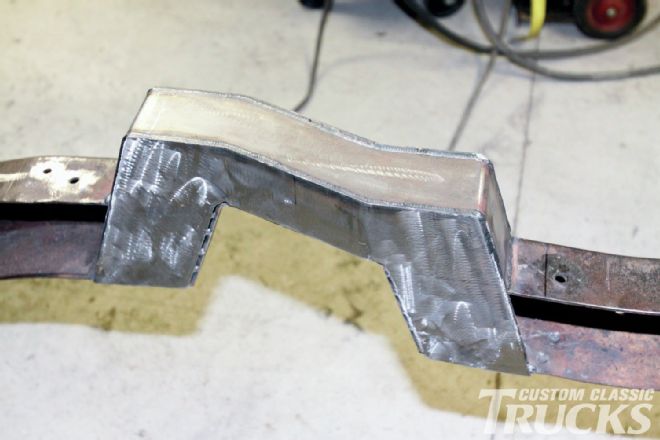 11. On the inside of the ’rails the steps were left long enough to act as boxing plates. Note the stock frame has not been cut away.
12. Here the inner legs have been trimmed and welded to the bottom framerail lip. The boxing plate has also been trimmed, tack welded in position, and the original frame has been cut away.
11. On the inside of the ’rails the steps were left long enough to act as boxing plates. Note the stock frame has not been cut away.
12. Here the inner legs have been trimmed and welded to the bottom framerail lip. The boxing plate has also been trimmed, tack welded in position, and the original frame has been cut away.
 13. On the outside of the frame the steps were welded to the top of the ’rails to keep the outside of the ’rails smooth.
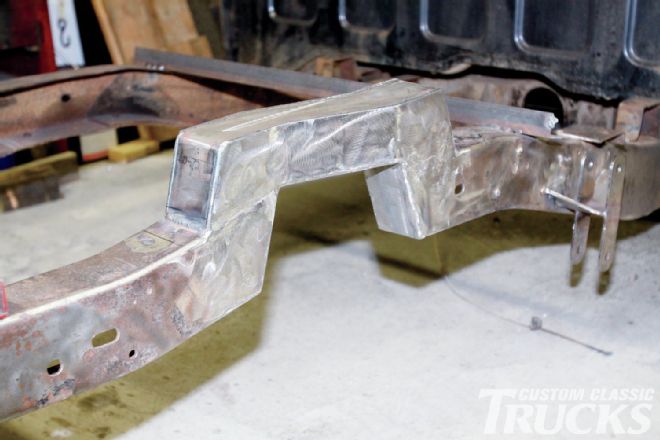
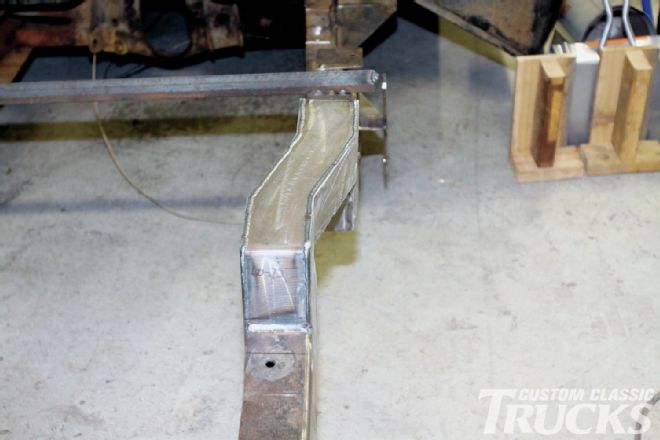 14. In this view the shape of the frame where it narrows can be seen. Like everything we’ve used from Scott’s the steps fit perfectly—they matched the shape of the frame exactly.
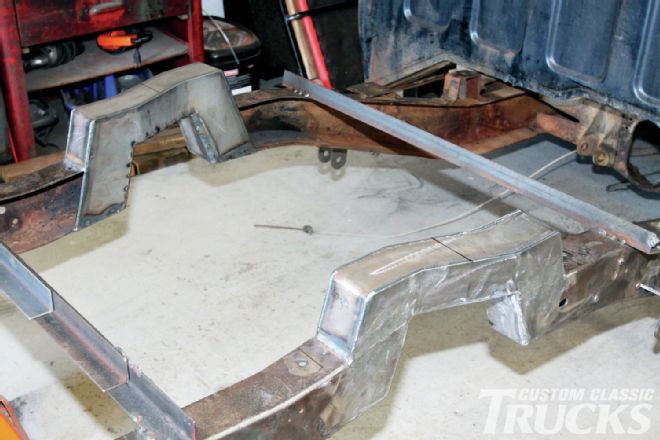 15. With both notches in place the next step was to replace the stock crossmembers that had been removed.
 16. To provide the necessary clearance for the center section, boxing plates for the new crossmembers were added in front and behind the steps.
 17. Gussets made from square tubing would be added to all the crossmember attachment points.
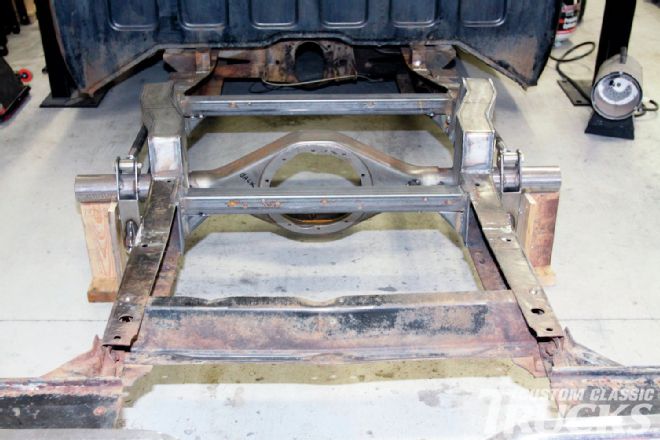 18. The new crossmembers were made from 2-inch square tubing and were welded to the additional boxing plates. Note the gussets have been added.
 19. The modified frame will allow slightly more than 4 inches of suspension compression with room for a bumpstop with the ride height we were after.