
Channeling a car is the simple or not-so simple act of lowering the body over the frame. This lowers both the overall profile of the car and the center of mass. It is one of The Big Three modifications in the hot rod and custom car world; chop, channel, and section, all different methods to achieve a lower profile. The reasons are often different for each modification, but it is safe to say that top chopping came about first as an effort to cheat the wind. By lowering the frontal area of the windshield the associated wind resistance was dropped dramatically and speeds increased. Channeling and sectioning tend to lower body roll on a car and this aids handling through curves. But for the custom crowd all of these modifications were all about restyling the car.
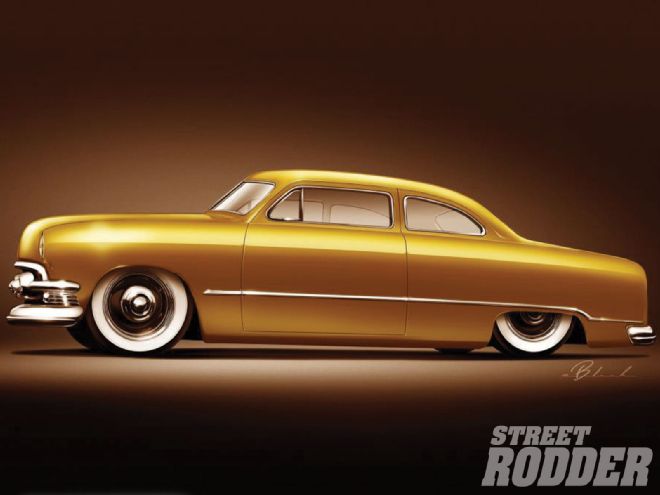
As most readers know, the 2013 AMSOIL/STREET RODDER Road Tour car is based on a '51 Ford sedan. The shoebox Ford has been a customizing favorite since 1949 and when the original car rolled into the Honest Charley Garage it also came with a great rendering by Eric Black. The rendering depicts an interesting approach to the shoebox Ford. By all rights this would be considered a radical custom, and yet the lines are so clean that it almost comes off as a mild custom. The top will be chopped, hood will be pancaked, and all trim will be eliminated. The stance is low, with a slight tail-dragger look.
The '51 was resting on a new Fatman Fabrications chassis, which lowered the ride height considerably, but to achieve that perfect custom stance seen in the rendering would require either Z-ing the frame or channeling the body. After studying the underside of the car it became apparent that the body could be lowered down almost 3 inches without cutting the main floor of the car. Wow, what a concept: channel a car without hacking up the floors. It may sound too good to be true, but with some careful reconfiguring of the body mounts on the frame and the body, you can actually lower the body over the frame with minimal disturbance to the main floor. You will have to cut a slot in the floor at the very rear of the trunk to allow the rear crossmember to come up flush with the floor. It should be noted that we opted to "angle channel" the '51, with no channeling at the firewall it then becoming progressively deeper channeled over each body mount as we move to the rear of the car. This angle gives us the tail-dragger stance we were looking for and it was a whole lot easier than Z-ing the frame.
Basically here is how it works: When Ford built the '51 Ford chassis they incorporated small pads or mounting brackets for the body to bolt to. This provided access to the nut and provided a platform for the rubber body mount. These brackets stand about 1-1/2 inches above the frame. On the side of the frame "outrigger" body mounts protrude and bolt to the outer rocker panel areas as the framerails ride well inside the rocker panels. Since all Fatman Fabrications chassis are designed to permit a stock body to be bolted in place, they too incorporate the body-mounting platforms on top of the chassis and the required outer body mounts. This makes mounting any '51 Ford body to a Fatman Fabrications chassis a simple, direct bolt-on operation.
When Ford built the '51 bodies a similar body mount bracket was welded to the bottom of the floor. This floor bracket lined up with the chassis bracket and the body was bolted in place. It too protrudes down about 1 inch.
It soon became obvious that by eliminating the raised mounting pad on top of the chassis we could effectively channel the body by 1-1/2 inches. By eliminating the corresponding body mounts on the bottom of the floor we could gain another inch. Since the Fatman Fabrications chassis is built from box tubing the only modification to the frame was cutting some access holes in the side of the frame so the nut on the body bolt could be accessed. We also had to move the coilover shock mounting crossmember that was welded to the top of the frame and move it down so it was even with the top of the frame. While you don't have to cut out the floor like a more conventional channeling job, due to our four-link coilover rear suspension we did have to cut clearance holes in the floor for the suspension brackets. If you were using the stock parallel leaf springs this crossmember would not be on the frame and the clearance holes for the four-link would not be required either, so the floor would remain intact. For that reason if you're planning on channeling your body over a Fatman Fabrications frame it may be easier to simply order the chassis with stock-style rear leaf springs.
Working at Honest Charley Garage made this process easier because of their state-of-the-art shop includes a lift. By using the lift the body could easily be raised off the frame and then lowered back down for test-fitting, and there is a lot of test-fitting.
As we removed the chassis body mounts and lowered the car down it became apparent that we would have to remove a section from the new Dennis Carpenter Ford Restoration Parts body mounts that we had welded in place while repairing the extensive rust in the car. This was a simple matter of cutting a section out of the bottom of the mount and then welding the lower piece back onto the upper portion of the bracket. We cut a little extra out of these body mounts as you can always shim the body back up, but you sure can't shim something down!
We now had the body resting on the framerails, but the brackets were still on the floor pan. This dropped the car a little more than an inch and while that may not sound like much the difference in profile was both noticeable and remarkable.
At this point we could have settled for a moderate channel and never fired up our Miller Plasma cutter. But to be true to the rendering we required a deeper channel so we moved onto removing the body mounts that are welded to the bottom of the floor.
A die grinder and cut-off wheel made short work of removing the mounts. Once again the body was lowered down to check for clearance. At this point we were getting very close to the top of the center X-member on the Fatman frame and we knew we must have a gap between the top of the frame and the body.
Next we removed a strip from the very rear of the trunk floor. This allowed the body to slide down over the rear crossmember. For some reason we forgot or missed the second to last set of body mounts on the floor pan and that turned out to be a good thing. By leaving them intact the body was down to within less than 1/2 inch of the top of the frame but still gave us the 2-3/4-inch drop (at the rear pan) we were hoping for.
After some shimming and measuring we had dropped the car on a very pleasing front to the rear angle with minimal invasion of the floor plan. Mounting the rear bumper will require some custom mounts and sheetmetal work but the overall effect is very rewarding. As the profile on our '51 Ford goes down the cool factor goes up.
For a better understanding of how the entire process works let's follow along with the team at Honest Charley Garage as they channel the shoebox and save the floor.
1. With all the rust repair out of the way it is time to start modifying the car to look like the rendering provided by Eric Black. The first step was to channel the body. We opted to "angle channel" the car, dropping it more in the rear.
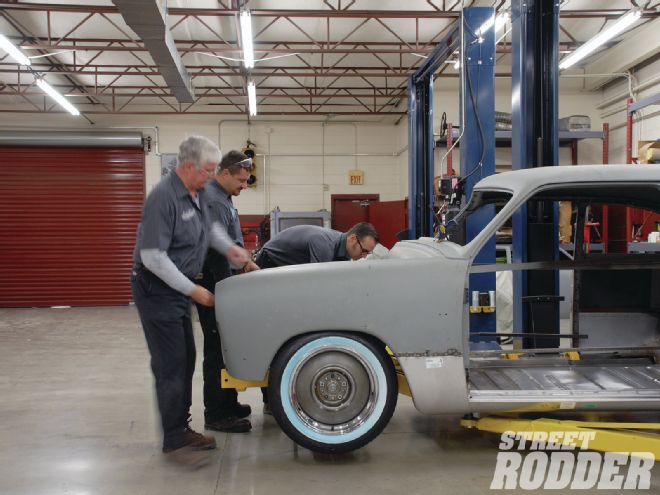
2. The first order of business was removing the front clip as we would be lifting the body on and off the Fatman Fabrications frame during the channeling process.
3. After raising the car, Delton Scott begins unbolting the body. Ford was serious about mounting the body in 1951 as they use no less than 16 bolts to hold the body on the frame. Notice how close the rear crossmember is to the floor pan.
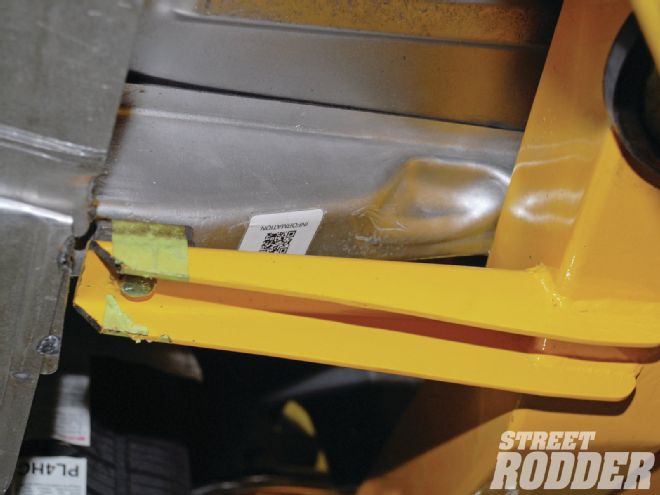
4. The Fatman Fabrications chassis employs the same style body mount as the original '51 Ford. The raised platform-style body mounts will be cut off the frame to channel the body down over the frame. The raised body mounts on the body will also be removed.
5. These outriggers on the chassis reach out to the factory body mounts that are located just inside the rocker panels. The new body mounts are from Dennis Carpenter Ford Restoration Parts. We'll section the body mount to lower the body.
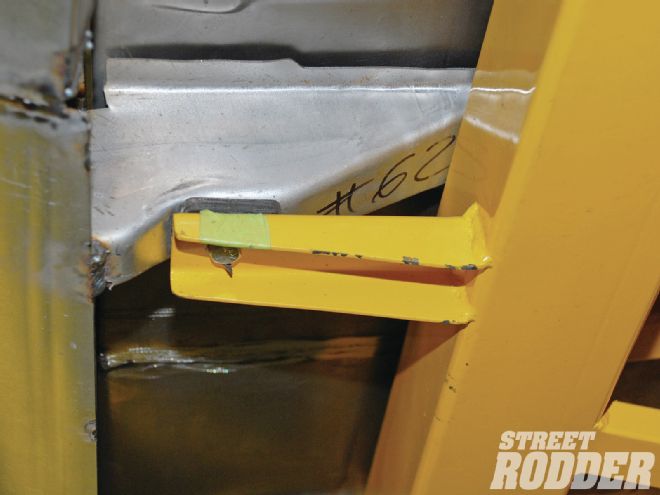
6. The rear outrigger mount is shorter and deeper than the front mount. We will section the rear mount 1/2-inch deeper than the front mount to achieve the desired angle on the channeling job.
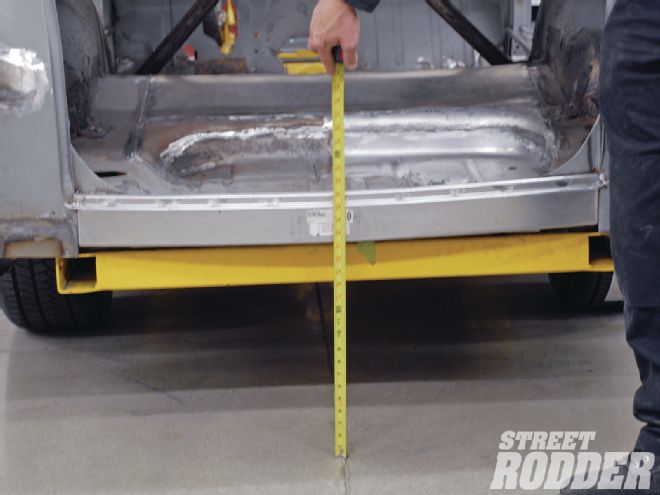
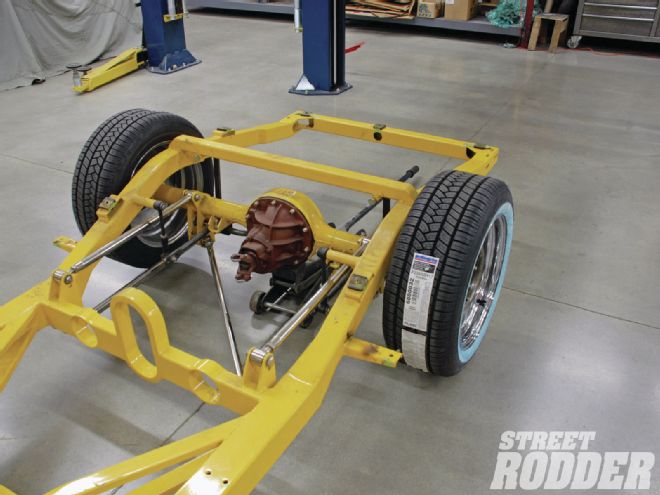
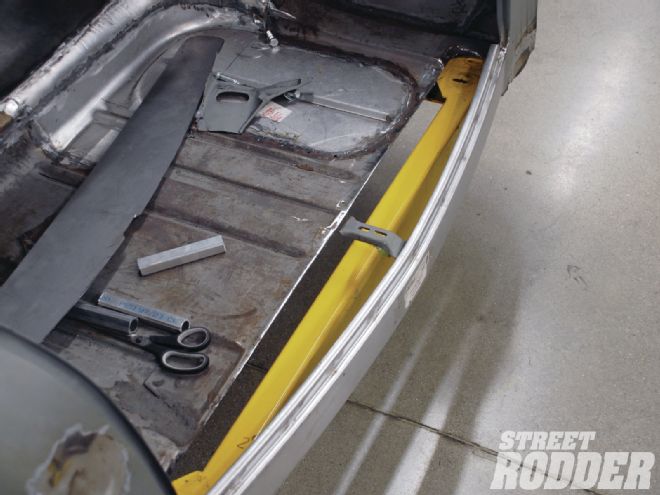
7. As you can see the Fatman frame drops the rear of the car, but we need to find several more inches to achieve that cool down-in-the-back custom look in the rendering.
8. Our baseline measurement shows 17-1/2 inches to the bottom of the rear pan, which by the way is another Dennis Carpenter Ford Restoration Parts replacement panel. After channeling this pan was dropped 2-3/4 inches.
9. Because we wanted the improved handling provided by QA1 coilover shocks we will have to notch the floor to clear the associated four-link brackets, Delton Scott marks the area to be removed for clearance.
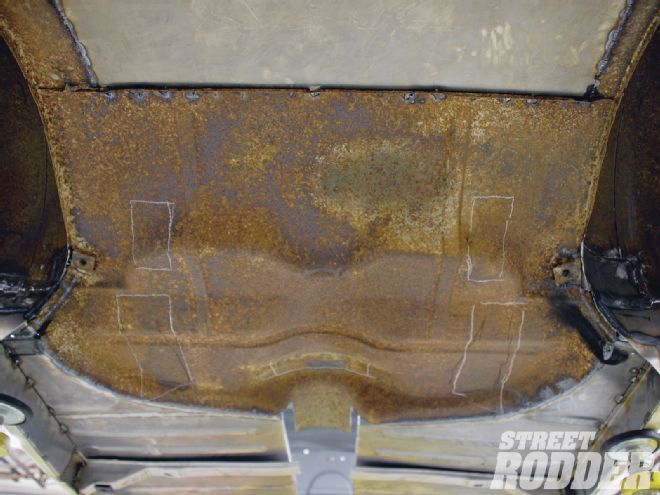
10. After marking the bottom side of the floor in all areas that will require clearance, the body was lifted off the frame.
11. The last body mount in the rear of the car is located in the back corner. This area of the floor will be notched to allow the body to drop over the rear crossmember.
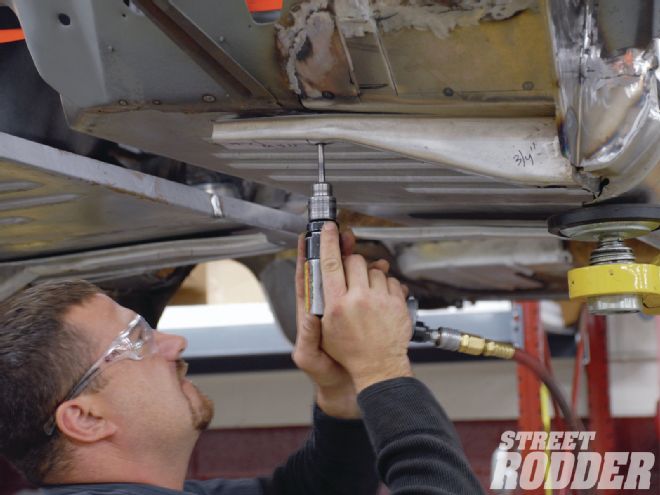
12. Richard Marter drills through the floor using the frame mount as a guide to properly locate the hole. The stock rubber body insulators will be used between the modified mounts and the floor.
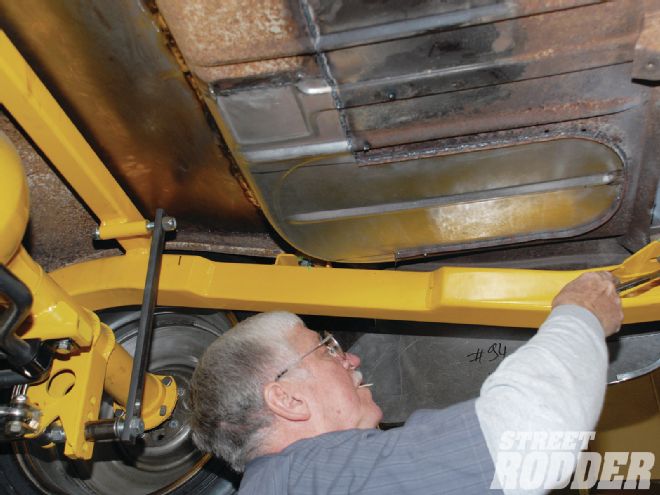
13. With the body off the frame it is time to remove and relocate the rear crossmember. Note the raised pads atop the framerails that serve as body mounts.
14. Looking from the side, it becomes obvious that we can lower the body 1-1/2 inches by simply removing the stock-style body mounts from the top of the rails.
15. Working in a state-of-the-art shop like Honest Charley Garage has its benefits, such as this lift. Using the lift to raise and lower the body makes life easy, but this job could be done at home with jacks as well.
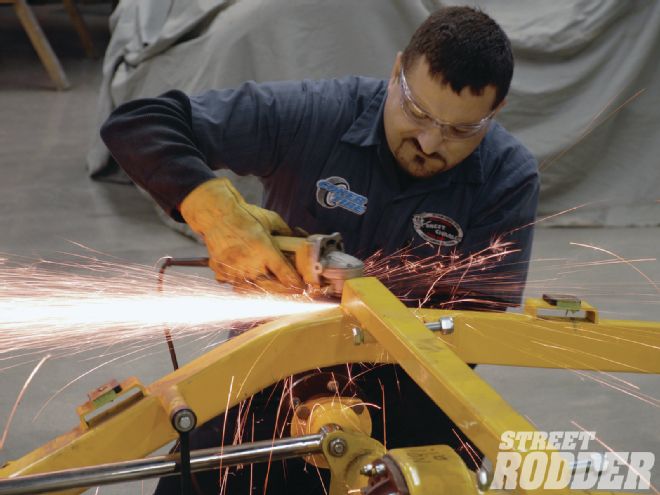
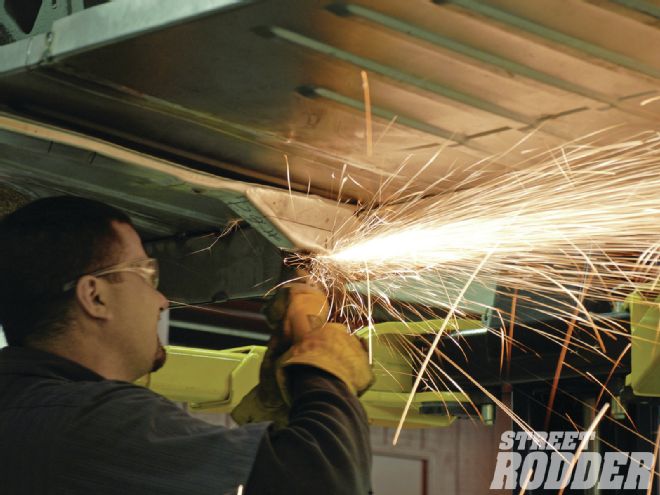
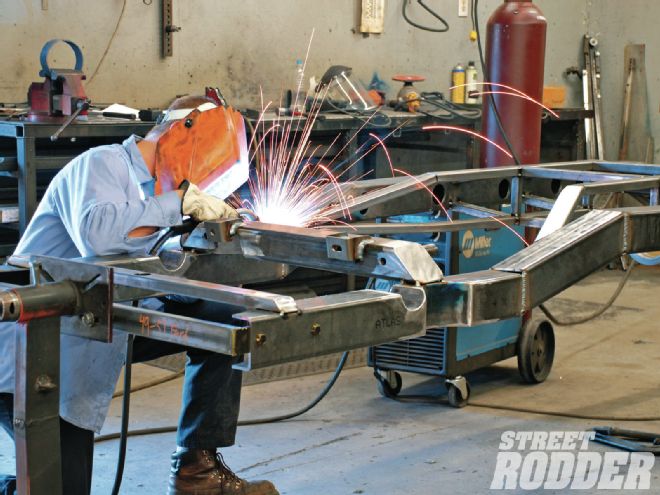
16. Marter takes the cut-off wheel to the welds around the rear crossmember, in the process removing and relocating the crossmember.
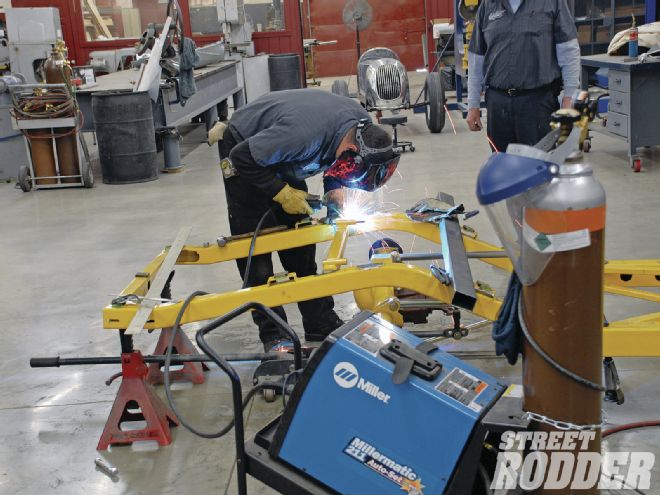
17. After trimming the crossmember to move down and to the rear, we fired up the trusty Millermatic and welded the crossmember in its new location.
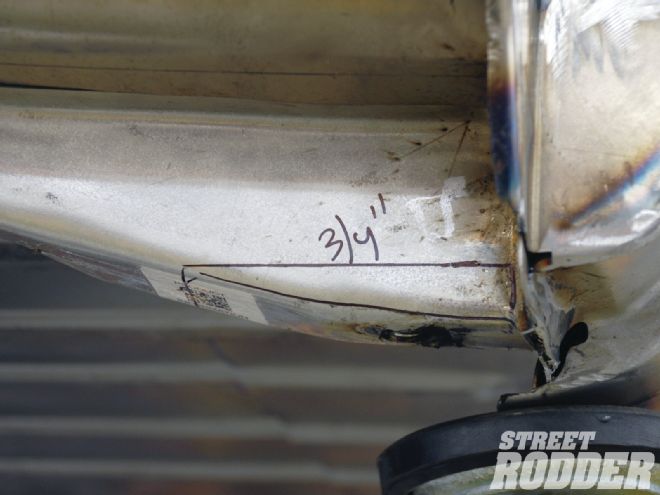
18. In the April issue of STREET RODDER we covered repairing the floor and body mounts with parts from Dennis Carpenter Ford Restoration Parts. This front mount will now be sectioned 3/4 inch to lower the body.

19. Prior to modifying the mount we drilled the inboard body mounting hold up through the floor. This will ensure perfect alignment later.
20. After carefully marking the cut lines with a square we cut the bottom section out of the mount. Team Honest Charley Garage will fabricate new flat bottoms for the mounts.
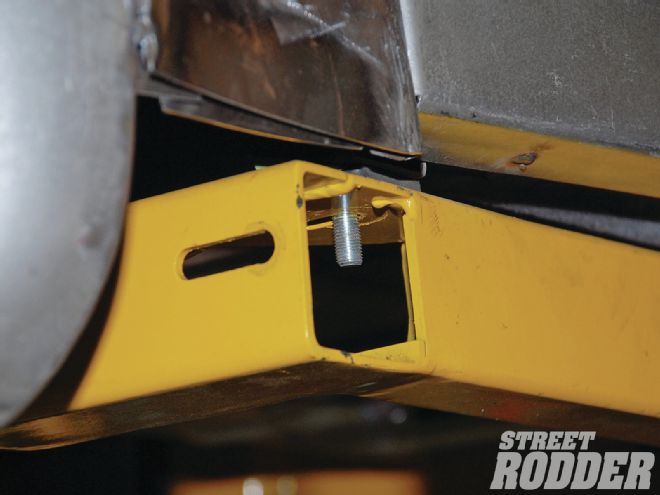
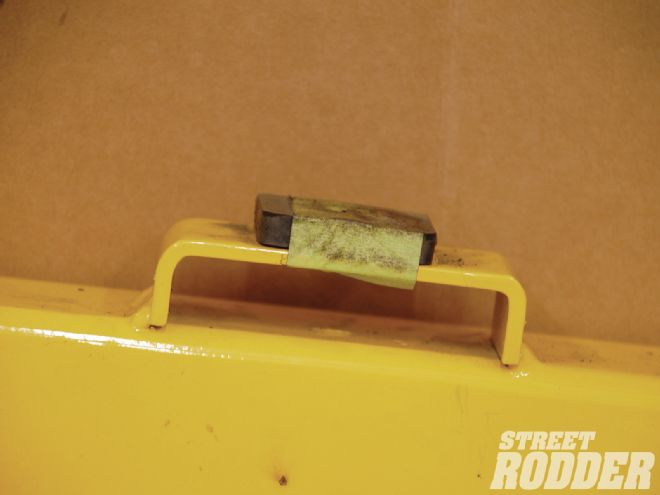
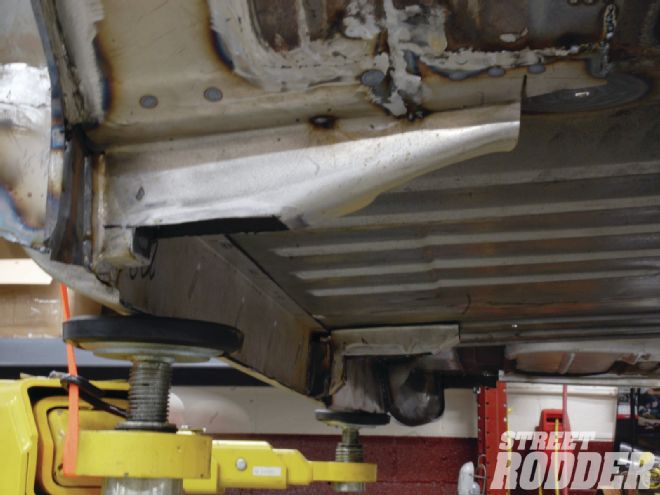
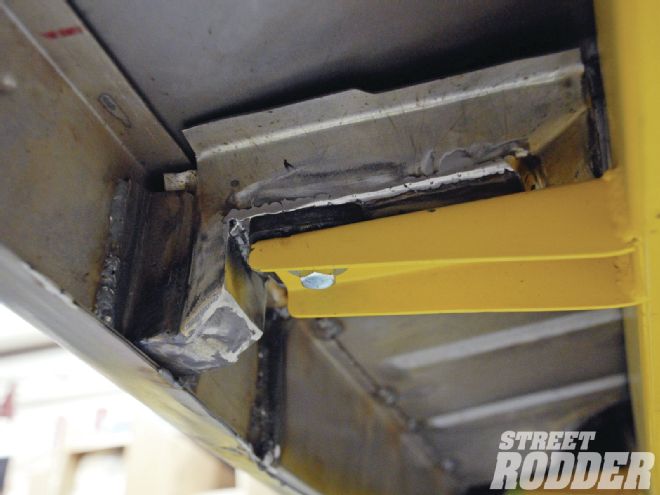
21. This is the modified rear mount. You will notice the end of the mount has also been trimmed to provide clearance between the top of the X-member and the new, lower floor pan.

22. The front mount will be modified with a similar cut. We will remove 3/4 inch up front as the channeling depth is less up front.
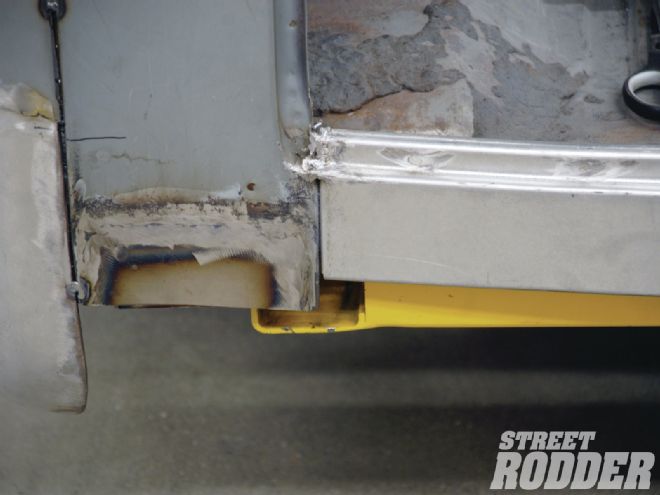
23. Here we can see both the front and rear side body mounts have been notched in the channeling process. We cut the notches deeper than the actual channel depth to allow for some body shimming later.
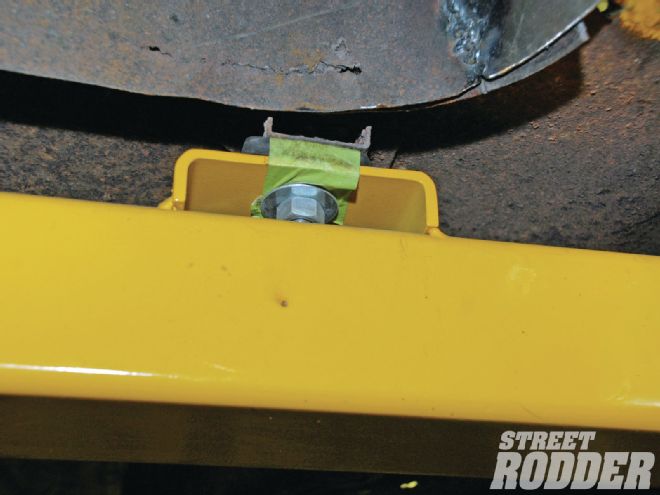
24. Simple pieces of 1/8-inch flat stock were cut to fit the opening and then MIG-welded in place to form the new mount. A nut is welded to the inside of the plate to receive the body bolt in the blind body mount. Note the factory rubber insulator being used.
25. The rearmost section of the trunk floor was neatly cut out with a Miller plasma cutter to allow the rear crossmember to come up even with the trunk floor.
26. A piece of 1/8-inch plate was fabricated with the proper body mounting holes drilled. This stout piece of metal makes for one very solid body mount, and once again the stock rubber insulators are used between the body and frame.
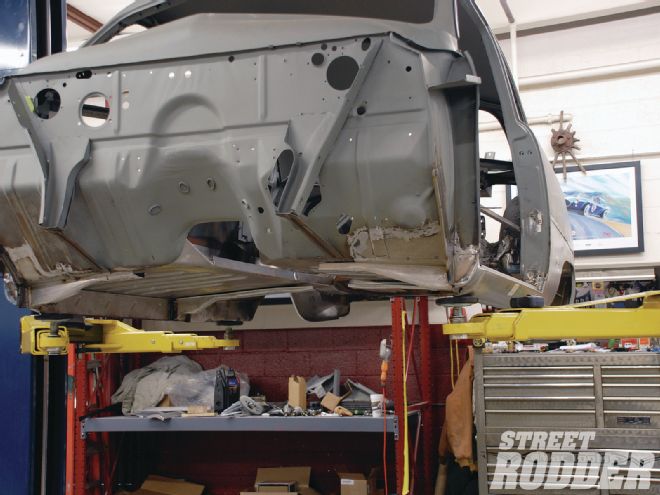
27. With the body back on the frame we can see the number of holes required to clear the four-link. Since this is going to be a "business sedan" with no back seat, a new floor section was planned.
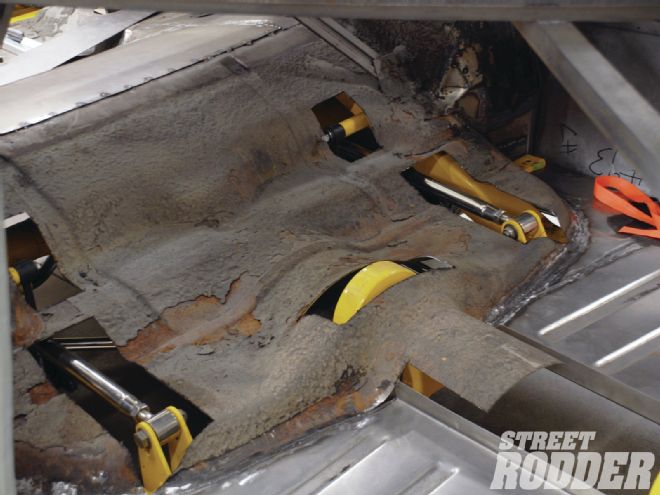
28. The raised floor will provide plenty of room for Jerry Dixey to carry his wares and it also provided lots of room for suspension travel. If desired, a seat could be mounted to this raised floor.
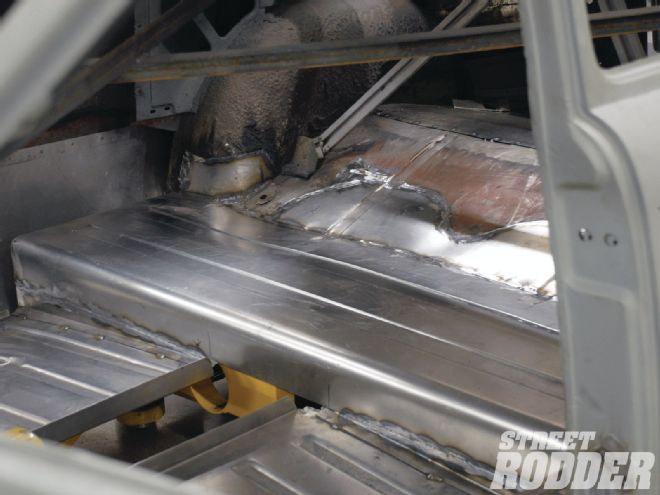
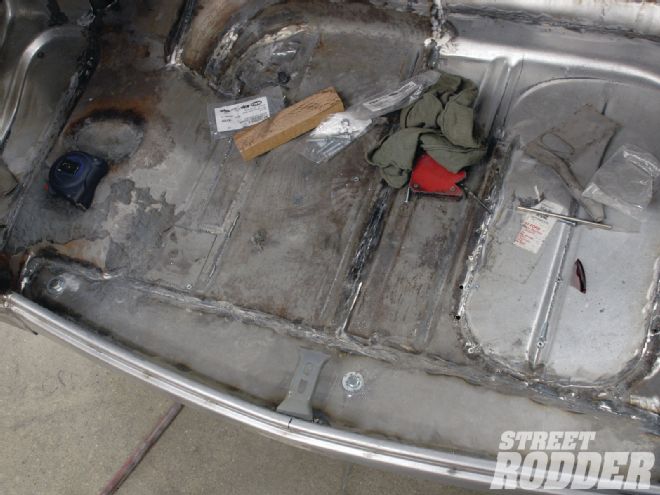
29. Looking at the rear of the car it is clear we have gained a lot of lowering, the rear pan is now almost even with the bottom of the rear crossmember.
30. Looking from the trunk forward the main floorpan is completely intact, something you seldom see on a channeled car.
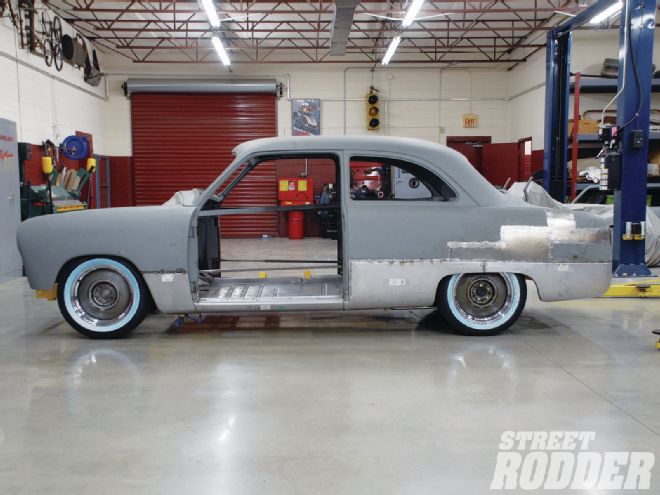
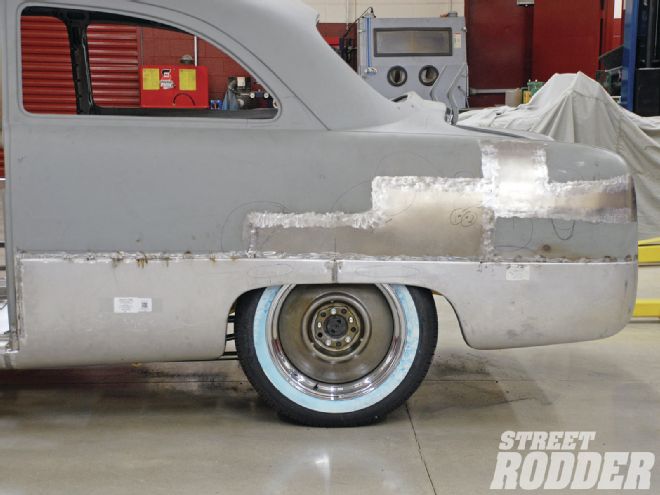
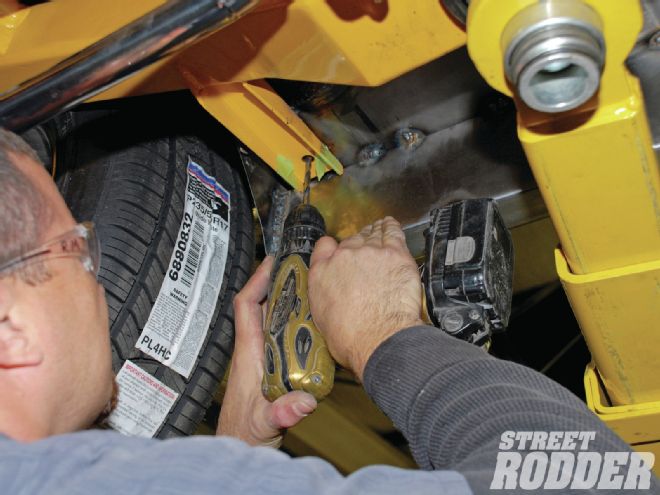
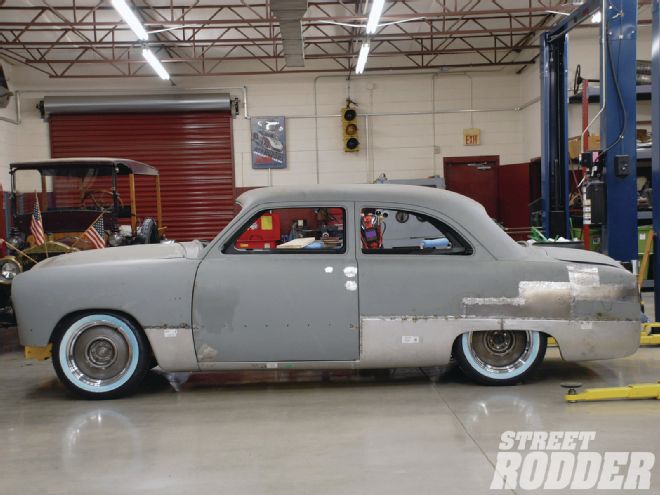
31. This side profile tells it all, notice how the top of the rear wheel opening is now level with the top lug nut. Before the channeling that same lip was well above the hubcap lip. The angle channeling made a dramatic difference in the profile and mood of our '51 Ford.
32. One look at the Eric Black rendering and you can see Honest Charley Garage is well on the way to matching the rendering. Next up on the modification list is chopping the top. We'll show you how in the next issue.
Watch the guys over at Honest Charley Garage work Body Drop-Ride Height here.
Check out more videos covering the 2013 AMSOIL/STREET RODDER Road Tour car build here.