
Unless legislation swings completely out of our favor, old cars should endure as one of the strongholds of mechanical creativity. We can shuffle the deck with at least four generations of cars and engines. Simply hybridize your favorite car with your favorite engine and you’ll tap into a decades-old spirit. All it takes is a little bit of imagination.
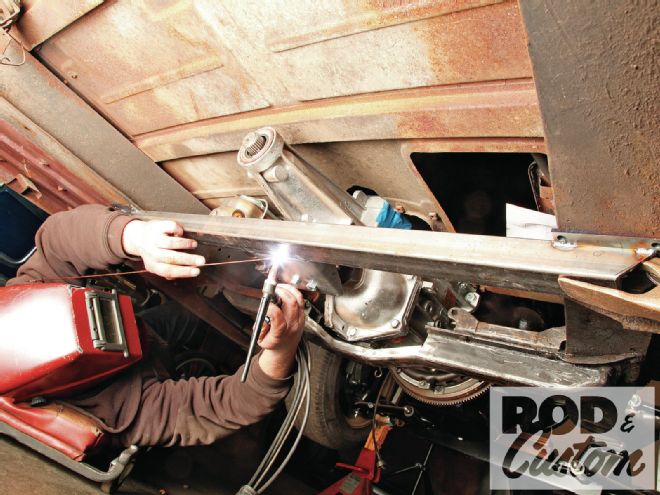
 1 Carburetor angle and chassis rake dictates how the engine sits in the car. Woolery began by setting the car on jackstands at the rake it sits when driving. He pointed the engine down to the rear 3 degrees to level the manifold’s carburetor mounting pads. Naturally, he centered the engine in the chassis and set it back far enough for fan clearance.
Of course it takes a little know-how too. For a generation reared on a farm that wasn’t a problem: yard out that steaming old heap, prop the new one in the hole, and connect the dots. Then something seemingly blessed happened: The aftermarket responded with generic kits that made all sorts of non-ordained marriages popular.
But with that blessing came a curse: We came to depend on those kits. And as the popularity of the engines that they supported declined, so did those kits’ presence. It’s a hasty generalization, but it seems that people won’t consent to an engine swap anymore unless someone makes a kit to do it. As a culture we’ve grown quite fond of convenience.
Well, we’re here to tell you that convenience is boring—new cars, dishwashers, and installment plans are convenient. So when it came time to install the late Stovebolt in the ’39 Chevy at Thun Field Rod & Custom, Marshall Woolery and I came to the conclusion that a good old-fashioned engine swap was in order.
He employed another part in the engine swapper’s bag of tricks: early Ford engine mounts. We owe Ford for what’s probably the simplest, most elegant engine mount: two flat rubber biscuits that basically sandwich the chassis bracket and give the engine bracket a platform on which to rest. A bolt skewers the assembly, making the mount both simple and rugged.
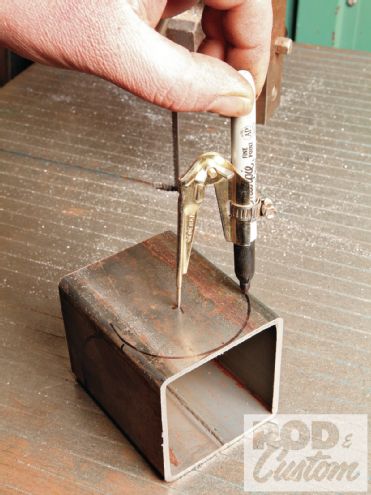 2 He then made the box-tube chassis brackets as short as possible to give the engine the most room. The protractor modified with a marker is a boatyard fab trick courtesy of Nate Abbott.
What follows are a few reliable rules for engine swapping. The first one: set the car at its final rake. Things like carburetors require level installation to work properly and to try to account for any other angle is only an invitation for disaster.
Speaking of float level we did things sort of backward; technically we should’ve installed the drivetrain before we installed the rear axle (we showed that two issues ago). It’s for two reasons: manifold design and U-joint angle.
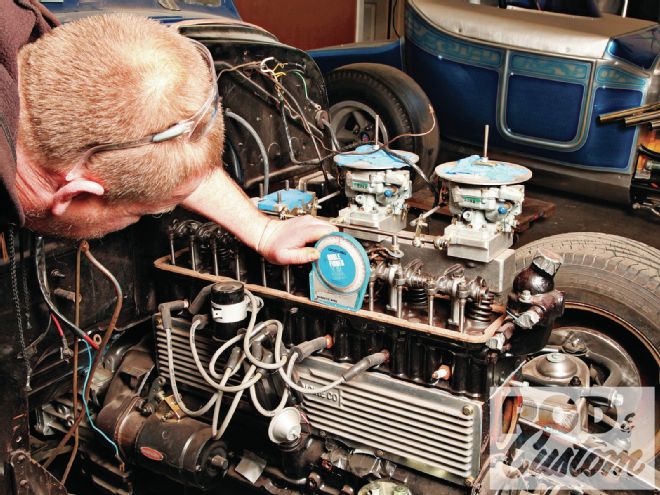
Years ago drivetrain designers began pitching engines rearward to minimize U-joint offset and minimize how far the transmission protruded into the passenger compartment. Well, carburetors work best when mounted completely level with the ground. So manufacturers leveled the carburetors by machining their mounting pads at an angle.
In this case when we installed the rear suspension we actually employed a little bit of foresight. This particular manifold pitched the carburetors forward about 3 degrees. We knew that we’d pitch the engine back 3 degrees to level the carburetors so we translated the inverse of that angle to the pinion shaft when we installed the rear axle. It doesn’t seem like very much of an issue but it bears some attention when installing a complete drivetrain and suspension package.
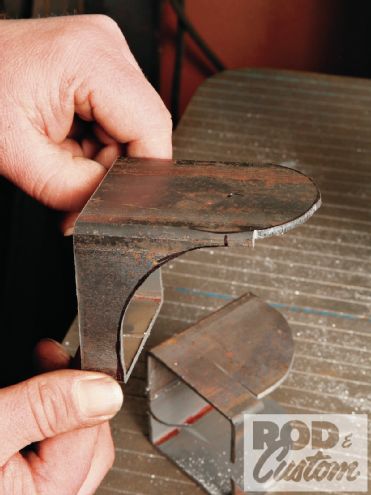 3 Cutting the tubing at an angle would suffice but the shapes set by the protractor and a little bit of bandsaw finesse make for a more refined-looking bracket. A bit of time on the sander turned this into a piece of functional art.
Understand a few things before we start. While we’re replacing like for like, Stovebolts aren’t exactly alike. Chevrolet moved the engine mounts to the sides of the block in 1958. This car has one of those later blocks. Second, that combination is actually one of those supported engine/vehicle examples. Our pal Buffalo at Buffalo Enterprises—the guy who modified this car’s pedal assembly last month—makes it. More than that, he also makes a crossmember kit to mount the increasingly popular T-5 five-speed transmission crossmember. In fact we’re going to reveal ourselves as hypocrites by advising anyone interested in this swap to consider his kit. Our way takes lots of time and preparation; he, on the other hand, has done the homework for us. It’s a really good deal.
But we knew that not everyone wants to commit to the same kind of swap we showed. So the information presented here applies to nearly any engine swap: simply prop the new drivetrain into the hole and connect the dots, just like Granddad did so many years ago.
Cooling Fans
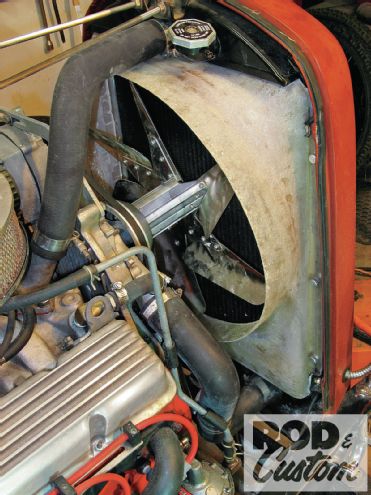 A mechanical fan with a properly designed shroud represents the best low-speed cooling option available. The flex fan on the ungainly spacer was merely for fabrication purposes; the thermal-clutch fan that replaced it robs no power when disengaged and moves volumes more air than any similar electric fan. Whether fixed-blade, flex-blade, or coupled by a thermal clutch, a mechanical fan moves a ton of air. The pressure generated at idle was sufficient to suck this folded terry cloth towel to my car’s grille.
It doesn’t seem like part of an engine-mounting story but things like cooling fans seldom rank very high when planning an engine swap.
If forced to choose between mounting the engine close to the radiator or recessing the firewall, consider the firewall route. Room gained at the front of the engine will permit a belt-driven fan. And while some people don’t think they’re as sexy as their electric counterparts, even electric-fan manufacturers like Flex-a-lite admit that a proper belt-driven fan with a shroud will move a greater volume of cooling air than its electric counterpart will.
When disengaged or de-energized, neither a thermal-clutch-driven fan will rob any power. Naturally, both consume power when engaged (the electric fan through the alternator). And while a thermal-clutch fan will draw just a touch more power than an electric fan when engaged, that’s a natural consequence of greater cooling power. But who really cares about an extra horsepower or two when cruising around at speeds insufficient to force air across the radiator anyway? So if you value cooling and performance, consider building your car around a belt-driven, thermal-clutch fan.