After installing a new Strange rearend in Don Prieto’s 1956 Chevy Nomad (STREET RODDER May ’12 issue) it was time to tackle the front suspension. The Nomad had undergone a conservative hot-rodding in the past, riding on basically stock suspension. While the car was serviceable in this configuration, good enough to act as a push car for Prieto’s fuel dragster, the fact of the matter is suspension and braking components have come a long way since 1956; it was time for an upgrade.
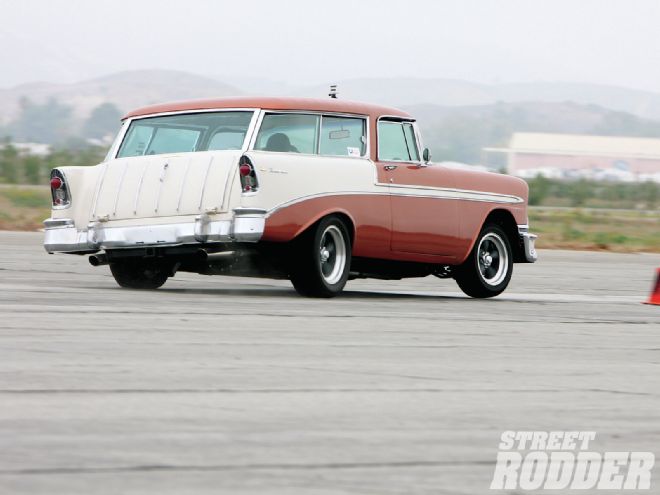
 The Nomad lumbered through the slalom course at 7.53 seconds at 38 mph. After the suspension upgrades it powered through at 6.51 seconds at 44 mph. Significant improvement. (Photo by Steven Rupp.)
The stock ’56 Chevrolet suspension provides a reasonable base upon which to build, so there would be no real fabrication required. The car had no antiroll bar from the factory so we will be adding a complete suspension kit from Performance Online that includes tubular control arms, a new sway bar, new lowering springs, dropped spindles, adjustable shock absorbers, and power disc brakes. This sounds like a lot of work but actually it is almost a complete bolt-on operation. You’ll need to drill a few holes and weld two tabs in place, but beyond that it is a matter of grabbing some hand tools and getting to work. Since the stock steering box will remain in service, all of our work will be confined to the wheelwell area.
Any time you are working on suspension, be safety conscious. Remember, springs store energy and can come flying out with tremendous force, so work slowly and carefully and consider the use of a safety chain through shock mount holes and through the center of the spring.
 New tubular control arms with urethane bushings will lower un-sprung weight and minimize bushing deflection for good handling. The new ball joints bolt to these control arms.
With the car safely supported we began by removing the front wheel. This allowed us to remove the brake drum (you may have to back off the brake shoe adjuster), which saves a lot of weight when it is time to remove the spindle. Next we removed the tie rod and draglink to the steering arms. Then the two nuts holding the steering arm to the backing plate were removed, along with the steering arm itself. The tired original-style shock absorbers were also removed.
We removed the brake hose to each wheel cylinder and captured the brake fluid in a container for future recycling and covered the open end of the brake line with a rubber cap.
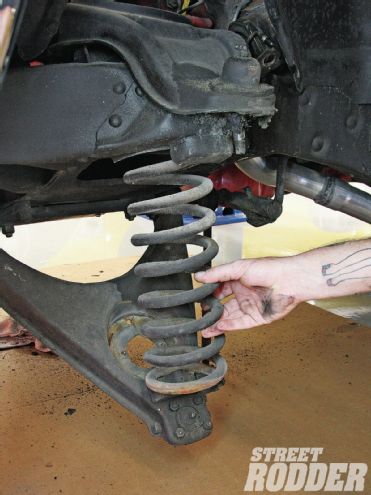 With no pressure remaining on the spring, we can lift it out of the spring pocket and put it on our “swap meet” pile.
Now we are ready to remove the spindle from between the upper and lower control arms. Since the compressed coil spring is under pressure between these two pieces we used a floor jack to provide upward pressure on the lower control arm. This prevents the spring from flying out of the spring pocket.
We used side cutters to cut the cotter pin in the lower ball joint and pulled the remaining piece of the cotter pin out of the ball joint shaft. We loosened the castle nut and performed the same operation on the upper ball joint. Removing the ball joint from the control arms can be handled in several ways; one is to simply give the side of the spindle a good whack with a hammer at the ball joint socket. This will often free the tapered ball joint from the spindle if you can get a clear shot at the ball joint area. If that doesn’t work a “pickle fork” can be used. This tapered fork drives a wedge between the ball joint and the control arm forcing them apart, the downside of the pickle fork is it often destroys the ball joint boot.
With the ball joints freed from the control arms, we removed the loosened castle nuts and lifted the spindle, hub, and brake assembly off as one piece and put it in a pile along with the brake drums marked “swap meet.”
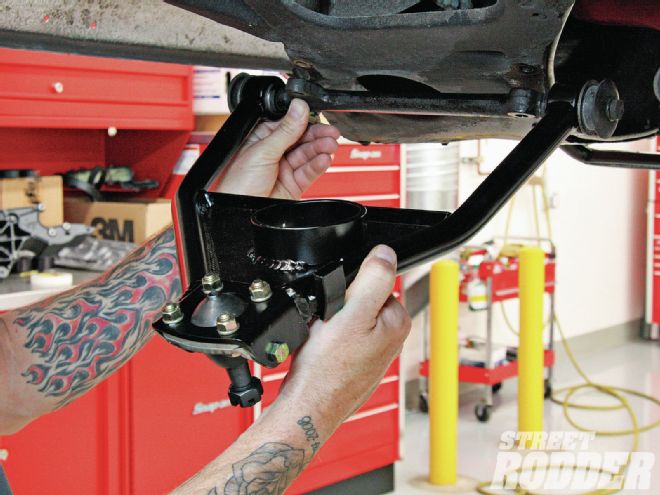
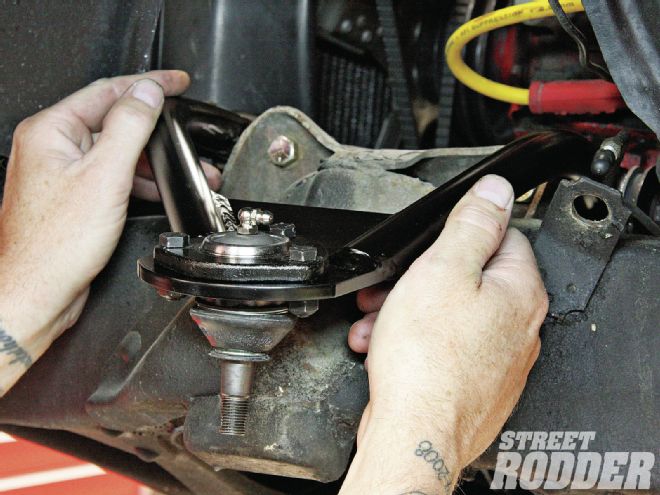 After bolting the new ball joint to the upper control arm it was installed using the original mounting holes in the framerail.
With the spindle removed we can now remove the coil spring. Slowly, very slowly, lower the floor jack to relieve the pressure on the spring. Once the spring is loose between the control arms you can remove the spring.
Next our attention is turned to the bolts that hold the upper and lower control arms to the framerail. Remove the appropriate cotter pins and then remove the nuts and lift the control arms off the frame, deposit these parts on that same swap meet pile. We have now effectively removed the entire front suspension from the car. Now is a good time to do a little cleaning and frame painting, if required.
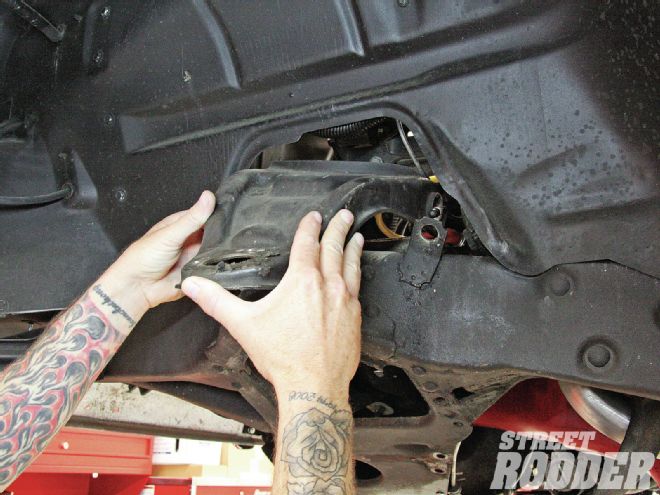 The upper and lower control arms can now be unbolted from the chassis; at this point we have relieved the Nomad of the entire front suspension.
The installation is a true bolt-on operation, first the control arms, steering arms, coil springs, and spindles. The new ball joints were bolted onto the new tubular control arms and we were ready to install them on the car.
Once again great care must be taken when compressing the coil spring between the control arms. After placing the coil springs in the control arm spring pockets there are two ways to compress the spring. One is use a quality spring compressor that pulls the spring together, allowing you to connect the spindle to the ball joints shafts on the control arms. The other method, and probably the more common for this type of suspension, is to place the coil spring into the spring pockets and with a floor jack carefully jack up the lower control arm until you can install the spindle. This method does not work on a bare frame with no engine since it requires weight to compress the spring.
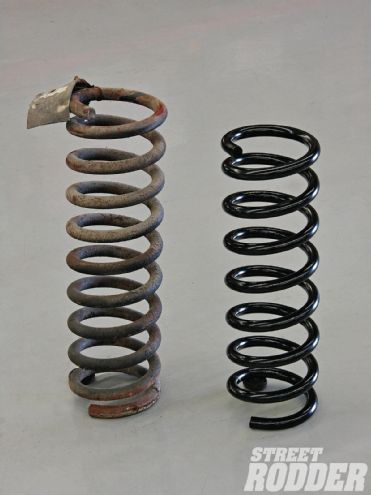 One of the keys to better handling is lowering the car. We had already lowered the rear several inches, and these new lowering springs (right) will combine with dropped spindles for a new lower stance.
Be very careful while installing the spindle as the spring is now loaded with energy. Once the spindle nuts are tight, the jack is slowly lowered down and your front suspension is back in tack. Finally, bolt in the Performance Online adjustable gas shock to complete the suspension.
Next we assembled the Performance Online brake kit, starting by packing the new wheel bearings and tapping the inner seal in place on the hub. Then the hub and rotor assembly was slipped onto the new dropped spindles and the front bearing was packed with grease and installed.
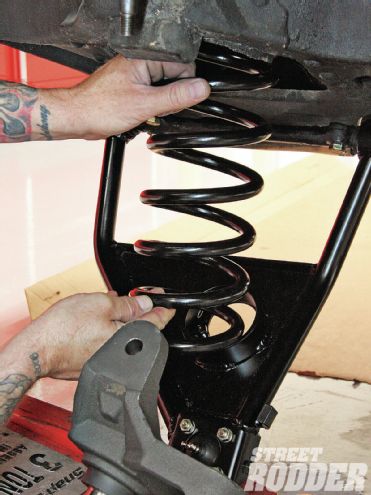 The new lowering springs are placed in the control arm spring pocket and a floor jack is used to carefully compress the spring and raise the lower control arm.
The caliper bolts directly to the new dropped spindles and the new brake hoses were a snap to install. Finally the stock steering arms were bolted to the new spindles and steering linkages were reinstalled.
Since we had now converted the Nomad from drum brakes to disc brakes a new master cylinder was in order. A firewall-mounted power master cylinder was bench-bled and installed. Since the car had a dual-reservoir master cylinder conversion earlier we simply bolted the new master cylinder in place. The existing brake lines were routed to the new master cylinder.
The final piece of the performance puzzle was the sway bar. Since our ’56 Nomad had no provisions for a sway bar we had to locate the bar on the frame and drill two holes per side for the urethane bushing mounts. Then the drop links were installed on the ends of the sway bar to find the proper location for the drop link mounting tab on the tubular control arm. After finding the proper location, the drop link bracket was welded to the lower control arm. The drop links were adjusted and bolted in place, completing our front suspension conversion.
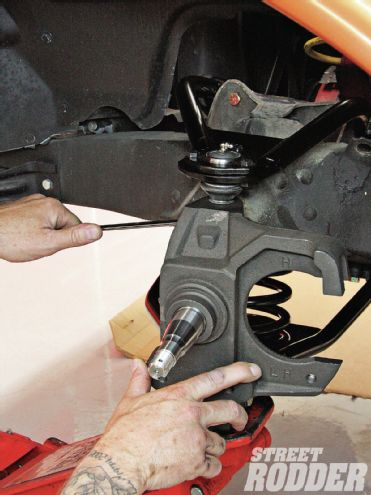 The new dropped spindle can now be bolted in place by slipping the ball joint shafts into the upper and lower tapered holes. Tighten the bolts and don’t forget the new cotter pins.
Once again with a pile of quality parts and a weekend in the garage we had converted a very nice Nomad from a stocker to a car with modern braking and handling abilities, and other than welding the tabs on the control arms it was a complete hand tool operation. Now that’s a good weekend’s work.