It’s been said that no good deed goes unrewarded, but if recent events give any indication, we’d also say that no stupid act goes unpunished, and we’re living proof.
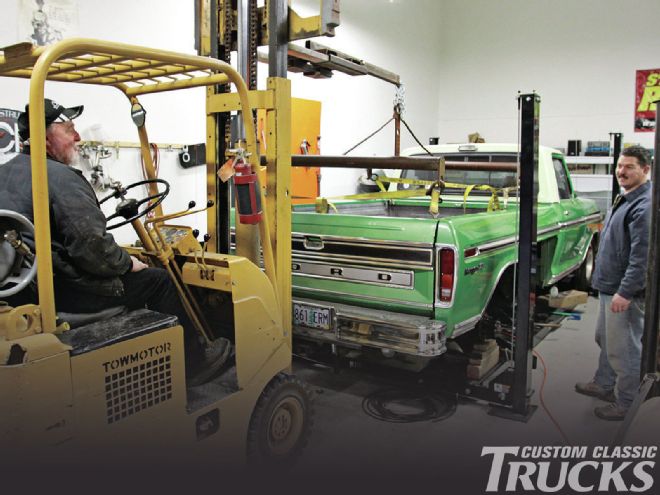 Tim Smith (on forklift) and Jake Brazille helped pull the bed so we could modify the frame of our F-350 for absolutely the last time.
Our problems began when we violated our own rule, which is to have a well thought out plan when building a project. When we started on the Hot Rod Hauler we knew what we were after, we wanted to make a cool work truck/hauler/utilitarian vehicle out of our F-350. Part of the plan was to lower it all around. From the day it was new the rear was 3 inches higher than the front and, for reasons that sounded good at the time, we decided to alter our plan and just make it sit level. So, we changed our plan and removed the rear overload springs and added airbags for handling a load, but the problem was we didn’t like the look of it when we were done. Back to the original plan—-we installed 3-inch dropped axles up front and 3-inch de-arched rear springs in the rear. And while that combination lowered the truck, and the new rear springs improved the ride dramatically, we found ourselves right back in the same situation with the rear 3 inches higher than the front.
To solve our dilemma we were faced with doing what we should have done in the first place, moving the spring brackets up on the frame. Of course, that meant we had to C-notch the ’rails for clearance during full suspension travel, and the airbag mounts already in place would have to be cut off and repositioned. Like we said, no act of stupidity goes unpunished.
With the help of Tim Smith, Jake Brazille, and a forklift, we removed the bed. Unfortunately for us, Ford saw fit to use stove bolts to secure the bed to the frame, and that meant that both gas tanks had to be removed to get to the nuts. To make things easier in the future we welded nuts to the framerail’s flanges and will use button head socket screws that can be installed from the top. If the bed ever comes off again (which it will when we repaint), the screws are easily removed and the gas tanks can stay in place.
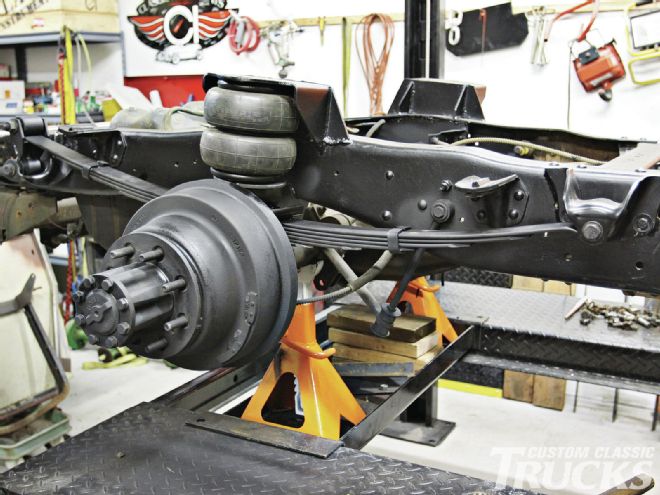 The rear suspension under the Hot Rod Hauler in the final form is 6 inches lower than stock. The springs are from Eaton Detroit Spring and are de-arched 3 inches, the original spring hangars have been moved up on the frame 3 inches, and the airbag mounts that were installed earlier have been moved up as well.
Once the bed was off, the springs were removed and the rivets holding the brackets to the frame had to be dealt with. Not only are they hard, which makes grinding the heads off the most effective method of removing them, but they swell up in the hole as well. So, once the heads of the rivets are knocked off it still requires a substantial blow from a hammer and punch to remove them.
With the spring brackets removed, they were shortened so as not to overlap the top of the framerails, which eliminated the top attachment holes in each bracket. New holes were drilled in the ’rails for the remaining two holes and the brackets were bolted in place, then welded as well.
As we’ve lowered the rear of the truck a total of 6 inches, axle to frame clearance became a concern so we elected to C-notch the ’rails. A length of heavy wall tubing was split and made into reinforcements for the notches and plates were cut to box the ’rails in that area.
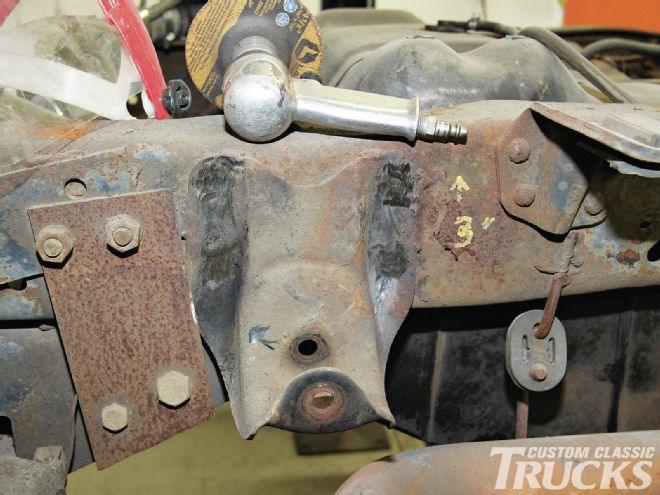 To remove the stock rear spring hangers the heads of the rivets were ground off, the remains were driven out with a punch.
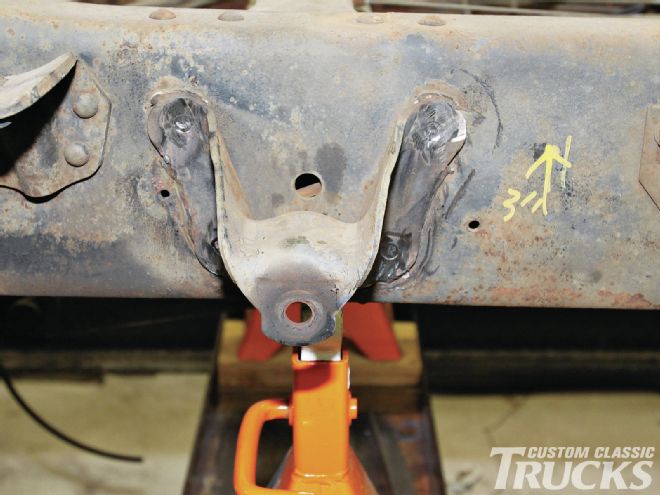
The last chore was to redo the air bag mounts we installed at the beginning of the project. We had mounted them to the outside of the ’rails for stability and had elected not to alter the floor of the bed to accommodate them, which had a great deal to do with our decision to alter the plan and not lower the rear too far. Ultimately, it came down to a choice between not having the truck sit the way we wanted or cutting holes in the bed—following the motto “anyone can restore a truck, it takes a real man to cut one up” we whacked the necessary holes in the floor and raised the bag mounts 3 inches.
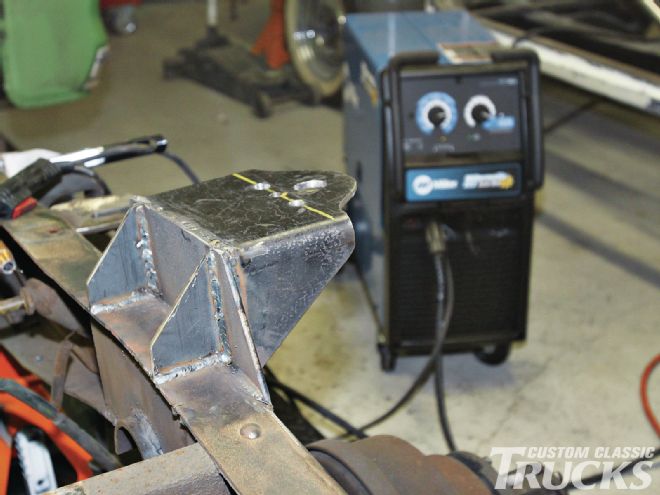 For additional strength a pair of gussets were added to the back of each bag mount. Note the boxing plate that has been added to the inside of the framerail.
When it was all said and done, we had come back to our original intention, and we’re glad we did. The chassis is now level, it’s 3 inches lower in front and 6 inches in back. We still have a couple minor things to do like patch the holes in the floor, but we wanted to shoot it with bed liner anyway. We had to order shocks that were 3 inches shorter and don’t have them yet and the tailpipes have to be re-routed, but we’re going to build a new exhaust system when the new engine goes in. Those are the plans—and this time we’re going to stick to them. CCT
Choosing The Right Welder For The Job
Modifying the frame of any vehicle is a critical operation that must be done correctly, and if any welding is involved a machine with adequate capacity is a necessity.
All welders have a duty cycle, which is how many minutes out of ten they can weld continuously before they have to be allowed to cool, and the higher the amperage setting on the welder goes the shorter the duty cycle becomes. That means that when welding on something heavy, like the frame of our F-350, with a small capacity welder it will probably have to be turned up so high the duty cycle will be extremely short, and exceeding the duty cycle can result in erratic operation that produces poor quality welds.
 What really sold us on this welder was the Auto-set function.
Another issue often faced by those of us who don’t weld on a regular basis is adjusting the machine properly. Normally, we don’t get it right until we’re almost through with what we’re doing.
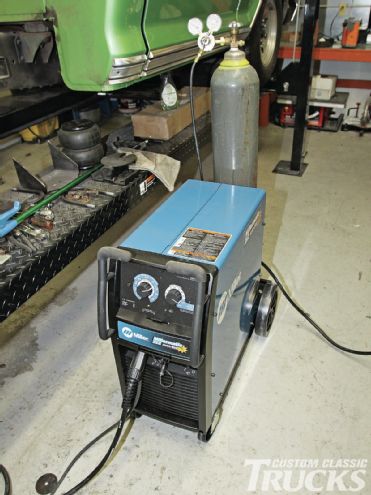
While in the middle of this project, our welder up and quit and we were given the opportunity to try a new Miller Millermatic Auto-Set 212—now we’re wondering how we’ve lived without it. At 160 amps it has a 60-percent duty cycle, which is plenty of capacity for anything we’ll ever do without fear of overtaxing the machine.
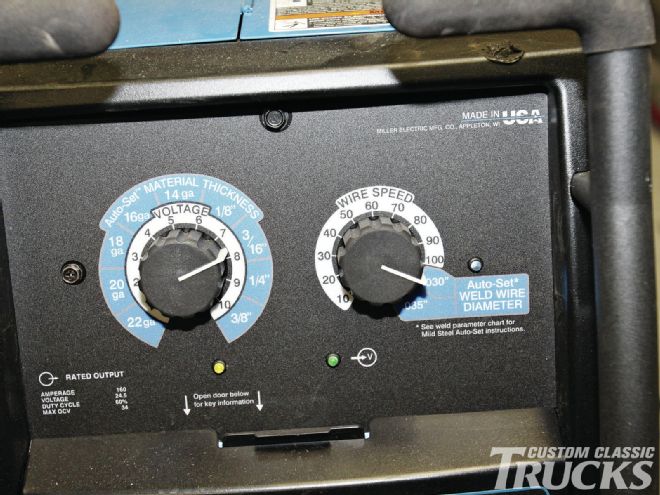 Set one dial to the diameter of wire being used, the other to the thickness of the material and the welder does the rest of the adjustments for you. Of course, there is a manual mode for those who want to use it, but we found we were better off letting the Millermatic do the thinking for us.