As with most muscle-era passenger cars, the GM A-Body's chassis was designed for comfortable straight-line cruising. The front sway bar provided just enough leverage to decrease some of the car's body lean in a turn, and the suspension's rubber bushings tried to limit noise, vibration, and harshness, or NVH, as the chassis engineers call it. As these cars aged, so did the suspension's rubber bushings, turning what were originally mediocre components into marginal performers at best. Cruising became an adventure that required constant steering corrections and slow cornering speeds. That is not the fate we wanted for this '65 GTO. While replacing the old bushings with new rubber ones would be an adequate solution, this car demands better. We contacted Performance Suspension Technology (PST) to see how we could improve this GTO's chassis while maintaining a stock exterior look.
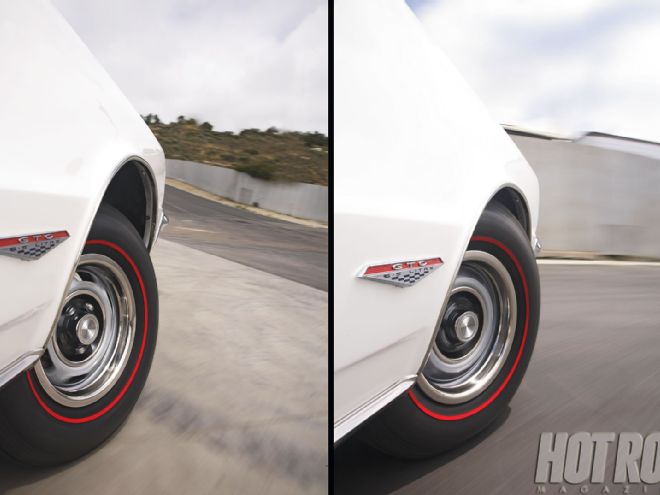
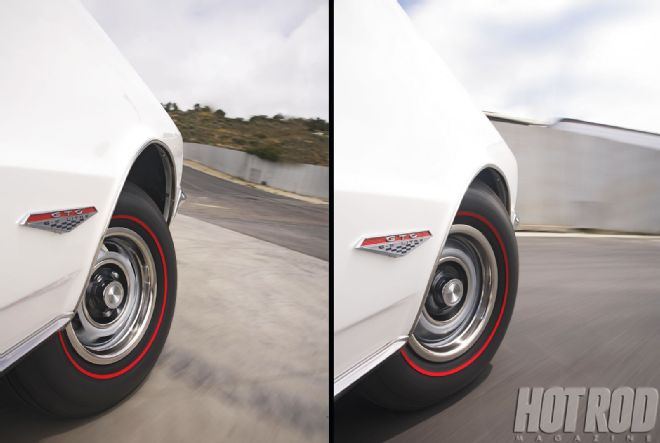 In the "before" photo (left), our GTO's worn suspension components turned a 20-mph corner into a thrill ride. In the "after" photo (right), after installing PST's polygraphite Super Kit, the GTO felt like a sports car in a turn at 30 mph.
Factory-style rubber bushings would have improved the GTO's road manners, but PST recommended we use its polygraphite bushings. Unlike standard polyurethane bushings, which can creak and groan with even the smallest deflection, these bushings are made from a special graphite-impregnated polyurethane. They'll give the GTO the handling characteristics of polyurethane bushings, with zero deflection, and the lubricating qualities of graphite mean no creaks or groans. In addition to the bushings, we ordered a complete suspension package that included heavy-duty springs, new ball joints, a heavy-duty front sway bar, a rear sway bar, and new gas shocks. It's what PST calls the "Super Kit."
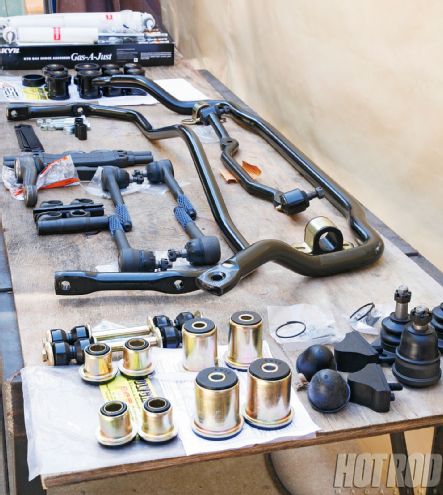 1 Upon receiving PST's Super Kit, we laid it out to ensure we had everything before we started. The only items missing from this photo are the new springs.
Rear Suspension Rebuild
We had the luxury of a hoist to do this upgrade, but it could be accomplished with the car suspended securely on jackstands. The first thing we did was mark the locations where the new sway bar will be attached on the rear lower control arms. We then disconnected the rear universal joint, shocks, flexible brake line, and upper and lower arms, dropping the entire rear axle out of the car. We used a drill press to make the holes in the lower arms for the sway bar mount and a hydraulic press to remove the bushings (see sidebar).
When working on any old car, it's a good idea to get into the habit of cleaning and refinishing any components you remove. We sent all the suspension arms out for powdercoating because of its durability. Assembly was straightforward, but we did not fully tighten the arms until the car was at its proper ride height with its weight on all four tires.
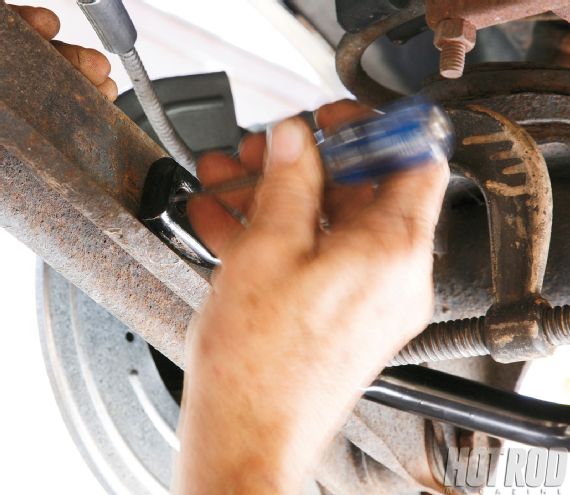 2 Prior to disassembly, we marked the rear lower suspension arms for the attachment of the new sway bar. Here the bar is held in place with C-clamps so the attaching hole locations could be marked.
Front Suspension Rebuild
Front suspensions are more complicated to disassemble because of the size of the springs, steering components, and ball joints. We stripped off the brake calipers, front shocks, and front sway bar. After removing the brake rotors, we loosened, but did not remove, the nuts that attached the spindles to the ball joints. A sharp blow from a 5-pound sledgehammer on the spindle broke the spindle free from both ball joints. We placed a floor jack under the lower control arm, using the weight of the car to take the pressure off of the ball joints, and then removed the spring's retaining nuts. When we lowered the jack, the spring was easily removed. This then allowed us to remove the upper and lower control arms.
We began stripping the front control arms by removing the ball joints. GM used soft rivets to retain the upper arm's ball joint, so we used a hand drill to cut off the rivet head and then knocked the remainder out with a punch. The lower ball joints were a press-in design that used the pressure of the front spring to aid in retention. These were pressed out using a hydraulic press in the same fashion as the suspension bushings.
 3 Forty-five years of use took their toll on our GTO's suspension bushings. The rubber on this rear suspension arm bushing is heavily checked and can no longer do what GM's chassis engineers intended it to.
With the arms cleaned and powdercoated, we started to reassemble them with the new ball joints and bushings. The new upper ball is loosely bolted in place with four supplied bolts and nuts, and the lower ball joint is pressed in place in the same fashion as the original.
Reassembling the front suspension is a whole lot trickier than the rear. We started by hanging the upper and lower arms with the spindle loosely attached. We did this to measure the height of the spring when it's installed and compressed. This dimension will be used when we compress the spring prior to installation. We disconnected the spindle from the upper arm and held the uncompressed spring in its upper pocket seat. GM's engineers stamped an upper seat that matches the helix of the spring, and the spring must be installed seated properly in this depression. With the top of the spring properly seated, we marked the inner side of the spring. This is going to be the side of the spring that will be the shortest when installed--a dimension we'll need to set up our spring compressor, which holds the spring in the approximate arc as it is when installed.
We are using a 40-year-old but very reliable spring compressor. It uses hooks to maintain the compression of the spring. While it looks benign, a compressed automobile spring is similar to a hand grenade with a loose pin. The kinetic energy stored is exceptionally high and, if suddenly released, could cause serious bodily injury or death.
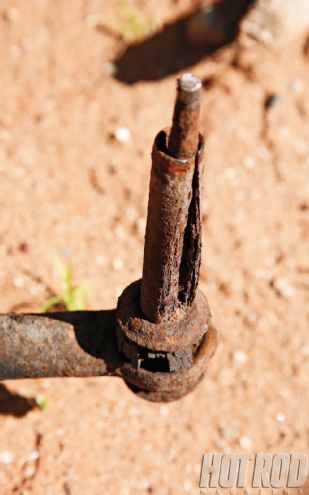 4 Time and weather didn't treat the chassis of this '65 GTO well. This front sway bar link was on the verge of failing, and the rubber bushings had dry rot and were falling apart.
We compressed the spring to the measurement we took from seat to seat--no more than needed for the installation. Once it was compressed, we carefully slipped the spring into the upper pocket, moved the lower arm up in position and attached the retaining nuts to the spindle. With the spring contained between the arms, we placed a floor jack under the lower arm and used the weight of the body against the jack to compress the spring enough for us to remove the hooks. To facilitate the spring installation, we did not install the rebound rubber bumper that attaches to the frame and contacts the underside of the upper control arm. This gave us an additional inch of upper arm travel, allowing for easier spring installation. And while grease fittings are included with the kit, we left the one off of the lower ball joint because we knew we'd be using the floor jack to lift the lower arm.
Up to this point all of the attaching bolts for the front suspension components were only finger tight to facilitate the spring installation. We tightened everything up, but not fully. It's necessary for the weight of the car to be on its wheels and the bushings in their normal position prior to final tightening, otherwise there will be an uneven preload on the bushings. With the front suspension assembled we added the center link, idler arm, tie-rod ends, and front sway bar. PST's front sway bar, which is 5/16 inch larger in diameter than stock, uses the factory mounting points for its brackets. The KYB shocks slid in easily. We used the supplied J-nuts for the lower shock attachments. When assembling, these are much more user-friendly than loose nuts.
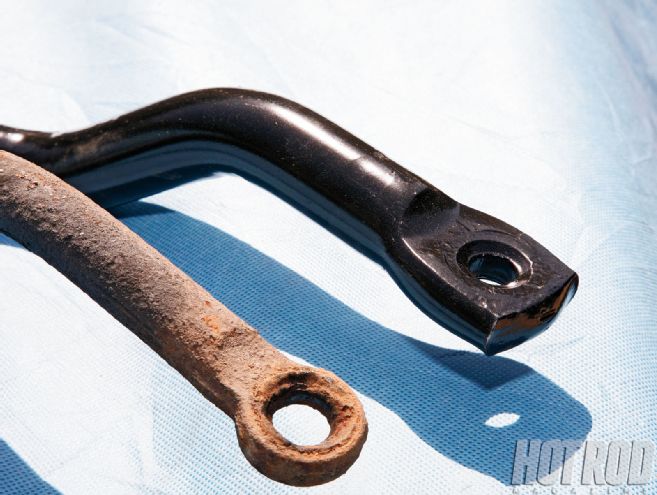 5 Here's the original 1-inch-diameter front sway bar alongside the larger, 15/16-inch-diameter PST one. It's easy to see which would make a car handle better.
Finishing Touches
When we disassembled the front suspension of our GTO, we noticed the excessive amount of oddly stacked alignment shims, no doubt to compensate for a raft of worn components. An alignment shop would be our final stop prior to a full road test. Preceding the alignment we tightened all of the pivot point bushings with the car at its normal ride height. Once the alignment was done and all components double-checked for tightness, we hit the road. The GTO's handling went from unpredictable to well mannered. It needed no more continual small adjustments to the steering when driving in a straight line, and now it corners with X-acto-knife precision. Best of all, there are no squeaks, groans, or even a whimper from PST's polygraphite bushings.
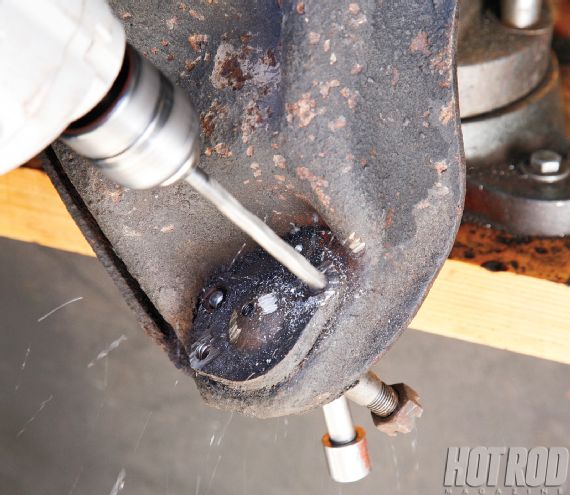 6 The upper ball joints on GM's A-Body cars were riveted in place. These rivets are soft and are easily removed by using a drill to remove the head and then a punch to remove the remainder.
Bushing Replacement
It is possible to replace some suspension bushings at home with a large vise, but it's better to use a hydraulic press. The holes in the arm for the bushings are stamped with a flange that retains the bushing. The holes are stepped (one larger than the other) to allow the bushing, with its two different outside diameters, to easily slide through one opening and then achieve a press fit on both ends.
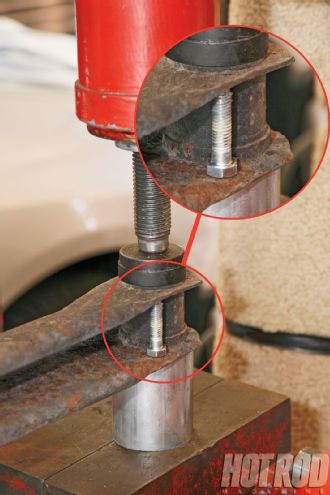
Removing bushings that have been in place for almost half a century takes a bit of work. Using a torch is counterproductive, as the rubber will burn and make a big gooey mess. What's needed is a short piece of exhaust tubing that is slightly larger in diameter than the bushing's retention flange, and a large socket that is the diameter of the bushing's small end. Penetrating oil will help rusted components. We used a simple bolt and nut combination as a spacer to prevent the U-shaped suspension arm from collapsing. When using a hydraulic press, it's best to use eye protection in case something goes flying. Typically the bushings break free with a loud pop.
Unlike the factory rubber bushings, the new PST polygraphite bushings are not a bonded assembly. This allows the installer to disassemble and lube the components (with lubricant supplied with the kit) prior to installation. The outer shell of the bushing still presses in, and once again our bolt and nut spacer was used.