
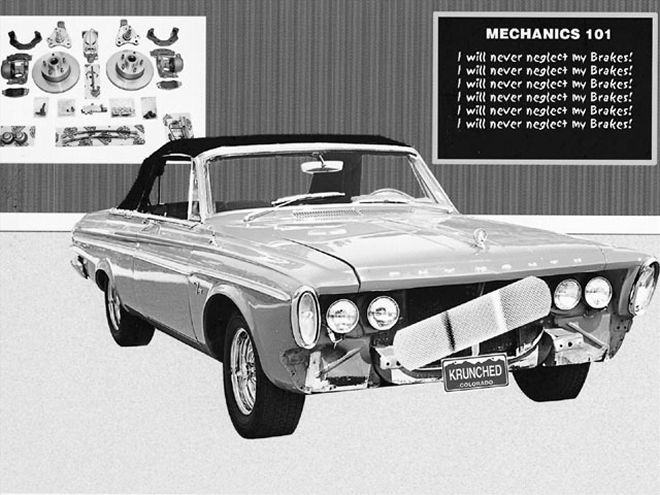
One day, while out for a cruise in our red '63 Fury ragtop, someone three cars in front of us slammed on his brakes to avoid hitting a bus. We locked 'em up too-for a split-second. Then, the brake pedal went to the floor, sending us smack into the back of the minivan a few car lengths ahead. Definitely not our finest moment!
Luckily, no one was hurt, and the damage to the front of the Fury was minimal-a bent bumper and grille and a few tweaked brackets. If the same thing had happened two days earlier when we were doing 70 mph on the interstate, it might have been a fatal accident. Frankly, the factory drum brakes were marginal, even for the slower-paced world of the '60s. With today's crowded highways, people talking on cell phones, and modern cars that can stop on a dime with their four-wheel discs, most of our earlier rides can use some serious help in the brake department.
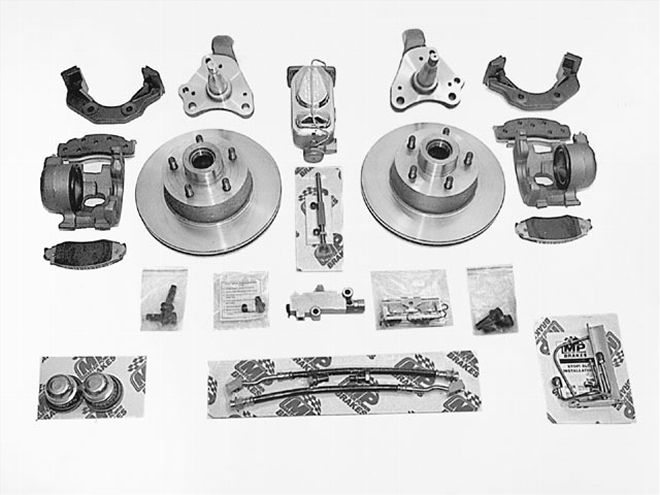 The Master Power Brakes kit for the early B-Body includes everything shown here. Even inveterate parts scroungers like us must admit there's a certain appeal to placing an order on the phone and getting a box full of nice new parts that don't need cleaning or refurbishing. It's also easy to see why the replacement of the old rusty drums with new rotors and calipers is so satisfying from an appearance standpoint. Of course, it's the resultant stopping power and reliable operation that is the real goal here.
Time being of the essence, we chose to forgo the usual parts hunt and go with a prepackaged kit. Mind you, we have nothing against used parts. In fact, for us, a sunny day in a junkyard qualifies as time well spent. But when we saw the ad for Master Power Brakes' B-Body front-disc brake kit, we thought it would be nice to open a box of brand-new parts for once and do the job from start to finish. We decided on the manual discs, as we weren't sure whether we were going to go small- or big-block with our next engine, and clearances get really tight in that corner of the engine compartment with the added bulk of the vacuum reservoir. We placed our order, and before we knew it, UPS showed up at our door.
We took the car to our good friend Carl Solko, who has a well-equipped shop complete with a lift at his disposal. He was especially interested in this swap because he recently installed a Max Wedge in his '63 Dodge wagon and found the factory drums to be woefully inadequate for his new power levels.
After we put the car on the lift, the first order of business was to completely back off the torsion-bar tensioner bolt. The wheels, brake drums, and all of the brake lines and hoses were removed. Then, we separated the ball joints and tie-rod ends from the spindle using an air hammer with a pickle-fork attachment. The Master Power Brakes kit included spindles and caliper brackets that were bolted together and mated to the lower ball joints. We bolted the assemblies to the upper control arms. The bearings were greased by hand for maximum lubricant penetration, and the seals were installed on the rotors. The rotors were then mated to the spindles, and the rotor surfaces were cleaned with brake cleaner. It's always a good idea to clean the rotors before mounting the calipers to remove any grease or factory coatings that keep the rotors from rusting. The crusty old single drum-o'-death master cylinder was removed at this point and given the heave-ho.
Early B-Bodies had single-reservoir master cylinders, so new lines were fabricated in order to hook the dual-reservoir master cylinder to the disc calipers. The factory frame-mounted distribution block was retained, and the two ports that originally fed the front brakes were blocked with threaded plugs from NAPA-PN 131-X-3. The new dual-line master cylinder was bled on the workbench. Then, we installed the master cylinder/proportioning-valve assembly to the firewall. We were able to reuse the original brake line for the right-front brakes (see diagram) because it was already correctly positioned and had the right fitting.
So, all that was necessary was minor tweaking to connect it to the new proportioning valve under the master cylinder. A new line was bent and installed for the left-front caliper and hooked into the appropriate port on the new equalizer block. The original line that went from the single-jar master cylinder to the factory distribution block on the frame was adapted to feed the rear brakes by cutting off the original flare as close to the master cylinder as possible, slipping on the kit-supplied flare nut and reflaring the line using an Eastwood Automotive double-flare tool. New flex lines were connected to the calipers using the copper seal washers supplied (two per caliper). At this point, we connected the kit-supplied adjustable pushrod from the master cylinder to the brake pedal and adjusted it so the brake-light switch functioned properly.
Because exhaust systems tend to put out a lot of heat, the instructions recommend building a sheetmetal heat shield for the master cylinder if the exhaust manifolds or headers run too close. When we replaced the ragtop's ailing poly-headed 318-two-barrel with an '81 318-four-barrel a while back, we took the advice of friends and used '95 Dakota truck exhaust manifolds. These are really a slick deal. They fit like they were designed for an LA engine in an early B-Body, and they don't require any special heat shielding because of their virtually perfect routing.
The MP Brakes instructions specify the use of DOT4 brake fluid, even though the master cylinder provided with the kit is clearly marked "DOT3 brake fluid only." We checked, and the only difference is the DOT4's higher temperature rating. So if you're not able to get every last drop of the old fluid out of your system, at least there won't be any compatibility problems between the two. During the final brake-bleeding procedure, we noticed the left rear-wheel cylinder was leaking, so we replaced it with a new one.
With the installation basically complete, we stepped back to assess the changes. The contrast in appearance between the rusty old drums and the new rotors and calipers is dramatic, as is the dual master cylinder/proportioning valve combo compared to the old setup. More importantly, a test drive showed stopping power to be significantly better and more responsive to driver input. The vague and insecure feeling when applying the pressure to the drum brakes was replaced by a distinct impression of control. The car felt lighter and more competent overall, and the chances of experiencing a complete brake failure-as we did earlier-were reduced exponentially with the dual-line system.
Our earlier check of the suspension had indicated the ball joints and bushings were tight and in good shape, but the shock absorbers had seen better days and were replaced with a set of MonroeMatic Plus gas shocks. In addition to better suspension control, they also provided an anti-dive effect upon braking, thanks to the gas shocks' resistance to compression. With the new shocks installed and at proper ride height, the car was given a good frontend alignment and a renewed stamp of approval for summertime cruising.
Granted, it may be more fun washing and waxing our cars than busting our knuckles on the brakes, but looking good isn't much comfort when you're careening out of control. Do yourself a favor and spend some time on the brakes!