As is almost always the case when fitting a larger engine than stock, the cooling system of the project '49 Chevy required upgrading to cope with the Smeding 383 that replaced the old 235ci inline-six. Luckily, a number of companies offer bolt-in radiators for such situations, and doubly lucky for me, U.S. Radiator had supplied one of their Desert Cooler triple flow radiators for our sister magazine, STREET RODDER's Road Tour Project '52 Chevy last year. Unfortunately for SRM, the use of an Art Morrison chassis meant this radiator did not fit, so it found a grateful home here at Rod & Custom for use in the Purple Pig!
Again, as is often the case, though the radiator is designed as a direct bolt-in replacement for the original, I found myself in familiar "two steps forward and one step back" territory. Sure it would bolt in, and left sufficient room for an engine-driven mechanical fan, but I wanted to use an electric fan; as I'm painfully aware of how often I sit in stationary traffic on the freeway. Additionally, the 2 5/8-inch-thick core of the new radiator, plus the addition of an A/C condenser mounted in front, meant I wanted to ensure sufficient air would flow through the radiator core.
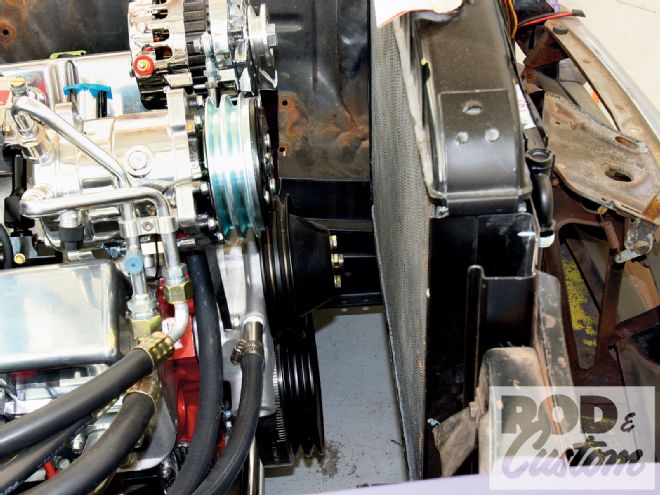
With the new U.S. Radiator mounted in the stock location, there was slightly over 2 inches between the core and the front of the water pump pulley. I required just over 4 inches to clear the fan motor I wanted to use and the depth of the shroud. The solution was to move the radiator forward; the problem being the top had to remain where it was or it would interfere with the hood. I decided to move the bottom of the radiator and mount it at an angle.
Not wanting to go to the trouble of moving the motor and trans mounts rearward-and anyway, it would only be able to move a 1/2 inch or so before the right head-to-firewall clearance would become virtually non-existent, and I wasn't about to alter the firewall-I opted to move the radiator forward to attain the necessary clearance. All well and good you might say, but the top radiator tank couldn't be moved forward as it would then hit the inner hood structure. The solution was to move the bottom of the radiator forward and mount it at an angle, which required a little fabrication and manipulation of the stock core support and surrounding sheetmetal. Once I'd figured out the easiest and neatest way to accomplish my goal, it took less than a day to make the changes.
Seeing as I was moving the radiator anyway, I discussed my fan requirements with the folks at SPAL USA, the manufacturer of choice for U.S. Radiator, and whose fans their shrouds are designed to accept. SPAL offers a range of electric fans with varying diameters, thicknesses, and airflow cfm ratings. While originally planning to use their 16-inch medium profile fan, rated at 1,610 cfm, as it would require minimal radiator relocation, it was decided that with the 383 motor, the core thickness, plus the A/C condenser, as well as the small grille area, this may not offer optimum airflow, and the high-performance 2,070-cfm fan would be more suitable. The same fan is available with 2,360 cfm, but with straight blades, and I opted for the curved blades, which are quieter. The drawback was the thickness of the fan and motor increased from 2 1/2 inches to just over 3 1/2 inches, meaning though I had the space, the A/C condenser would be very close to the hood latch panel support, with a 1/2 inch of clearance between the fan motor and the water pump pulley. Of course I could have moved the latch panel support too, but why make more work for myself?
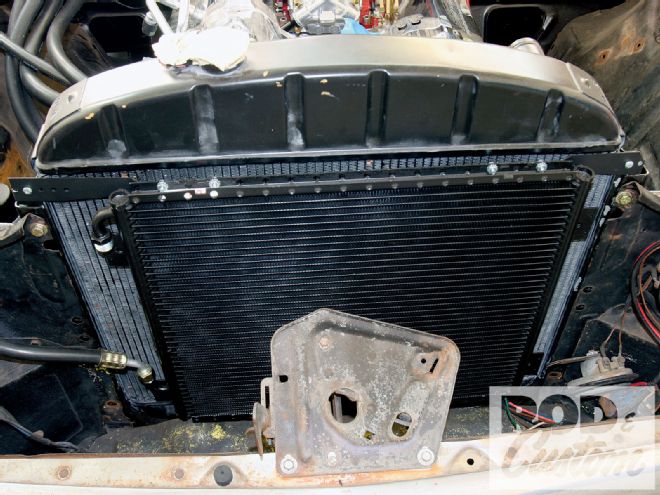 The mounting flange on the radiator sits inside the core support, also bolted to sheetmetal, which supports the front fenders. To move the radiator forward at all would mean mounting it forward of the core support, or more specifically, through the support. Both the front edge of the support and the sheetmetal required trimming, as the side-to-side gap between them was less than the width of the lower radiator tank.
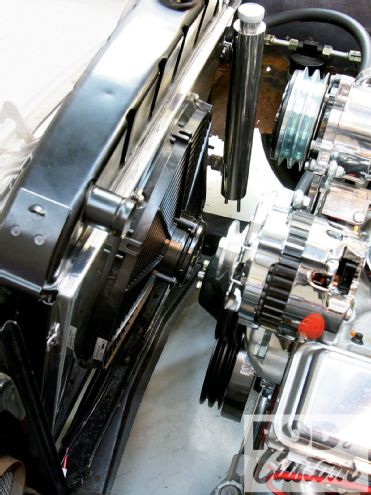
With the radiator, shroud, and fan mounted in their new location, my next problem was routing a top hose from the water neck on the intake manifold to the radiator top tank. Seeing as this would have to work its way around the alternator, rather than spend valuable time sourcing a hose at my local auto parts store, I called Speedway Motors for an adjustable 45-degree water neck, a 90-degree steel tube, and a couple lengths of suitable diameter silicone hose. Once the hoses are trimmed to length and the tube is painted, it'll look neater than a long rubber hose. The lower hose I'll source at the parts store, though that will be a regular GM part. Better get a radiator cap too, while I'm there!
Desert Cooler
U.S. Radiator has determined that core design and adequate airflow are the most important aspects for obtaining maximum coolant temperature drop from radiator inlet to outlet. By building internal walls in the radiator, as is the case with the Desert Cooler, the coolant is re-routed to pass through the radiator (top to bottom or side to side depending on design) three times, resulting in three separate exposures to temperature-dropping airflow, with little or no adverse flow restriction. The result is an average 15 percent reduction in radiator outlet temperatures. U.S. Radiator offers this unique flow design on all non-transmission cooler-equipped radiators in their extensive line of high-performance vehicle applications.