 Ensuring the proper mesh is placed between the distributor and driveshaft gears won't make more power, but it will help your engine live longer.
There's no doubt that plenty of racers feel the ignition system is the area of the engine that gives them the most trouble. Is the timing right? Am I getting enough spark to the combustion chambers at high rpm? Is everything wired correctly?
Yes, the electrical part of the ignition system can be difficult and confusing at times, but don't allow your focus on the electrical component to cause you to ignore the mechanical component when it comes to keeping your distributor working the way it should. In many cases, quality racing distributors come from their manufacturers practically "plug and play." For example, the internal bushings that hold the shaft steady are already lubricated. But one thing that no distributor manufacturer can do for you is make sure you have the proper mesh between the distributor and cam gears. Racers spend a lot of time and money ensuring their ring-and-pinion gears mesh as perfectly as possible, so doesn't your distributor gear deserve a little more respect than simply slamming the unit in place and tightening up the hold-down clamp?
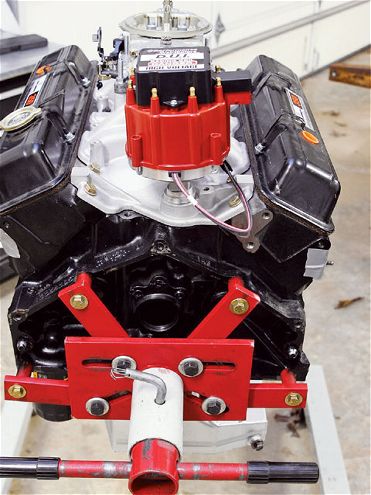 Because the distributor mounts to the intake manifold in Chevrolet engines, machining processes that can change the height of the intake relative to the camshaft can cause the distributor gear to bottom out on the oil pump driveshaft and cause wear problems.
Wear Versus Destruction
The gear that drives the distributor lives in a very difficult environment. First, in stock form, the only oil that lubricates the spinning cam and distributor gears gets there by the practically random splash effect. Second, in a wet-sump engine, the oil pump is driven off the distributor shaft. That means the resistance that the distributor gear applies as the cam gear tries to turn it comes not only from spinning the distributor shaft, but also the oil pump. If you are running a high-volume oil pump or racing on cold motor oil, this can cause tremendous pressure on the system. Even if you don't run a high-volume pump, the tight bearing tolerances used to increase oil control and high rpm levels seen in modern racing engines still cause the pump to work very hard and put extra resistance on the distributor gear.
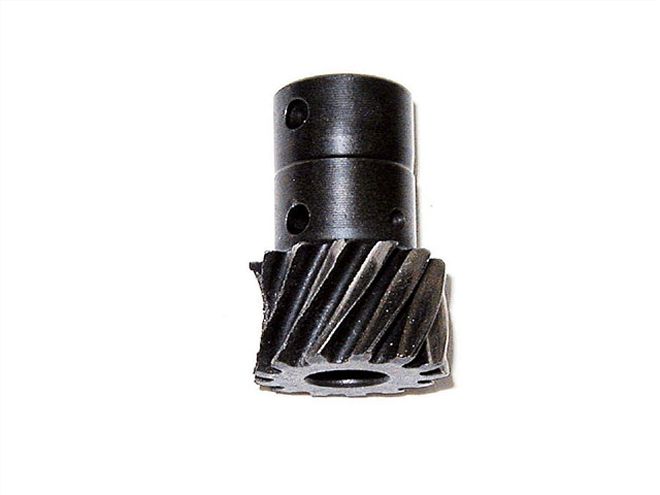
Finally, a distributor gear has a tough life because it's designed to be sacrificed if things go wrong. It's a lot easier to pull the distributor and replace a worn gear than it is to replace the camshaft, so the distributor gear should always be made of a softer material than the cam gear. If you are racing a hardened flat-tappet camshaft, an iron distributor gear should be fine, but if you are racing a roller cam, you need to go with a bronze gear. Whichever type you run, the softer distributor gear also wears some during engine break-in to help the two gears mesh properly. Some racers fear that a bronze gear will wear too quickly and is undependable, but if the distributor is installed correctly, it will last a full season under even the worst racing abuse, and the particles that are worn off the gear are so fine that they do not hurt the engine.
An excessively worn distributor gear such as this one will display razor-like gear teeth. Photo courtesy of Performance Distributors
Determining Depth
The Chevy V-8 is, by all accounts, a fantastic engine design, but it also has its quirks. One is that the distributor mounts to the intake manifold. This means the distributor's installed height is determined by the height of the intake's distributor mounting boss. In stock form, this isn't a problem, but many modifications can be made to the engine in search of power-such as decking the block for a higher compression ratio, as well as decking or angle milling the heads-and all can require cutting the intake to fit and change the height relative to the camshaft. This isn't as much of a problem on Ford engines, where the distributor shaft collar seats against the engine block and not the intake.
When this happens, it raises the possibility that the distributor will bottom out on the camshaft gear and oil pump driveshaft. The same problem can also arise (no matter what type of engine you are building) if you use a replacement oil pump driveshaft that's longer than necessary. This puts extra pressure on the entire system and causes destructive wear on the cam and distributor gears, and the pressure can even be transmitted down to the oil pump and bind that up, too.
 Before checking for free play in the distributor shaft, remove the cap and rotor so you can reach the top plate of the shaft. Since this is securely fixed to the shaft, it won't give you false movement.
Steve Davis of Performance Distributors says checking for proper distributor gear depth is critical, especially on Chevy engines, but it isn't that difficult to do. "When you install a distributor, you need to check to make sure it isn't bottomed out," he says. "You can do this by installing the distributor in the engine without any gaskets. If you haven't already, pull the cap and rotor so you can reach the top plate for the main shaft where the advance weights connect.
"With one hand, hold the distributor firmly against the intake and use the other hand on the top plate to see if there is any up-and-down movement. Make sure you do not grab the reluctor because this slides on the shaft and will always have movement. If you can move the distributor shaft up and down a few thousandths, you should be OK. Put the gasket on, set your timing, and you are good to go. If you don't have any movement, you need to shim the distributor to get it up some so it won't be bottomed out."
Performance Distributors-and most reputable distributor manufacturers, for that matter-sells a nylon shim kit to help you achieve the correct distributor height for your engine. Davis warns against simply stacking gaskets on top of each other to get the correct height. Over time, the gaskets will compress and the gear mesh problem you thought you had fixed will return. Also, as the distributor gear wears, you want to see a nice even wear pattern centered vertically on the gear.
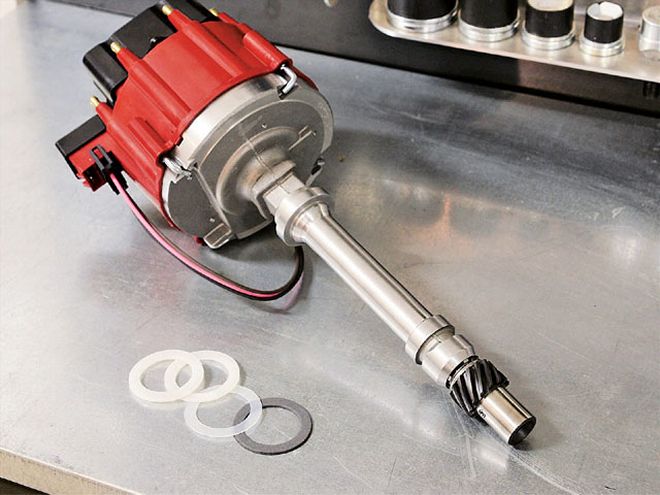 If the distributor is bottoming out in the engine, nylon shims are an easy solution to raise the distributor. Do not stack gaskets as shims. They will only compress over time and leave you where you started.
Cam PlayIf you have your distributor depth set correctly and still notice undue gear wear, it could be because your camshaft is "walking" inside the block. A better term for this is "camshaft runout." It happens when the cam moves back and forth, from front to back, in the block. Davis says camshaft runout is most common when using a lightweight stamped steel timing cover that will flex and not hold the cam in place. When this happens, it sends a shock wave through the gears and up the distributor shaft and can disrupt engine timing. Signs that this is happening in your engine will be excessive wear on one side of the distributor gear, excessive play in the distributor shaft from worn bushings, and possibly damage to the cam. Fortunately, the remedy for this problem is also simple. Davis recommends investing in a sturdy machined timing cover and using a cam button to precisely locate the cam's position in the block and hold it there.
 The movement of the mechanical advance assembly can eventually wear the hinge pins. If this wear causes the distributor timing to be erratic, it's time to replace the shaft. Photo courtesy of Performance Distributors
Advance WarningsDavis also cautions about ignoring the mechanical advance mechanism in your distributor. Performance Distributors customizes the advance curve in every distributor for the specific engine that it will be going into, and it is usually correct, right out of the box. But the system of weights and springs that make up the advance mechanism can wear and cause timing problems, so they do require periodic attention.
One area that is prone to wear that you might not expect at first is the top plate, where the pins serve as hinges for the advance weights. The movement of the weights can wear the pins over time and cause the advance curve to change. Davis says the chance for pin wear increases if the effects of camshaft runout is sending shock waves up the distributor.
The easiest and often most practical way to determine if your distributor is suffering from wear or other problems is simply to put a timing light on your balancer. If you check your engine's timing and notice it is erratic or changes shortly after you set it, then there is definitely a problem somewhere that must be fixed. You should first check for wear at the mechanical advance pins, the distributor gear, and the distributor shaft bushings. You will be surprised by how quickly you can spot problems and pinpoint the specific source of those problems with the right information.
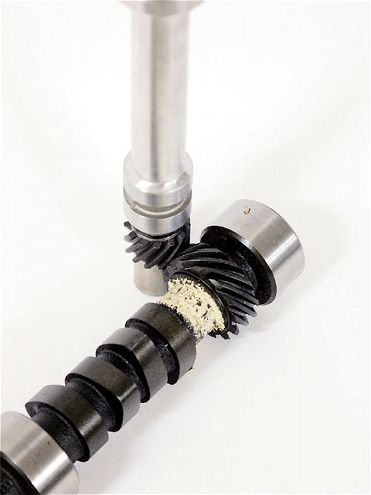
 The hardest period for a distributor gear-even if it is correctly installed-is the first few minutes it is run on a new engine. Before installing the distributor in the engine, don't forget to apply a generous portion of assembly lubricant to protect the gear until the oil system can catch up.
Not all of the great tips for reducing distributor gear wear come from the distributor manufacturers. Crane Cams also offered this tip for improving the lubrication between the camshaft and distributor gears on Chevrolet engines. As we mentioned earlier, the only oiling for the gears in stock engine trim comes from what's splashing around inside the block. But Crane has come up with a simple way to provide the gears a fine jet of pressurized oil.
According to Crane: ". . . the bottom of a Chevrolet distributor housing can be modified to spray pressurized oil onto the distributor drive gear. The extra lubrication will reduce distributor gear and camshaft gear wear. This is especially important when the gear is used to drive non-standard accessories, such as a high-volume oil pump or a magneto that puts additional loads on it and the cam. Simply file a small vertical groove 0.030 inch wide by 0.030 inch deep on the bottom machined band (immediately above the gear). This can be accomplished by using the side edge of a file. Pressurized oil running between the two bands will be directed downward onto both the gear and the cam."
This idea sounds like a great one because it is simple, easy, won't cause much pressure loss in the rest of the engine, and will work with both iron and bronze gears.
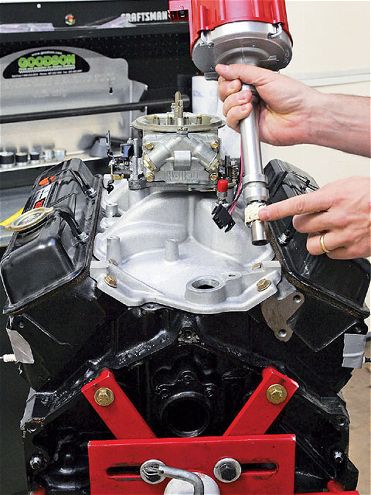
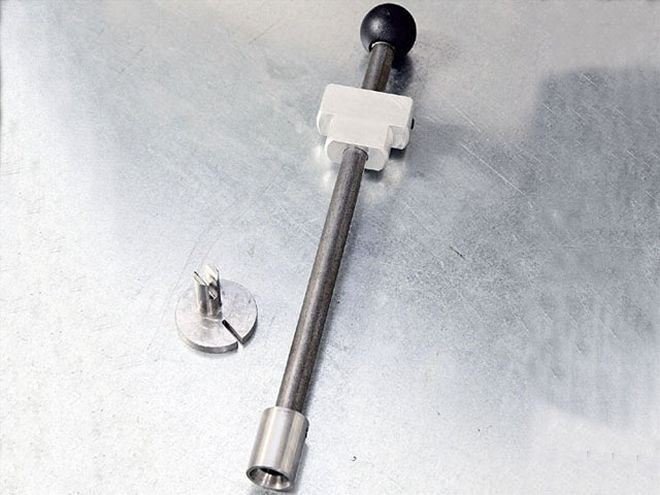 Goodson's distributor depth gauge is a simple tool that allows you to precisely measure the gear depth you need.
It is possible to determine correct distributor depth with nothing more than a set of shims and a steady hand, but if you want to be a little more precise or build several engines a year, this will be useful to you. Goodson, a top supplier of engine building tools, recently began offering a tool designed to measure correct distributor gear depth.
Known simply as a distributor depth gauge (PN DDG-05), this tool allows you to precisely measure the distance from the distributor seating flange on the intake to the oil pump driveshaft and then match the measurement to your distributor. The design is elegantly simple and, in our experience, works quite well.