
We’re rolling now. We mean that literally, as we’ve got our Project ’51 on all four and just with that accomplishment, we’re rejuvenated and ready to move onto the next series of tasks. Not to mention that we’re well under our budget, which makes it even more fun to get some new parts bolted in place.
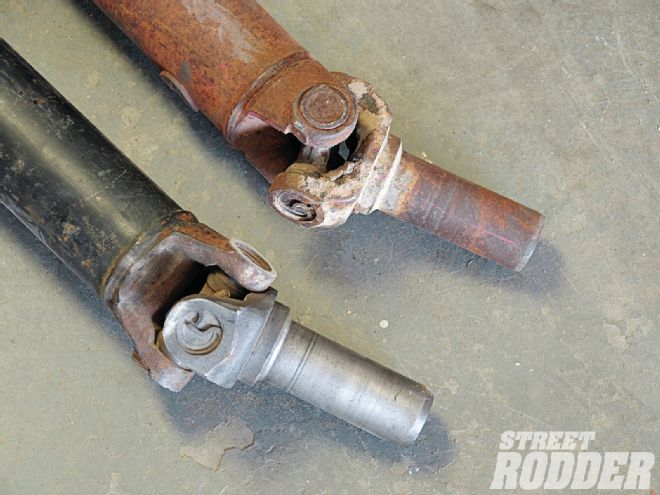 We scrounged two driveshafts out of the boneyard hoping we’d get lucky but to no avail. Both had the right yoke, but unlike the fairy tales, we had one that was too short and one too long.
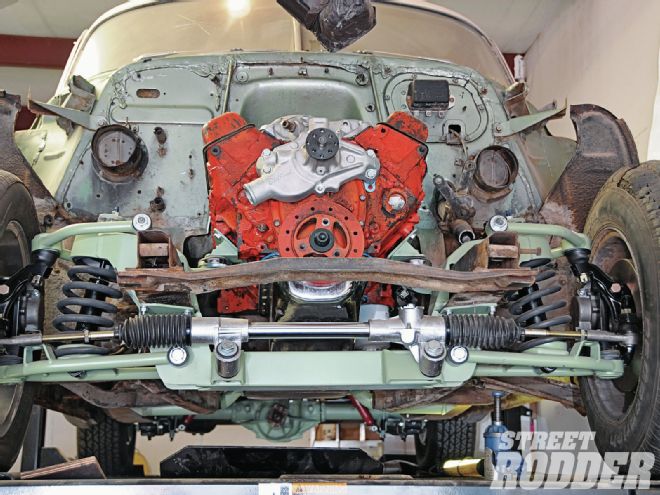
In the last installment we got the used small-block mounted to the new Chassis Engineering frontend and tied a 350 Turbo to a trick trans mount from Walton Fabrication. The missing link to complete the drivetrain was a driveshaft, which we set about to remedy with a trip to the boneyard. We found two candidates from similar Chevy pieces but it turned out one was too long and one too short. Goldilocks we are not. However, we scored a usable yoke and a starting point with a shaft that could be shortened.
The local driveshaft specialist gave us the direction on how to measure the length (install the yoke as far as it’ll go, and then pull it out 3/4 to 1 inch and measure from the center of the yoke’s cap-hole mounting flange of the rearend pinion). Ours was right at 57 inches and the team at U-Joints did their thing by cutting the used shaft and welding it to the perfect length. New U-joints were installed, of course, and the unit slipped right into place. The drivetrain was all connected.
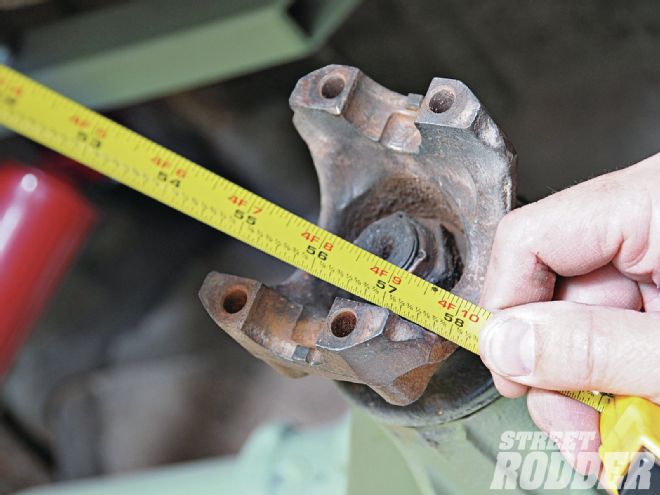 There are several ways to measure for a driveshaft depending on your vehicle. A rule of thumb for single-section shafts is to install a yoke on the output shaft of the trans and push it in until it bottoms out, then pull it out an inch. Measure from the center of the U-joint cap hole to the flat of the pinion mount. Ours measured 57 inches.
With everything connected we couldn’t resist getting our tires and wheels mounted. Not just any tires were going to do; we had to go with a set of wide whites from Coker. This was a bit of a hit to our budget, with the tires showing up on our doorstep to the tune of $970, but the car just wouldn’t look right without vintage whites and the radials will provide a safe, comfortable ride. We’ll see how we fair budget-wise in a few months.
We did roll with the stock rims and after a thorough media blast, we painted one various shades to come up with the right look. After hemming, hawing, and even getting my wife’s opinion, we ended up right back where we were at the beginning—red. The tires were mounted, balanced, and installed. When we dropped the old Chevy on the ground, we were pleased with the stance and overall guise.
With chassis and powertrain projects out of the way, we decided to move to a lightweight project—wiring. A call was made to the techs at Painless Performance in Fort Worth, Texas, for a recommendation. Since the electronics on the ’51 are fairly limited, we ended up with their 12-circuit harness kit (PN 10102). We won’t lie, wiring can be intimidating. Painless jumps through the hoops so you don’t have to. Each wire is marked with its function and where it needs to be routed. When we did have a question, their techs were quick to guide us in the right direction with the ignition switch and proper connections. With the front end off the car, we’re limited to what we can accomplish, but there’s plenty to connect to keep you busy. Our goal is to get the wiring complete to fire up the car prior to assembling the front end.
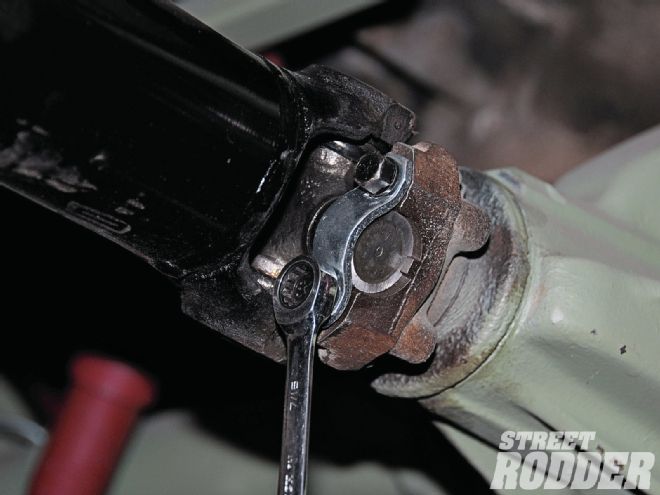 We dropped the two driveshafts off to be merged as one and, a few days later, voíla! We’re happy to report that the new driveshaft fit perfect and we topped it off with new mounting hardware gleaned from the local parts store.
At the end of this installment, we’re tipping the budget scale north of $8,000 but we’re still feeling pretty good about having enough leftover to fund a road trip to a show.
Parts Cost Part 6: Wiring harness Painless Performance $335.95 Bulbs and sockets Local Parts 13 Tires Coker 970 mount/balance 45 Paint/primer for wheels 36 Driveshaft, hardware U-joints 138 Part 6 Total $1,537.95 Total Spent ’51 Chevy Business Coupe $2,750 Chassis Engineering front suspension 2,052 Rear Suspension rear suspension 602 Brake Lines, Valve, etc. 137 Walton Fabrication trans crossmember 169.95 Engineered Components MC brake bracket 130 master cylinder 75 Engine and trans traded for a duster 250 Energy Suspension transmission mount 40 Chassis Engineering SB engine mounts 86 Gaskets for engine oil pan, intake, timing 90 Trans seal and inspect 125 Intake and valve covers swap meet 60 Grand Total $8,104.90