We have all heard the saying "rust never sleeps," and when it comes to vintage Mopars the battle to keep our prized possessions from getting eaten by oxidation is never ending. Twenty and 30-plus years ago, to get rid of rust you needed to find NOS or used rust-free sheetmetal. Eventually the NOS supply pretty much ran dry, and if you found a solid piece, it became way too expensive for the average enthusiast. Finding rust-free donor vehicles at salvage yards in northern states and across the rust belt has always been an issue. Even the supply of straight, rust-free sheetmetal from the southwest has dried-up for most popular models.
Fortunately, companies like Auto Metal Direct (AMD) and Eastwood have released products to help alleviate the rust issues that plague classic Mopar sheetmetal. For a northeast vehicle, our 1973 Dodge Challenger Rallye (aka The Slick Challenger) does not have a serious amount of rot—the only affected areas are in the lower part of the trunk extension panels. That's mostly due to having spent most of its life in a garage, away from those salt-covered winter roads. Before the availability of reproduction trunk extension panels, we had seen many restored cars missing or having incorrect-looking extension panels. It's been one of our pet peeves. Helping cure this is AMD, which has released reproduction trunk extension panels that offer factory-fit and appearance.
Most enthusiasts don't have welding experience or the required welder and related tools. At the same time, structural adhesive technology has been used in body shops for nearly 20 years. We've had success gluing quarter-panels on a Challenger (Nov. '02) and front floorpans on a '66 Dart GT (May '07). The Challenger still looks great without any signs of cracking or separation and the same goes for the Dart. Other benefits to not welding include eliminating the possibility of tin corrosion at the panel joint and the prevention of possible heat warpage in the panels. Plus, without sparks there's less chance of fire in the home garage.
Sure, professional butt and spot welding can give that concourse-correct appearance, but we just wanted a nice-looking street driver that could be a local car show winner. Once the AMD trunk extension panels and Eastwood structural adhesive and restoration supplies were in hand (along with our arsenal of tools at home), we were eager to get to work. Keep a sharp eye on our how-to pix, because the Eastwood glue system can put competent body repair in the hands of the average do-it-yourselfer!
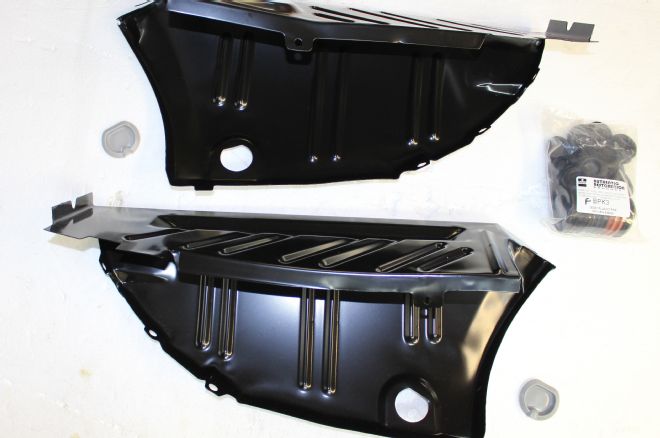
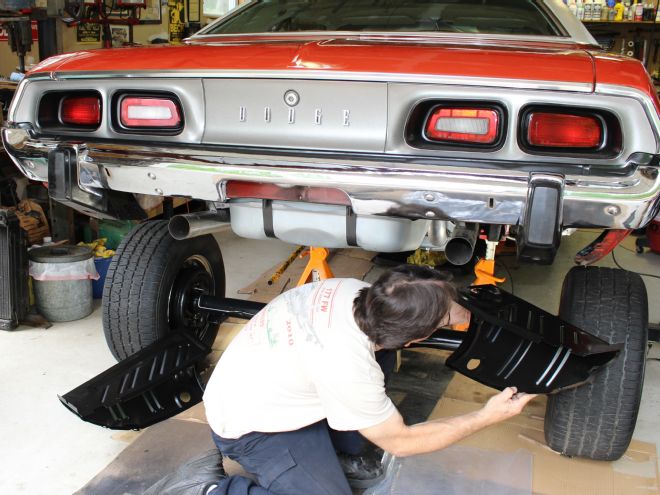
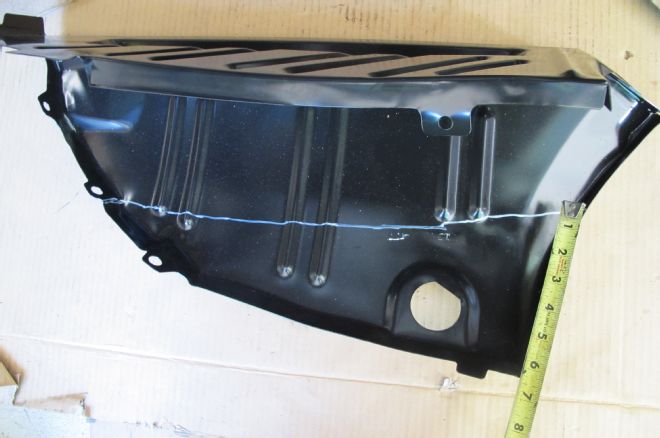
1. These left and right trunk floor extensions (part No. 840-2570-L, 840-2570-R, $129.99 each) from Auto Metal Direct will replace the rotted-out sections on our E-Body project. They feature a factory appearance and are a direct replacement made from high-quality steel with an EDP coating for rust protection. The bag of body plugs (part No. F-BPK3, $59.99) will fill in the body plug holes to keep out water, dirt, and noise.
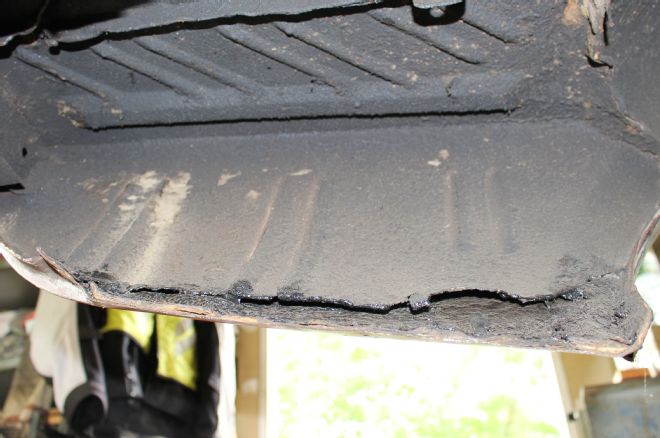
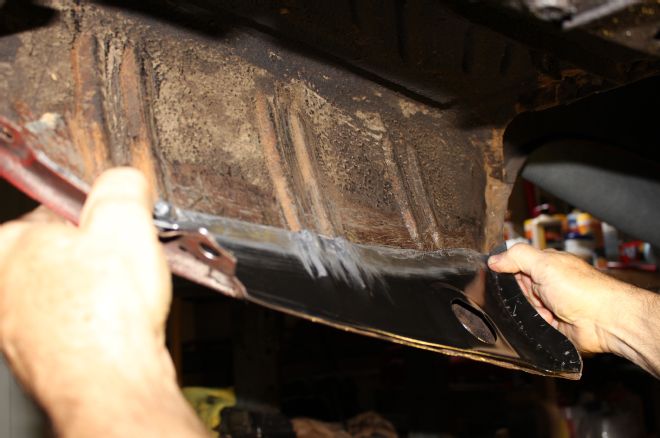
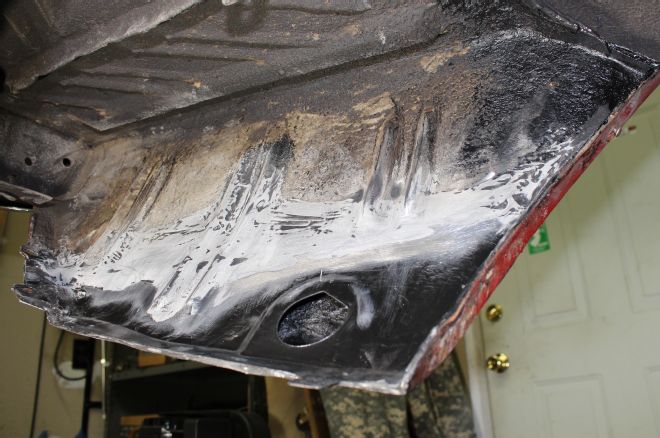
2. Here you can see the damage to the left-side lower extension panel. Ironically, the quarter panels on each side weren't rotted out. It appears the car received new quarters when it was re-done back in 1983. In those dark times the bottom of the trunk extension panels were filled with tar paper and undercoating! After we removed the tarpaper the rusty panels received a coat of Eastwood Rust Encapsulator to stop the spread of oxidation.
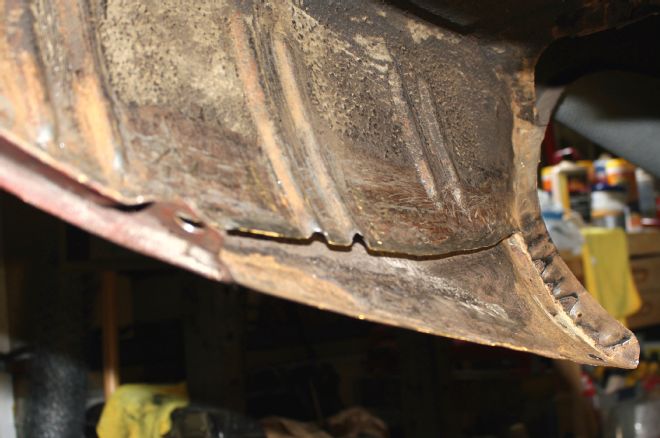
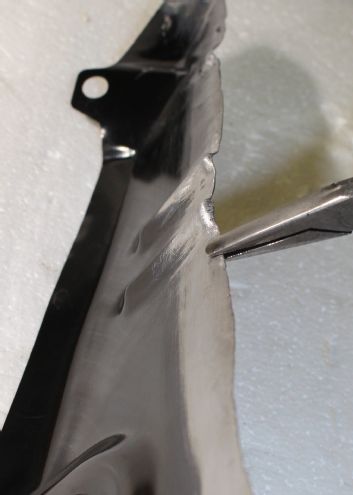
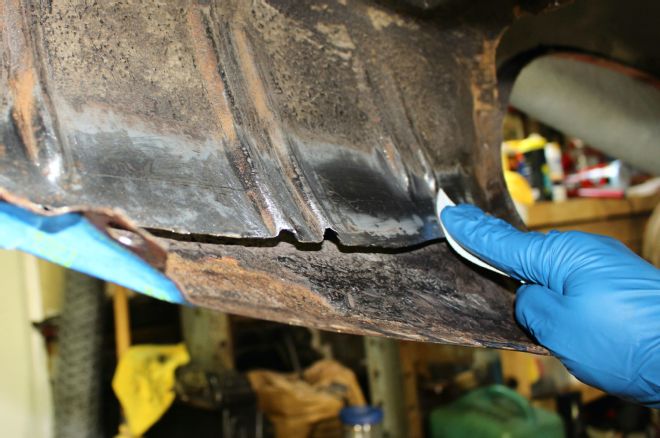
3. We carefully cut out the rust without touching the outer panel that was less than a half-inch away. A die grinder with a cutting wheel did this tedious task, and it's not for the faint of heart. Our cut was an inch above the rust where the panel proved to be strong and solid to work with. The fender lip and bottom area of the quarter panel only needed cleaning-up with a wire wheel.
4. The new panel features that stock/original look you want when people take a peek under your pride and joy. We measured and cut an inch above the cut-out area so the newly made patch panel would overlap for a strong bonding area for the panel adhesive.
5. After placing our patch panel in position, we were impressed how well the ribs and the lips lined up. Minor cutting and tweaking (bending) is necessary for perfect line-up. It takes time, patience, and a lot of planning to go into the job, especially if you're a novice like your author.

6. Many trial fitments with the clamps were performed until a routine was established with perfect panel position/alignment. We needed to be certain we could apply the adhesive and place the panel in position in time before the adhesive would set-up. The panel adhesive will set up in only 20 minutes in our warm (80-90 degree) working conditions.
7. The panel edges were curled over just enough to meet flush when clamped together. After a few more mock-ups with the clamps we felt we were ready to begin the adhesive process.
8. Proper prep work to the adjoining panel area is paramount. For the panel adhesive to hold the panels together (like being welded together), that surface area must be clean bare metal. We roughed it up with 80-grit sandpaper, then cleaned it with Eastwood's PRE Painting Prep (part No. 10041Z, $9.99) sprayed onto a clean rag.
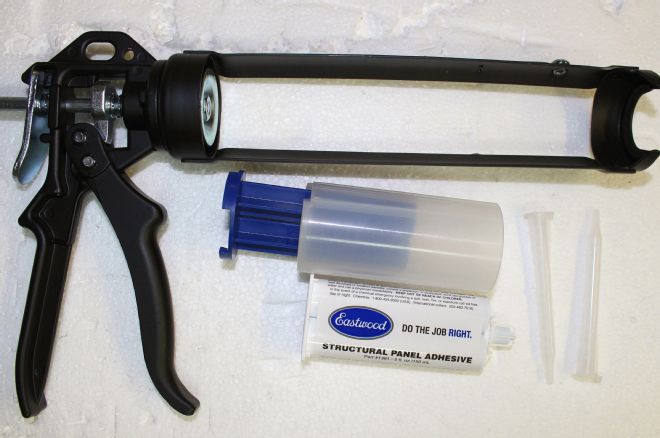
9. We've used Eastwood's Structural Panel Adhesive (part No. 31087, $19.99) for years with outstanding long-term success. Two Panel Adhesive kits were needed for each side. Eastwood's 26:1 Cartridge Gun (part No. 46613, $19.99) makes pulling the trigger easier than using a standard caulking gun.
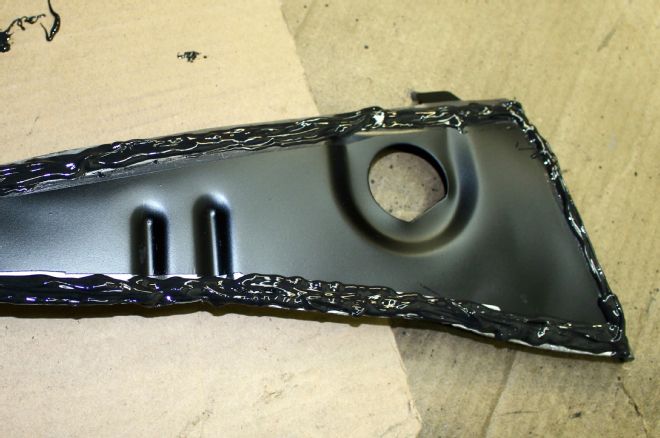
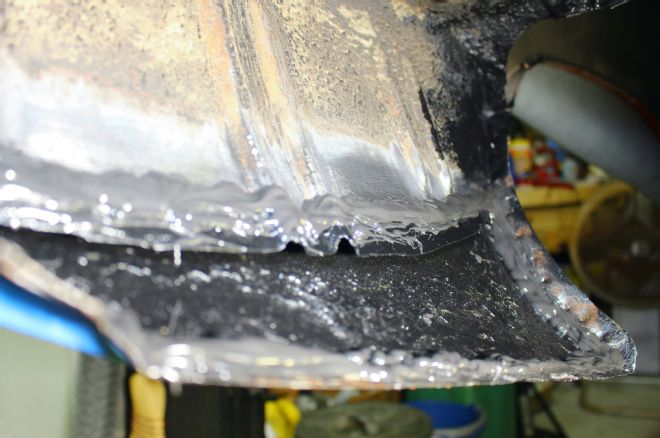
10 & 11. Right after the panels got the glue, they were quickly aligned and clamped together before the adhesive set-up. Notice the heavy bead (1/4 inch) of adhesive along the entire bare metal contact area for positive adhesion and rust protection. Also, the no-contact, inner areas were brush-coated with Eastwood's Rust Encapsulator (part No. 16065ZP, $39.99)
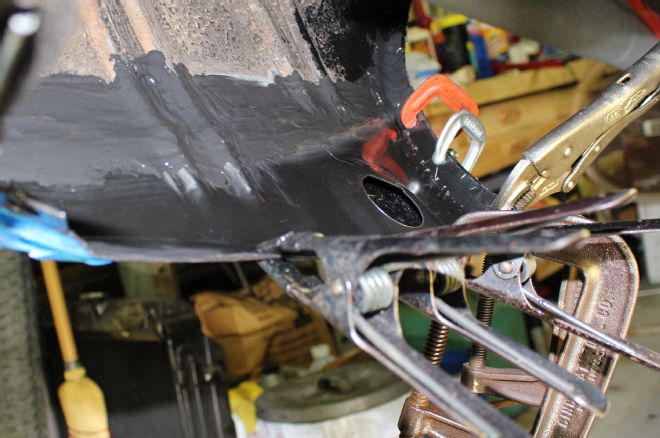
12. The clamps hold the panel in position while the adhesive hardens. The adhesive will hold the panel in place and seal-out rust for many years. The next day after full cure (24 hours) we removed the clamps.
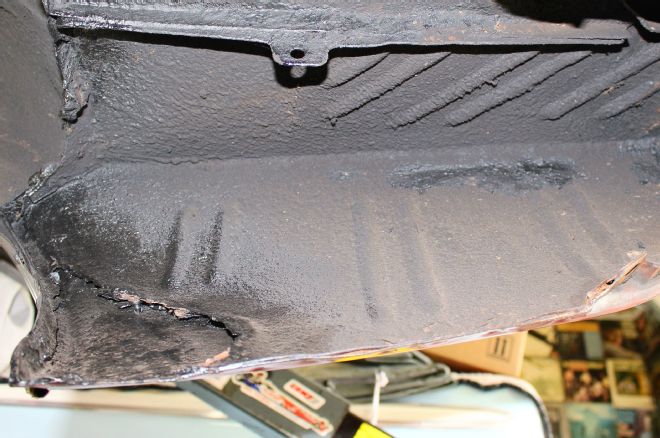
13. With a sanding block using 80-grit sandpaper, we blended-in the glued-on panel similar to sanding body filler, though the adhesive is harder to sand. Since this panel is hidden underneath the car, we didn't go crazy with the finishing work. We'll finish it off with Rust Encapsulator paint and undercoating, sufficient for our street driver.
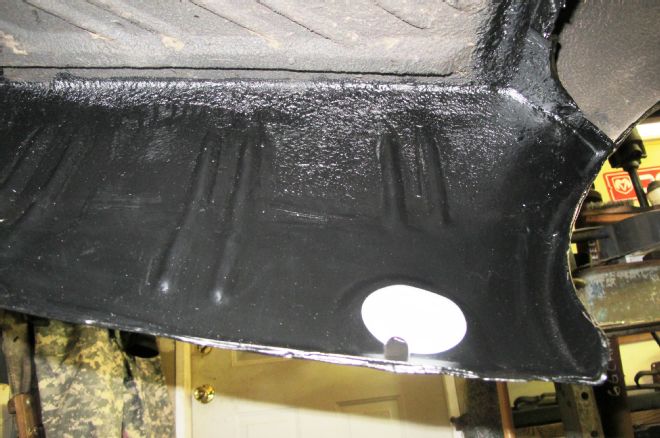
14. We're proud of our first-time lower trunk extension panel work. We brushed on Rust Encapsulator treatment, making a good base for the Rust Encapsulator Rubberized Undercoating (part No. 13651Z, $22.99). It will blend well with the factory and/or dealer undercoating. The new body plug will be undercoated for that stock-like appearance.
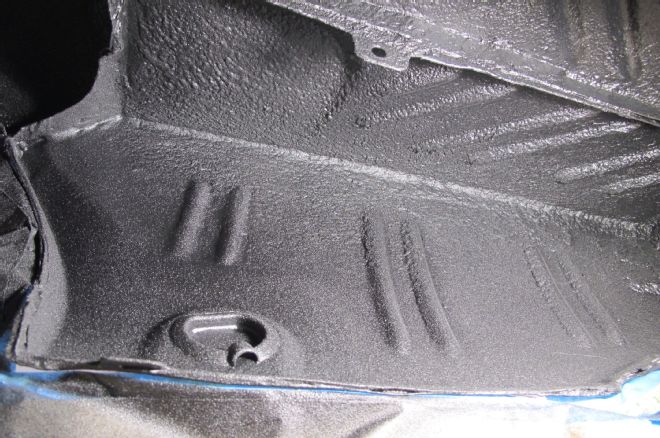
15 & 16. Here's a "before" and "after" look of the repair on the right-side panel. The Eastwood undercoating blended nicely with the stock splatter. It was well worth all the work (eight days, three hours each day). Now the panels have that correct-look we wanted.