When it comes to building a classic truck, it's an unfortunate expectation that somewhere lurking under all those years of paint, Bondo, and surface gunk lies an uninvited friend. A friend who's been quietly sleeping all these years; quietly growing, feasting on the very sheetmetal that you so carefully planned on restoring. And if he isn't stopped, it will only get worse.
The problem with rust is that more often than not, it goes unnoticed. Under the matting and carpet, down in the lower corners of the doors or cab, tucked into the deepest crevasses of the fenders. Its existence usually comes to light in the form of paint bubbles that merely hint to its very existence. Unfortunately by then, a deeper, darker secret is lurking underneath.
So was the case with a few spots on my otherwise clean C10. The lower corners of the doors were starting to display that telltale "rust bubble" on the surface of the paint, as was the corner of the roof on the driver side. Thankfully, other than these few trouble areas, our '68 didn't need any further attention before we shipped it off to the body shop.
Turned out, I was really enjoying my time "killing" rust. So much so that I decided to tackle what I should have tackled months ago. I had repaired a pretty decent dent on the top of my tailgate before sending out the whole thing to get sandblasted. Suffice to say, it returned, was promptly reinstalled, and lived an unspecified amount of time in situ, gathering rust. Thankfully, sorting out a little surface rust isn't nearly as time consuming as cutting out cancerous panels, but it's still worth illustrating here as it could be the difference between that fender being saved or scrapped on your next project.
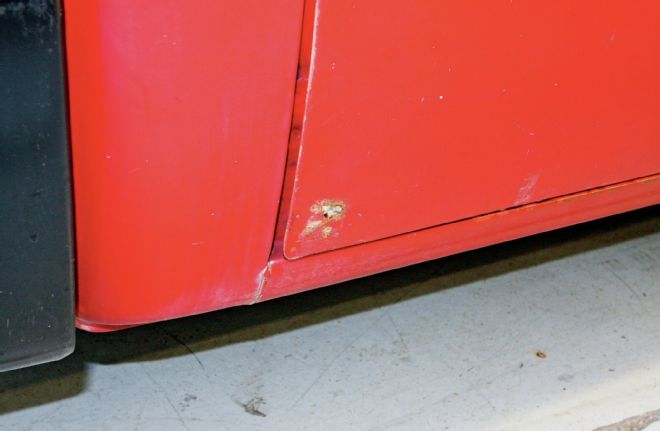
01 Here's the aforementioned trouble area on the lower door corner. The damage isn't too bad and thankfully doesn't extend into the "structure" areas of the door, making repair fairly easy and straightforward.
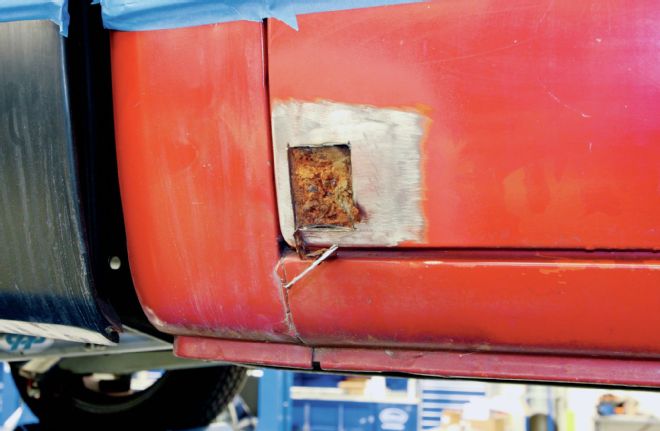
02 The first step in repairing the rusted area is to cut the damaged section out and investigate the inner structure of the panel. This is typical of rust damage in most any vintage vehicle; moisture gets trapped between two panels and rust begins to form.
03 As the section is cut out, the damage is pretty evident.
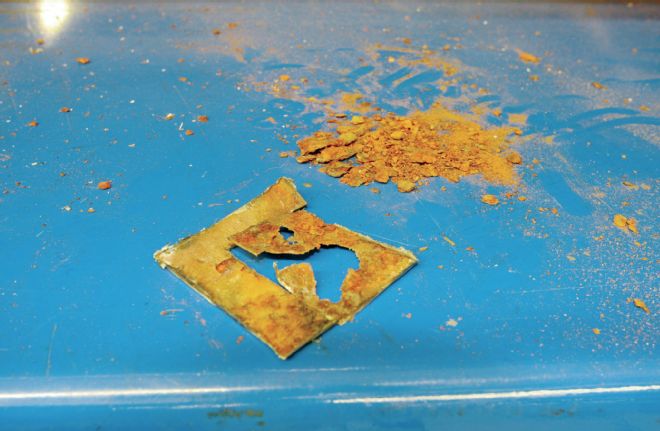
04 Using the pick end of a body hammer, I chipped away at the damaged inner section so that it could be repaired as well. Most of the rust damage was merely cosmetic surface rust so it wasn't necessary to remove as big a section as the exterior skin.
05 Additionally, the structure of the door corner was still intact and looked good.
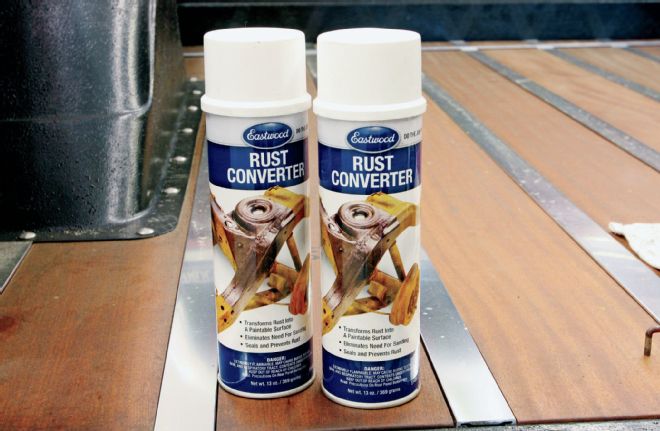
06 To prevent the existing rust from spreading again once the outer skin is repaired, the rust needs to be neutralized. For this end, I'll be using a two-step process. First, I applied Eastwood's Rust Converter, which is specially formulated to convert the rust into a polymeric coating that seals the existing surface against moisture and prevents future rust growth. It also acts as a great primer coating for our next step.
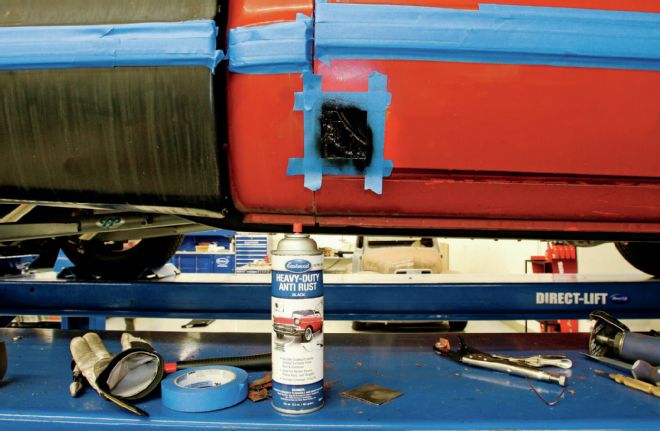
07 I followed up with a coat of Eastwood's Heady Duty Anti-Rust, which is specially formulated for use inside frames, doors, rocker panels, or any exposed surface where a traditional topcoat isn't required. Combined with Eastwood Rust Converter, the combo serves as a great 1-2 punch to tackle and prevent future rust, especially in tight or hard-to-work spaces.
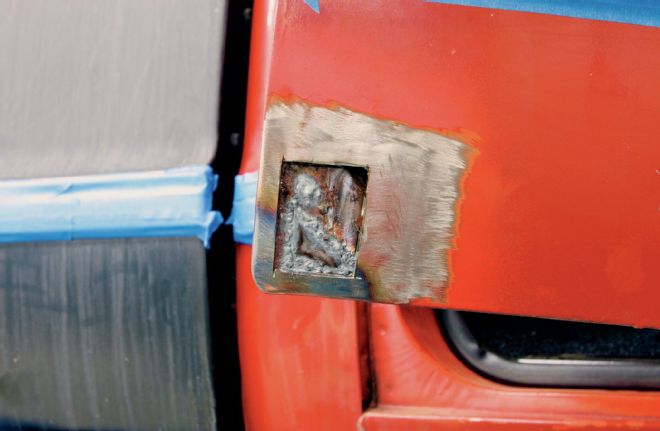
08 When it comes to fabricating a patch panel, one can either cut the hole and fab a patch panel to fit or fab a patch panel large enough to cover the damaged area and cut the hole to fit. I prefer the latter as it allows me to use the panel as a template for the hole.
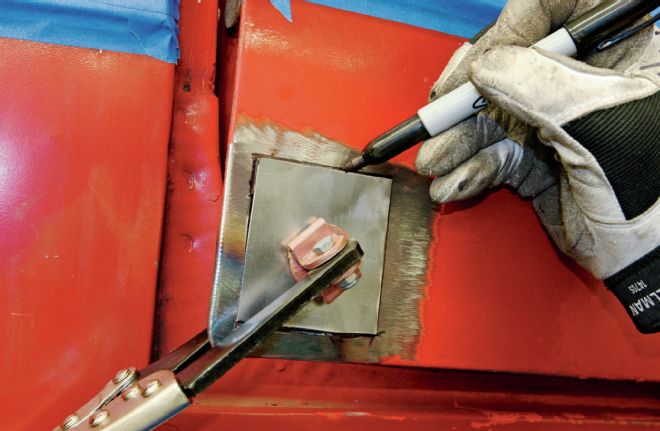
09 Once cut and massaged for a decent fit-up, the panel is held in place while its tack welded to the doorskin. Difficult-to-clamp panels, such as this one that straddles an uneven section of the door corner on the inside, can be held in place using any number of means. Don't overlook the obvious. Sometimes it's as simple as using a length of masking tape to hold the panel in place while it's tacked.
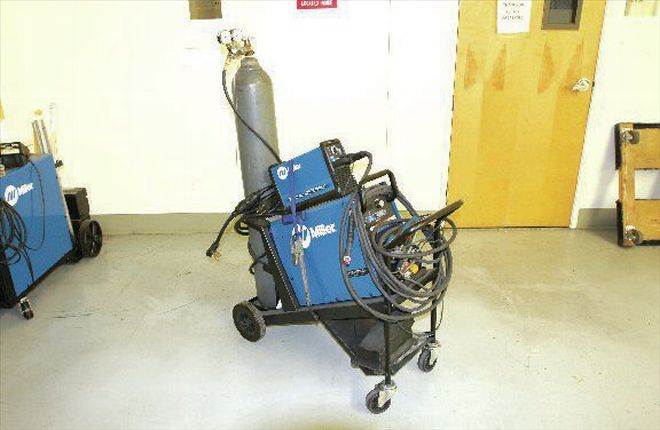
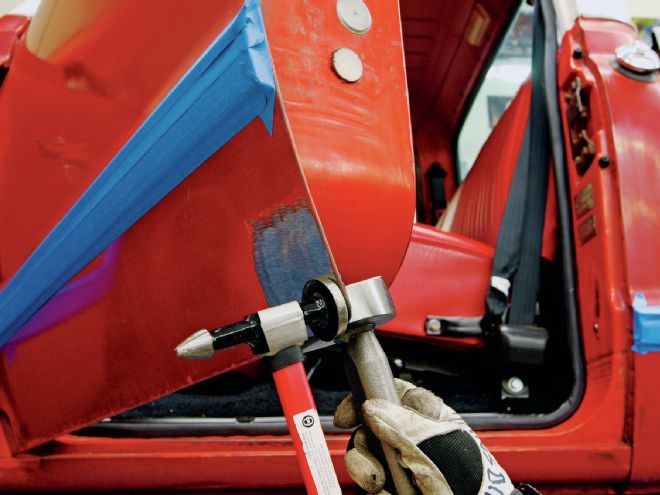
10 To weld our patch panels in place, I'll be using a Miller Diversion 180 TIG welder equipped with a 1⁄16-inch Tungsten and similarly sized ER70S-2 rod.
11 I like to tack the patch panel in place and then grind down the welds before carrying on welding the rest of the panel. This allows me to ensure that the panel is nice and even with the surrounding area.
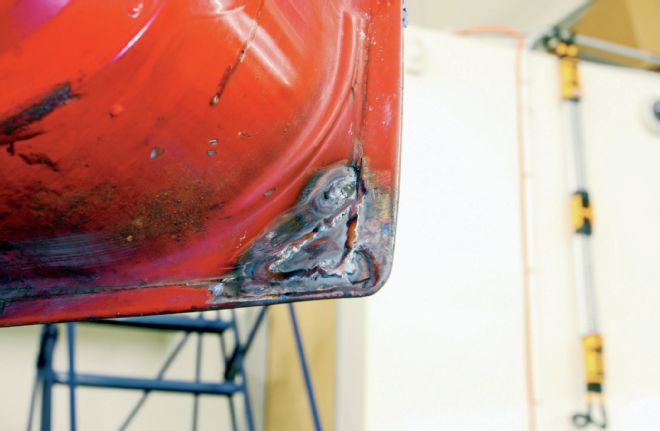
12 From there, the rest of the panel can slowly be welded solid. To prevent warping the panel, I alternate the welded area and use compressed air to slowly cool each section before moving on to the next.
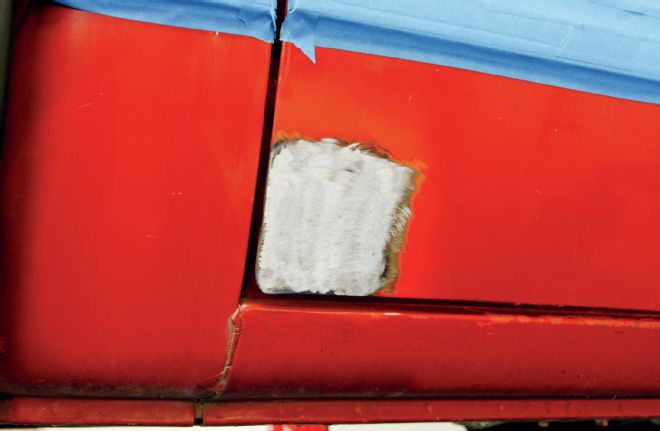
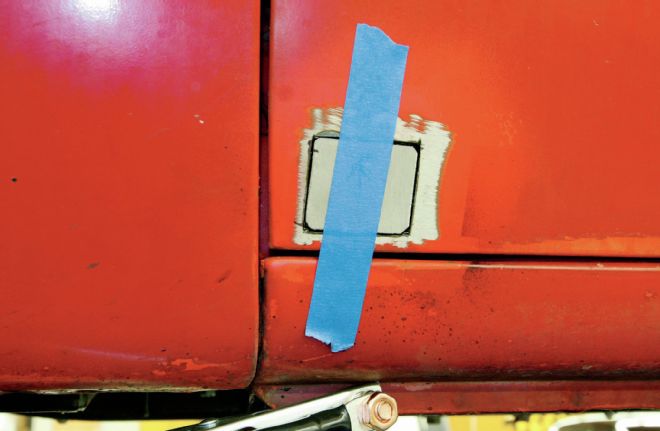
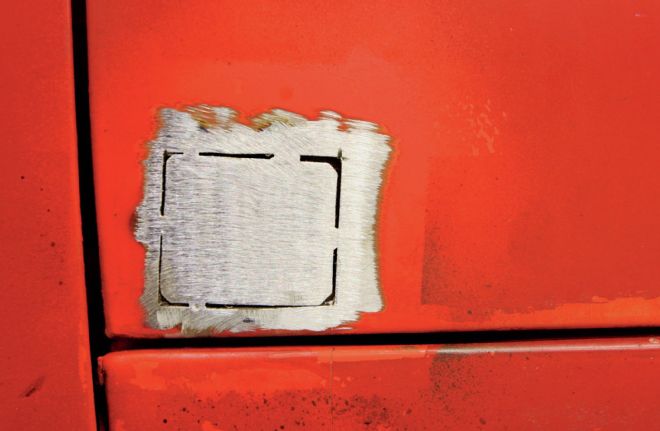
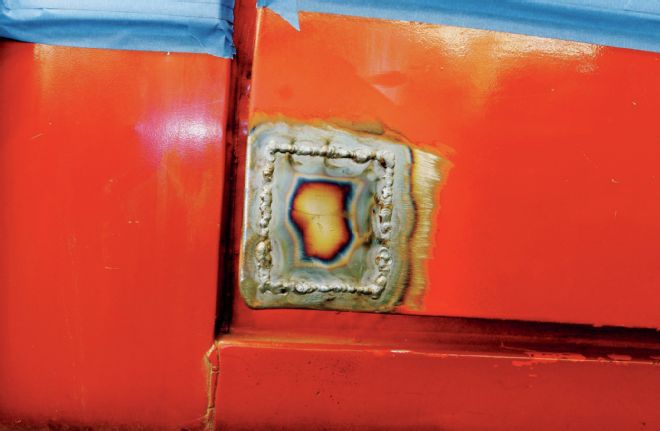
13 Another round of sanding and the weld is knocked down nice and flat and the patch panel is now one with the doorskin.
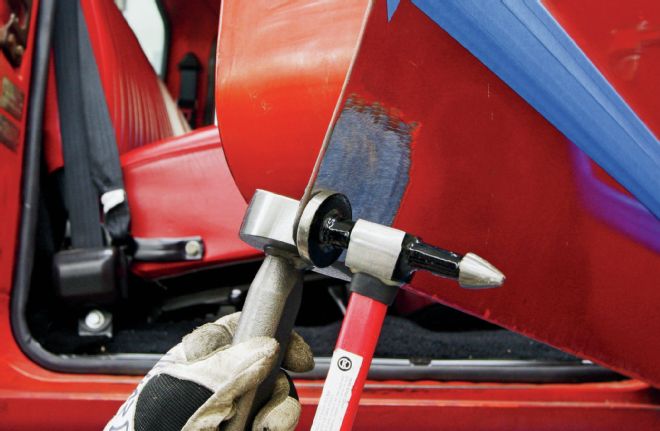
14 Once the door corner was repaired, I noticed that it was slightly proud when compared with the lower corner of the door opening on the cab. Before the corner was repaired, there wasn't enough strength in the area for it to be repaired. With the patch panel in place, the affected section could now be brought into shape using a hammer and dolly.
15 One corner down, three to go!
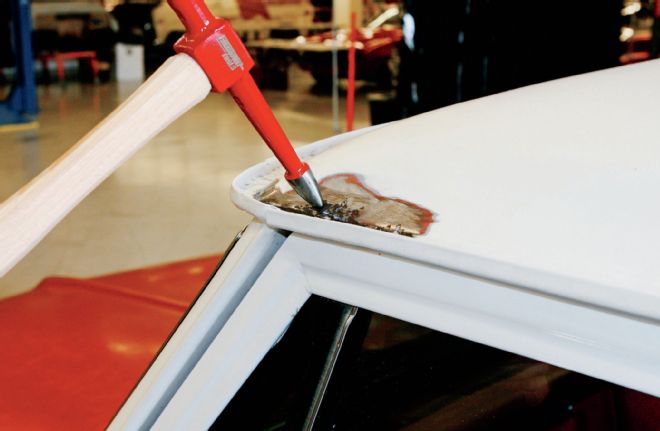
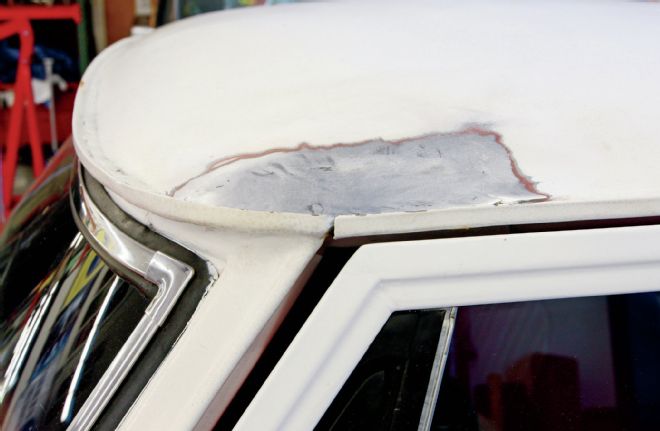
16 Another area that needed some attention was the upper roof corner on the driver side. There is a seam in the roof gutter that is filled at the factory using seam sealer. Over the years, this seam sealer dries up, cracks, breaks apart, and then allows moisture to wick in between the two metal panels. Using the pick end of a body hammer once again, I can detect where the weak, rusted metal ends and the decent, unaffected sheetmetal begins. This establishes a perimeter for the repair area.
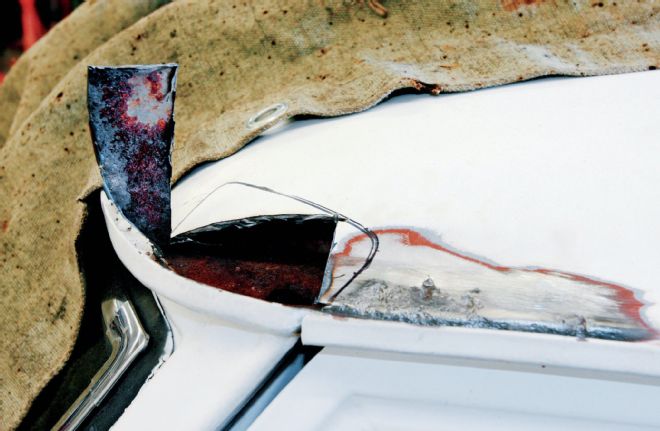
17 Using a small cutoff wheel, the roof is opened up and further investigated. Like the door corner, this area was very thin, having nearly fully succumbed to the cancerous rust. Note the rusted interior section, much like what we found in the door corner.
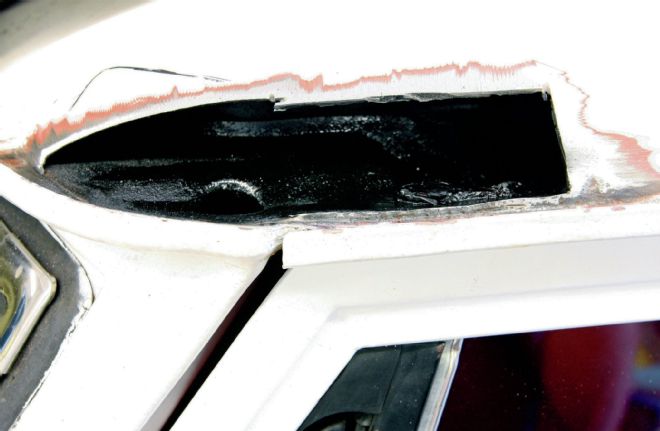
18 Having cut the damaged area out further, I then treated the inner section just like I did the door.
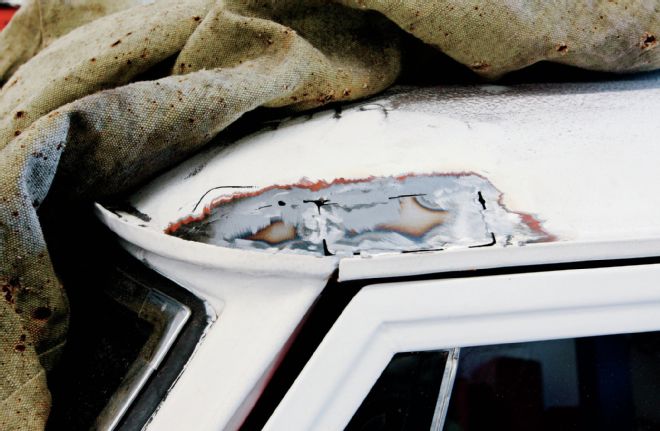
19 Repairing the roof corner will be trickier than the relatively flat panel we just repaired on the door. For starters, the very corner is a compound curve; it curves from the corner of the door in toward the center of the cab as well as upward from the gutter toward the roof. I opted to fabricate the patch panel in two pieces, using an Eastwood Oblong Forming Dolly mounted in a vise to hammer out two panels that had the correct form. I then tacked them in place, using the same technique as before.
20 Due to the corner's rather complex shape (and my relatively mediocre sheetmetal skills), a little body filler will be necessary to make the repair perfect.

21 One last rust problem that we need to tackle is by far the simplest, but probably the most common as this one has to do with simple surface rust. As mentioned, I sent out the tailgate to the sandblaster's after repairing the mega-dent that it had. As you can see, my "buddies" in the shop didn't listen when I told them to wear gloves when helping push the truck around the shop. The end result? A bunch of CSI-quality handprints all over my nice, bare metal tailgate.
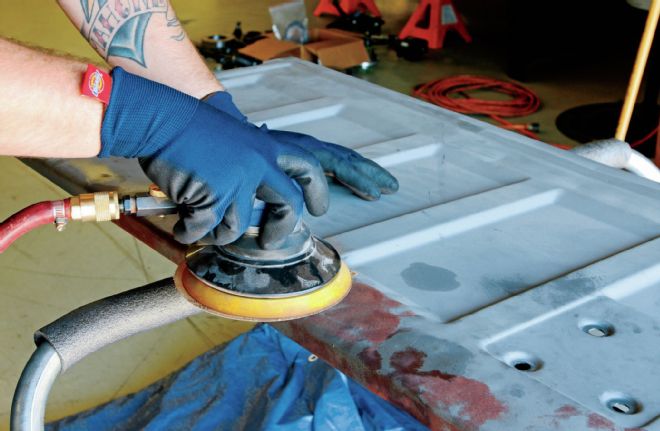
22 Fortunately, it's nothing a palm sander and a little elbow grease can't handle.
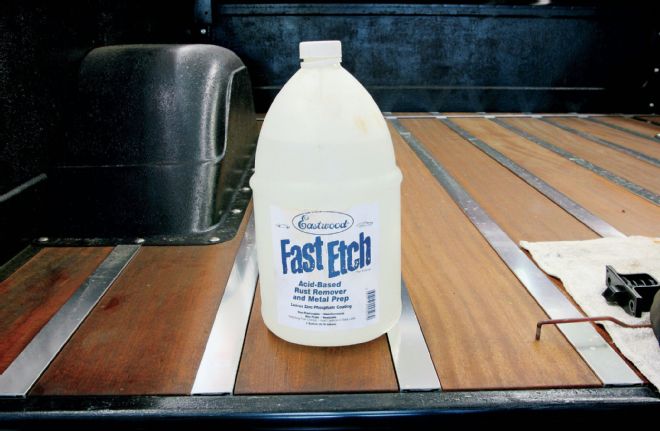
23 Sanding down the affected area to bare metal as best I can, I then followed with a bath of Eastwood's Fast Etch. An acid-based rust remover, it also works great as an all-around metal prep prior to applying a primer coat. I like to use Fast Etch on light surface rust or whenever there is a possibility that I can't reach into every nook and cranny as it quickly dissolves the iron oxide, leaving a zinc phosphate coating behind.

24 Fast Etch is can be applied by simply wiping the surface with a damp cloth. When the treated surface develops a haze, the excess is wiped off and the surface cleaned thoroughly using Eastwood's PRE Painting Prep.
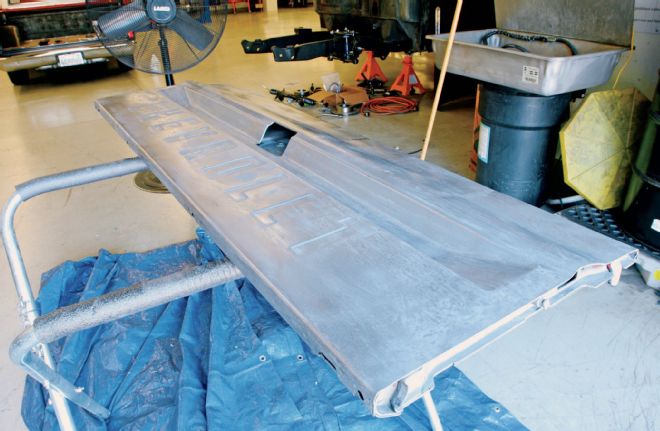
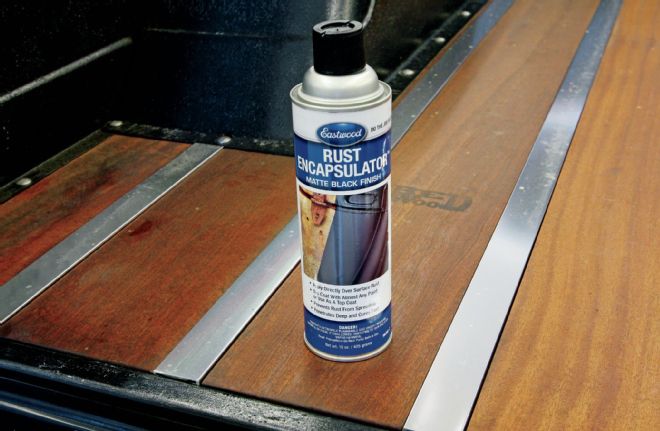
25 To protect the tailgate until it's time to bodywork the truck and to further treat whatever lingering rust might still exist, I'm going to dust the entire tailgate with a coat of Eastwood Rust Encapsulator. This stuff is similar to the Heavy Duty Anti-Rust that I used on the door, but it's more compatible with a variety of topcoats, which is important since we'll soon be bodyworking and painting the truck.