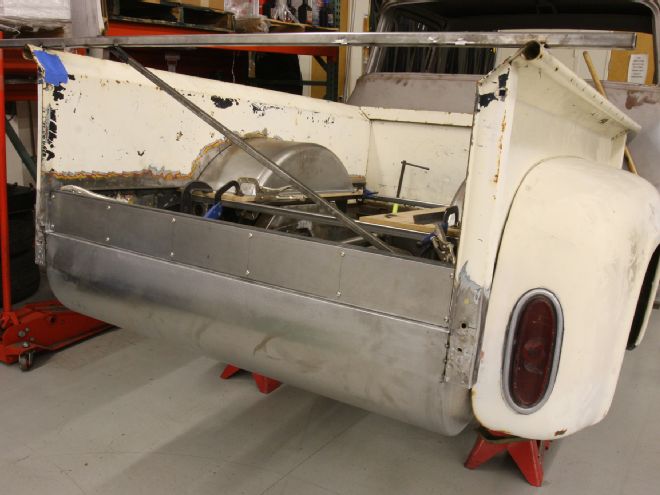
We've been busy on the project 1955 Chevy wagon with some sheetmetal replacement and rust repair. Now, we don't have a high-end shop, or indeed any professional shop, doing this for us, but we do have a relatively well-equipped shop of our own and a little knowledge (though that's a dangerous thing, right?). This project is a budget build, meaning we're doing the work ourselves, and even fabricating panels, or using sections from donor cars, in the process. Yes, the same way most of you would do it!
OK, so this last section isn't related to our project wagon, but making wooden formers is a neat way to easily form radiused, or rolled, edges on curved panels if you don't have fancy tools. We're building this 1956 F-100 pickup in the pages of our sister publication Classic Trucks, and thought we'd include here how we fabricated the end caps for a roll pan we made for the truck.
There are plenty of applications for this technique when tackling body panel fabrication, just use your imagination. Ideal a hard wood should be used, especially if you plan on using the former several times, but for this one-off (OK we made two caps, so technically two-time) application, we used 3/4-inch plywood. We used a softpad on an angle grinder to rough shape the radius, then finished it by hand using sandpaper. Remember, the smoother the wood, the better the sheetmetal will turn out.
We actually started the edge radius using a special roller (thanks to Circle City Hot Rods for the use of the equipment) which formed the radius to 45 degrees, then used our former to continue it to 90 degrees.
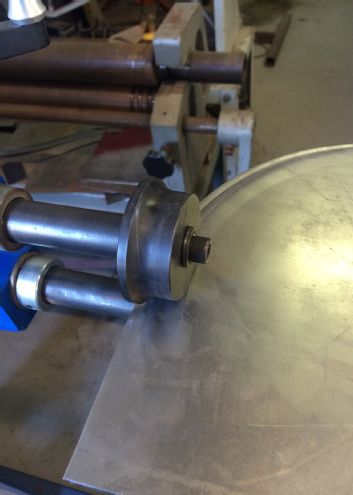
Using these dies in Circle City Hot Rods' electric roller we formed the beginning of our radius. Note after the radius, it flattens the steel back in the same plane as it was originally.
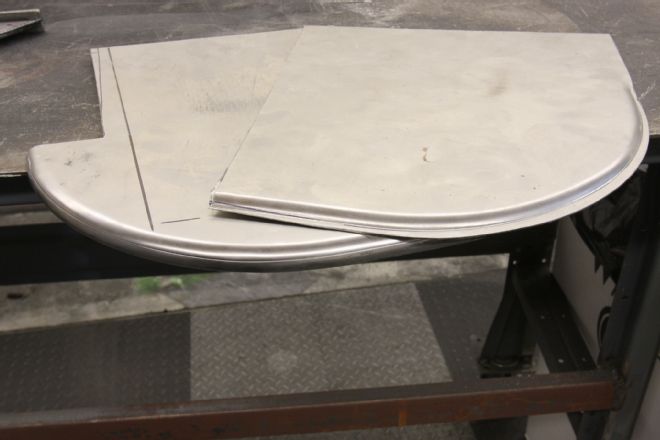
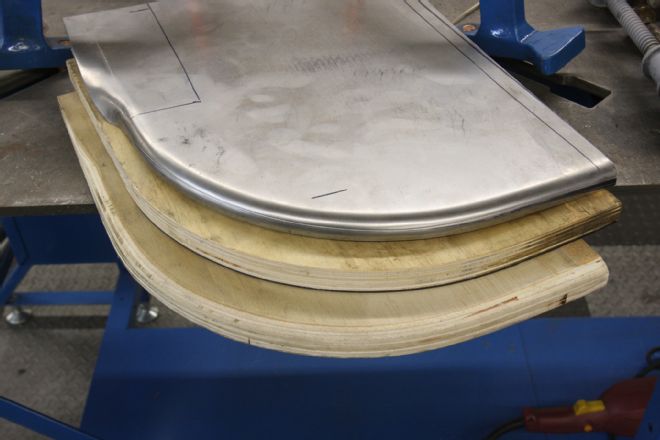
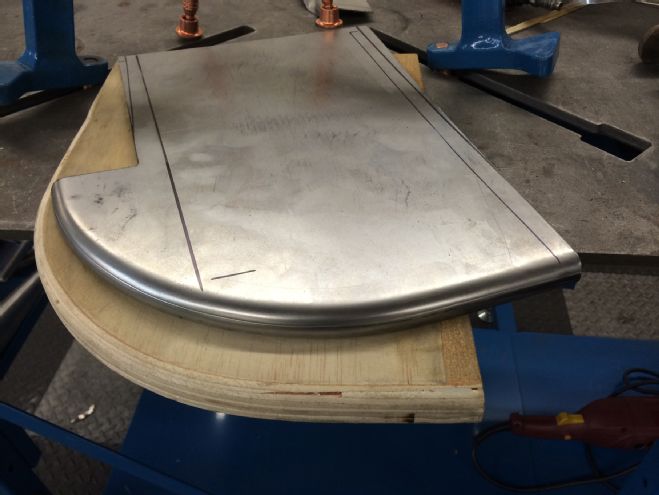
Fresh from the roller on top, and the finished panel below. We made quick 'n' dirty plywood formers to achieve this.
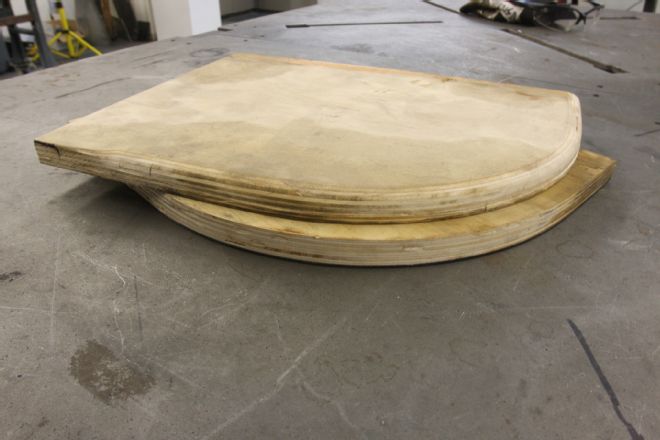
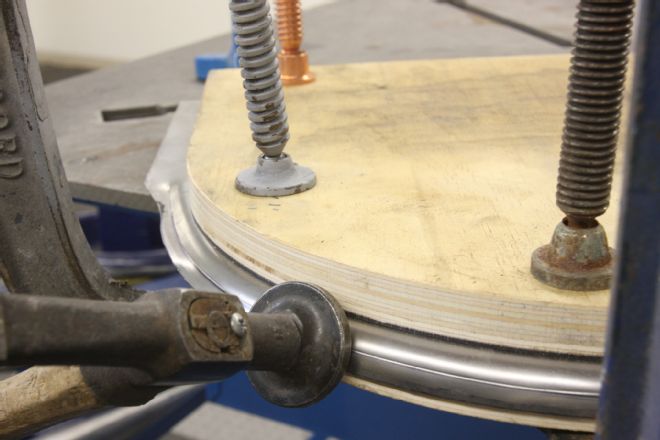
Two pieces of 3/4-inch plywood were cut to the same curve as our roll pan, then we radiused the edge on one using a softpad followed by sandpaper.
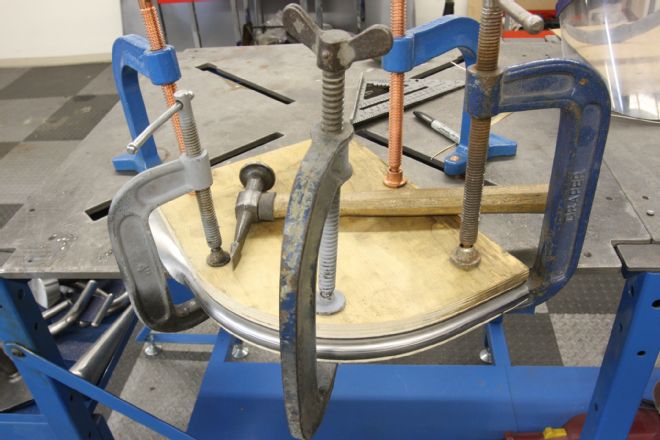
The steel was sandwiched between the two pieces of wood, which were clamped together and to the bench once their curved edges were aligned, leaving access to hammer over the steel.
A body hammer was used to hammer the steel over the contour of the wood.
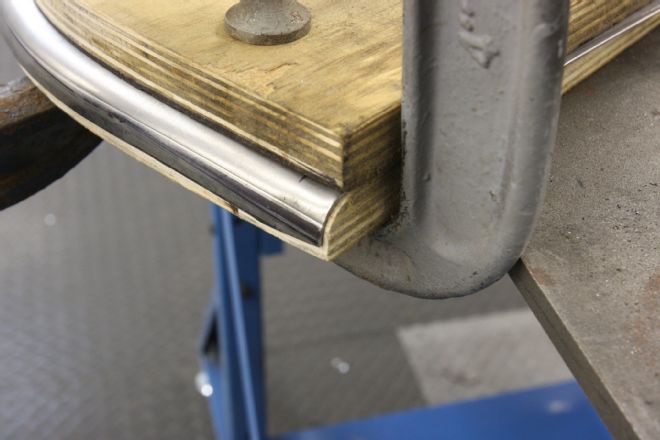
Here's our nicely radiused steel, ready to be released from the former.
Voila! Ready to be trimmed to fit. We didn't radius the upper section as it'll be removed.
Trimmed to clear the stake pocket and almost ready for installation
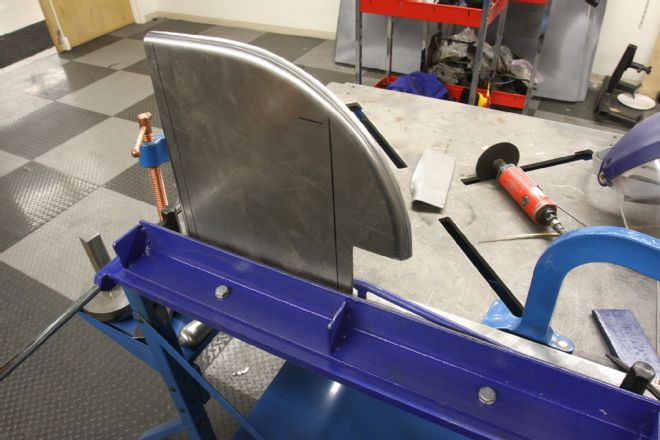
Once cut to length, with 3/4-inch extra to allow for the 90-degree weld flange, we used Eastwood's 30-inch bench-top metal brake to form the 90-degree flange.
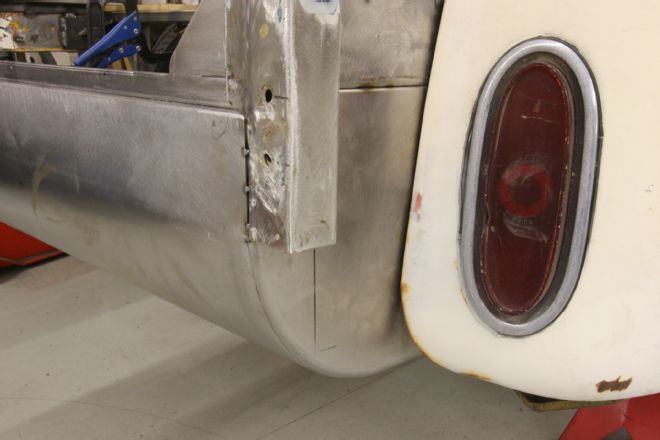
The endcap welded in place. The upper flange welds to the existing bedside flange, eliminating the original lower filler panel. We still have to modify the bottom of the stake pocket, which is why it's unfinished.