We've been busy on the project 1955 Chevy wagon with some sheetmetal replacement and rust repair. Now, we don't have a high-end shop, or indeed any professional shop, doing this for us, but we do have a relatively well-equipped shop of our own and a little knowledge (though that's a dangerous thing, right?). This project is a budget build, meaning we're doing the work ourselves, and even fabricating panels, or using sections from donor cars, in the process. Yes, the same way most of you would do it! So, enough talk, let's roll our sleeves up and get to replacing rocker panels.
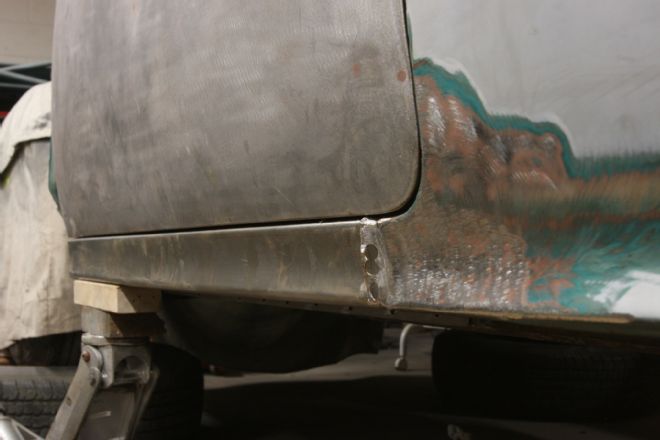
The more we dug into our project 1955 Chevy wagon, the more obvious it became that it would require some sheetmetal repair, specifically the front floorpans on both sides, plus the passenger side rocker panel. However, having discovered some pretty bad rust inside the windshield posts, as well as a couple of areas we had to repair on the lower firewall where the cowl vent drains, and the rear doorjambs, we decided to replace both rocker panels under the doors as well as the lower sections of the rear quarters. It would just be false economy to prep and paint the wagon only to have rust appear in short order afterward. Our decision was made easier given that someone had jacked the wagon up using the rocker panels near the A-pillar at some point and crushed them.
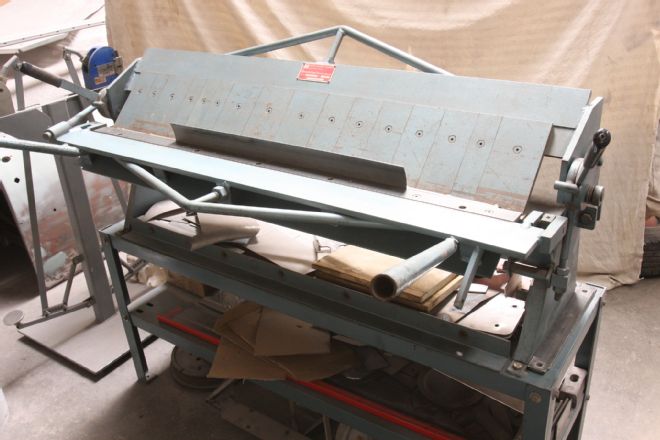
While we purchased the rocker panels under the doors, we elected to fabricate the lower sections of the quarter-panels, both to save money and because we could! This required the use of a slip roll, stomp shear, and finger brake. Sure these are large pieces of equipment, and most people won't have them, but if you're going to do this sort of work regularly they're invaluable, and can be sourced relatively cheaply each online, either on auction sites or craigslist. I sourced used ones for a few hundred dollars each to equip my personal shop, and they've paid for themselves purely in the time saved.
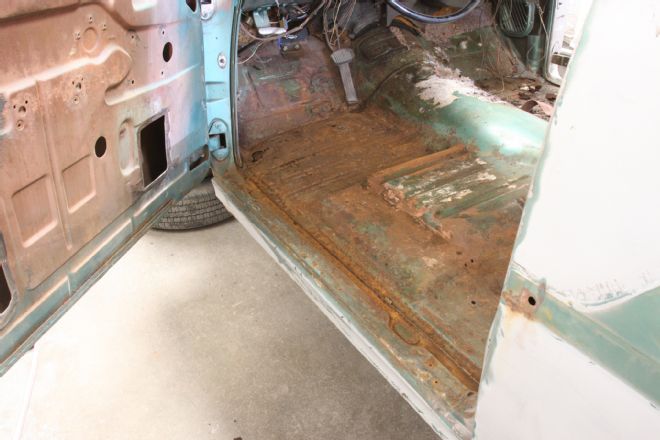
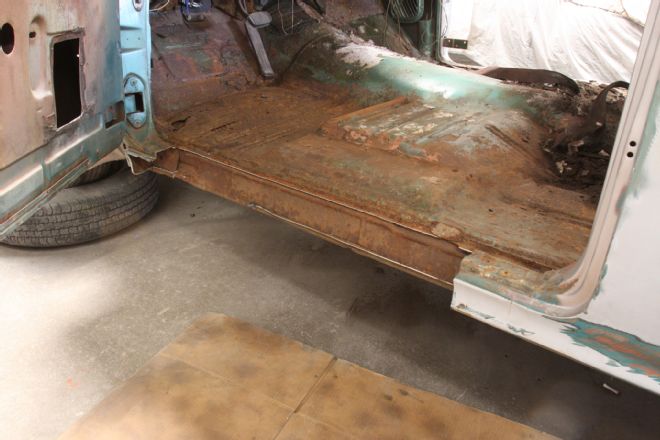
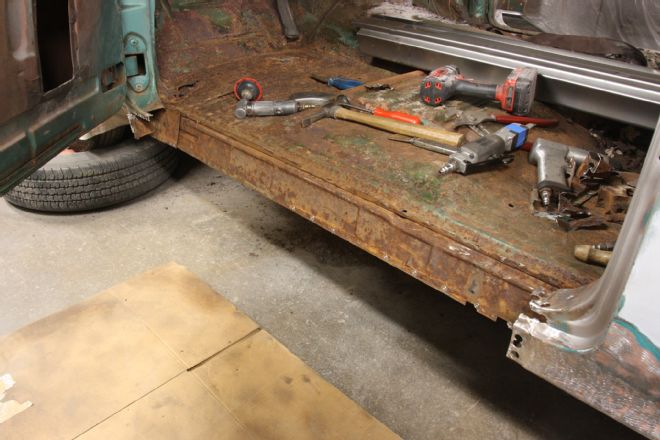
The front floorpans were rusted badly and had holes in them, but we'll deal with that after the rockers are fixed to retain as much structural integrity as possible during each stage. The doors were left on to check that they aligned both with the new rockers and the quarter-panel.
We cut the majority of the rocker panel off, leaving the upper and lower mounting flanges, but the 1955 has these closing panels just forward of the B-post. We fabricated new ones.
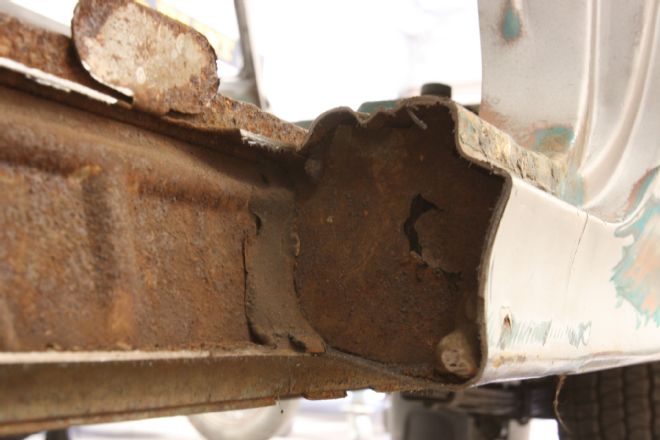
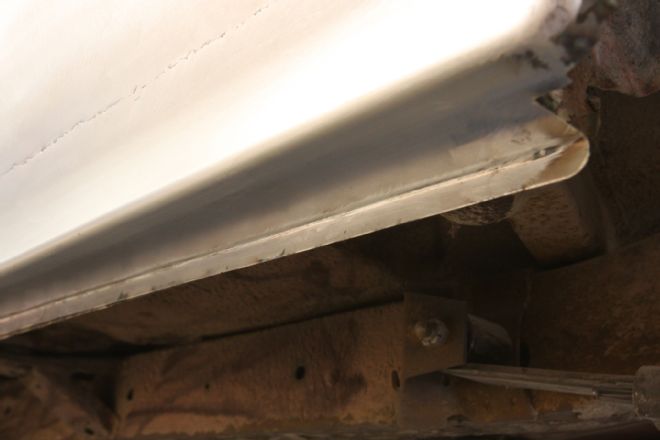
With the majority of the rocker removed, we could concentrate on drilling out the spot welds at the base of the A-post, along the flanges, and at the base of the B-post.
Using an Eastwood spot weld cutter, here's what the inner rocker and lower B-post looked like once the remnants of the old panel were removed.
While it has surface rust, the inner rocker panel was deemed fit to stay, once the rust was treated.
There were so many spot welds at the base of the A-post we elected to remove this section and make a new one.
We used a stripper wheel and disc sander to clean the rust, then treated it with Eastwood's aerosol Rust Encapsulator, masking the weld flanges first.
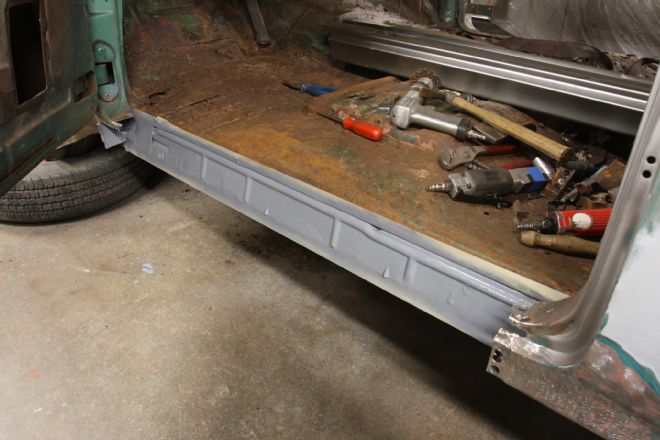
The replacement rocker panel was mocked in place and the door closed to check the gaps and alignment.
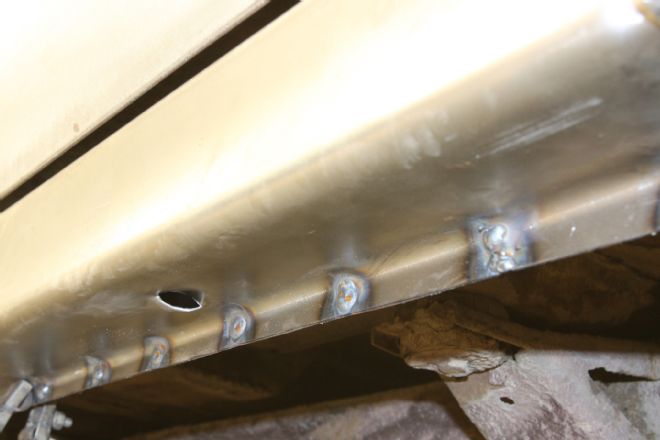
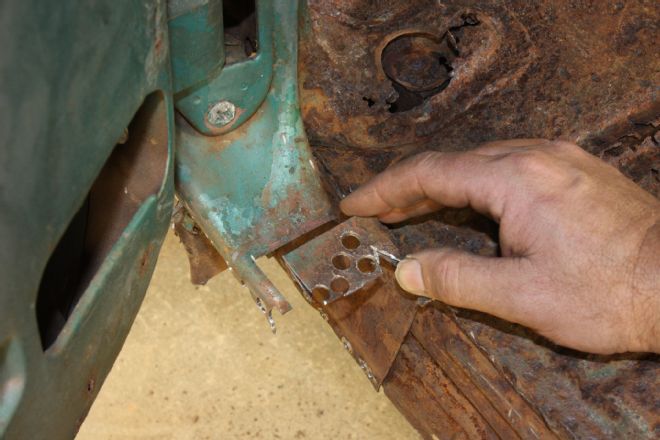
Prior to installation we drilled holes along the weld flanges to make plug welding easier.
Moving ahead slightly (the floorpan has been replaced here) here's how the base of the A-post looked once plug welded and with the new section let in.
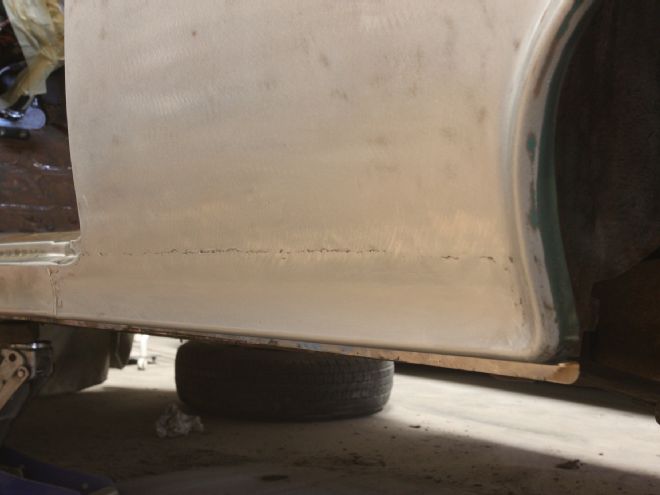
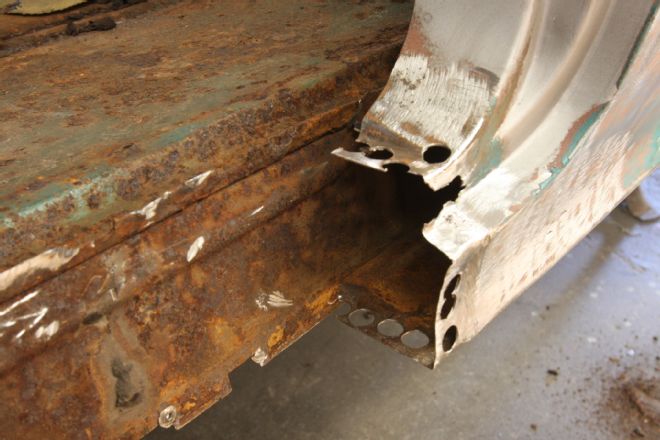
The rocker was plug welded along the upper and lower flanges, but not welded to the quarter-panel, and here's why: While not rusty, it had been damaged and pushed in at some point …
… and creased along the edge, making repair difficult. We had decided to replace it anyway.
A sheet of 18-gauge steel was trimmed to length in our stomp shear. This is a 3-foot shear. A 4-foot shear is preferable, but considerably more expensive!
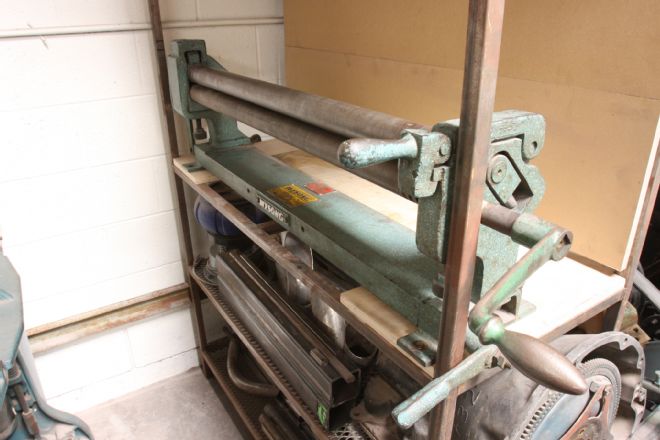
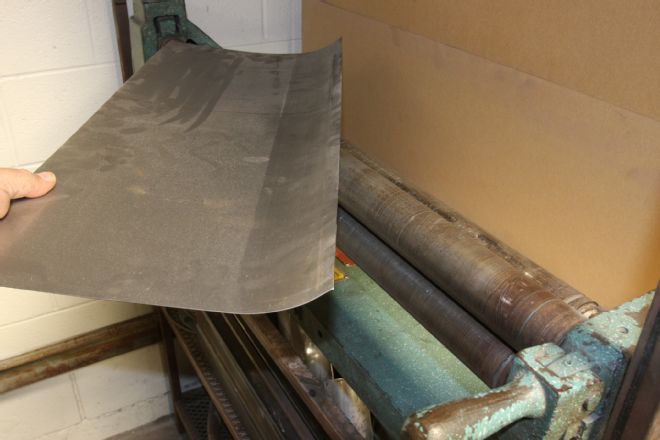
As the rocker and lower quarter are curved, we used our slip roll to match the curve in our repair section.
Here's the curved section ready for the next step.
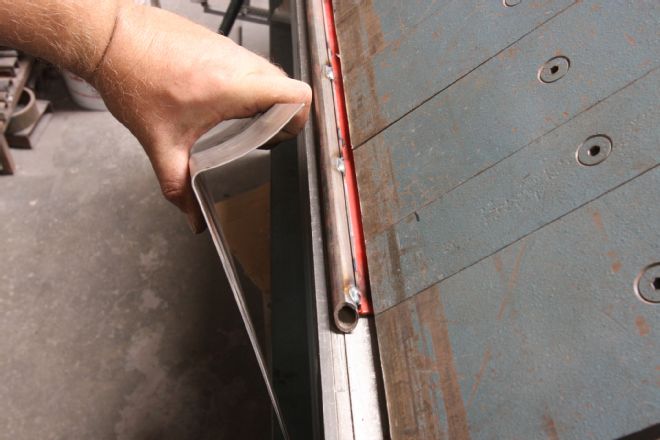
We used our finger brake to form the 90-degree bend at the base of the new panel, but it's not a sharp bend and has a radius to it.
To form the radius we welded a length of tubing the correct diameter to a length of 1/16-inch steel, moved the fingers back so the edge of the tube aligned with the brake, and bent the steel around the tube. I'm holding the finished piece, the radius clearly visible.
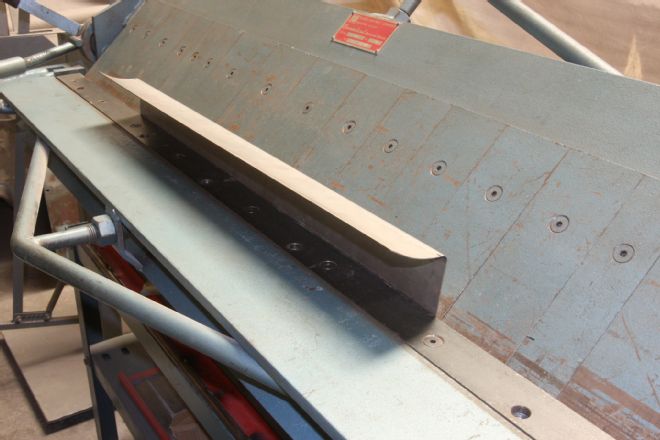
Adjusting the fingers back to their normal position, the second 90-degree bend formed the weld flange, after the excess had been trimmed in the shear.
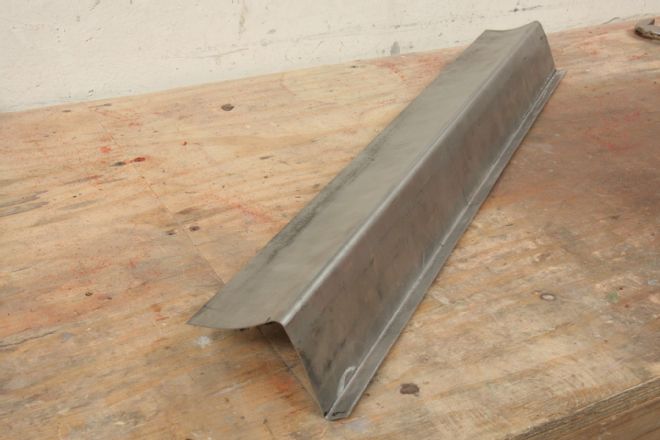
Here's our repair panel. Using steel we already had, the savings on two lower rear quarter-panels was enough to pay for half of our shear, or slip roll!
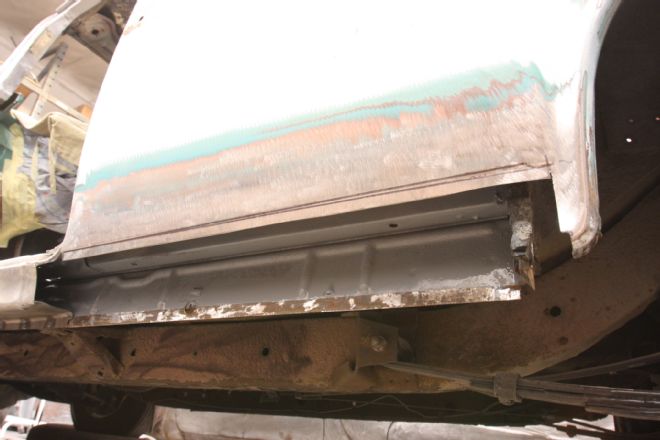
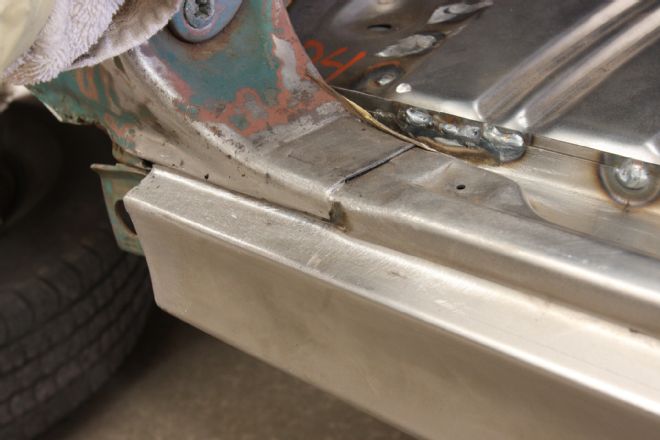
With the old section removed, the rust was again treated. The closing panel at the end of the rocker, and the lower corner of the wheel arch, were rust free, saving us a little work.

With a step formed on the quarter-panel (we'll show this procedure when we replace the lower doorskins) we tack welded the repair section in place, once it aligned with the new rocker.
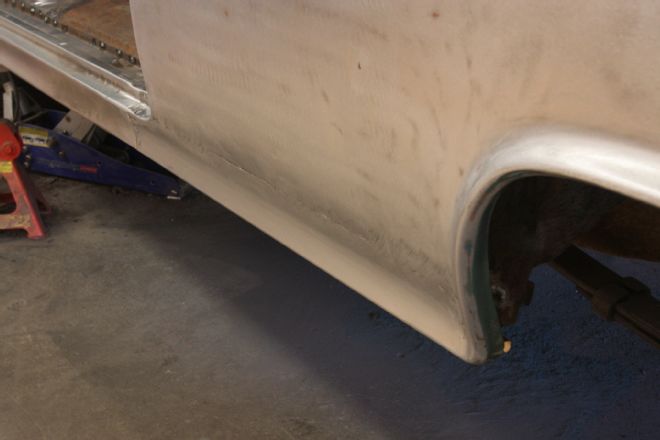
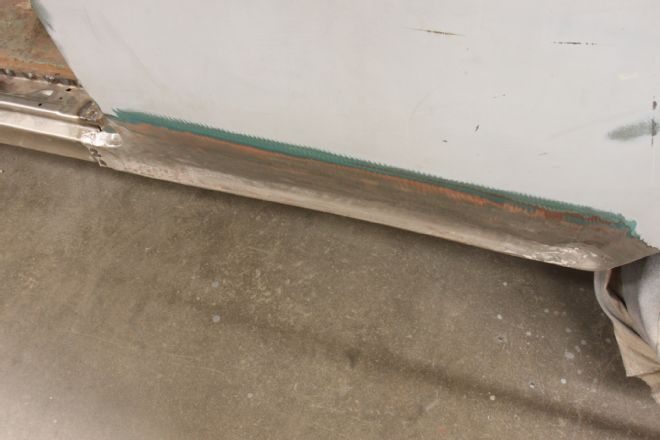
We then welded between the tacks, moving around to avoid heat buildup, and hence distortion, before grinding the welds down using a soft pad on an angle grinder.
The plug welds on the lower flange were also ground smooth.