
Over the last couple of decades we classic truck lovers have had the good fortune to gain easy access to a lot of great aftermarket reproduction parts, chrome, trim, badges, mechanical and suspension components, interior trim and parts, body repair panels, and even complete classic Chevrolet pickup cab assemblies. As a matter of fact it was just a couple of years ago in these very pages that we showcased the then brand-new, complete, all-steel 1947 to 1953 Chevrolet cab assemblies brought to market by the craftsmen at Premier Street Rods of Lake Havasu City, Arizona.
Well, since the 3100-style cab assemblies were so well accepted by us classic truck enthusiasts, they went ahead and did it again—this time manufacturing brand new all-steel 1955-1959 Chevrolet cabs! So, since I'd use just about any excuse to spend time with the guys at Premier I thought I'd spend a day or so out in Lake Havasu to give you a glimpse of what goes into assembling one of their awesome all-steel Chevy truck cabs.
 Premier Street Rods is a family-owned and operated manufacturing and wholesale/retail classic truck and street rod company with decades of service and experience their belts. Above and beyond the Tri-Five Chevy pickup cabs we're focusing on here, Premier also assembles and sells all-steel '47-'54 reproduction cab assemblies as well as everything else one needs to complete classic Chevy pickup and street rods projects too.
Premier Street Rods' 1955-1959 truck bodies are assembled at their factory in Arizona with 100-percent fresh 18-gauge steel and feature 25-percent more spot welds than the OEM had used at the factory. The quality and craftsmanship of these brand new all-steel cabs surpass that of even the originals as they've used the best components, the most modern technology, and professional craftsmanship to ensure its cabs are the finest available today. Each and every cab is manufactured one at a time using high-grade steel with modern welding techniques, and the individual sheetmetal components are completely EDP coated for superior rust prevention as well.
If your old cab's best days are behind it, or you've found a shaky old barnyard survivor—instead of spending immense amounts of time doing bodywork yourself or paying upward of $100 an hour in labor time (not to mention the additional cost of material and repair parts) to a professional restoration shop to whip it back into shape, why not just replace it with a brand-new (better than OEM) all-steel Tri-Five Chevy cab for far less than you'd invest in an old rust bucket? It seems to me that the choice is clear. That said, let's take a look at one of these awesome cab assemblies going together.
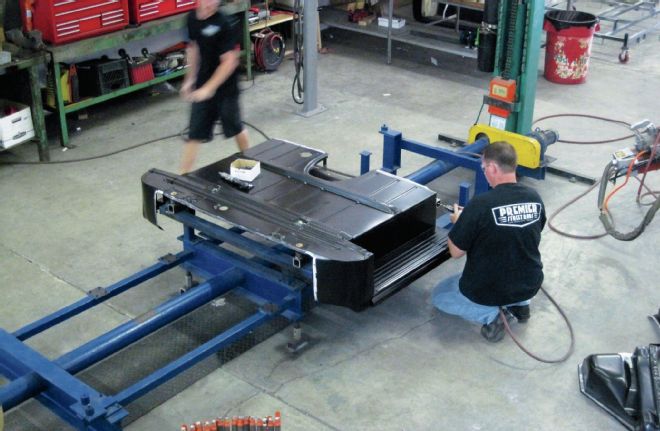
01 The morning I arrived at Premier Street Rods I was greeted by owners Rob and Kerry Logsdon, it'd been nearly two years since I'd visited and I was looking forward to seeing their new Tri-Five Chevy cab go together. Out in the production facility Ross Logsdon and Len Harris were ready to rock and had the new cab floor (the starting point of the cab assembly) attached to the rotisserie/lift.

02 Speaking of, the combination lift and rotisserie they use allows perfect access to every facet of assembly. Here the lower portion of the jig and the main floorpan are shown being located and bolted into place on the rotisserie.
03 Consistency and quality of each and every cab are ensured by the use of an extensively engineered multi-piece jig assembly that's utilized for each assembly step. Here we see Len Harris (owner of the Chop Shop) lending a hand with this particular cab by punching the front edge of the floorpan for the rosette welds used to attach the right front pillar section in place (prior to the aforementioned jig assembly).
04 With the jig base and floorpan assembly located and secured in place the next step is the installation of the first of two doorframe section jigs.
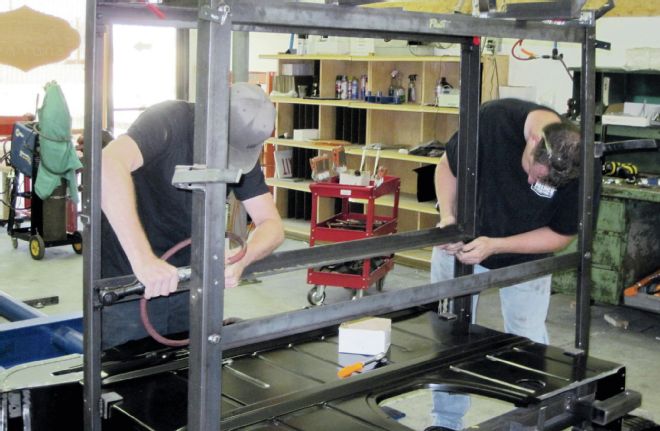
05 With the two side sections of the cab jig secured the balance of the upper jig and mid-point jig support components are located and tightened in place.
06 These images show a closer view of the right-hand door opening jig components and some of the attaching and clamping points that hold the panel in perfect alignment. The time and engineering spent by the company in manufacturing the assembly-jig, and the high-quality sheetmetal cab components themselves are, along with the expertise of Ross Logsdon and Les Harris, the primary reason these pickup cabs (each and every one of them) are as high or perhaps even higher quality than original OEM assembled vintage cabs.
07 With the floor and door opening jig components in place, the next step was to locate and clamp on the A-pillar/cowl-side panels to the jig.
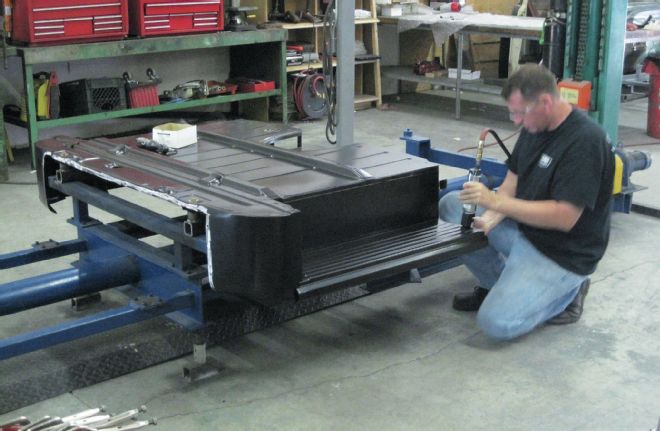
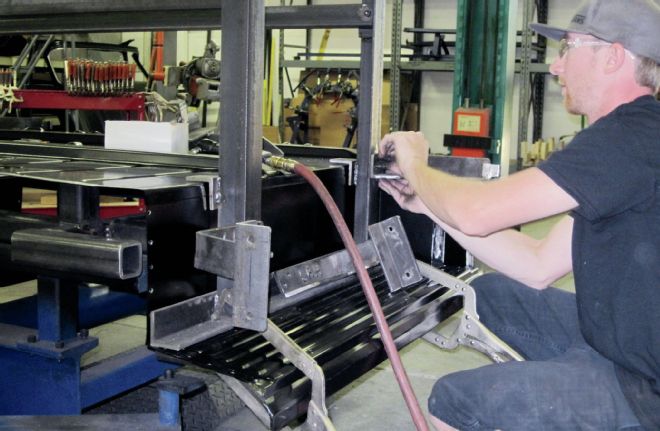
08 Next, the toeboard/lower firewall panel is prepped; the mounting flanges readied for welding, and slid into place before rosette-welding it to the floorpan and front floor/cab mount supports.
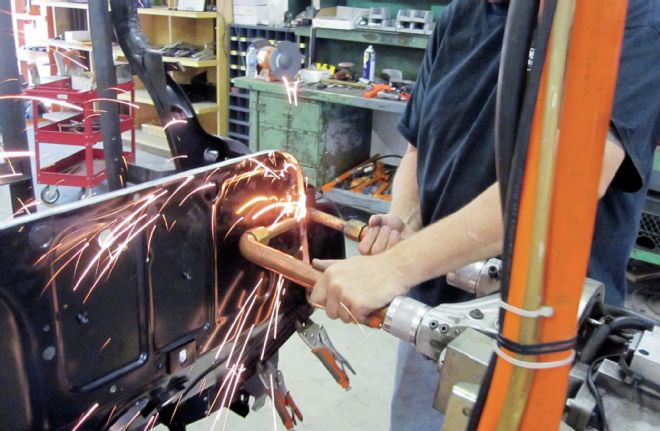
09 Satisfied that panel positioning and anchoring was perfect, the guys proceeded to resistance-weld critical points using large industrial resistance spot-welding equipment identical to the equipment used in many OEM assembly plants. As I said earlier, Premier Street Rods' assembly methods and techniques mirror those of any OEM manufacturing concerns with the added insurance of ample time for quality workmanship versus the assembly speed focus of the typical assembly line environment.
10 Positioning the cowl top came next. As is the case with each panel, exact placement is a must. Once the cowl is precisely located a few rivets at either side of the panel ensures everything stays in place for the welding process.
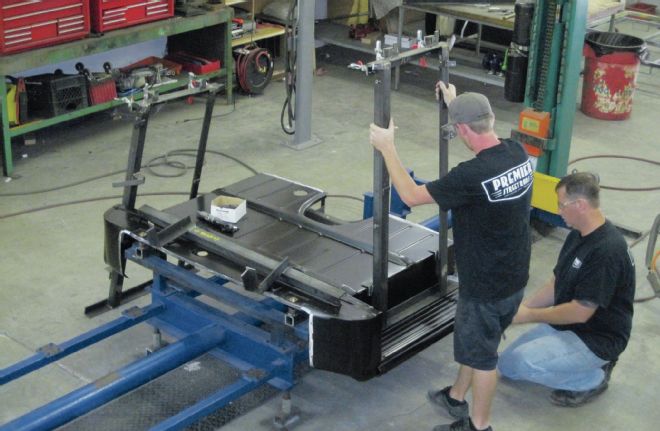
11 With the front of the cab assembly under control, the guys move rearward and position the inner rear cab wall panel.
12 Next the guys lift and place the inner roof panel. Again, precision is the name of the game. Once the panel is perfectly aligned with the rear inner panel and the front A-pillar assemblies the panels are held firmly in place with clamps around the panel perimeter.
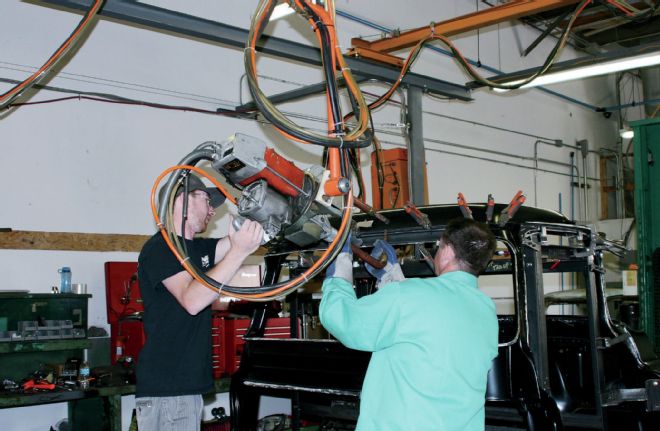
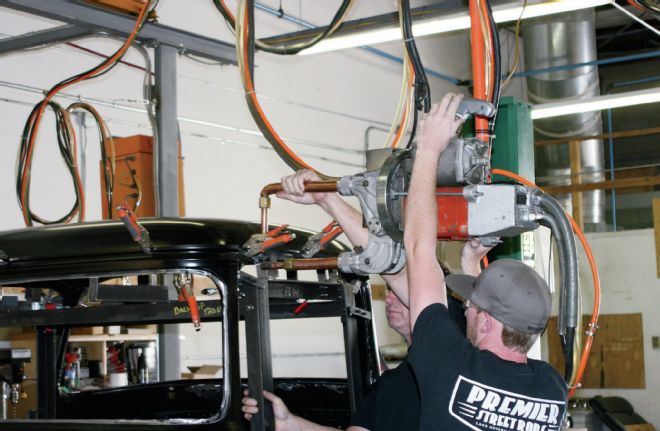
13 The roof and rear cab panels are then double checked for perfect positioning and then welded, tying the inner structure together for a strong structural base for the outer panels to come. Again, check out the OEM manufacturer-style resistance welder(s). Premier utilizes these spot welders for the majority of the welds on their cab assemblies that actually makes the Premier assemblies structurally as sound or even superior to the originals.
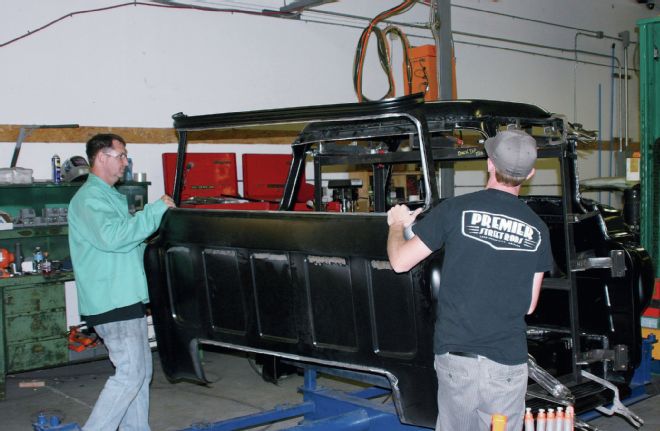
14 Speaking of outer panels, the rear outer cab wall comes next.

15 Once in place the guys make any needed adjustments and then clamp the pinch-weld areas and insert temporary rivets to hold the outer edges of the panel at the door opening striker pillar area to keep everything in perfect alignment.
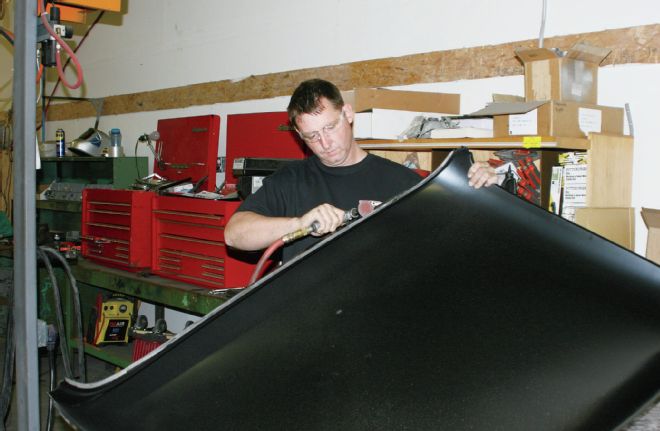
16 Len preps the outer roof panel for installation by grinding the edges to make a clean area for resistance welding.
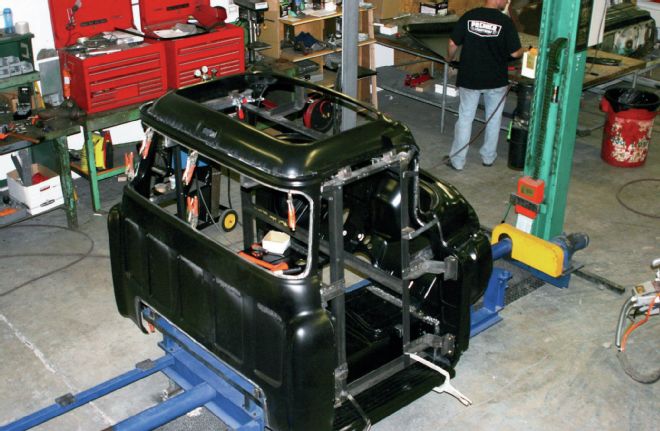
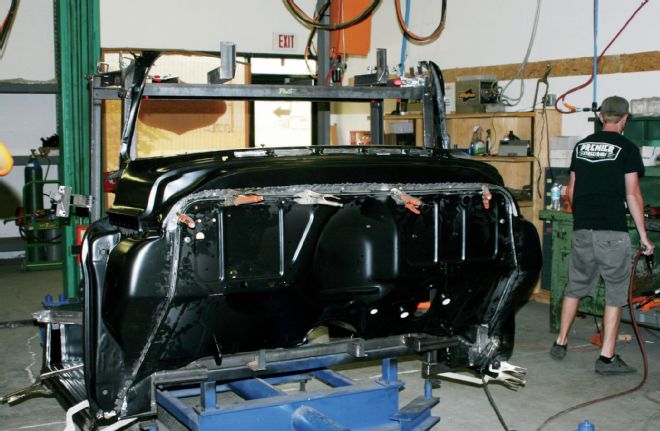
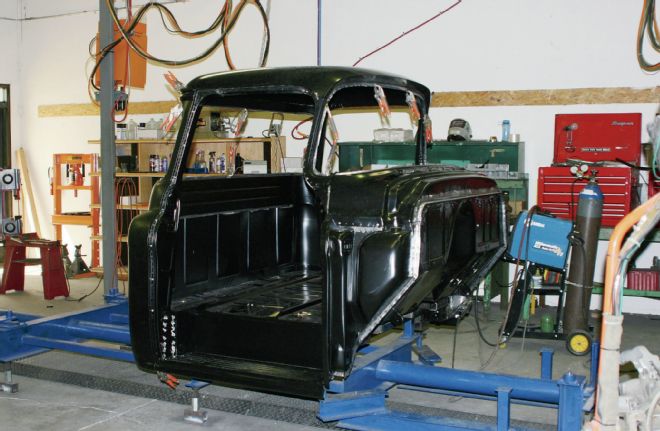
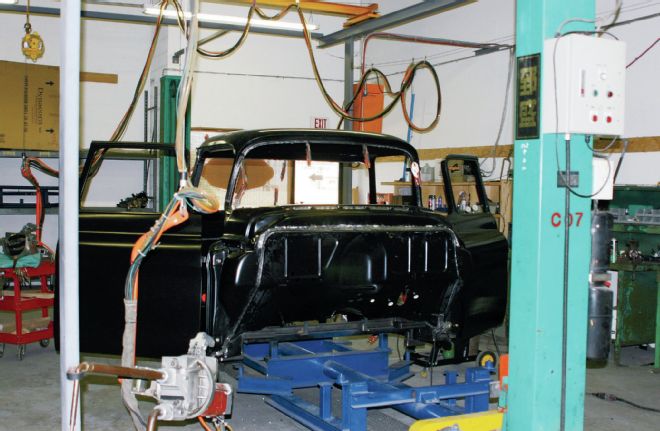
17 Here's a shot showing how far along the cab is at this point.
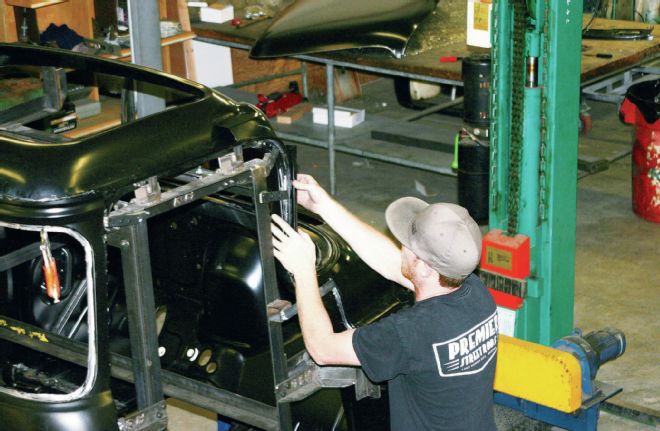
18 While Len gets the roof panel ready, Ross works on installing the outer A-pillar panels.
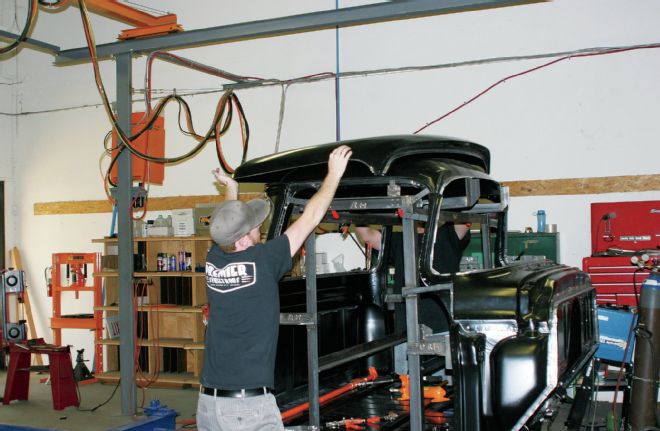
19 The outer roof panel is then lifted into place and perfectly aligned around its complete circumference.
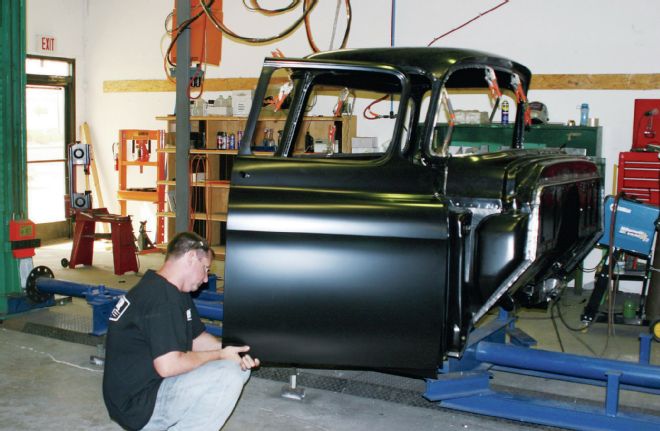
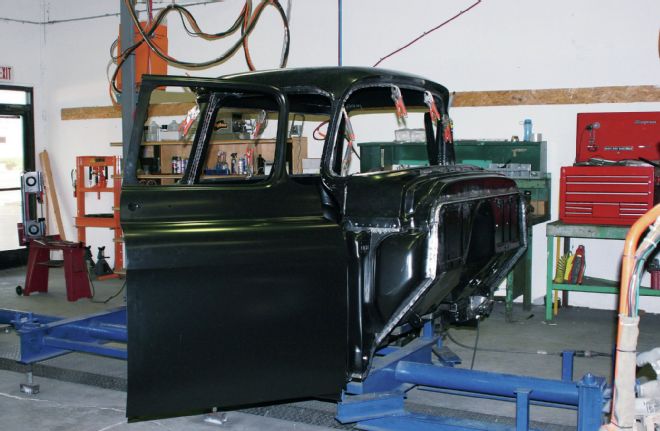
20 The panel is then clamped in place and the resistance welder muscled around it permanently tying the inner and outer roof panels into one unit. The rest of the cab, the junctions of the inner and outer panels and the cab floor assembly, as well as the door opening step panels and cab mounts have been welded as well.
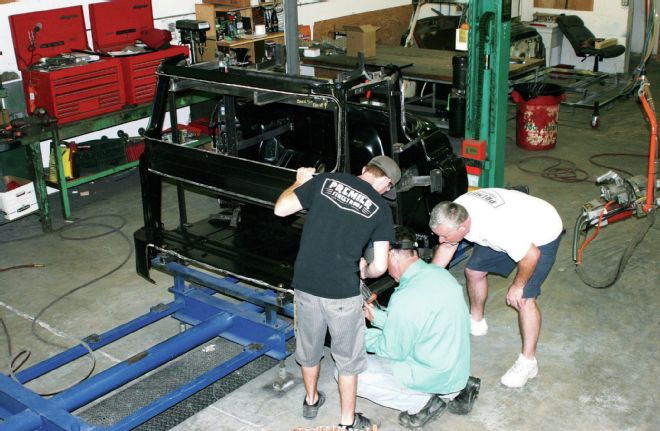
21 Once the perimeter cab assembly is complete the guys perform another inspection of the cab, double and triple checking that each and every panel is perfectly aligned and all welds are complete and ground smooth where appropriate. At this point the final few components are ready for installation.
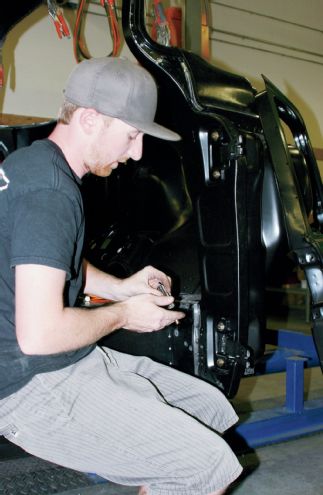
22 Satisfied that all is well Ross next installs the door hinges in both hinge pillars as Len unpacks and inspects the door assemblies.
23 Hanging the door assemblies is a two-man job so Len holds the door while Ross connects the hinges to the door.
24 The guys then swap jobs, Len adjusting the door fit and gaps while Ross readies the other door.
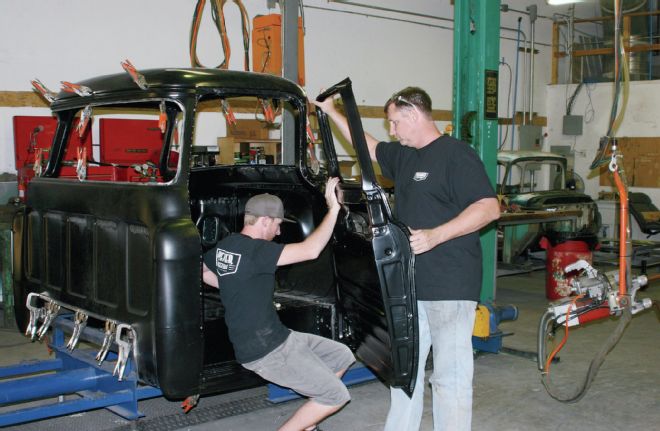
25 With both doors hung and adjusted for fit and door gap uniformity the guys are in the home stretch.
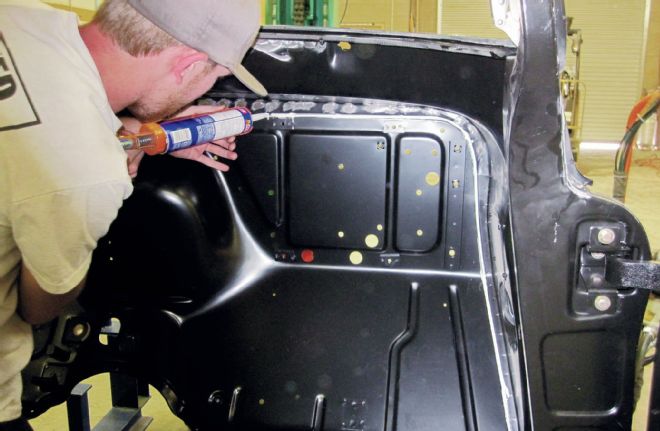
26 The cab is then sealed at every seam to ensure a good seal at each and every panel joint.
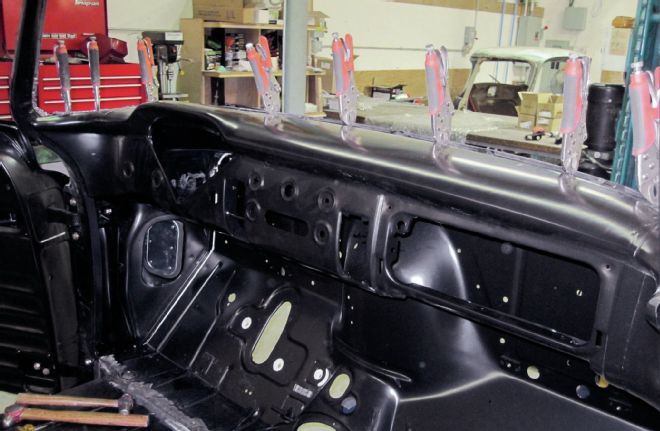
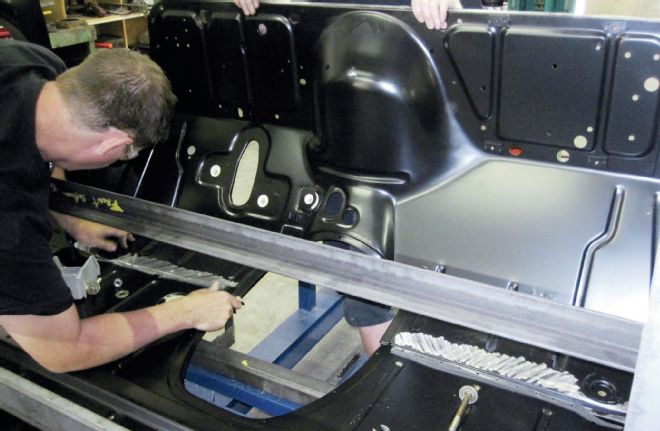
27 The final bit of assembly is next, the fitting of the dashboard. This step is another two-man task as correct fitment is vital. And of course the guys ensure that the dash fit is as perfect as the balance of the cab components have been.
28 At this point the cab is ready for final inspection—double and triple checking that each and every panel is perfectly aligned and all welds are complete and ground smooth where appropriate. At this point the cab is ready for final finishing and priming before being shipped—and the guys are ready to begin the next cab.