I'm sure many of us, especially those of us who have spent any time working in the collision repair industry, have seen truly horrific rust repairs. Everything from concrete in rocker panels to wadded-up newspapers soaked in resin then covered in body filler. Some true "artists" are out there carving whole sections of vehicles from plastic filler and short-strand fiberglass paste.
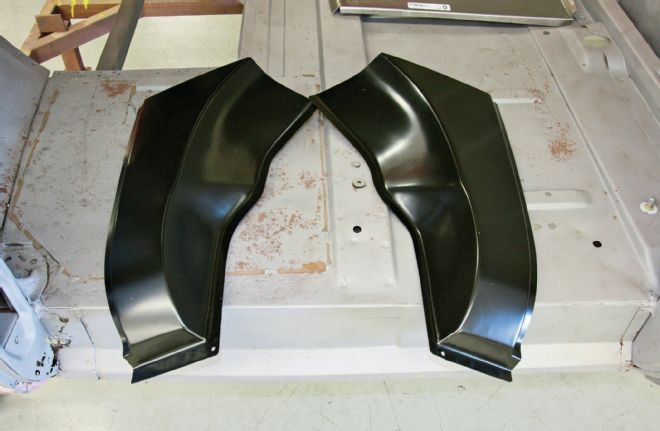
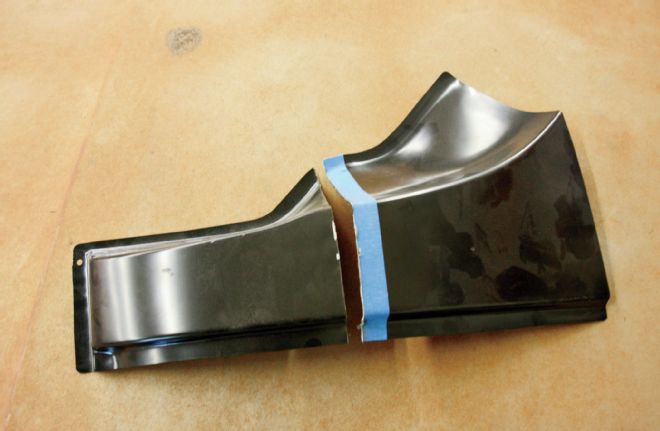
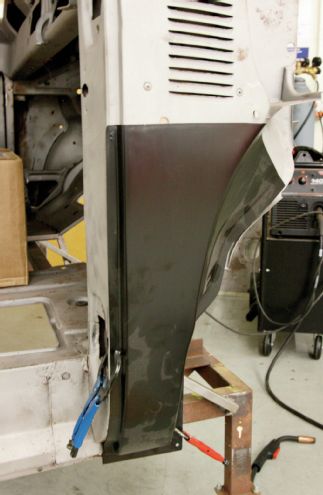
01 The A-pillar repair panels were supplied by Dennis Carpenter Reproductions, are tall enough to replace the most severely rusted-out sections, and feature the return lip inside the door shut for ease of welding.

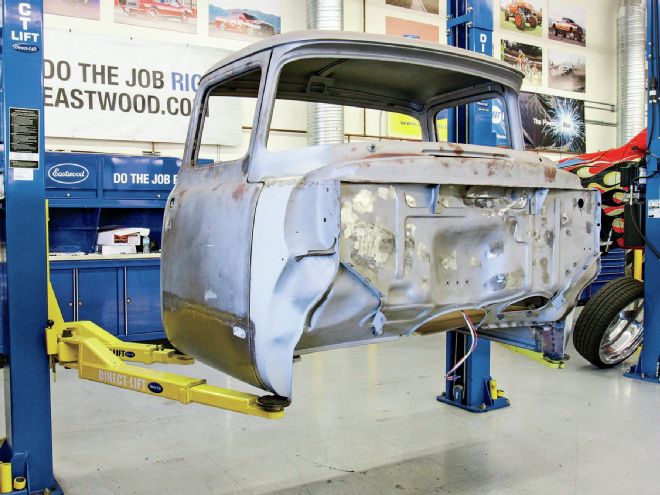
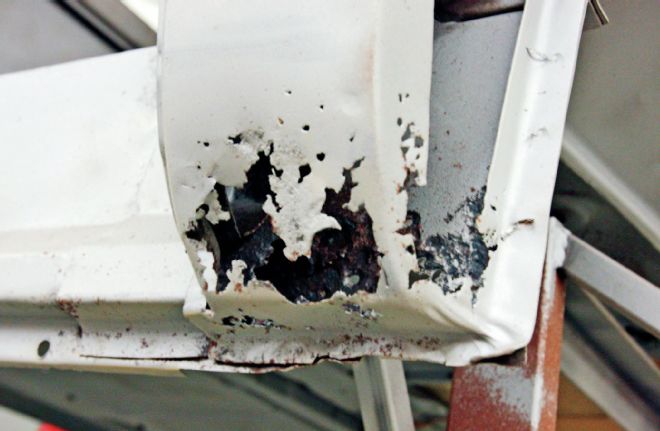
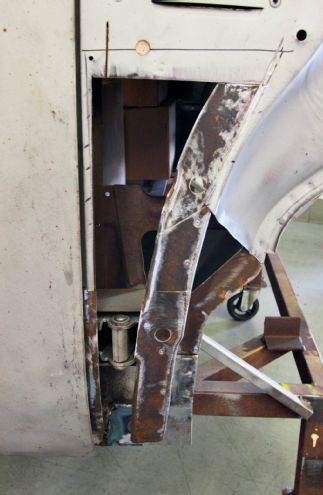
02 As seen in our last installment on floor repairs, the driver side A-pillar base was pretty far gone, as was the inner panel and the cover panel sandwiched between the two.
03 With the inner and cover panel repaired, and the A-pillar cut back to eliminate all rusted areas, we could proceed. We'd also have to fabricate the lower section of the pillar under the hinge pocket.
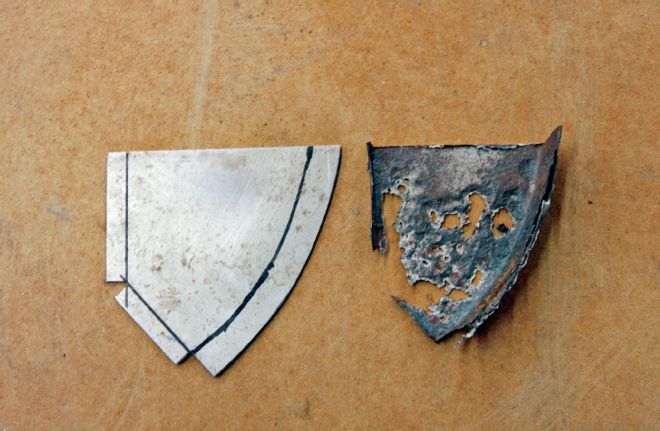
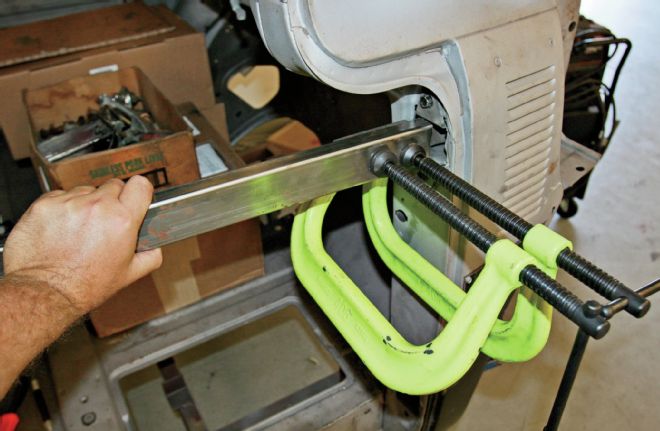
04 The lower section was simple to form, simply by copying what was left of the original. The hardest part was bending the curved lip, achieved by hammering it over the edge of a toe dolly.
05 Once we'd determined we wouldn't need the upper section of the new panel, it was trimmed oversize…
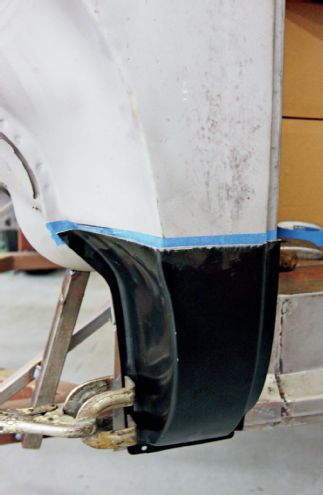
06 …and clamped over the old pillar. The upper edge was marked on the tape, then the original steel cut along that line to allow the new section to butt up against it. The remaining part of the lower pillar was then cut away.
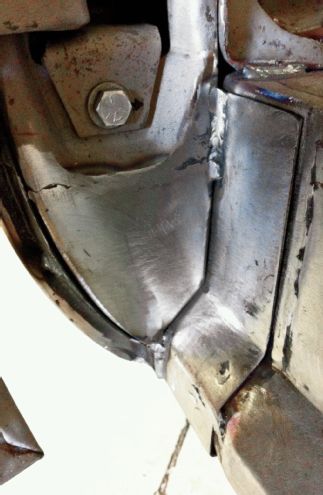
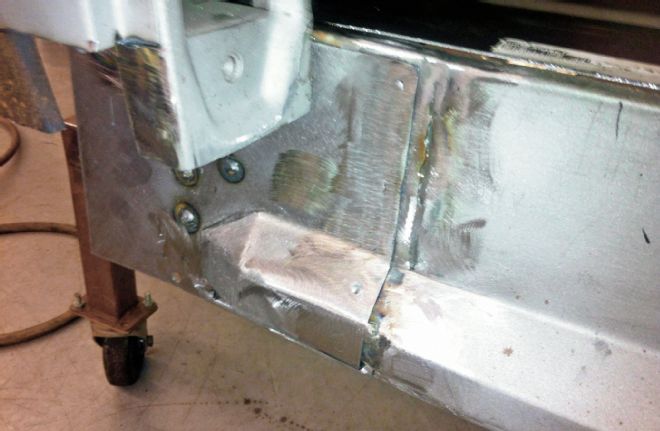
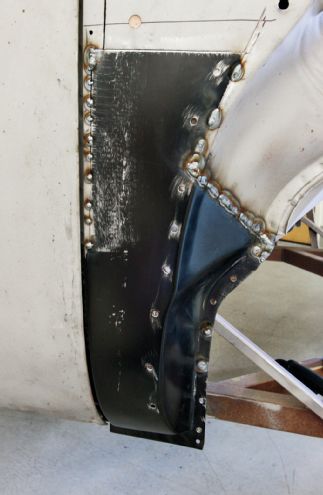
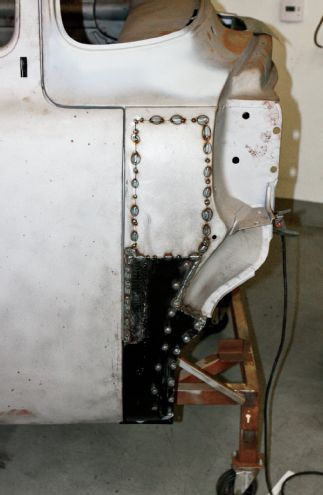
07 Once the new section could be clamped in place and tacked, the section we'd made could be checked for fit. Everything lined up, so it was welded in place. At this point the door was hung back on the cab, to check alignment with the lower section of the pillar at the door gap.
08 With everything fitting as it should, the section was finish welded and all welds ground smooth. Plug welds were employed along the outer lips, with butt welding across the panel.
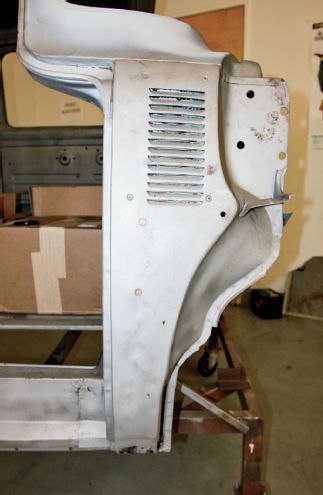
09 Moving to the passenger side, while the bottom of the pillar wasn't as bad and didn't require any inner panel repairs, not only did the owner want to lose the air vent, but the pillar was damaged from the door swinging open and creasing it.
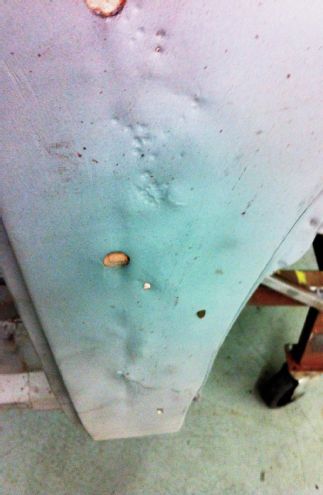
10 At some point someone attempted to beat out the crease, then fill it with Bondo. It had looked pretty good until we had the cab media blasted, revealing the extent of the damage.
11 Not as bad as the driver side, and if it weren't for the damage above, we'd probably have fabricated this section rather than use a whole repair panel.
The A-pillars on our project F-100 weren't quite that bad, but the lower sections had rusted out, and body filler had been applied over the "knocked-in" rust. It wasn't a surprise; we spotted it along with a few other minor jobs when the truck was purchased, but nevertheless it needed fixin', and fixin' properly. We also had a twisted door and bent hinge to contend with as part of this section of our cab restoration.
A call to Dennis Carpenter Reproductions and we had a pair of outer A-pillar panels on their way to us. We were impressed with the quality of fit, but installation isn't quite as easy as a flat floorpan section. That's not to say it's outside the realm of a homebuilder who's never done such a repair before, and learning new skills is all part of the fun, right?
12 This time we'd be using almost the entire repair panel.
13 Once we'd marked the upper edge of the panel on the old pillar, we elected to draw a line straight along the fender mounting face, then across the inner fender to the plug-welded lip. This simply offered a better fit for the new panel. The surface rust on the inner panels was ground and treated prior to proceeding.
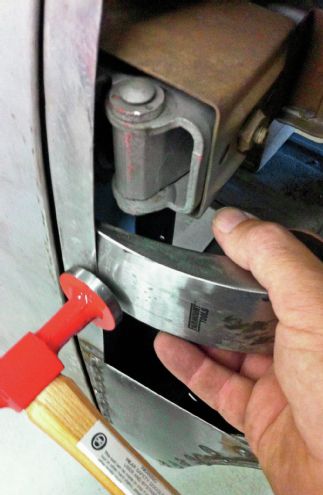
14 Remember we said the door had at some point swung around and creased the pillar? Well, it also tweaked the upper door hinge, not allowing the door to fit correctly in its aperture. Clamping a length of stout box section to the hinge and pushing it inward was enough to straighten the hinge.
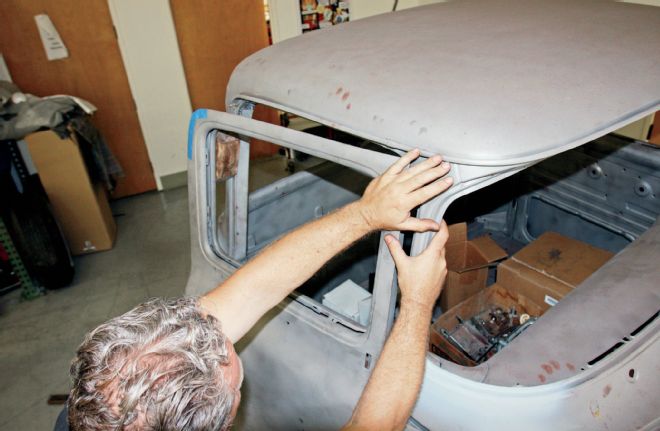
15 Even with the door fitting the aperture, it still needed further manipulation. The upper front corner was sticking out, so with a block of wood between the door and the cab at the rear, the front corner was pushed inward a few times. This was enough to get everything to align.
16 With the door fitting as it should, we could continue with the pillar repair.
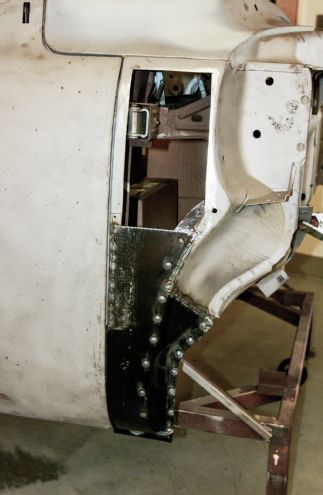
17 As you can see, we elected to trim the panel and use as much of the old sheetmetal by the door shut as possible. The panel was now tack welded in place. The upper edge was not welded for reasons that will become clear.
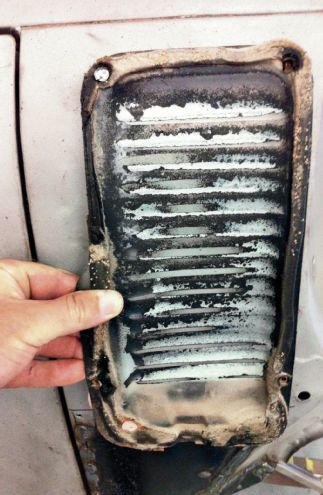
18 The air vent also has an inner louvered panel that is held in place with four screws. This was removed before we continued.
19 The outer vent was then removed and a piece of similar gauge steel formed to fit the resulting hole.
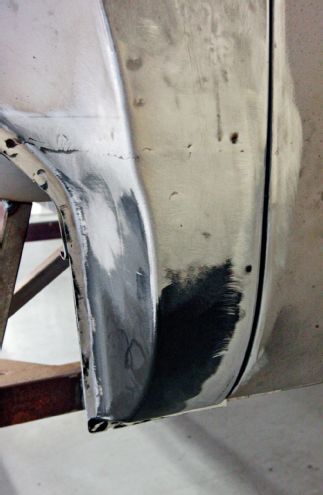
20 We could also now access the stock steel along the door shut and move it back into its original position, pre-crease, using a hammer and dolly.
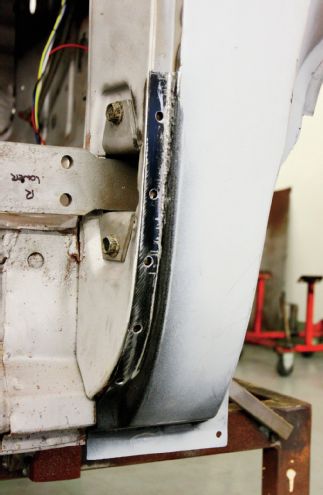
21 With the door gap massaged to our satisfaction, the new steel was tack welded in place, then finish welded, welding an inch-long section at a time, to avoid warpage.

22 With all welds ground smooth, the pillar now looked a whole lot better.
23 We could now remove the door again to access the plug welds in the door shut. There's a lot of removing and replacing doors in this part of the cab restoration, made harder if you're working alone. A floorjack can be your best friend here! The plug weld lip was later trimmed to match the lower cab lip (arrowed).