For the past 30-something years, your author has noticed that many of the 1972-74 Challengers have had their tail panels blacked-out. While black is beautiful and looks good, we wanted to go back to the stock look of the blacked-out taillights surrounded by the textured Argent color on our 1973 Challenger Rallye project car.
Sure it's easier to just black-out the tail end, rather than painstakingly detail those recessed taillights, which is probably why the blacked-out treatment is so popular. Also, the factory blacked-out tail panel of the 1972-74 'Cuda looks great, so many mimicked that treatment on their Challengers.
The 1973 Challenger Rallye 340 we'll be working on was repainted in 1983, and given the blacked-out tail treatment. My best friend purchased this E-Body in 1988 and not shortly afterwards the 340 spun a rod bearing and wiped out a few cam lobes. His beloved E-Body sat in his garage until recently when I purchased it from his widow. The car's resurrection has commenced.
With quality paints available from reputable suppliers in a spray can, it's now easier than ever for the do-it-yourselfer to perform restoration-type work at home. Follow along as we beautify the back end of this Challenger Rallye.
PRICE TAG Part PN Cost Eastwood High Build Self-Etching Primer 14260Z $16.99 Eastwood PRE Painting Prep 10041Z $9.99 Eastwood Trim Black 39143 $14.99 Totally Auto Dark Argent paint CALL $24.95
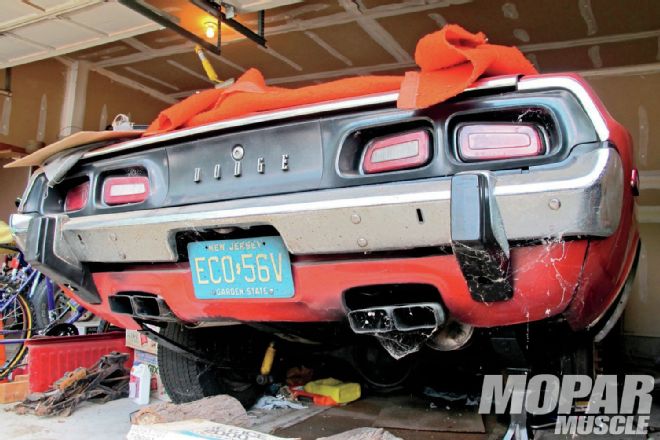
1. This is the way my best friend Slick’s 1973 Challenger Rallye 340 looked after uncovering it after it sat for over 25 years, cob webs and all. The blacked-out tail treatment was done back in 1983. With today’s quality restoration paints available, we decided to refurbish the rear end with (what we think is) a more tasteful—and original—treatment. As mentioned in the text, this rebuild/restoration of “The Slick Challenger” will be a tribute to its late, former owner.
 2. After cleaning the tail panel, pitting of the pot metal on the taillight housings was evident. This is when we decided to go for the stock-style treatment. We removed the housings, and then the lenses before hand sanding with 220-grit to level out the pitting. The pit-holes were eventually filled using Eastwood’s High Build Self-Etching Primer (PN 14260Z). We sanded the primer, re-primed and re-sanded the primer with 400-grit until the pit holes were filled smooth, leveled out, and not noticeable. Good bodywork will take a lot of time and patience.
 3. We disassembled the tail section of its taillight housings, bumper filler panels, rear bumper, valance panel, moldings, Dodge letters and trunk lock. The tail section was first cleaned with Eastwood PRE Painting Prep (PN 10041Z) to rid it of dirt, exhaust, wax and oils, before being lightly sanded with 220 then 400-grit sandpaper.
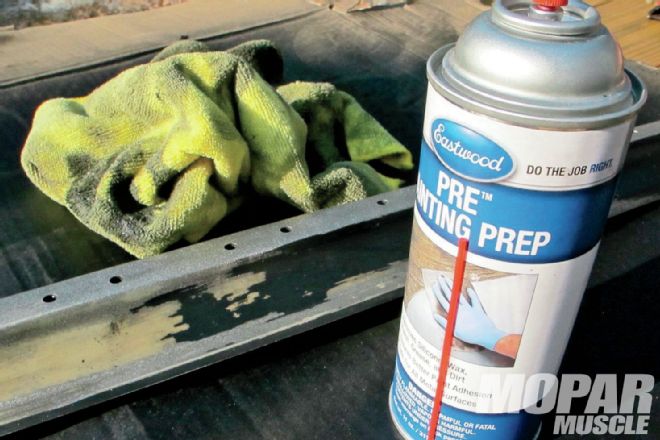 4. The rubber bumper filler panels were covered with 30-year-old lacquer paint that has cracked and faded. We Eastwood Pre Painting Prep to remove the old and weak lacquer paint with a towel. It took a few hours of hard rubbing with the Pre Painting Prep soaked towel to remove the black paint—it was better than sanding, which could easily make sanding-scratch marks into these soft, old rubber pieces. It was cool to find the original textured argent underneath that old black paint.
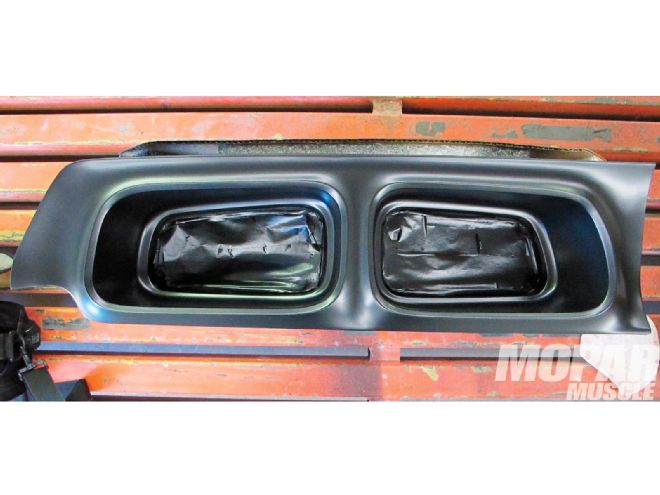
 5. The bumper filler panels and taillight housings received three coats of the Trim Black (Eastwood PN 39143). It’s a strong, durable enamel paint that’s the right satin finish for automotive exterior trim components.
 It’s a strong, durable enamel paint that’s the right satin finish for automotive exterior trim components.
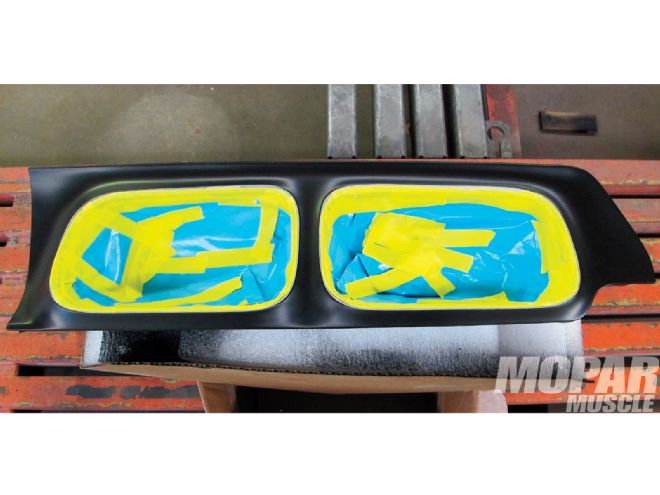 6. We let the Trim Black paint set up for a week before we taped-off the recessed taillight section so we could apply the Textured Argent. We didn’t want the masking tape to lift any of the black paint during tape removal.
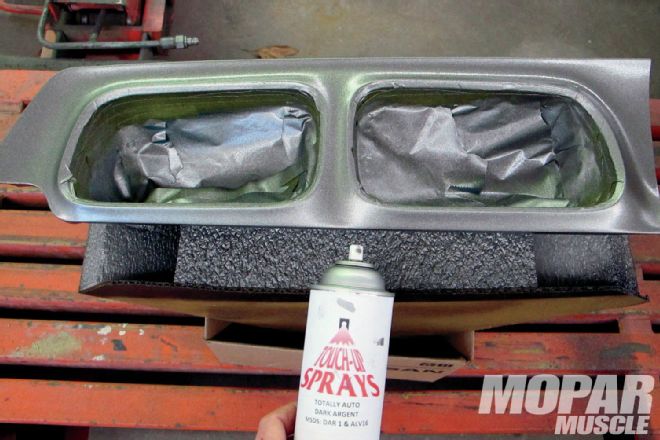 7. Totally Auto offers Textured Argent in light or dark in a spray can. We choose the Dark Argent (call for PN) to match the factory cue and texture for our application. This paint is amazing in how well it closely duplicates the way Ma Mopar did it back in the day.
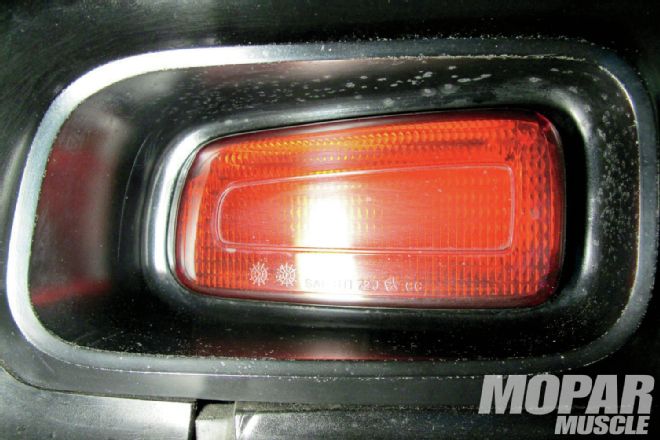
 8. We just love the new/original look of our taillights.
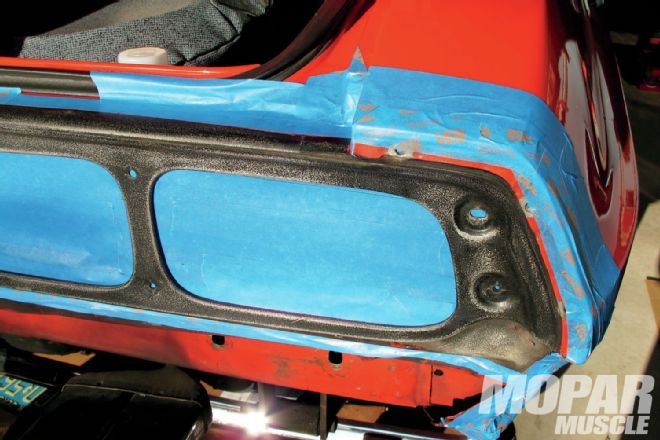 9. We taped-off the tail section to duplicate the way we found the factory had applied the textured argent. It was apparent the factory applied the argent halfway into the area of quarter-panel molding screw holes, 1-inch into the trunk lip, and where the tail panel rolls underneath the bumper filler panels. This way you don’t see body color once all the parts are put back in place.
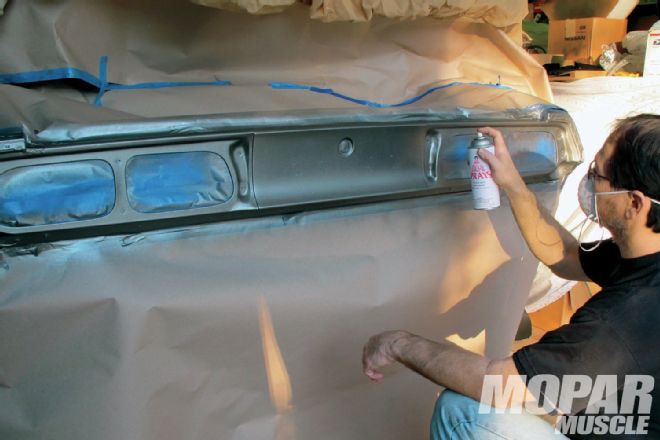 10. Be sure to completely cover the car and wear a mask, because flakes of argent will be flying around. Notice the masking tape is behind all the holes. The textured argent is messier than regular paint—that’s ok because the results are as close to original as it gets. Here we’re applying the first coat of the textured argent.
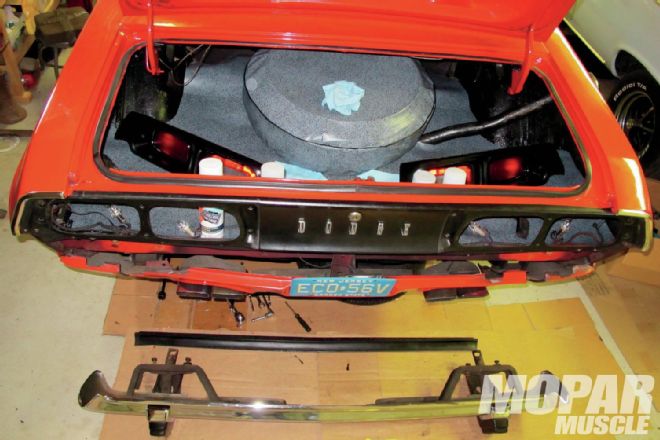
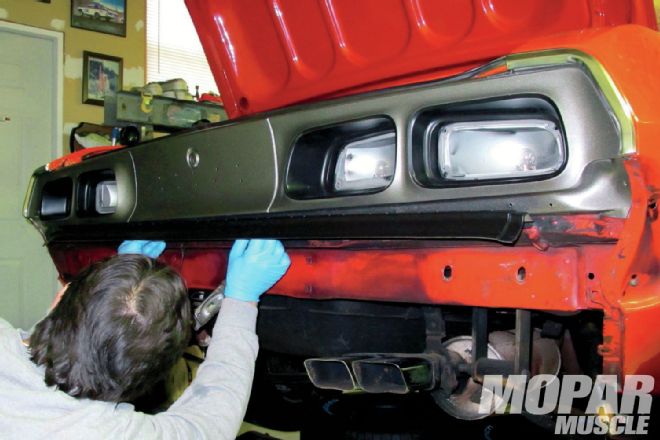 11. We applied four coats of the textured argent with 10 to 15 minutes between coats. Once the masking tape was removed and the taillight housing was installed, it began to come-alive. It’s noticeable here how we did our best to duplicate the way the factory applied the textured paint. At this point, we installed the trunk lock, quarter-end moldings and were putting on the center bumper filler panel. Here’s a good look at the application of argent where the tail panel rolls under into the bumper area. This detail is especially important for the ’72 Challenger without the quarter-end bumper filler panels.
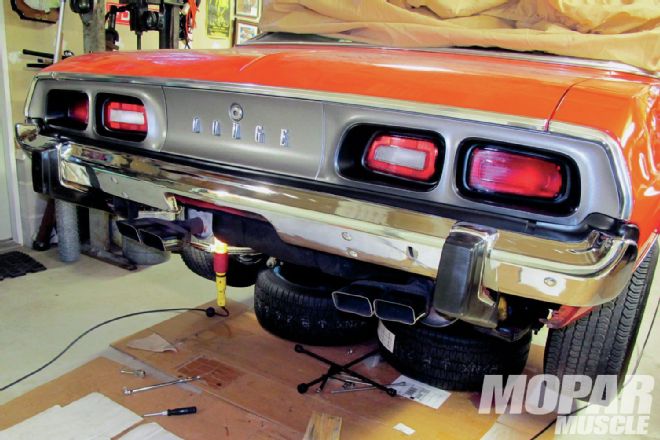 12. The rear bumper was lined up straight with the tail and bumper filler panels before tightening the bumper bracket bolts. It was starting to look good, but will look even better once the refinished, original valance panel is in place with those cool exhaust tips popping out of the valance’s exhaust cutouts.
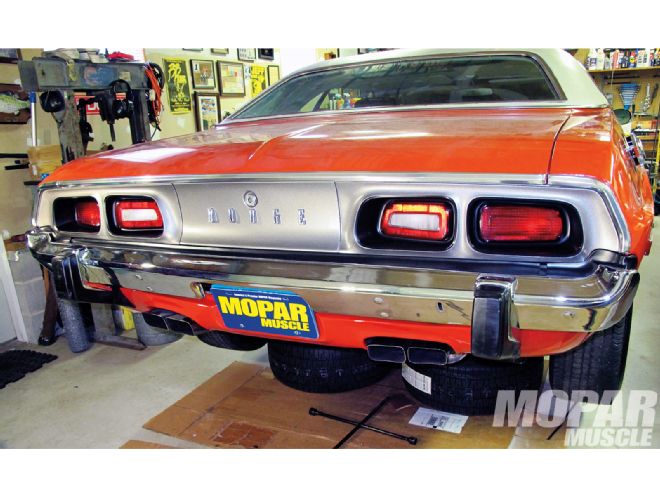 13. Here’s the result of our efforts. We like the way the bumper filler panels look finished in black instead of the argent silver. They seem to blend nicer with the black bumper guards and black recessed area of the taillights. We’re not trying to be factory-correct, just have a nice looking driver quality type car. All we can say is the end results were very satisfying! More of the “Slick Challenger” later… mm