
As we explained last month, Mike Chase followed along as Art Himsl flamed Vic Edelbrock Jr.'s 1932 Standard coupe. In that issue we outlined the way Himsl, well...outlines a flamejob. This month Himsl shed some light on how he colors within those lines.
Pinstripes withstanding, the methods used to lay flames don't differ from any other conventional automotive finish. In fact, Himsl favors brands associated with refinishing. "I'm using either PPG or House of Kolor," he reveals.
That Himsl consents to mix brands suggests that flame painting isn't just like painting an entire car. Though he regards both brands with the same esteem and calls them functionally interchangeable (we're sure the paint reps would disagree) he distinguishes between the two brands.
The difference lies largely in how its manufacturer orients itself in the industry. For example, he explained that he prefers PPG for its comprehensive catalog of materials. It makes everything from primers to clearcoat and offers a version of every color an OEM applied to a body. But that global availability comes at a price: PPG is so big that it can't always react to the unique needs of every job. Tiny batches of limited-production formulas don't fit the company's business model.
House of Kolor's catalog may not be as fat but the company is small and agile enough to offer very specialized formulas. It understands its place as a custom-paint manufacturer means fulfilling very specific needs. So rather than sell prepackaged formulas that can be tweaked at the mixing point to achieve a distinctive personality it offers the basic building blocks and lets its clients pick and choose them to achieve a desired effect. Need a translucent color with a touch of pearl to apply over a silver base? House of Kolor offers exactly what it takes to do that job.
As stated in the last installment Darryl Hollenbeck applied the PPG ruby red base over which Himsl applied his masking pattern. It would've been a good idea to show how Himsl prepped the surface prior to applying the base for the flames but Himsl got ahead of Mike Chase and shot the paint before Chase got a chance to shoot the process. But really that process differs none from applying any other basecoat. It takes the same cleaning, scuffing, and spraying process.
Really the only difference between conventional refinishing and flame painting is expression. Whereas traditional finishing favors clockwork precision and consistency, graphics like flames celebrate creativity. Depending on the genre very contrast colors may crowd together at their borders or very subtle variations may blend. As Himsl shows, there exist a number of techniques that endow the patterns with a false sense of third dimension.
And that's the beauty of graphics like flames: there really isn't a wrong way to do anything. In fact, some of the very best graphics techniques were discovered by complete error—you think someone intentionally laid cling film on fresh paint to see what it would do to the finish? It was likely an accident.
While it's true that no single article can offer everything there is to know about flames, the information that Himsl dispensed in this one goes far beyond the very basics. So now that you know it, go out and do something with it. And let the flames fly!
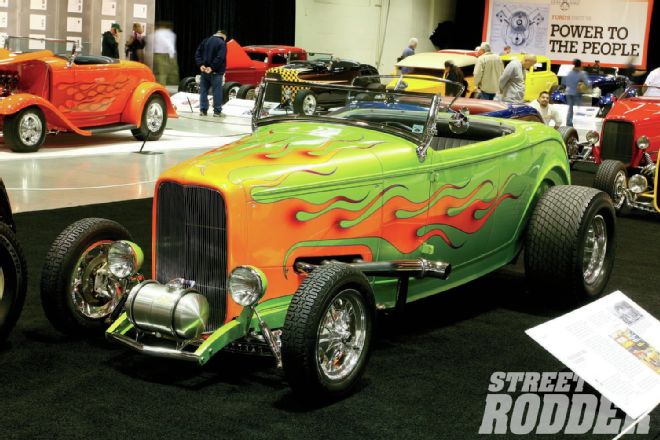 Do your homework and flames can look at once traditional and contemporary. The ones on Limefire evoke the ones Manuel Reyes shot on Pete Chapouris’ “California Kid” in the early ’70s yet the hooked ends look decidedly ’90s.
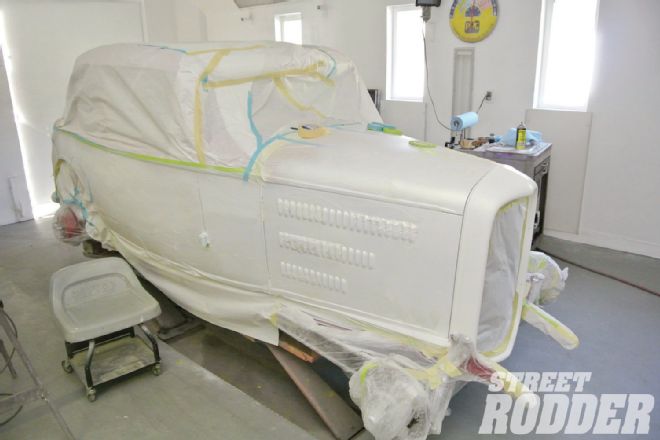 1. We don’t have photos of it but there’s nothing novel about the basecoat process that we missed. Himsl scuffed the panel with a red abrasive pad, cleaned it with wax-and-grease remover, and started spraying.
 2. Himsl mixed his first color, a translucent orange from House of Kolor. Once mixed, the paint goes into one of Himsl's airbrushes. He sets the airbrush tip to shoot a narrow pattern then focuses that spray just inside the tape line along each flame's crotch.
 3. Here’s how Himsl achieves his trademark three-dimensional flame. Once the paint dries Himsl returns to re-tape the panel. Only this time he tapes just inboard of the primary tape line.
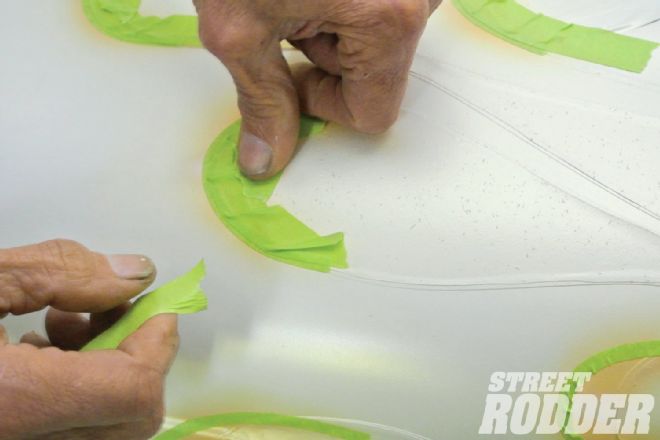 4. The second line defines the second boundary line of the paint shape at each crotch. Art protects the area between the lines by taping over it completely.
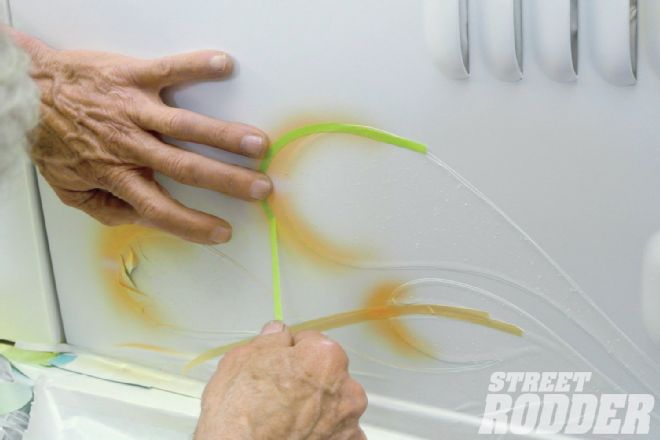
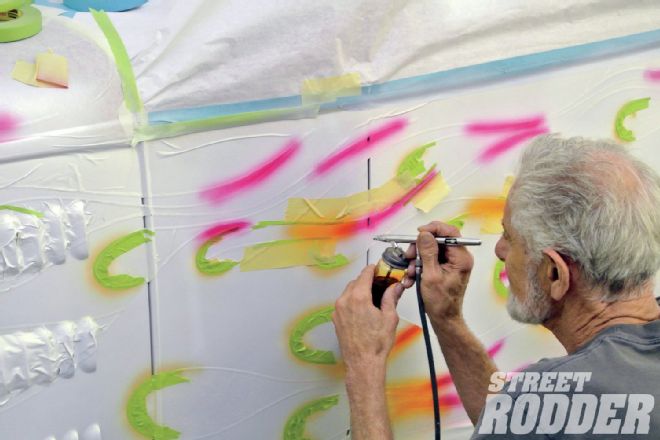
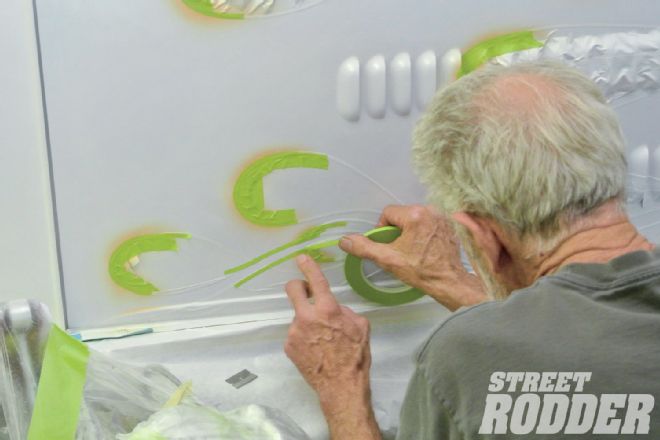 5. Most painters favor flames that overlap. “The overs-and-unders, yeah that just takes a lot of masking,” he says. Himsl sketches the layout before he paints so he knows which licks go over the others but leaves his options open until he starts shooting.
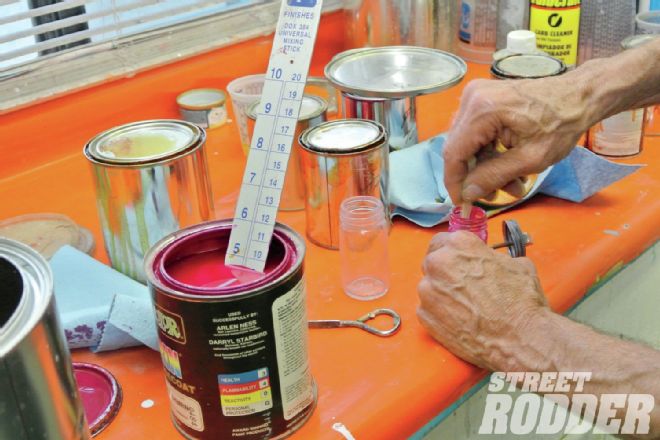 6. Content with the layout, Himsl mixes his second color. For reference, he’s using straight toners—specifically House of Kolor in this case. These translucent colors use the basecoat (in this case PPG) as a base reflection.
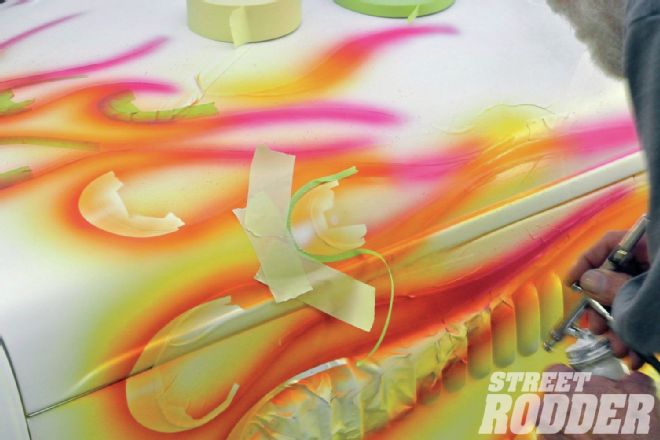
 7. Himsl then laid in all of the tip colors in the magenta toner. He recommends tipping the flames sparingly to preserve their light and wispy nature.
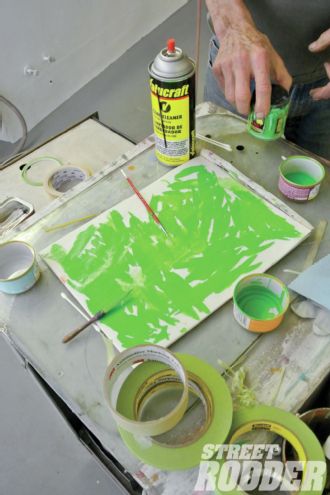
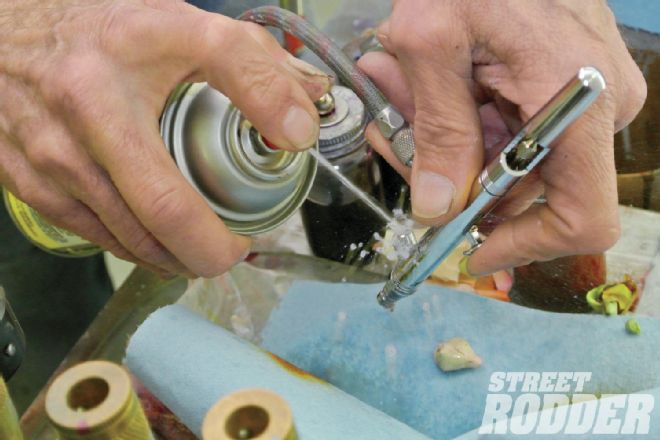 8. Like most painters Himsl stresses frequent gun cleanings. Unlike most, he recommends carburetor cleaner. “It works better than anything else I’ve ever used and dries quickly,” he says. Plus it comes with an indispensible spray tube.
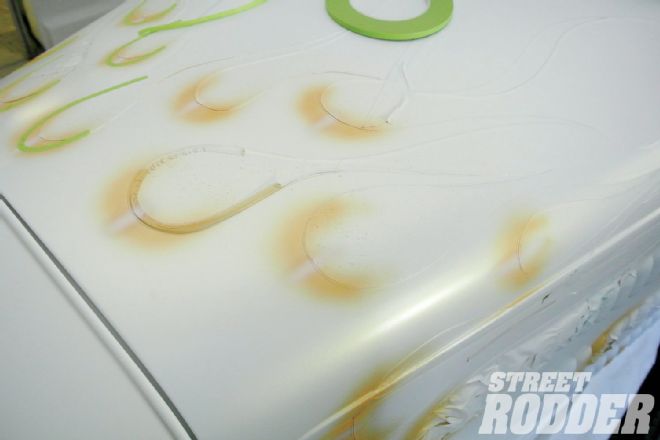
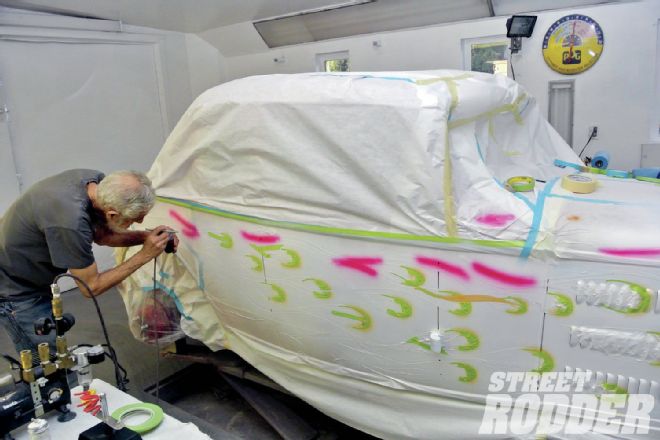
 9. Himsl returned to the orange toner to strengthen the flames’ color. Because Himsl sprayed only one coat of the translucent orange on the crotches before he masked them they’ll emerge considerably lighter than the areas he’s spraying.
 10. After the orange dried, Himsl pulled the second boundary tape that he used to define the second wall in each flame crotch. Note that he didn’t pull the tape that separates the flame crotch from the body color.
 11. He ran new tape around the line defined by the tape he removed. Only this tape masks the darker orange coat and fully exposes a pale orange crescent in each flame crotch. Then he shot a narrow white streak perpendicular to each pale orange crescent.
 12. Take a moment to step back and realize the gravity of your actions. Yes, you really have made a mess of your car. But you’re in good company; so has Himsl. Now pull all of the tape. It’ll look a lot better.
 13. No matter how carefully you taped you plotted a few imperfect lines and paint crept under the tape here and there. No worries; it happens to the best. A pinstripe will give the flames a solid border and cover the flaws.
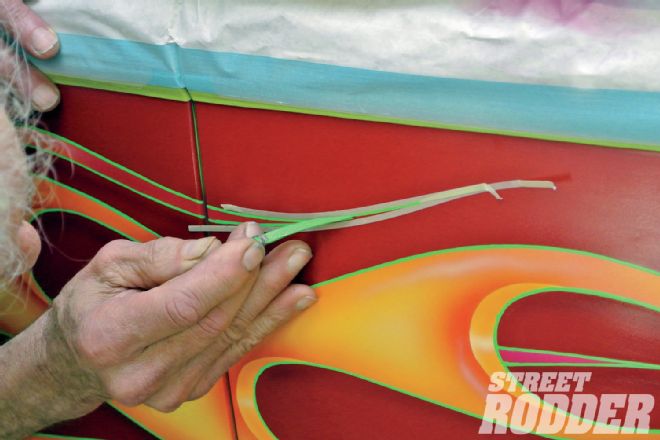 14. Most people can learn to pinstripe pretty quickly but dragging tips out takes a special type of skill, one that Himsl admits doesn’t come easily. “It’s easier to just tape the lines than it is to lay it out with the brush,” he says.
 15. Once the surface dried Himsl scrubbed it with wax-and-grease remover and applies the clear. Though nearly any formula compatible with the base and graphics will do, Himsl says that he prefers PPG’s line of clears.
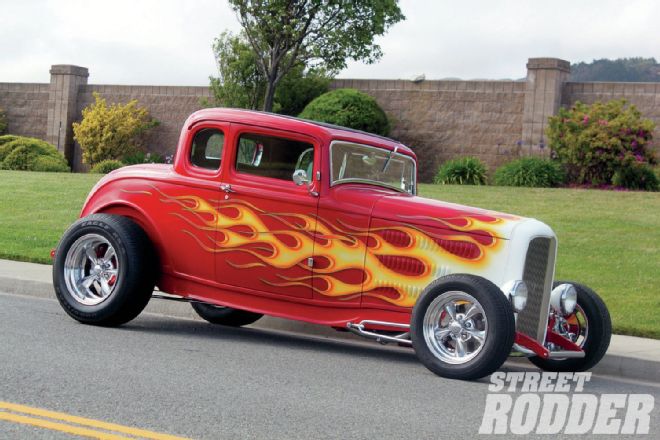
16. The final product looks considerably different than the progress images suggest it will. Now the extra effort to the crotched areas of the flames pays off: The flames practically pop off the car.
15. Once the surface dried Himsl scrubbed it with wax-and-grease remover and applies the clear. Though nearly any formula compatible with the base and graphics will do, Himsl says that he prefers PPG’s line of clears.
16. The final product looks considerably different than the progress images suggest it will. Now the extra effort to the crotched areas of the flames pays off: The flames practically pop off the car.