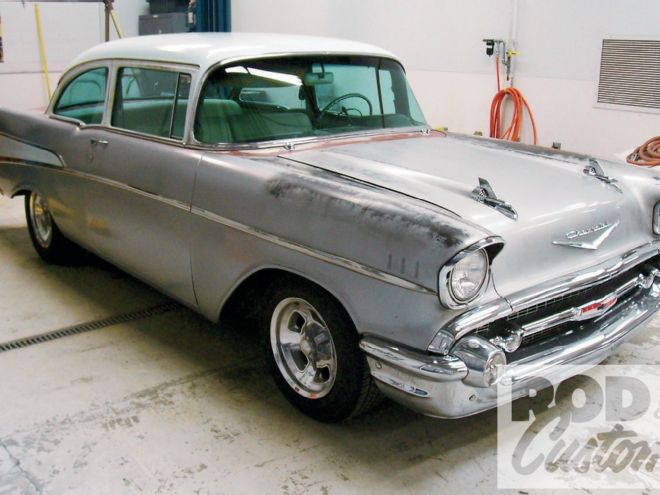
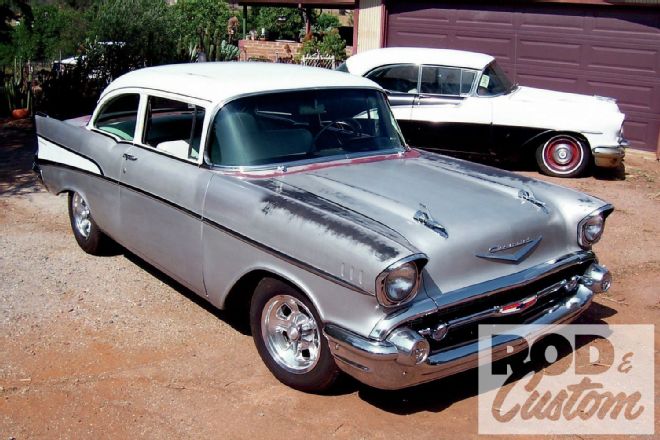
Last month, as you may recall, we talked our friend, John Fleming of Boulder City, Nevada, down from having us bodywork and refinish his cherry, original 1957 Chevy 210 two-door sedan—in Resale Red acrylic urethane. The reasoning behind our reasoning is that a car is only original once, and this old car's original lacquer finish has an honest weathered appeal worth preserving.
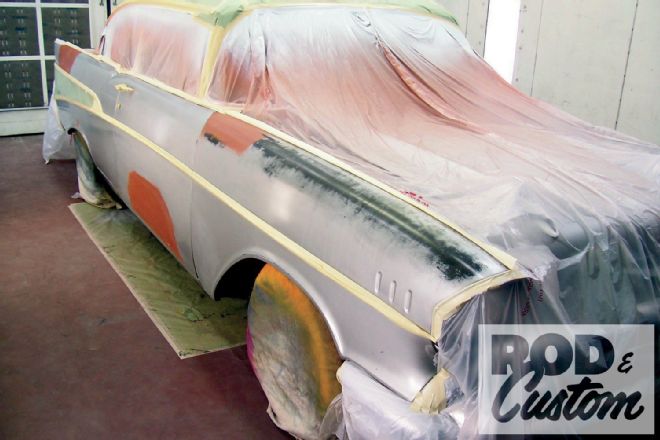
With bodywork and rust repair chores now behind us, we're back in the booth for the application of hard-to-find PPG Duracryl acrylic lacquer topcoats. The roof panel will be refinished in its entirety, while the silver on the sides will be blended and distressed to match the car's existing finish; and we'll get to use some old tech tools and materials that don't ordinarily come into play.
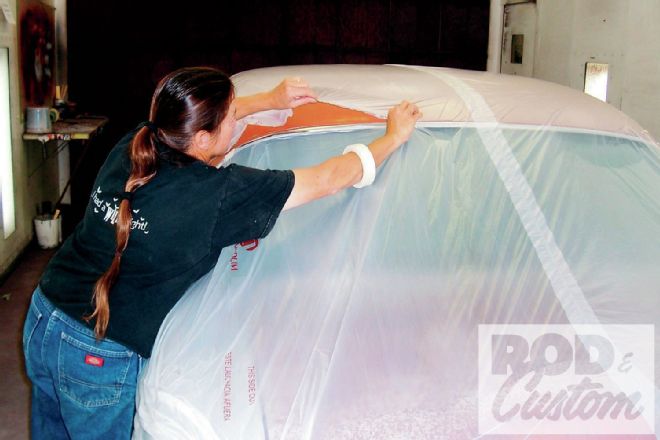 1. Once again this will be masked in such a way that both colors can be applied during one booth session. The roof will be shot first, and then covered as the masking is modified as necessary for the next color. No tape or paper will be removed until the spraying portion of the job is completed.
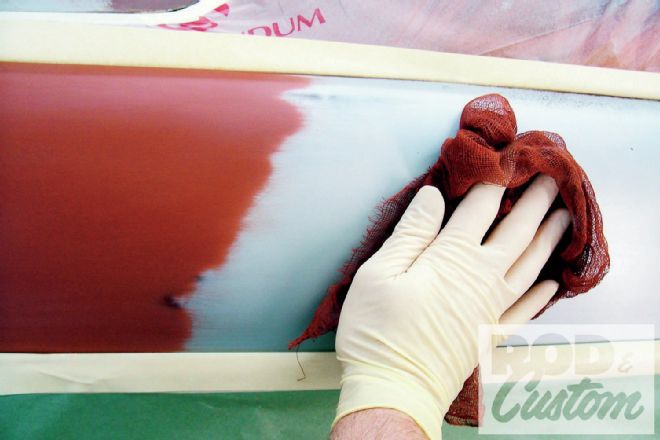
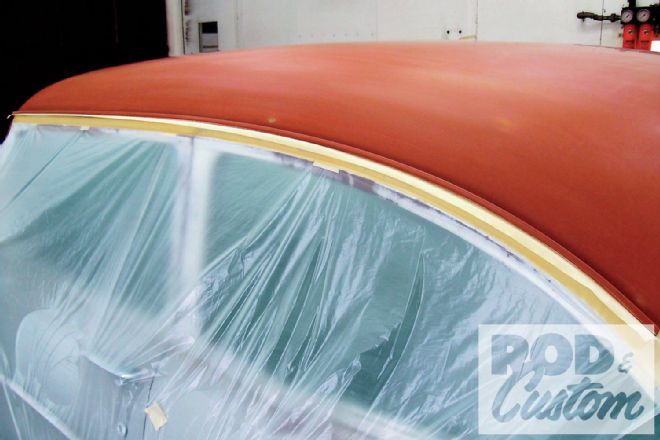 2. Here’s a close view of an age-old technique known as "back masking".
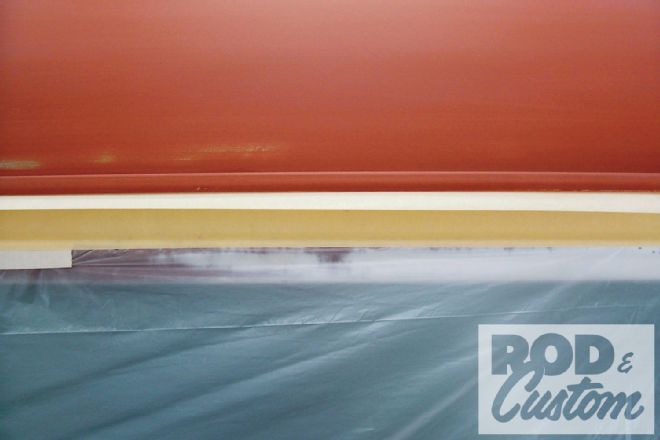 3. This will help to prevent a sharp edge from building where new paint should smoothly transition into the old. There is a modern alternative available from 3M, but in our effort to stick to our primitive painterly roots, we’ll get the desired effect the old fashion way.
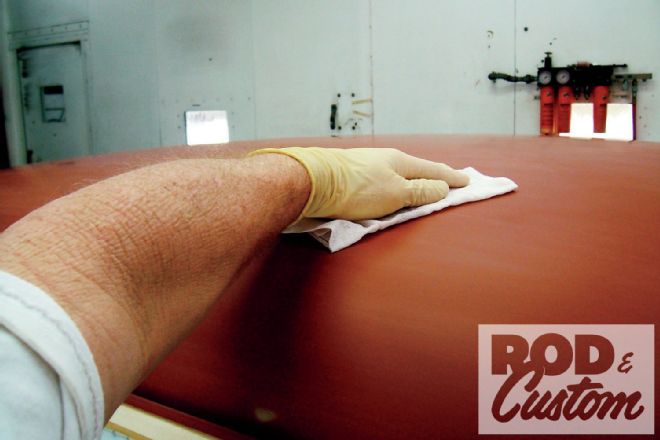 4. Tack rags have been around for ages and sometimes they’re a good thing. Personally, I try to use them only when absolutely necessary. Grease and wax remover and surgically clean, disposable paper toweling have already been used here, but since the car has set overnight, a light once-over with a clean tack rag might not hurt.
 5. For color holdout, a non-sanding lacquer sealer should be used between sanded primer and topcoats. It would also guard against shrinkage as it doubles as an adhesion promoter. However, my favorite sealer of yore has been discontinued by its manufacturer, so I’ve made my own by over-thinning the primer we have.
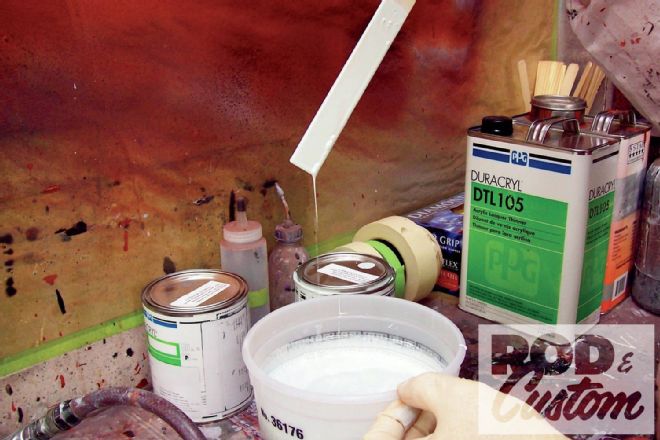 6. Amongst lacquer’s few redeeming qualities would be forgiveness, as mixing ratios don’t need to be taken as seriously as with modern finishes. We’ve covered the “glub system” before, but here’s a quick refresher: one glub color to two glubs slow thinner, give or take a few glubs.
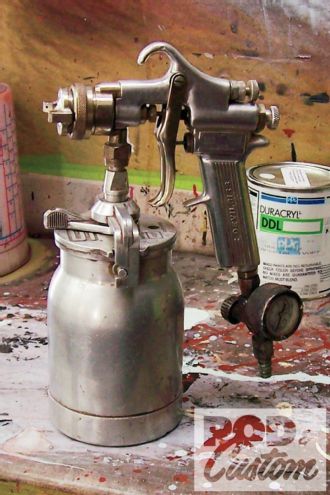
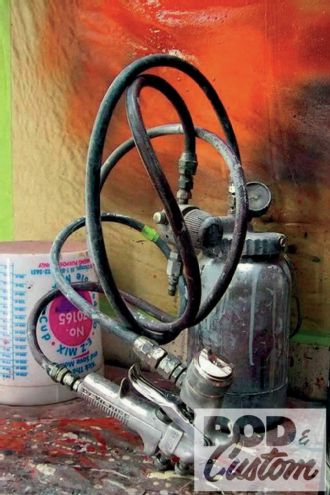 7. Even with slow thinner, lacquer topcoats will flash off very quickly. So, in order to keep the roof wet enough to achieve flow, my stunt double has dusted off an elderly DeVilbiss JGA, 2-quart pressure pot. You don’t see these used much outside of truck shops today, and there are reasons for that.
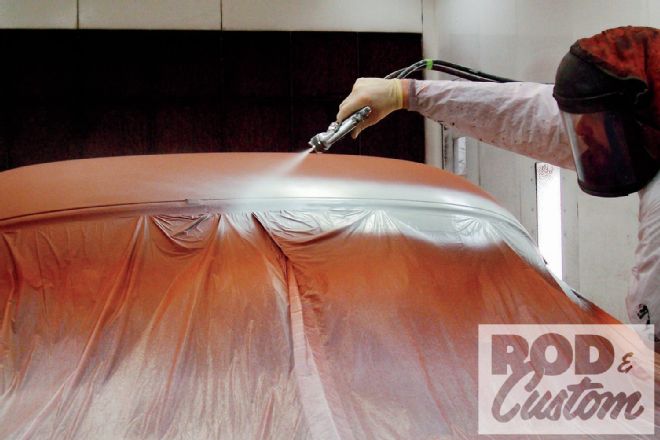 8. When it’s really needed, the old pressure pot is still a versatile workhorse. It’s capable of producing a very wide pattern, and for large expanses it can propel material quickly enough to keep fast-flashing lacquer slick without dry overspray. Here we’ll begin by spraying a band of color at the roof’s front and rear edges.
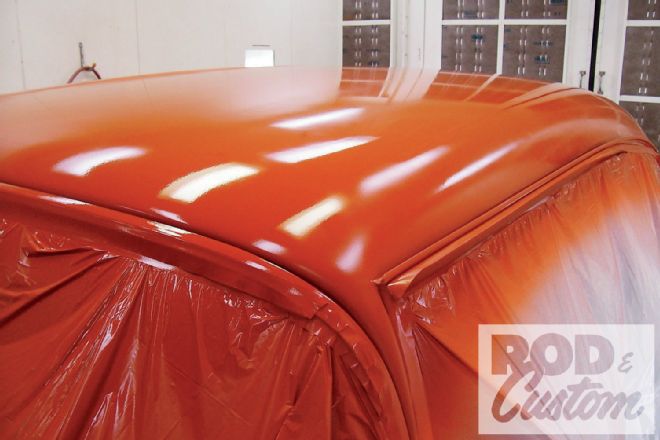
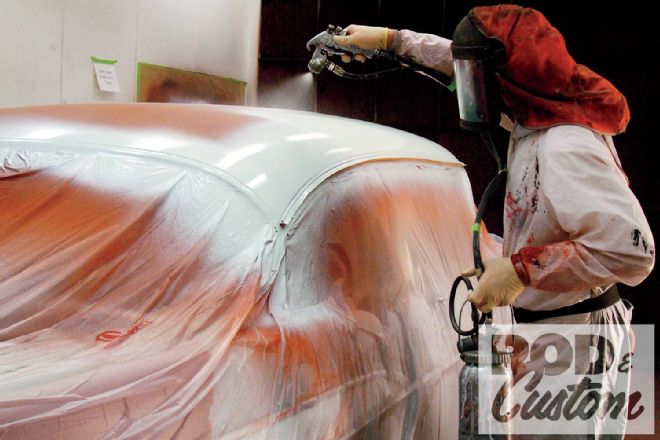 9. Then working from one side to the other, the bulk of the roof skin is sprayed to melt into the previously applied bands. For what we intend to accomplish, two wet coats of color will be more than sufficient.
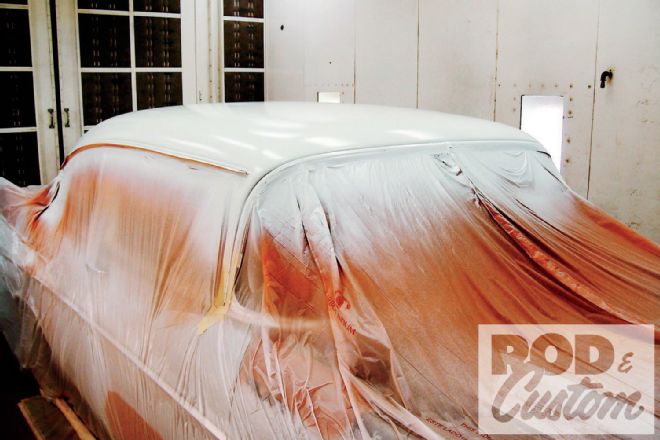 10. Because we’ve used slow thinner, we’ll allow the freshly painted roof to sit overnight before masking for the next step.
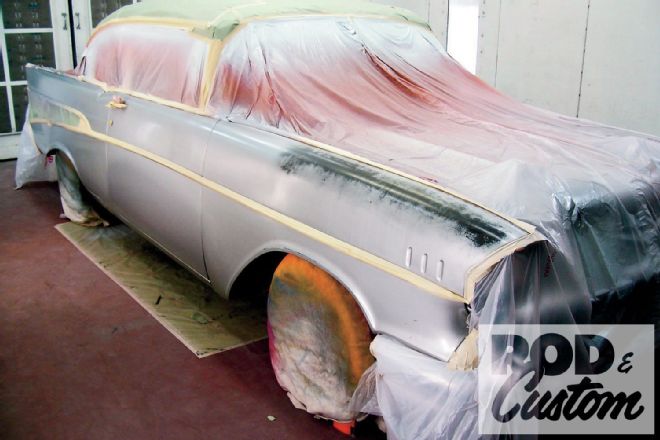
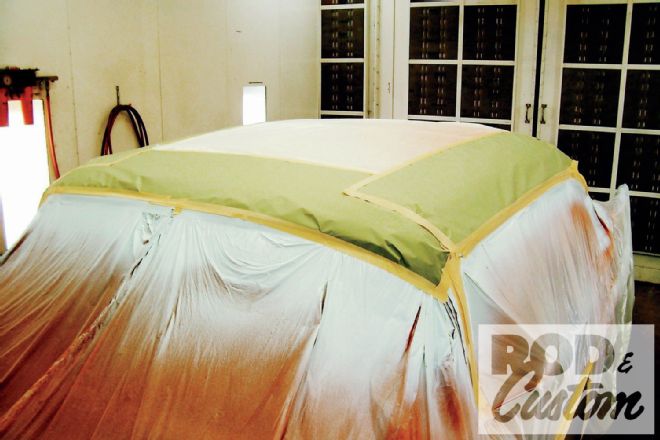 11. The very next day, the roof skin is masked over as necessary to protect the new coat of India Ivory from the Inca Silver to follow.
 12. Here we’ve used the old back-masking trick at the rounded peak of the old Chevy’s fenders. The upcoming Inca Silver will be gradually blended, each coat extending slightly beyond the last for a smooth-as-possible transition.
 13. Once again, tack rags should be considered an occasionally necessary evil. In warm weather especially, the gluey stuff can stick to an otherwise clean surface, causing more problems than tack rags are intended to prevent. When I absolutely have to use one, I prefer less-sticky BASF basecoat tack rags.
 14. For the spot-blending of the next-up color, I’ve called upon another old friend. This DeVilbiss MBC is a manly handful, designed with heavy production in mind. For ordinary day-to-day jobs, this gun would not be considered. However, for the job at hand it seems only right.
 15. With just enough color applied to achieve coverage, the color is quickly emptied from the gun’s cup and replaced with slow thinner, which can be lightly fogged to melt dry overspray at the edges of each spot repair. Had we needed to move more quickly, a backup gun, loaded with thinner would have been employed.
 16. The majority of this old Chevy’s underlying factory primer is red-oxide, which is what we’ve also chosen to use. Here’s the roof after vigorous color-sanding with 3M 600-grit wet sandpaper. Now that our red-oxide primer is exposed to our liking, we’ll take it from here with a course-cut rubbing compound.
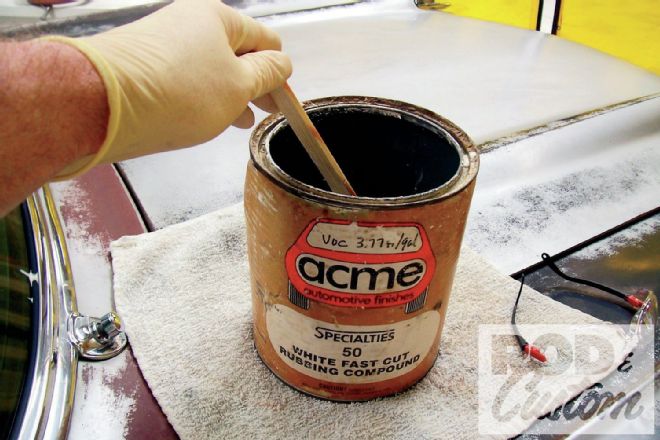 17. This bucket of compound has been on the shelf for a very long time. It’s not what we’d use today, but it’s what we used back when, so it’s particularly appropriate here.
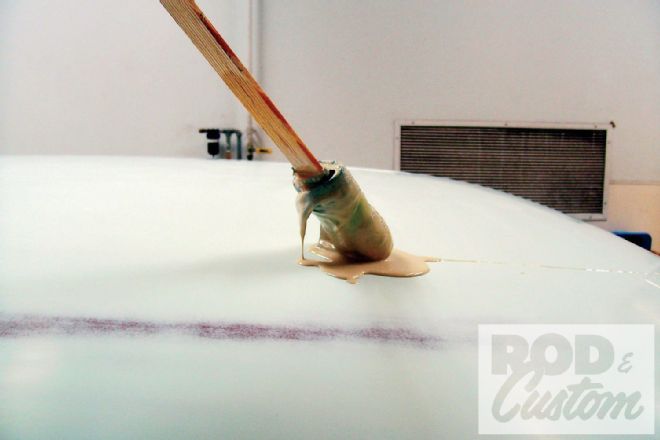 18. Just as I was taught at my first real job, a small section of rag is taped to the end of a paint stick, which then becomes a compound applicator.
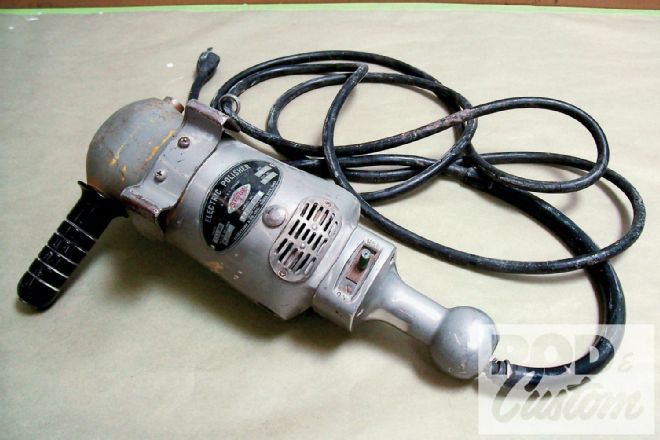 19. So, to maintain retro-tech authenticity, how far must we go? It’s time to buff, but this period-correct Sioux buffer is pretty hefty. In fact, its throttle is nothing more than a toggle switch. You can turn it on, or turn it off, but there’s nothing in between.
 20. At this point, we’re pleased to report that no one was injured while buffing. In order to keep a low gloss, only course-cut rubbing compound has been used, as sparingly as possible. Next we’ll need to formulate a game plan for duplicating a crumbly appearance where new Inca Silver must blend into the old.
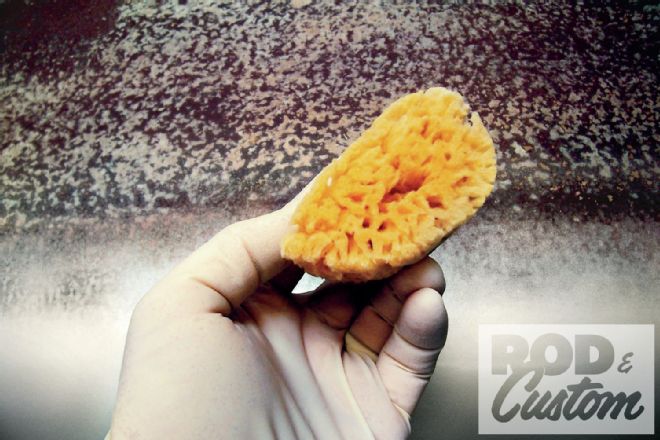 21. From the bottom of Rotten’s box of woodgraining supplies comes the ideal tool for this occasion. This sea sponge, once impregnated with lacquer thinner was used to gently blot the blend.
 22. Lacquer thinner melts lacquer—regardless of its age, so care must be taken not to overdo it too quickly.
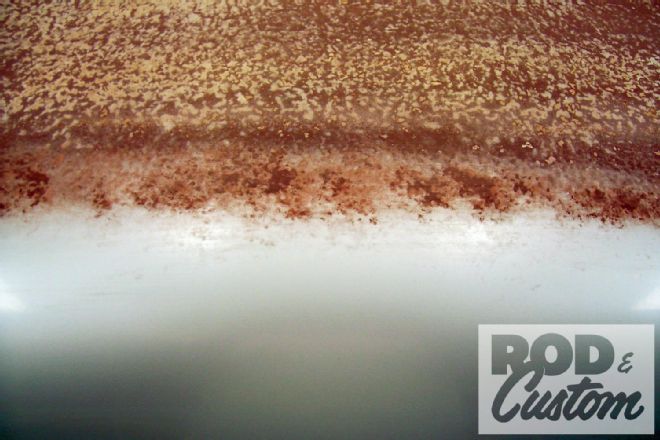
 23. Lacquer isn’t known for durability, but in this case, that’s good. In cooler, cloudy climates, Bon Ami, or even a handful of dirt could be used to accelerate the aging process. In the Boulder City sun, however, it won’t take long for new to become old, and at least for the time being, we’ve saved an old Chevy from a Resale Red repaint.