Shaved handles undoubtedly look cool, though living with them on a daily basis can get wearing after a while. But what do you do if you don't want the stock handles and don't want them shaved? This was the dilemma a buddy of ours voiced while we were tackling some body mods on his 1956 F-100.
Our immediate response was to replace the stock ones with 1946-48 Lincoln door handles, which are essentially a button rather than a "handle". Now, 1946-48 Lincolns weren't exactly common when new, and rarer still today, so finding a pair was the next task. Logic Industries manufactures a superb reproduction, but it's a reproduction from the outside only, and relies on a huge nut and threaded housing to attach it behind the doorskin. This isn't a problem on most cars, but the F-100 simply didn't have the space, with limited room between the inner door structure and window channel.
In addition, our doorskin was curved, and both the Lincoln button and reproduction mount to a flat surface. Slightly frenching the button would overcome this, however. As usual, the Internet came to our rescue, and pretty soon an original pair of Lincoln buttons were winging its way to us. We were lucky, as even these only just cleared the door structure and window channel, but would push against the stock door latch lever as we'd planned, meaning that part of the installation would be simple.
Of course now that we had a means to unlatch the door, we needed something that would actually open it, as we no longer had a handle to pull on. AutoLoc sells a number of different spring-loaded door poppers, so we selected a heavy-duty pair capable of handling the weight of the truck doors. With everything done, the doors now pop open at the push of a button, and look good doing so!
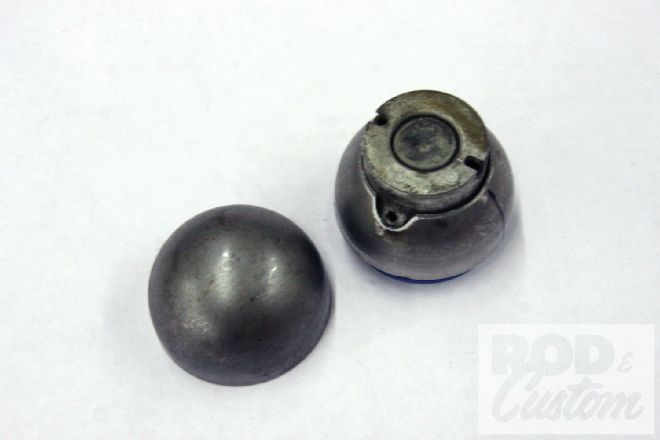
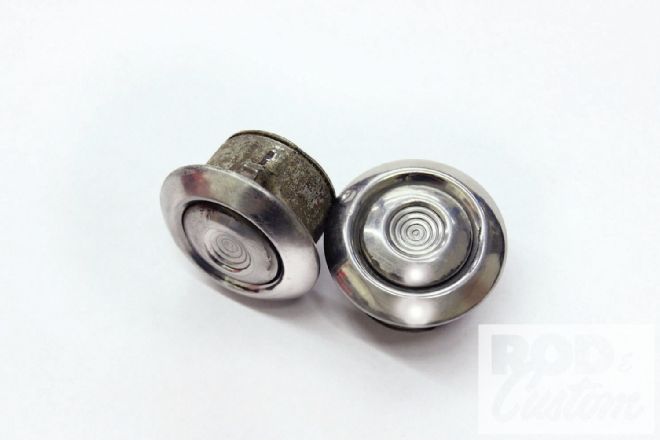 1. Stock ’46-48 Lincoln door buttons look like this. They’re stainless steel and attach using a set screw at an angle through the inner door structure.
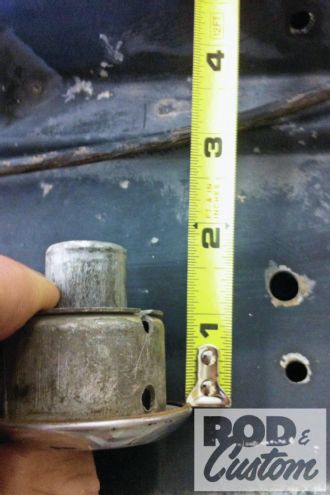 2. With the button fully depressed the distance from the doorskin to the end of the button measured 1 3/4 inches.
 3. The distance from the doorskin to the actuating lever on the latch mechanism measured 1 1/2 inches, allowing 1/4-inch travel for the button to push on the lever. We were frenching our buttons, so we would have just over a 1/2 inch of travel.
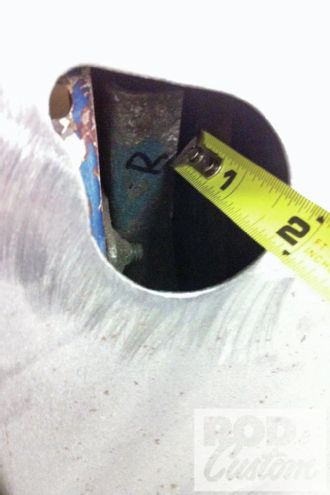
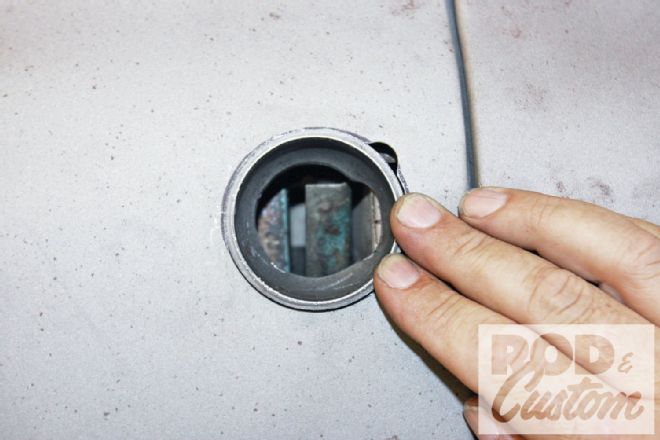
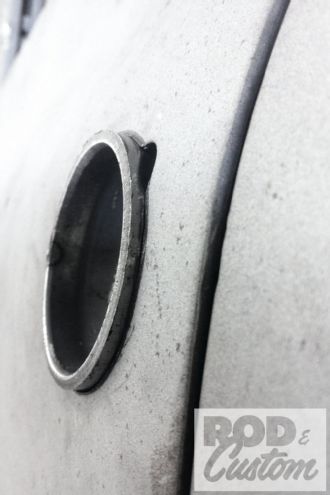
 4. In the previous picture of the passenger door you can see the stock circular hole left when the F-100 handle was removed, as well as the inner door structure (colored blue) on the left of the hole. While the Lincoln button fit in the hole, its casing fouled on the structure, so we elongated the hole slightly for clearance, inserted the button, and checked it would operate the lever on the latch without hitting the window channel. This is the driver door.
 5. We were going to uses a length of tubing to french the buttons, but stumbled onto these “half spheres” while at our local metal supply house. Trimmed as shown on the right, they offered an ideal way to incorporate the set screw (arrow).
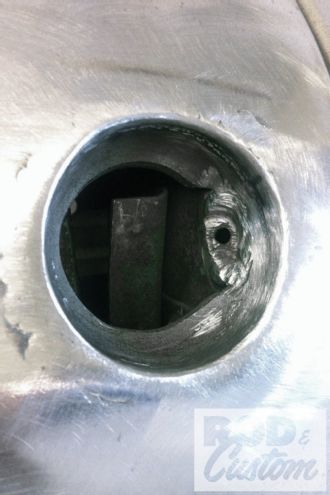
 6. The outer circle marked in image 4 denoted the diameter of the half-sphere, the doorskin now trimmed back to suit using an air-powered die grinder. This view also shows the window channel. As you can see, the latch lever operates in a narrow gap.
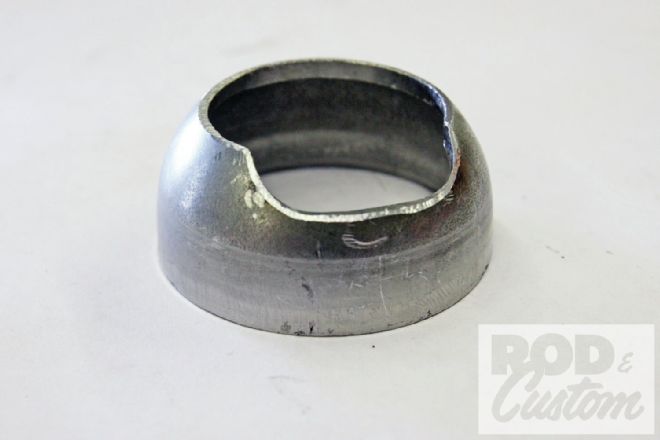 7. In order to provide clearance for the inner door structure, the final shape of our half spheres looked like this.
 8. Tacked in place, the protruding section was ground back prior to final welding.
 9. The cutout in the half sphere offered access to weld it to the door structure, a section of which was reshaped using a hammer and dolly then drilled to accept the set screw.
 10. Here’s the new set screw, as well as the hole for the stock handle’s set screw. This area will be altered to show no trace of the original hole.
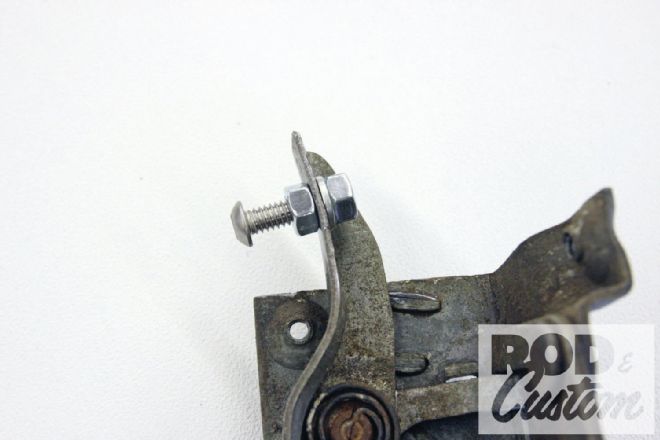 11. The 1/2-inch travel in image 3 wasn’t quite enough for the lever to actuate the latch, so we added 1/4-inch stainless bolts to the lever. Once the travel required is determined, we’ll weld one nut to the lever and replace the second with a Nyloc nut.
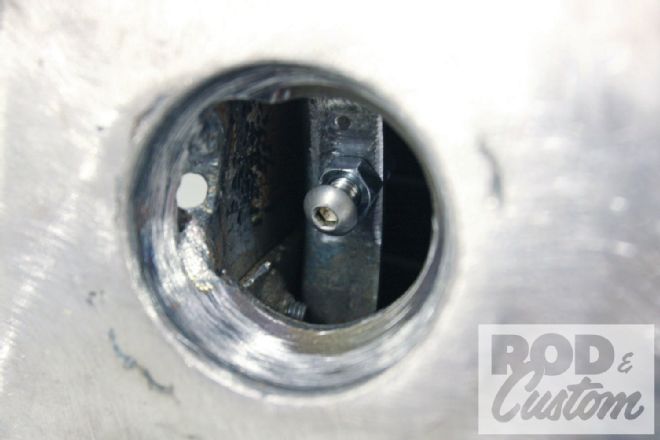 12. The passenger door latch and stainless “travel adjuster” bolt in place. You can see how the button will now press against the domed head of the bolt.
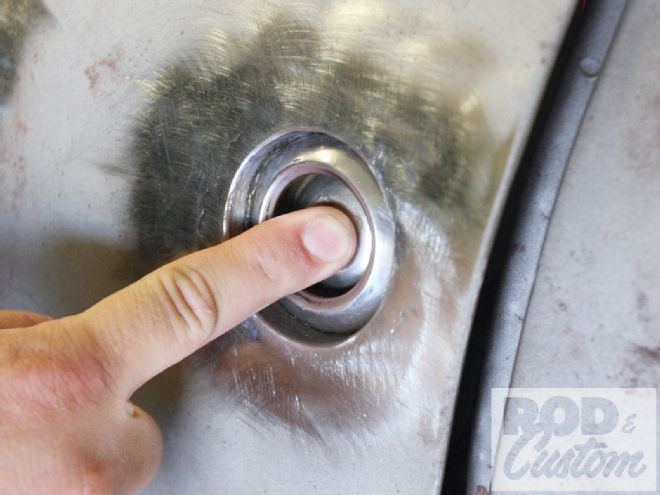
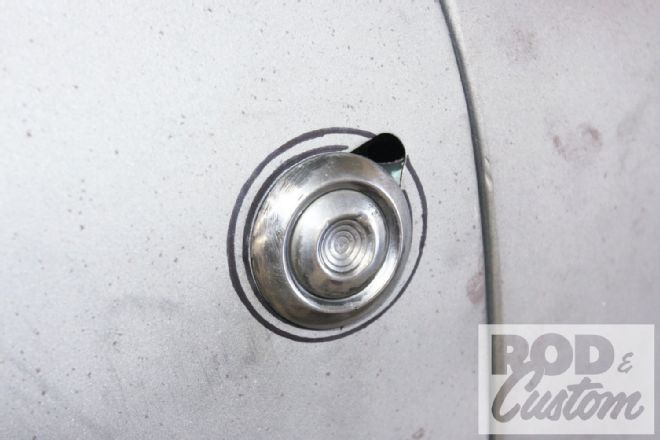
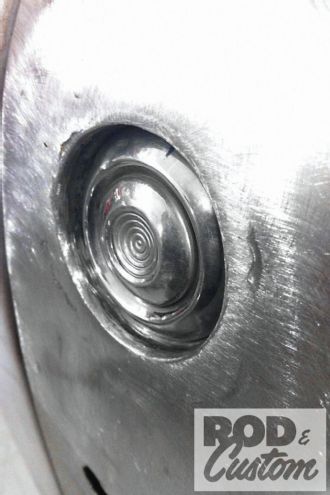
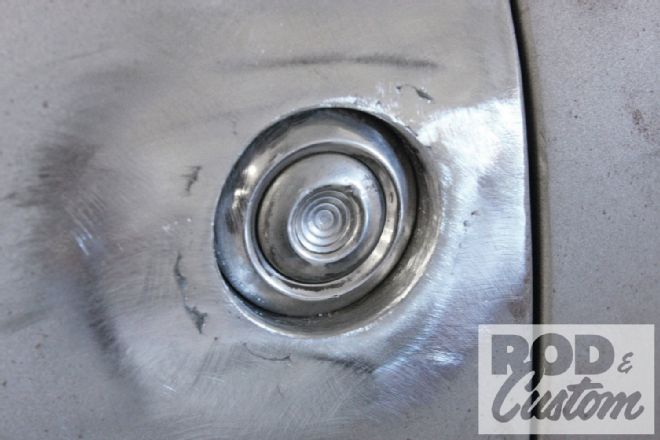 13. The driver door button frenched in place. However, though it releases the door latch, without a handle there’s now no way to open the door.
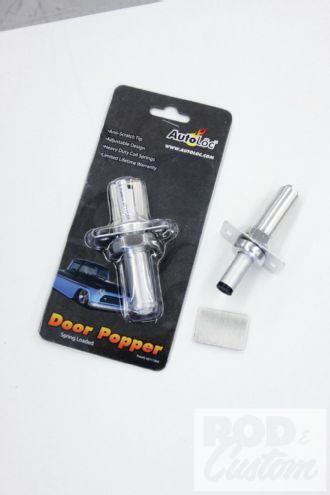 14. Our door opening solution came in the form of Autoloc’s heavy-duty door poppers (PN DP3000), which are supplied with a stainless plate to spread the load of the popper.
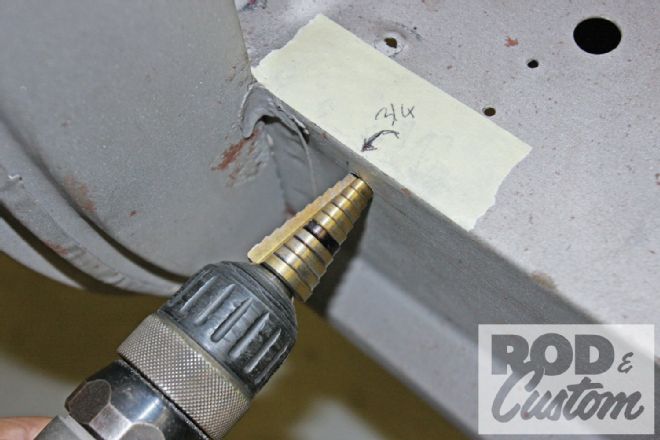
15. Once we’d decided on a suitable location for the poppers, a step drill was used to open up the mounting hole. The Sharpie mark on the drill? That tells us when we’ve reached the right diameter!
14. Our door opening solution came in the form of Autoloc’s heavy-duty door poppers (PN DP3000), which are supplied with a stainless plate to spread the load of the popper.
15. Once we’d decided on a suitable location for the poppers, a step drill was used to open up the mounting hole. The Sharpie mark on the drill? That tells us when we’ve reached the right diameter!
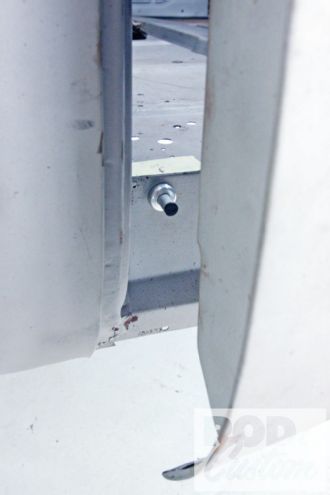 16. The installed popper. We mounted them in the cab step, pushing against the door, rather than in the door itself, as there was less chance of snagging a passenger’s clothing, and they’re less obtrusive here.
 17. A little body filler and paint, and these’ll look factory …