All of us have attempted our own paintjob with differing results from good to not-so good. But we are all aware that this is one area that’s fraught with the potential for things to go wrong—sometimes terribly wrong. Problems occurring with the paintjobs are so common to those of us in the hot rod world it almost seems natural or normal to have a problem here and there. It shouldn’t be and the more preparation that’s applied, the more knowledge of what it is you are attempting, and the understanding of the materials you are using will go a long way to minimizing these paint woes.
Just in case, we joined forces with Axalta (formerly DuPont) and came up with a number of identifiable problems that occur in our world. We have also asked illustrator and frustrated painter of hot rods (like the rest of us) Jeff Norwell to put his ink to paper and illustrate a handful of these problems. For solutions to these problems Axalta gives us the answers we will need.
Axalta provided information on 29 of the most common paint defects (and I believe I have managed 12 of them on one panel thereby banning me from the paint booth). What we have done in this article is to identify the more common mistakes, and asked our hot rod artist in residence to illustrate so that we would be able to show examples and then offer the Axalta solutions.
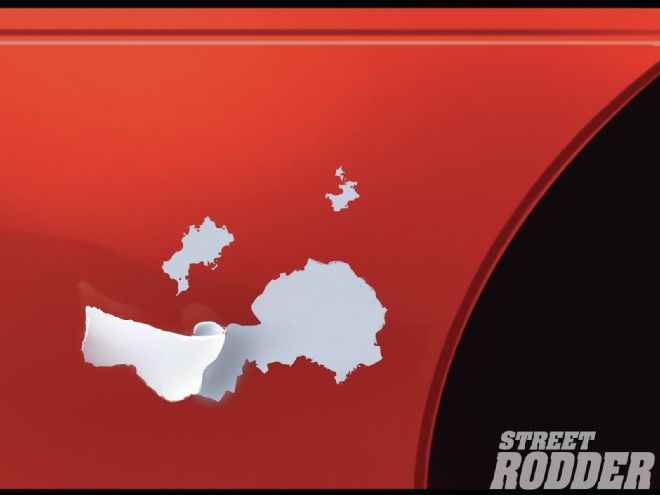
 Adhesion—loss of clearcoat from the basecoat.
Adhesion Loss, Clearcoat
We’ve all seen the clearcoat that peels off from the base color. This can be the result of excessive thickness of the basecoat (yes, basecoat), the intermediate and final flash times of the basecoat are too short, wrong mixing ratio for clearcoat and its activator.
So how do we prevent this from happening? Make sure to check and recheck the correct flash times of the basecoat before applying clearcoat, make sure that all layers of paint material (base color and clearcoat) area are applied at the prescribed thickness, and make sure to mix clearcoat correctly.
But what happens if one of us hasn’t followed the instructions correctly? How do we fix the problem once it has occurred? Take the affected area and sand, making sure to isolate this area from unaffected areas and refinish.
 Bleeding—original color seeping through the topcoat, causing a discoloration of the new finish.
Bleeding
Sometimes referred to as bleed through, staining, and stains; yes, we’ve all seen this no matter what it’s called. It will appear in the form of the original finish color or peroxide hardener from polyester body filler seeping through the topcoat, causing a discoloration of the new finish.
This can be the result of a reaction of color pigments from the original finish with solvents of the coat, which has been applied on top of it. It can be a contamination; usually in the form of soluble dyes or pigments on the older finish before it was repainted. (Many of us have seen this with cars originally painted red and then repainted over the older shades of red.) Another reason for this bleeding to happen can be the result of the old finish not well sealed or too much hardener in the polyester putty or filler was used, or the polyester putty or filler wasn’t mixed properly.
So how do I stop this from happening from the get-go? You will need to apply a sealer if there is any doubt that the bleeding will occur. You can test a small area of the old finish by applying a coat of the final color. Follow the directions on the amount of quantity of hardener when mixing the polyester putty or filler. Carefully check quantity of hardener; you can do this mixing by weight or use a dispensing machine (probably will have to have access to a professional shop for this one). Once putties and fillers are combined make sure to mix thoroughly.
Should bleeding have already occurred you will need to remove the polyester and redo the repair. Begin by sanding and then isolate the original finish with sealer and reapply the topcoat.
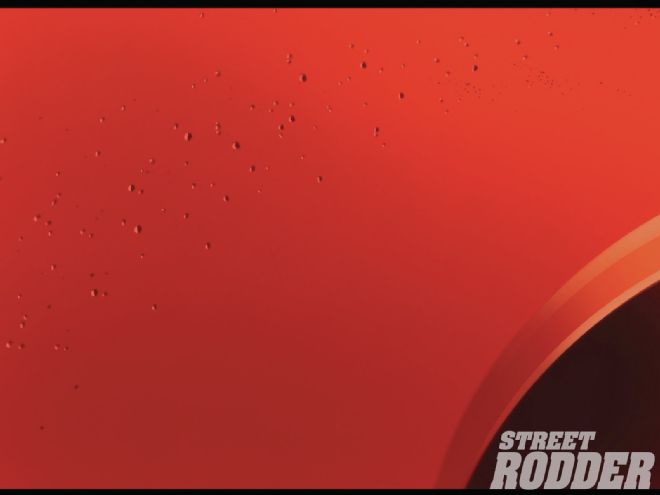
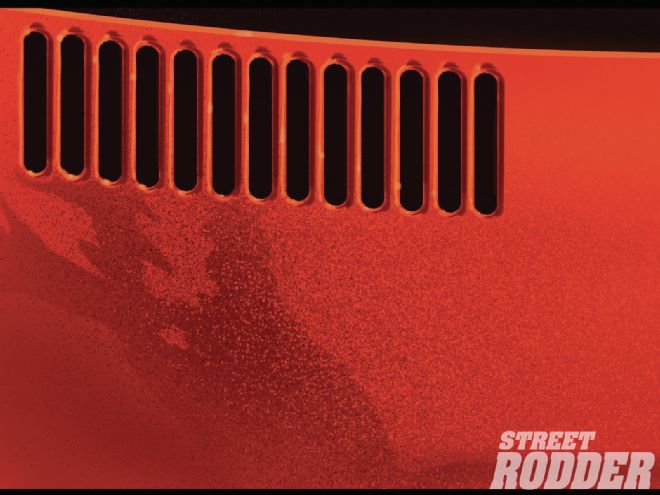
 Blistering—bubbles or pimples appearing in the topcoat.
Blistering
Sometimes known as moisture blisters, blisters, bubbling, blowing, or bubbles, this hiccup will manifest itself as bubbles or pimples appearing in the topcoat. It is generally the result of leftover sanding water in the corners, edges, crevices, or below any other art on the final paint. It can also result from the ambient humidity too high. And what none of us wants to hear but we know happens, improper surface cleaning and preparation—poor location or prep of the work area such as contamination of compressed air lines; oil, water, or dirt in lines. It’s the direct result of tiny specs of dirt left on the surface and these dirt particles act like a sponge and retain moisture. This happens when wet sanding polyester and applying topcoat without enough time for the water to evaporate. Also, insufficient drying time between coats or too heavy application of the undercoats may trap solvents, which escape later and blister the color coat. This can also occur in unison with excessive film thickness; we are in a rush and don’t allow sufficient drying time and apply too much material. When the finish is exposed to the sun (or abrupt changes in atmospheric pressure), moisture expands and pressure builds up. If the pressure is great enough, blisters form. It can also occur because the wrong thinner or reducer was used; incompatibility of materials. Use a fast-dry thinner or reducer, especially when the material is sprayed too dry or at an excessive pressure. Air or moisture can be trapped in the film.
So, how does one go about preventing this from happening in the first place? Remove any and all trim (you are removing hiding places for moisture). Make sure to use sufficient air pressure that is properly filtered to remove dirt and moisture from the air lines. Make sure to thoroughly clean the area (location) where the painting is to occur before starting the sanding process. Make sure the surface is completely dry before applying any materials (undercoat or topcoat). And, for the 100th time, never touch a surface to be painted with your hands as the oils in your skin will contaminate the surface. Make sure to match thinner or reducer to suit your “weather” conditions in area where painting will occur. Be sure to provide for amply (proper) drying time for undercoat and topcoat, making sure to allow each coat to flash properly before continuing. Always start with thoroughly cleaned and maintained equipment, such as drain and clean air pressure regulator to remove any trapped moisture and/or dirt. (It’s a good idea to drain the air tank often but especially before attempting any paint project.) Make sure surface to be painted is cleaned carefully and thoroughly.
If blistering has already occurred and the time has come to fix it, what are my options? If the blistering is severe enough the paint will need to be removed down to at least the undercoat (primer) or even bare metal. This is determined by the depth of the blisters. Next, begin the refinish process, this time not taking any shortcuts and making sure to adhere to the proper directions and techniques.
Corrosion
Should corrosion be visible it will appear in the form of a brownish-red for steel or white rust in the case of aluminum. This can be caused by contamination of the metal resulting from fingermarks, water, and so on, before the paint materials were applied. It can come from the original paint being removed by chipping off paint or leftover scratches, all leading to improper and inadequate pre-treatment of the metal surfaces. And with older hot rods, especially vintage tin, it can occur because rust wasn’t completely removed before proceeding or the new paint materials were contaminated at some point in the process.
 Corrosion—surface of metal substrate is visible and shows corrosion spots.
To prevent corrosion from occurring, all metals need to be prepped with a metal treatment and a wash-primer. Make sure all chips and scratches are repaired before rust can set in and make sure to thoroughly clean area to be painted before applying any material. If you do spot water from the wet-sanding process on the surface, make sure to wipe it off and allow ample time to completely dry before proceeding.
If it’s too late and you need to remedy the problem, here are some methods: The paint will need to be stripped and sanded back to bare metal. (Bet you didn’t want to read this!) From here a metal conditioner and a phosphoric acid wash primer (you may be familiar with etch-primer) designed for your substrate (steel, aluminum). Once these steps are complete then it’s on to refinishing.
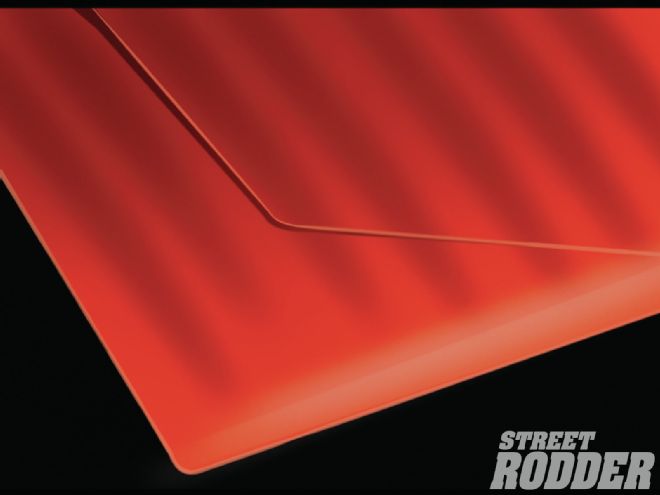
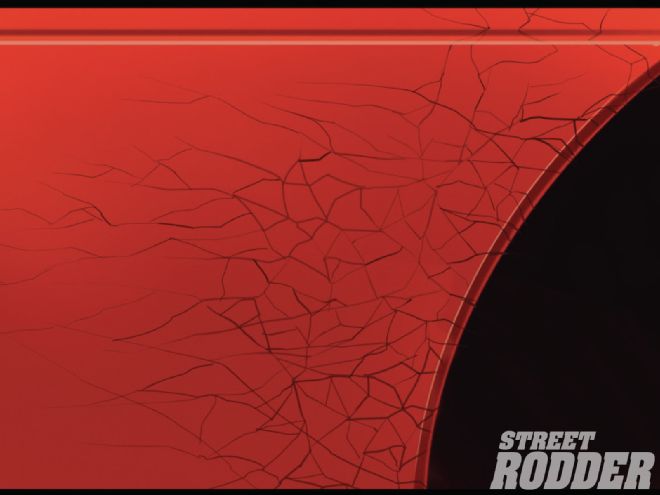 Cracking—a series of deep cracks often in the form of three-legged stars with no definite pattern
Cracking
Often explained as a series of deep cracks resembling mud cracks in a dry pond usually manifested in the shape of three-legged stars and in no definite pattern, they are usually in the color coat and sometimes the undercoat as well.
The cause can occur from excessive film thickness, which magnifies the normal stresses and strains on paints, thus resulting in cracking even what would have been considered normal conditions. Other possible causes are materials not uniformly mixed, insufficient flash times between coats, incorrect use of additives, substrate is too hot or cold, the use of coats incompatible with each other, and lastly the omitting of the activator when mixing a 2K product.
So how does one go about fixing cracking? When applying a topcoat do not over apply material, allow sufficient flash and drying time between coats, do not fan dry by using compressed air from the spray gun (we’ve all seen this at one time or another), and make sure to properly stir (mix) all pigmented undercoats and topcoats. Additives not specifically designed for a color coat may weaken the final paint film and make it more sensitive to cracking. There’s also the obvious: Read and carefully follow recommendations in the Technical Data Sheet(s). These can be obtained from your paint supplier or from online.
To fix cracking once it has reared its ugly appearance you will need to sand to a smooth finish the affected area unless it is extreme cracking, in which case you will need to remove damaged materials and get to bare metal. From here a full refinish is necessary.
 Edge-Mapping—can result from shrinkage or solvent penetration; repair area and original finish show after topcoat application; enlarged sandscratches visible as swelling action of topcoat scratches.
Edge Mapping, Shrinkage
We’re pretty sure most rodders are familiar with the term paint shrinkage but it is also known as edge mapping and featheredge splitting. It generally occurs as the result of “piling on” the undercoat in heavy and very wet coats. What happens is, solvent is trapped in the undercoat layers and have not had enough time to set up. It can also occur because the material isn’t properly mixed, especially with high pigment content of primer-surfacer; it’s possible for settling to occur after it has been thinned. Speaking of thinning, the incorrect use of thinner and reducer selection is another cause, as is improper surface cleaning. When not properly cleaned, primer-surfacer coats may crawl or draw away from the edge (shrinkage) because of poor wetting and adhesion. Another sure-fire way to screw up a good paintjob is to employ improper drying techniques. We mentioned earlier in this article about not fanning with a spray gun. Should this technique be employed after the primer-surfacer is applied it will dry before solvent or air from the lower layers is released. Another means to an edge mapping issue is the use of a too coarse of a finishing grit of sandpaper. This can occur when we try and save time, money, and/or our fingers! By skipping a step and not continuing on with the proper grit of finishing sandpaper is another way to create a problem.
The way to prevent this from happing is to properly apply reduced primer-surfacer in thin to medium coats following the prescribed flash time between coats. (Again, look at the data sheets for this info or ask your paint supplier.) Make sure to thoroughly stir all pigmented undercoats and topcoats, select only thinners/reducers that are recommended for the type of conditions you are painting within, and thoroughly clean areas (the shop as well as the surface area) to be painted before sanding. Make sure to use the recommended sandpaper grit before applying polyesters or undercoats.
Should you find yourself in trouble and need to remedy the problem now that it has occurred you will need to thoroughly dry off the surface area, sand, and refinish.
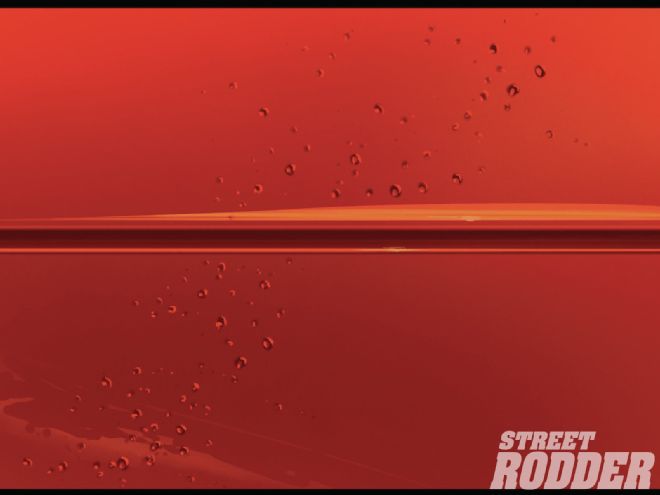
 Environmental Damage—discolored spots or etching resulting from acid rain or bird droppings.
Environmental Contamination
A pair of long words for everyday occurrences attacking your paintjob; acid rain, bird droppings, spotting, pitting, acid marks, blistering, and insect marks. The discolored spots reside in the topcoat and are noticeable by the clearcoat losing transparency and/or its gloss. You will, in most cases, be able to see etching marks visible in the topcoat (probably the clearcoat).
Should you find yourself living in an agricultural area you car’s paint will be subjected to horticultural sprays as well as other regional or even seasonal bird and/or insect populations. The organic etching is accelerated by intensified sunlight (heat), while time and temperature dramatically increases concentration of acid. The damage is more visible on dark or darker colors due to heat absorption. Acid rain is the term given to rain containing effluents from manufacturing, chemical industries, and particularly power stations. Some of the effluents may be acidic or alkaline in the presence of water (e.g. sulphur dioxide will dissolve in water to give an acidic solution; even a mixture of cement dust and water is strongly alkaline).
To attempt to prevent this contamination the answer is obvious but not always feasible. Avoid the contaminated atmosphere. Get out the ol’ water bucket and wash your hot rod (or family car) paints often. After washing it’s always a good idea to protect your car’s paint/clearcoat (topcoat) to use a quality polish or wax; one that doesn’t contain silicone. Should you see the contamination, such as bird droppings, immediately clean with a mild detergent soap (or a car wash solution from a car wax manufacturer) before etching begins.
Should you find the contamination has begun the process then you will need to wash your hot rod (or family car) thoroughly with a water/detergent solution using a soft bristle brush and lightly scrub; keep the brush saturated with water. Afterward go over the affected areas with a rubbing compound and then follow with a proper polishing. Should the contamination be severe you may need to sand the affected areas, making sure the craters are sanded away completely before using a primer and topcoat.
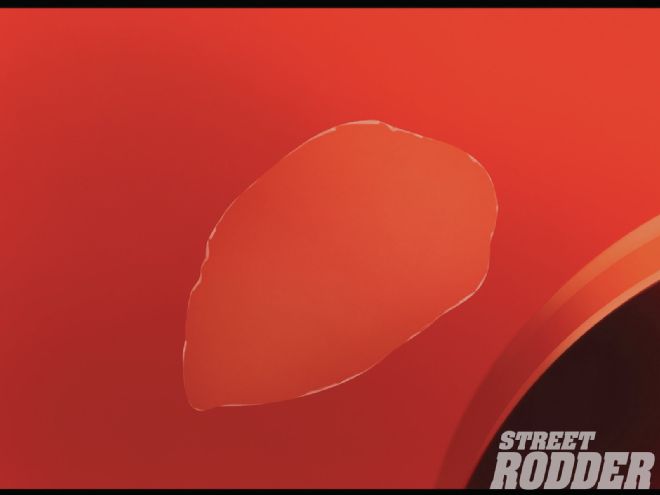
 Mismatch— The color of the repaired part differs from that originally on the object being painted.
Fish Eyes
OK, all hot rodders have heard of “fish eye” or seen this paint flaw on more than one occasion. It’s also known as: silicone contamination, poor wetting, saucering, pits, craters, and cissing. (Most of these terms I’ve never heard of but they are used in the paint industry.)
The fish eye is a small, crater-like opening in the finish (topcoat or color) after it has been applied. It generally comes about because of improper or insufficient surface cleaning or preparation. Remember a few paragraphs before we made mention of using a polish that’s silicone free, now you know why. Many waxes and polishes contain silicone, the most common cause of fish eyes. Silicones adhere firmly to the paint film and require extra effort for their removal. Even small quantities in sanding, dust rags can cause this type of failure.
 Fisheyes—small openings in the finish after it has been applied.
Another cause could be the leftover effects of a previous finish or an older repair. The previous finish or older repair may contain excessive amounts of silicone from additives used during their application. It’s been painters’ experiences that usually solvent wiping will not remove embedded silicone. Contamination is a big deal in painting and a contaminated air supply (water or oil), other oils, wax, grease, or silicone are the key points of emphasis when trying to avoid fish eye appearing in your new paint. Something to remember about silicone it can be found in polished but it can also be found in other aerosol sprays, such as interior cleaners or dressings and these should be kept away from any area that is used for painting.
It should be obvious what you need to do to prevent fish eye. Treat silicone as your enemy and keep it away from any and all areas to be used for painting. Make sure to properly clean the substrate to be painted and drain and clean air pressure regulators before any paint project is begun.
Should you find yourself with fish eye in your paint then you can apply light coats of basecoat until the defect is covered. There is also a fish-eye eliminator that can be used. If the fish eyes are severe then you will be required to sand the affected areas, clean thoroughly, and refinish.
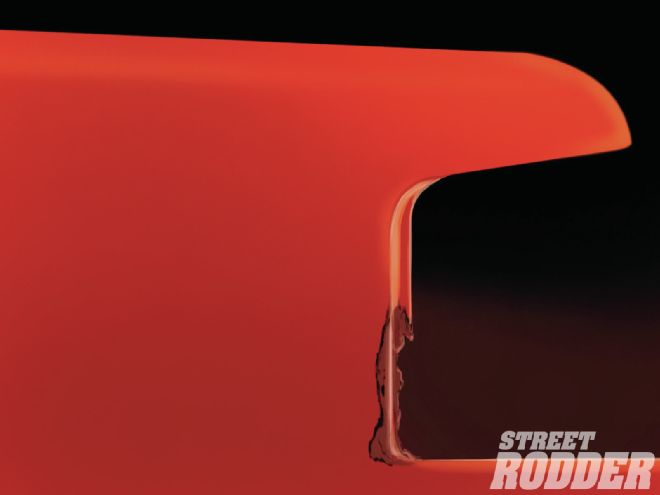
 Peeling—Loss of adhesion between paint and substrate; topcoat to primer.
Peeling
Yep, here’s another all of us are familiar with and it is also known as: loss of adhesion, shelling, poor bond, delamination, flaking, and poor adhesion. It is the loss of adhesion between the paint and the substrate (steel or aluminum) and the topcoat to primer and/or previous finish, or primer to substrate.
Again, improper cleaning and/or preparation is one method that will ensure that your paintjob will fail. This can manifest itself by not removing all of the sanding dust or other contaminants as it will stop the finish coat from coming in contact with the substrate. Improper metal treatment by failing to use a metal conditioner and/or wash primer is another way, as would be the use of incompatible material for substrate. Improper mixing, failure to use the proper sealer, and paint film too thick are more poor methods that can lead to peeling. By applying material too dry, material was too dry when the masking tape was removed, flash times too short, poor sanding techniques, condensation on substrate resulting from temperature changes, or too low or too high of surface temperature when applying refinish.
To prevent peeling from occurring make sure to degrease and prepare substrate carefully, use the proper grits of sandpaper, seal to eliminate sandscratch swelling, proper thinner or reducer for your work environment, proper thinner and reducer for primer-surfacer, compatible paint systems, and do not apply coats of primer too heavily.
Should you already be in peeling hell then you will need to remove paint from an area slightly larger than the affected area and refinish.
 Pinholing—tiny holes in the topcoat or putty or primer resulting from trapped solvents.
Pinholing
Again, another paint aliment known to rodders is often referred to as: pinholes, solvent retents, pock marks, pitting, pops, and pin pricks. These are tiny holes or groups of holes in the finish, in putty, or primer, and are the result of trapped solvents, air or moisture, or improper surface preparation.
The most probable causes of pinholing are some of the same issues that cause any number of problems. For instance, improper surface cleaning or preparation; moisture left on primer-surfacers will pass through the wet topcoat to cause pinholing. Contamination of air lines, moisture or oil in air lines will enter paint while being applied and cause pinholes when released during the drying stage. Wrong gun adjustment or technique; too wet, or if the gun is held too close to the surface, pinholes will occur when the air or excessive solvent is released during drying. Wrong thinner or reducer; solvent that’s too fast for your garage temperature tends to make the refinisher spray too close to the surface in order to get adequate flow. When the solvent is too slow, it is trapped by subsequent topcoats. Improper drying; fanning (back to that again!) a newly applied finish can drive air into the surface or cause a skin to form, both of which result in pinholing when solvents retained in lower layers come to the surface. And a handful of lesser but equally troublesome poor techniques are insufficient sanding or filling of pores in fiberglass substrates, insufficient mixing of polyesters, solvent popping that has not been sanded to smooth, and insufficient isolation of polyesters.
Should you find yourself dealing with pinholes here are some ways out and these are all the same procedures you should have done with any number of other paint fixes. Thoroughly clean all areas to be painted and make sure surface is completely dry before applying undercoats or topcoats. Proper care and maintenance of air supply system and paint application equipment; also make sure you use the proper gun adjustments, techniques, and air pressure. Suitable thinner or reducer for your garage environment, allow proper flash time, and no fanning with compressed air through spray gun. Also, make sure to thoroughly mix polyesters, sand smooth the solvent pop pores and other defects.
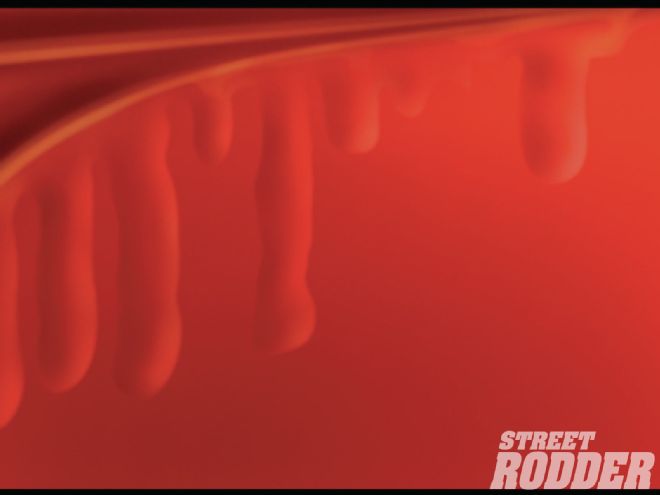 Runs—too heavy an application of sprayed material; primer, color, or clear.
Runs
Here’s what many of us would call the most common paint oops: runs. It’s also known as: overloading, curtains, gun spits, sags, sagging, and drips. But, let’s face it, all of us call by what it looks like—a run. Officially it is the heavy application of sprayed material that fails to adhere uniformly to the surface.
Runs can be caused by incorrect spray viscosity, improper flash time, poor technique, or film (paint) thickness. Runs can also be brought about by a defective spray gun or improper setup, too much or the wrong thinner or reducer, surface contamination or the paint area is too cold, and the obvious, paint drops directly from the gun!
To prevent these causes it’s better to allow vehicle surface to warm up to room temperature before applying paint, then maintain the proper room temperature, use a properly maintained gun with correct technique and air pressure. Make sure to allow for proper flash and drying time between coats and use the proper thinner and/or reducer, and proper equipment.
Ok, it’s too late and there’s a run, how do you remedy this problem? Begin by washing off the affected area and let dry until you can sand to a smooth surface and then refinish. For solid colors and clearcoats, sanding and polishing is recommended. In the case of a basecoat, refinishing after sanding is necessary.
Solvent Pop
Here’s one that may not be so well known but around a paint shop solvent pop is all too common. It’s also known as boiling, solvent boil, boil, and popping. It looks like a blister on the paint surface that’s caused by trapped solvents in the topcoats or primer-surfacer, a situation which is further aggravated by force drying or uneven heating.
 Solvent Pop—Blisters on the paint surface caused by trapped solvents in the topcoats or primer-surfacer.
Some of the most common ways a solvent pop can occur results from solvent or air trapped in the paint and escapes during the drying process leaving a pop mark; incorrect spray viscosity, spray pressure, flash time, or improper drying; and, incorrect choice of hardeners and/or thinners. On the subject of fast-dry thinner or reducer, you need to be especially careful when the material is sprayed as too dry or at excessive pressure will lead to solvent pop. Drying (baking) temps are also critical; temperature too high, baking is started too soon after application, infrared lighting too close, too much material applied, and our old favorite, improper surface cleaning or preparation can all lead to solvent pop.
As with every aspect of prepping for the “perfect paintjob” it is always imperative that all areas to be painted are thoroughly cleaned, proper thinner and reducer is selected that works best in your area, always allow sufficient time between applying coats (flash and dry time) and never, never fan (using compress air through a spray gun) to assist drying time. Allow to dry naturally. Also, never spray too much material and always follow Axalta (DuPont) recommendations from their data sheets when working with their product.
Should you be well into solvent pop on your paintjob then you will find yourself having to remove the paint and get down to the undercoat, or possibly, the metal. This will be dictated by the depth of the blisters. And then it’s time to refinish but this time paying attention to all the aspects of a good paintjob.
Well, these are some of the more common problems you and I will run across when painting. It happens to the pros just as easily to the do-it-yourselfer, invariable it is a matter of plan your work and work your plan—no rushing, no shortcuts, and no excuses. The number of steps associated with body and paintwork is time-consuming and can often be tedious work but the end result more than makes it worthwhile and worth the effort.