
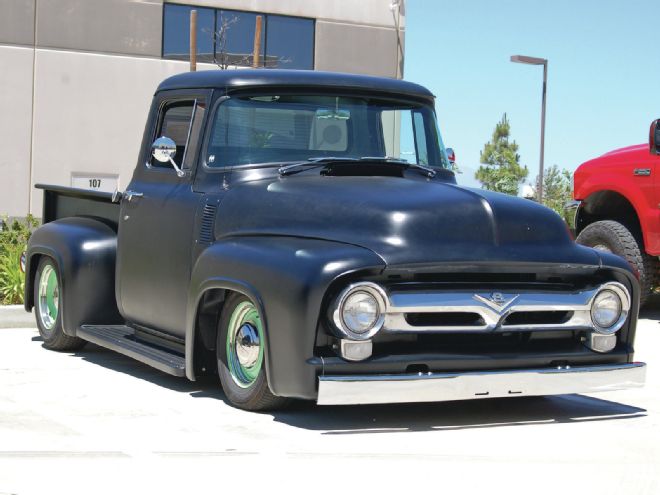
Dropping your whole truck down for that slammed crusin’ stance requires careful planning, modifying, and trimming of the different parts and pieces that are in the way. It’s just that simple.
The little 1956 I bought is a prime candidate for some modifying, trimming, and finishing up. The Mustang II is already installed and done. The brakes, although not power, work great with the Corvette master cylinder that got installed. The small-block Chevy runs great, but the tranny needed to be rebuilt. Since the rebuild, the truck has been trouble free. But back to what we’re here for.
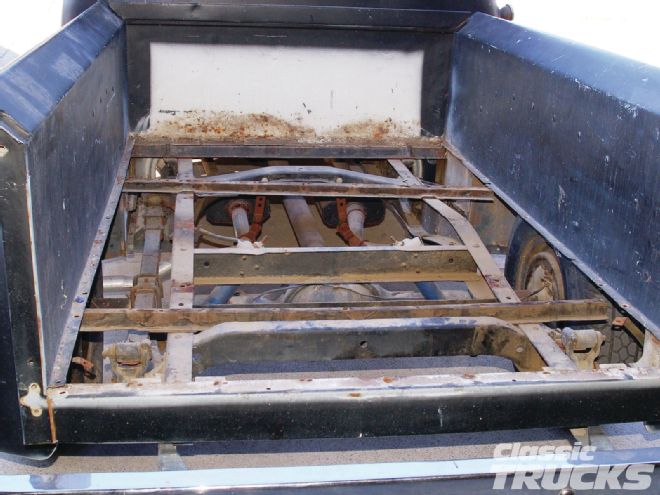
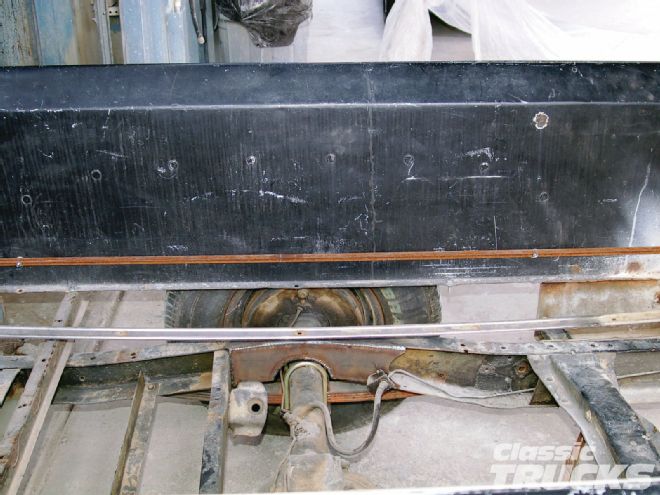
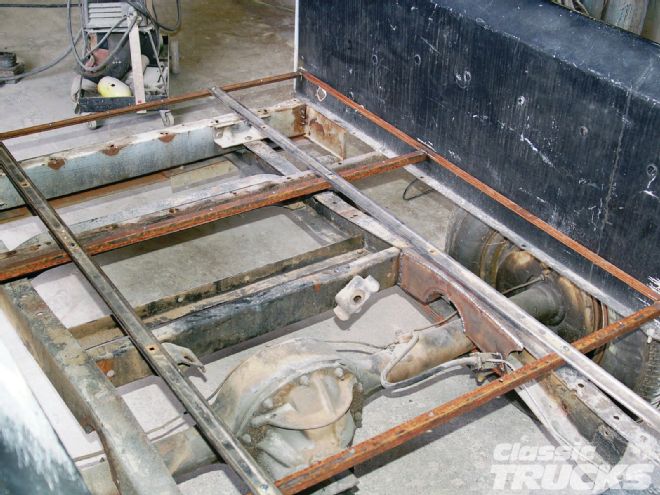
 01 When you have them set up low like this and want to drive it, you’ll need some clearance at the rearend housing to bed floor. The top center of your rearend housing will only have minimal clearance unless you cut a hole in the bed floor for it, or raise the bed floor.
The rearend was still mounted stock, under the springs. This gave the truck a real stink bug look. So while the cab was in having the bodywork done, I removed the rearend and did the “flip.” A 3-inch C section in the frame, rearend placed on top of the springs, centered and the mounting pads welded back on. This got the rearend mounted where it needed to be. But with this rearend being 61 inches wide, my wheels and tires hit the fenders. That’s OK; I expected that. There are two ways you can fix this.
One is to have the rearend narrowed to a proper width and install wheelwells into the bedsides. For years at Bobco we have used a 55-inch overall rearend with 21⁄4-inch wheelwells from Dan Carpenter. This will get you right at 14 inches of clearance between the wheelwell and the edge of the fender. The wheels are normally 10 inches wide with 41⁄2-5 inches of backspace. This way is very expensive, but gives you the big tire under the stock fender.
The second method is to widen the fenders. That’s what I did because that’s what I do, so it kept the cost down you might say. You could also just buy a set of wider fiberglass fenders and be done with it. I have never personally liked the wider glass fenders because of the way they cover the edge of the running boards and they look a little out of proportion to me, but that’s my opinion. The two days it took to modify the fenders didn’t cost me anything but time, plus I only wanted to add 2 inches and I modified the running board ends to match the fenders, like stock.
So now I have trimmed and modified and got the truck to sit where I want it. Now I have a clearance problem with the top of the rearend housing and the bed floor. One good bottoming out and there might not be a bed floor anymore. So this brings us around to why I have called you all here in the first place.
The obvious solution is to cut a hole in the bed floor and make a nice box to cover the hole. That way the center section has room to move. Well, obvious to some, but I’m thinking of something better without a hole.
I came up with this idea years ago on a pro street ’56 we were building and have done it to a lot of trucks since. I built a framework to remount the floor 3 inches higher. This will give you a ton of clearance with the rearend housing and you won’t have a chrome or painted box in the middle of your bed.
Follow along as I make a new bed floor mounting framework that will raise the bed 3 inches and give you plenty of clearance with the rearend housing.
It’s made out of 1x1-inch L angle with some 1x1 square tubing for mounts. I weld in two supports that, along with the front and rear supports, are drilled for the bedstrip bolts. After you bolt the structure to your bedsides, you install the bed wood to the structure the same way as stock. We have our bed wood cut special so there is not a recess on the outer edge of the bed wood, where it used to fit under the bedside flange.
This framework uses the lowest rear fender bolts and runs at that level around the bed. In the front it is bolted to the front bed panel with two 5⁄16-inch bolts and each side gets three 5⁄16-inch bolts down the side. The back gets mounted with two 1⁄4-inch bolts and there are four square tube feet that mount on the top of the chassis with 5⁄16- or 3⁄8-inch bolts. I usually use the stock holes in the top of the chassis where the stock bed crossmembers bolted to.
So I don’t run into any tailgate issues, I stop the framework just short of a full-length piece of wood. I cut off the end that has been routed for the stock trim piece that the F-100s have. Then I make a little fill panel out of some sheetmetal that takes care of the edge and fills the open area left by the new framework.
When complete, you can hardly tell the floor was changed. There is still plenty of room for coolers or whatever, and you don’t have a chromed pimple in the center of the bed either.
For your viewing pleasure, the article shows two versions being built. One for a stock bedside and the other using Dan’s awesome wheelwells. When doing a bed with the wheelwells installed, I basically make a rectangular front and rear section and then join them with the pieces bolted to the wheelwells.
If you should need any parts for your bed as you’re putting it together, Mid Fifty F-100 Parts can handle any pieces you might need. Bed wood kits, bedstrip kits, (stock and boltless), bolt kits, tailgate latches, and stays…you name it.
Dan Carpenter supplies us with the wheelwells we use. We use the 21⁄4-inch-deep ones. He also handles full beds, bed parts, tailgates, latches, and stays as well. Both of these companies have been around for years and are top-notch people to deal with.
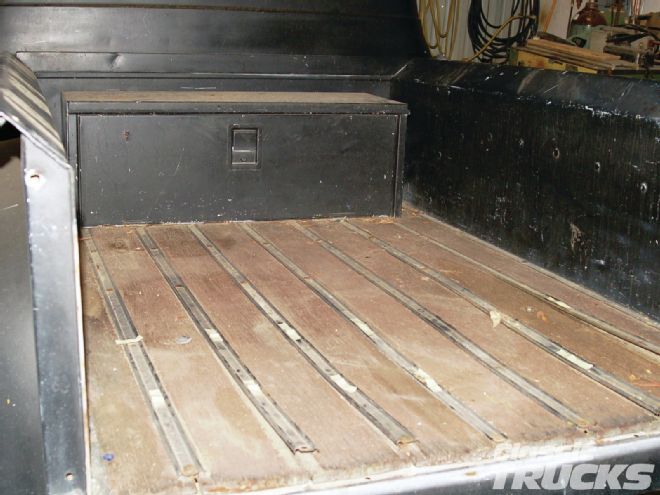 02 Here’s where I started. The toolbox is a classic touch. I removed it and all the old bed wood and the strips. The strips will get repolished.
 03 The bed has some problems at the bottom of the front panel. When the new floor is in it will hide all that ugly down there. I’m just building a real low-budget driver, no reason to replace the bed panel or bed. There are other places that need the money.
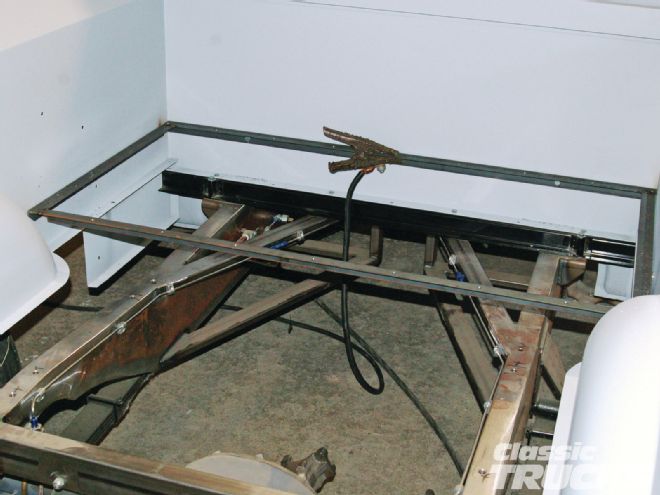
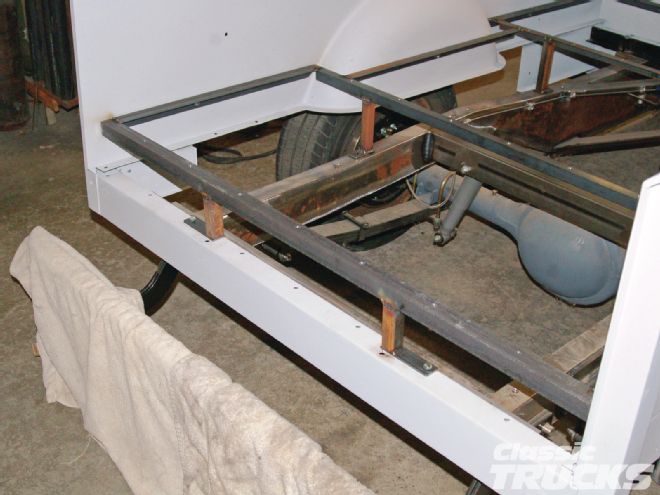
 04 Here I have the outer perimeter tacked together and bolted to the bedsides and front panel. I have two bolts up front and three down each side. Here the bedstrips are laid in place for the positioning of the two center braces that will be tacked in. They are located where the stock ones bolted to the bed wood and to the frame. This way the bedstrip bolts will all line up with the crossmembers and bolt to them.
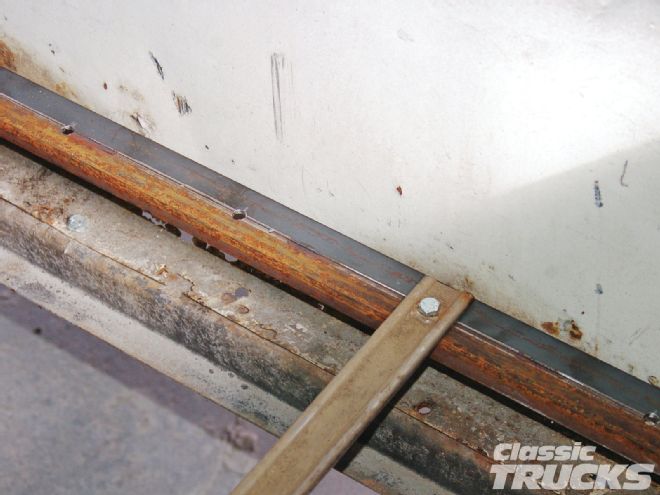
 05 The structure bolts to the side of the bedside using the bottom rear fender bolt to secure the rear of the structure. I usually use two SAE flat 5⁄16-inch washers between the angle and the bedside. This way the structure will end up slightly smaller than the bed itself and installing it into a painted bed is a lot easier.
 06 This is the front piece of the structure that bolts to the front bed panel. It needs to be 2 inches wide at the top so I weld on a 1-inch strip. The forward bedstrip bolt holes usually end up at the centerline of the two joining pieces.
 07 Here we see both strips in place and the front fitting nice.
 08 In this shot you can see I have tacked in the two center supports.
 09 Now the bedstrip bolts to each one of the supports, just like stock.
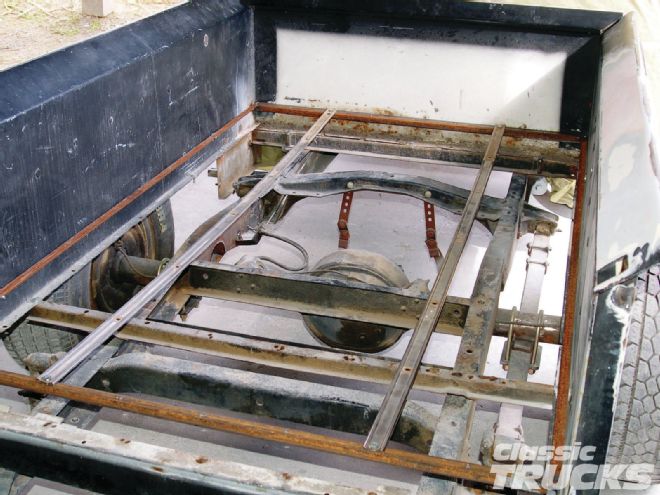
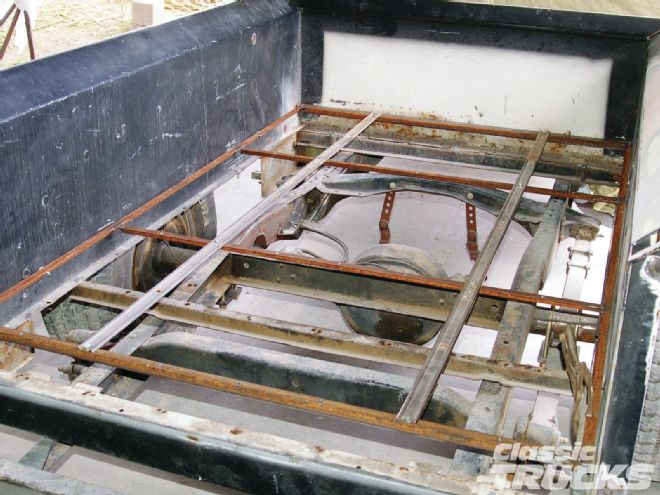
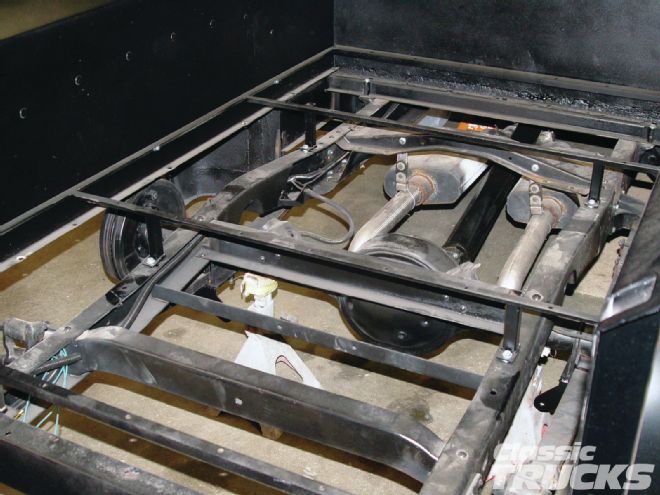
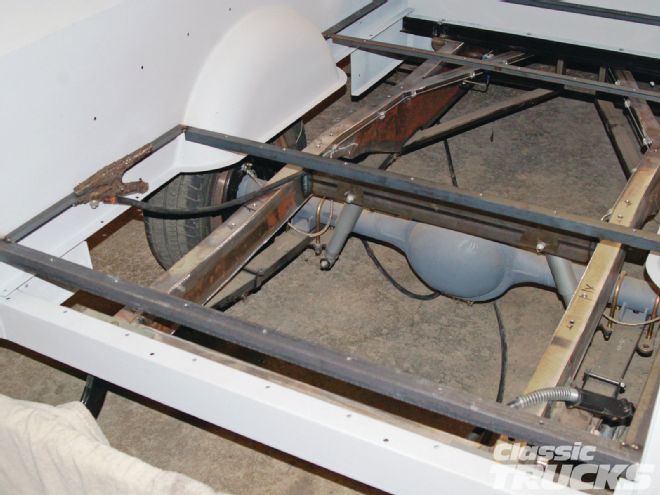
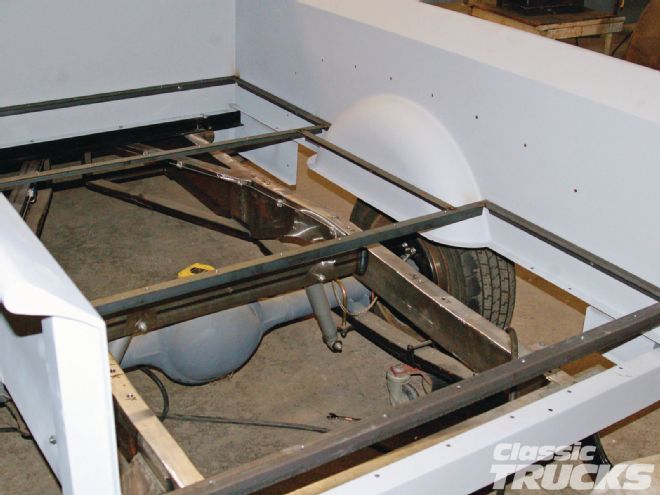
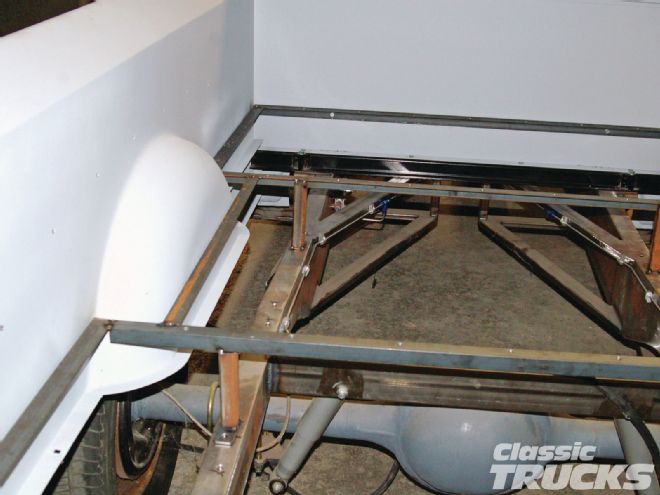
 10 From this angle you can see the clearance that the raised floor will provide. The space at the back between the rearend sill and the new floor structure will get filled by a piece of sheetmetal that will screw to the support stands that will get welded on the back.
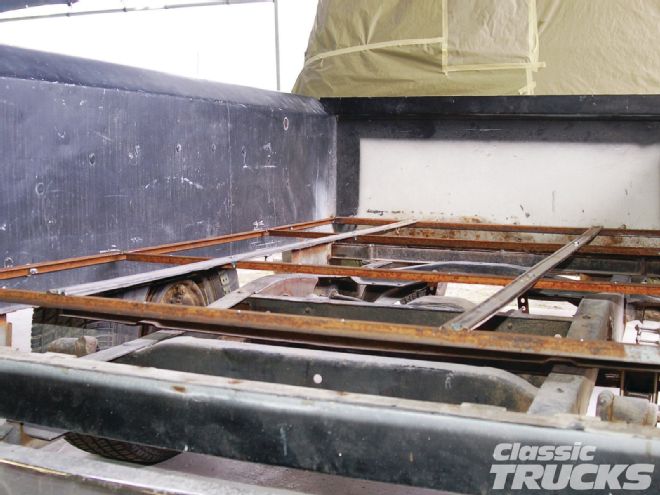
 11 Another shot looking to the rear.
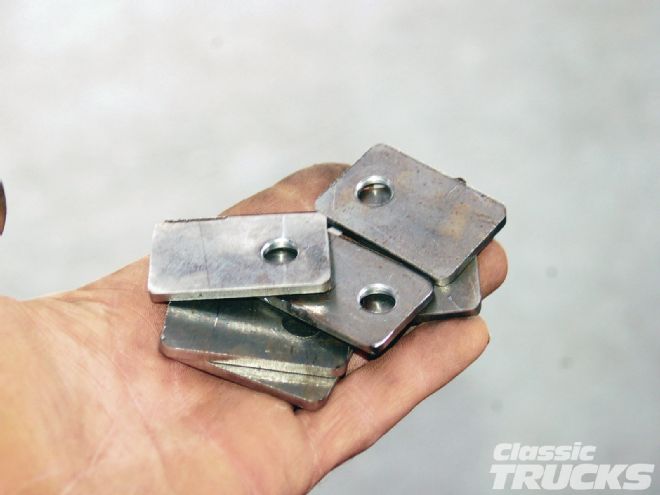 12 I make up a handful of mounting tabs for the bottoms of the stand-up supports. These get bolted to the stock bed crossmember mounting holes in the frame.
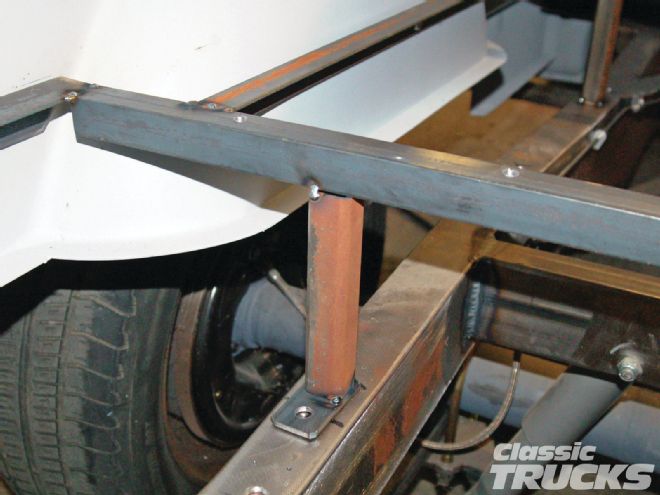
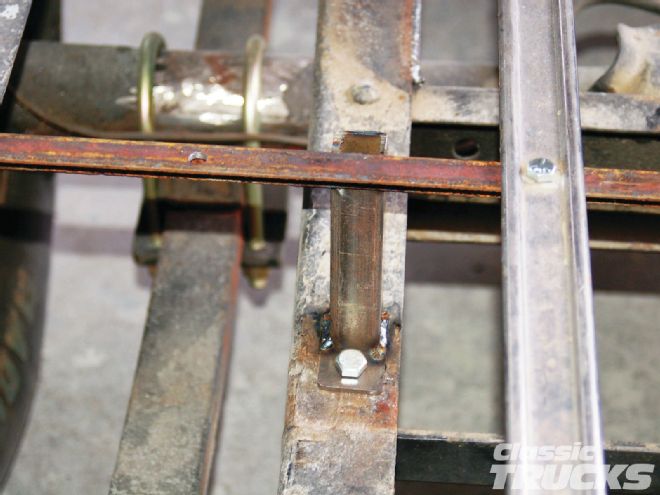 13 Here the square tubing is cut to fit and welded to a tab that has been bolted to the frame and then welded to the bed frame structure. I do this at the four original mounting points.
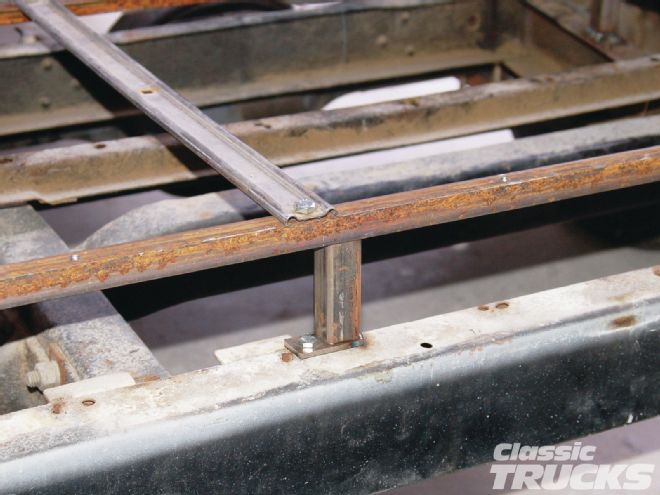 14 Here is how the rear is handled. The tubing also gives you a place to secure the sheetmetal cover that will be made and installed to fill this gap.
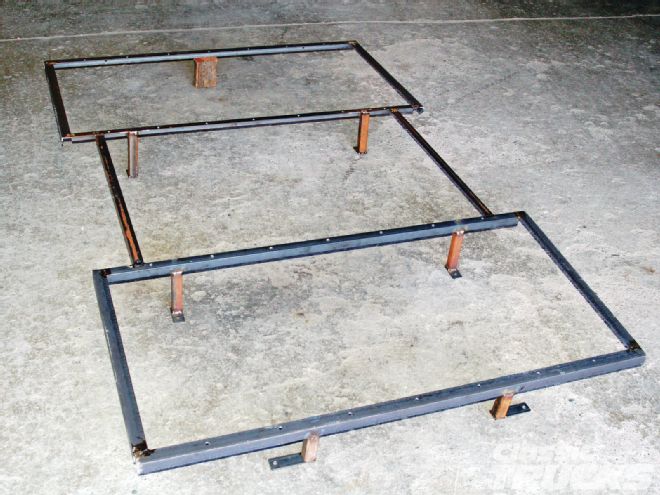
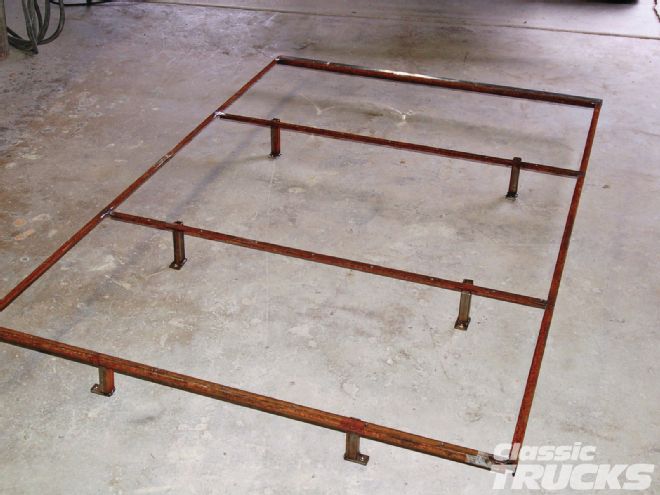 15 Here is the finished structure ready for sandblasting and paint. Pretty basic and simple. What an easy way to have a complete bed floor in your lowered Effie.
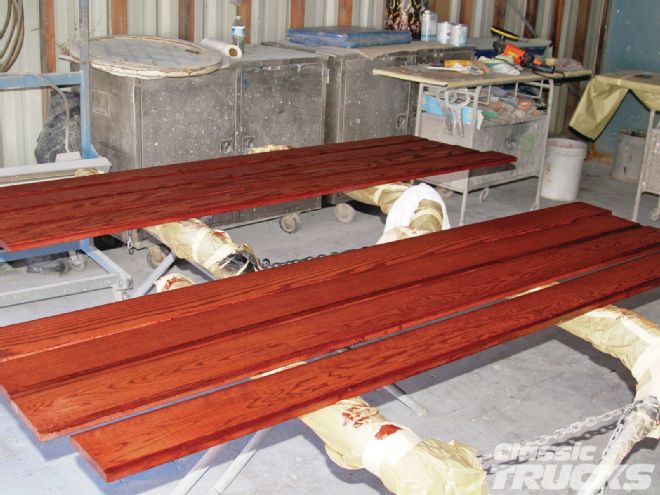 16 I’m using white oak stained with a red mahogany stain. Then Bobco cleared it with a satin UV protectant clear. Bobco did both sides of the wood because the bottom needs to look good for the guy you run over.
 17 Here’s the painted structure installed and ready for the bed wood. Black paint is so good at hiding all kinds of things.
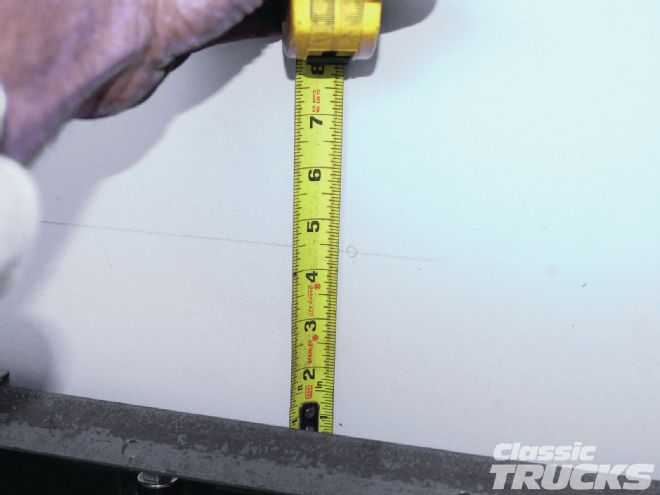
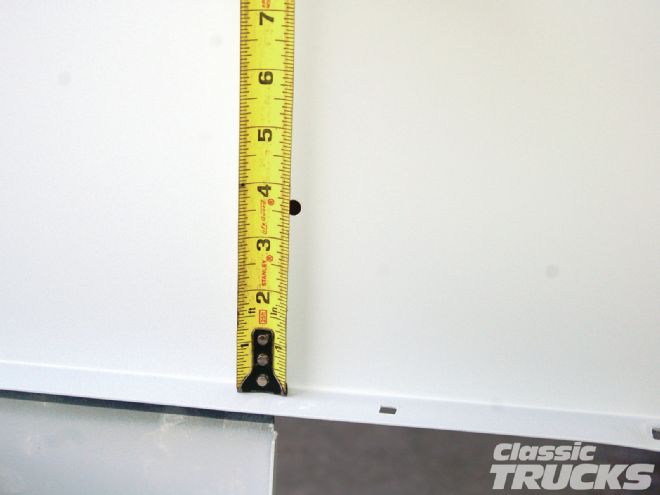 18 If you have a bed that has wheelwells in it and still needs a raised bed floor, here is how I do them. I know I want the framework to mount using, among others I will drill, the bottom rear fender bolt that is 31⁄2 inches up from the flange.
 19 I mark the front bed panel and drill for two 5⁄16-inch bolts.
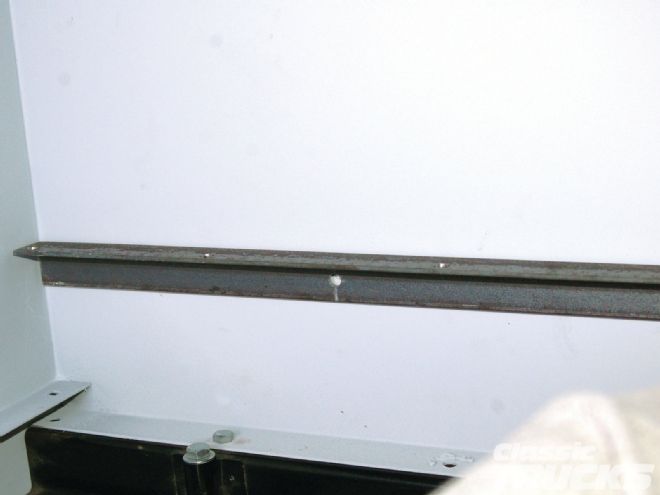 20 This front bed frame piece I’m mounting is the same as I made for the regular bed. This front piece has another 1-inch-wide strip welded to it so the bedstrip’s front bolt holes have a mounting place. This piece has been predrilled.
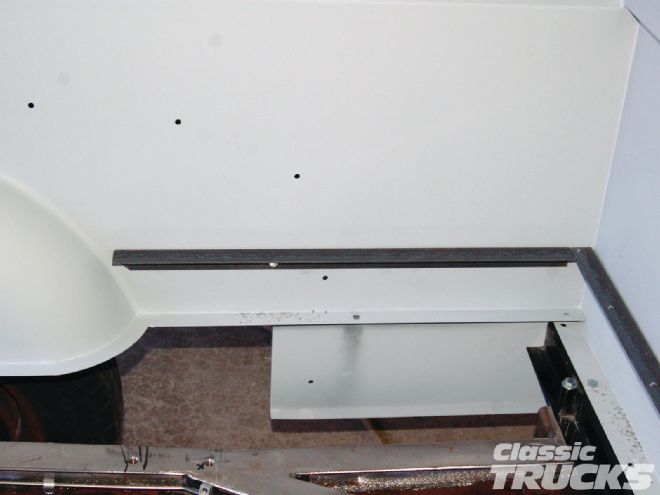 21 Next are the side pieces that are cut to fit and tacked to the front piece.
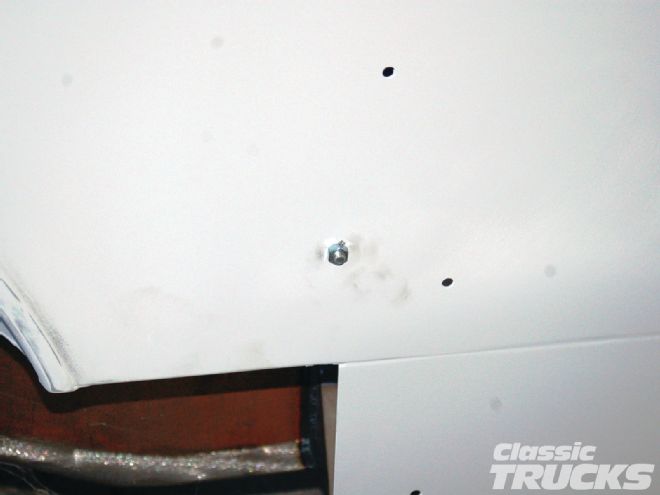 22 These side pieces will also get a 5⁄16-inch hole drilled in them and they will bolt to the bedside with a bolt and two washers for spacers that will be just inside the fender.
 23 Then a piece is cut and tacked on that forms a box.
 24 Another “box” was made for the rear section.
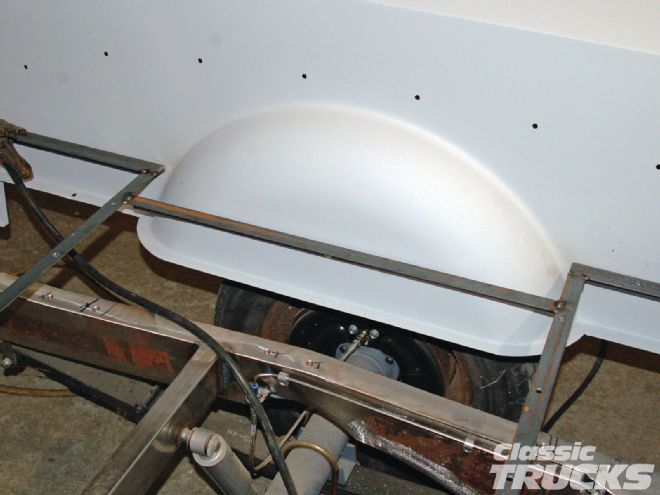 25 This section picks up the rear fender bolt and also is secured to the end sill.
 26 Here we have the finished bed frame structure tacked together and bolted to the bedsides and front panel.
 27 Using some 1-inch square tubing, I cut four pieces to make legs that will mount the new bed frame to the chassis.
 28 I also made up some flat tabs that I welded to the bottoms of the legs and drilled them so they could bolt to the chassis.
 29 The rear of the frame is mounted with square tube also. Also made for the rear is a sheetmetal cover. Be sure to check your tailgate fit when you make the cover piece. This one fits with no problems. You wouldn’t want to get it all done and installed and the tailgate won’t close.
 30 After some finish welding and gussets in a few spots.
 31 Ready for a sandblast and some satin black paint.
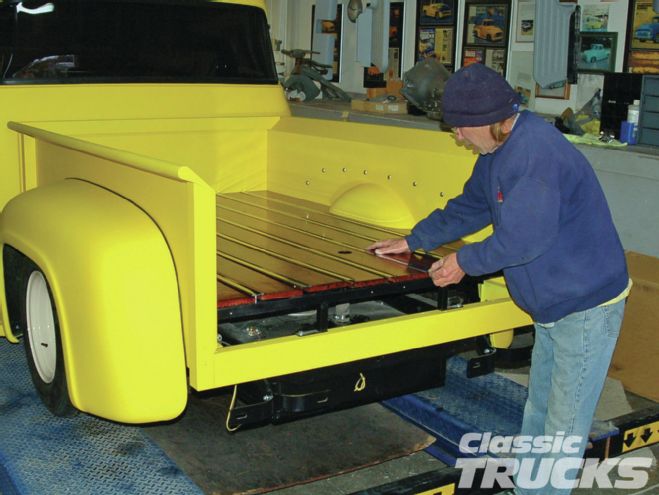 32 Now it just assembles like a stock bed. Even better are the boltless strips I talked Bob into. He stained his oak with the same red mahogany stain I used on mine. Bob also used a satin clear to finish it.
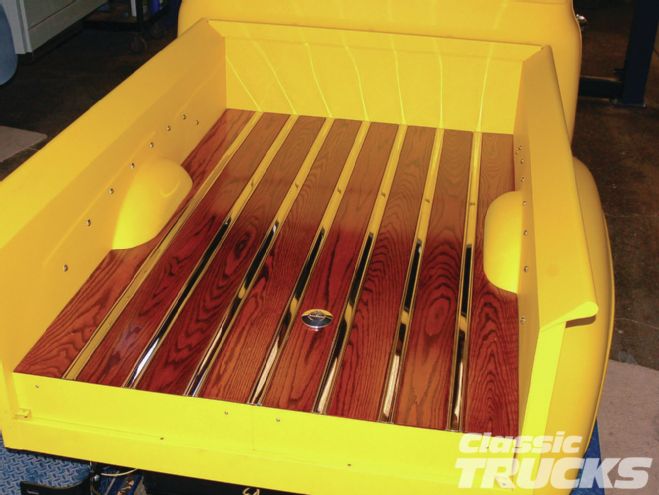 33 Here you get a good shot of the sheetmetal fill piece that was made to cover the big hole that resulted from raising the bed floor. Now you have great clearance and a full, bitchin’-looking bed.